14 Free Backcountry Campsites in BC

Welcome back to the second part of my 2-part series to help you get camping with minimal advance planning, in any season! Part 1 focused on permitted campsites (that don’t require reservations) and Part 2 focuses on unpermitted (free) campsites! 

Camping is incredibly popular in BC, especially near Vancouver. The popular campsites require reservations that release 4 months out and being coordinated to plan so far in advance can be a real challenge for people. It might seem like all the good campsites are booked, but there are lots of great options that don’t require advance bookings!

HOP_4999

Why do some campsites require a permit and others are free?

The simple answer is that a lot of free campsites are located on crown land or in BC recreation sites (also considered crown land). The land doesn’t have park status, so it generally receives limited maintenance or it is maintained by users and volunteers. As a result, free campsites are often more rustic than traditional permitted campsites. There are lots of campsites located on crown land that are privately managed, either by for-profit or non-profit groups, and those campsites will usually have a campsite fee to go towards ongoing maintenance, though some non-profits will fundraise for the upkeep of facilities, like on the Sunshine Coast Trail.

That said, there are still some free campsites located in provincial parks, especially the further you get from the lower mainland. I don’t know the exact reason why some campsites have permits and others don’t, but I think it’s likely related to the popularity of a park and how much maintenance the park gets. For example, I visited South Chilcotin Provincial Park last year for 6 nights and didn’t pay any camping fees, but the park is very remote, has limited infrastructure, and several of the places we camped were considered wild camping (no outhouse or bear cache). When sites become more popular, permits will often be introduced.

If you are visiting a free campsite that does not have bear cache facilities or an outhouse, it is absolutely essential to practice bear safety and leave no trace practices. You must hang your food or bring a bear bin. In addition, you must be prepared to dig catholes or use a wag-bag, and pack out your toilet paper, pads, and tampons. It is not acceptable to poop in the woods without burying it, or to leave your toilet paper around the backcountry. We are so lucky to have access to incredible backcountry in Canada and we need to respect it.

Campsites Near Vancouver

Hanging Lake

DSC09695

Hanging Lake is located in Whistler, sharing a trailhead with the Rainbow Lake trail on Alta Lake Road. Rainbow Lake is Whistler’s water supply, and as such, it’s a protected watershed area, so you’re not allowed to camp there. But if you hike a few more kilometres over Rainbow Pass to Hanging Lake, you can enjoy a nice view from the pass and a relaxing night at the lake. It’s a 10km trail to the lake, but the real challenge comes from climbing 800m of elevation along the way. There’s a fair bit of space for tents at Hanging Lake and there is an outhouse and a bear cache. You can also access this trail from the Rainbow Madeley trailhead near Madeley Lake.

Tikwalus

20220528_140213

In my opinion, Tikwalus Heritage Trail is an underrated trail along the Fraser Canyon. To access it, you take Highway 1 past Hope until you pass Alexandria Bridge Provincial Park. The Tikwalus Heritage Trail has been used by indigenous peoples for generations, and in more recent history, it was used by fur traders. It’s only 6km along a semi-loop trail to the campsite, but you’ll climb almost 800m in elevation, so it’s steeper than Hanging Lake. Most of the trail is in the trees, but there are some beautiful mountain views from the campsite. There’s lots of space for tents, as well as an outhouse and a bear cache. There’s no water source directly at the campsite, so fill up at the creeks on the way up to save yourself having to backtrack.

Brunswick Lake / Deeks Lake

DSC07712

Deeks Lake and Brunswick Lake are both located on the Howe Sound Crest Trail, but are accessible from the northern trailhead at Porteau Cove if you’re not doing the 30km thru hike from Cypress Mountain. Both lakes are beautiful and offer an easier alternative to the strenuous Howe Sound Crest Trail. It’s 6.5km to Deeks Lake (which is the smaller site) and 10km to Brunswick Lake, however there’s almost 1200m of elevation gain along the way. Most of the elevation gain is in the first 6.5km to Deeks Lake, making this part of the trail the steepest on my list. Of the two lakes, Brunswick is the most scenic and has more room for camping. It’s also important to note there are no facilities at either site, so be prepared to hang your food and dig catholes.

Flatiron

DSC06682

Keeping in theme with the previous trails, the trail to Flatiron is just as steep, climbing over 800m in ~5.5km, with most of the elevation gain in the first 3.5km. It’s located in the Coquihalla Summit Recreation Area off Highway 5 and shares a trailhead with Needle Peak. The first section of the trail is a huge slog through the forest, but the views are incredibly rewarding. Once you pass the junction for Needle Peak, there’s a small lake where you can camp. You can also camp at the summit of Flatiron, but there’s no water source up there. There are no facilities at either site, so be prepared to hang your food and dig catholes.

Brew Lake

PSFix_20201005_141152

Brew Lake is less steep than some of the other trails on this list, but still a big hike, covering 900m of elevation gain over 8.5km. However, if you have access to a 4×4 vehicle, you can reduce some of that distance along forestry roads. We parked along Brew Creek FSR, at the entrance to Branch 50, and hiked the entire trail from there, including 3.5km along other FSRs. This isn’t a very popular site, so it’s a nice place to go to escape the crowds. There are no facilities, so be prepared to hang your food and dig catholes.

Fairview Bay / Manzanita Bluffs

20220804_200318

We have finally arrived at some options that are not super steep! Both of these sites are located on the Sunshine Coast Trail, which has lots of possibilities for backpacking trips. The whole trail is 180km long, but there are lots of sections that can be done over a day or two. The campsite at Manzanita Bluffs, located on the north end of the trail, is especially beautiful. I also really like the campsites at Fairview Bay and Rainy Day Lake, located on the south end of the trail. All campsites along the trail have outhouses and most of them have bear caches or huts. They do not all have water sources, so plan accordingly. While these sites are free, I do recommend a donation to qPAWS if you opt to stay in one of the huts.

Campsites Accessible by 4×4 Vehicle

Tricouni Meadows

20220820_132359

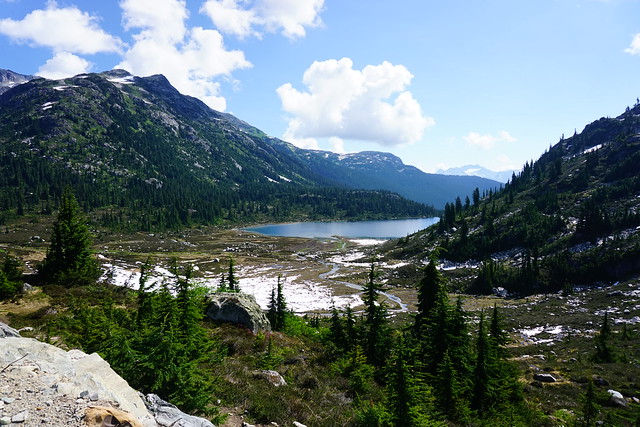
Tricouni Meadows is a popular campsite located northwest of Squamish. The trailhead is located on Branch 200, off of Squamish River FSR. If you can make it all the way to the trailhead, the hike to the campsite is just over 3km, with 250m of elevation. However, there was a large wash-out on Branch 200 when I did this hike in 2022. If you park at the wash-out, it adds 3km to the trail. In 2022, some vehicles could get through, but I’ve heard it’s gotten worse, so play it safe. There are 3 lakes near the meadows, with the campsite located at the middle lake: Spearhead Lake. It’s not a large campsite, so I recommend getting there early. There are no facilities, so be prepared to hang your food and dig catholes.

Blanca Lake

20240721_074347

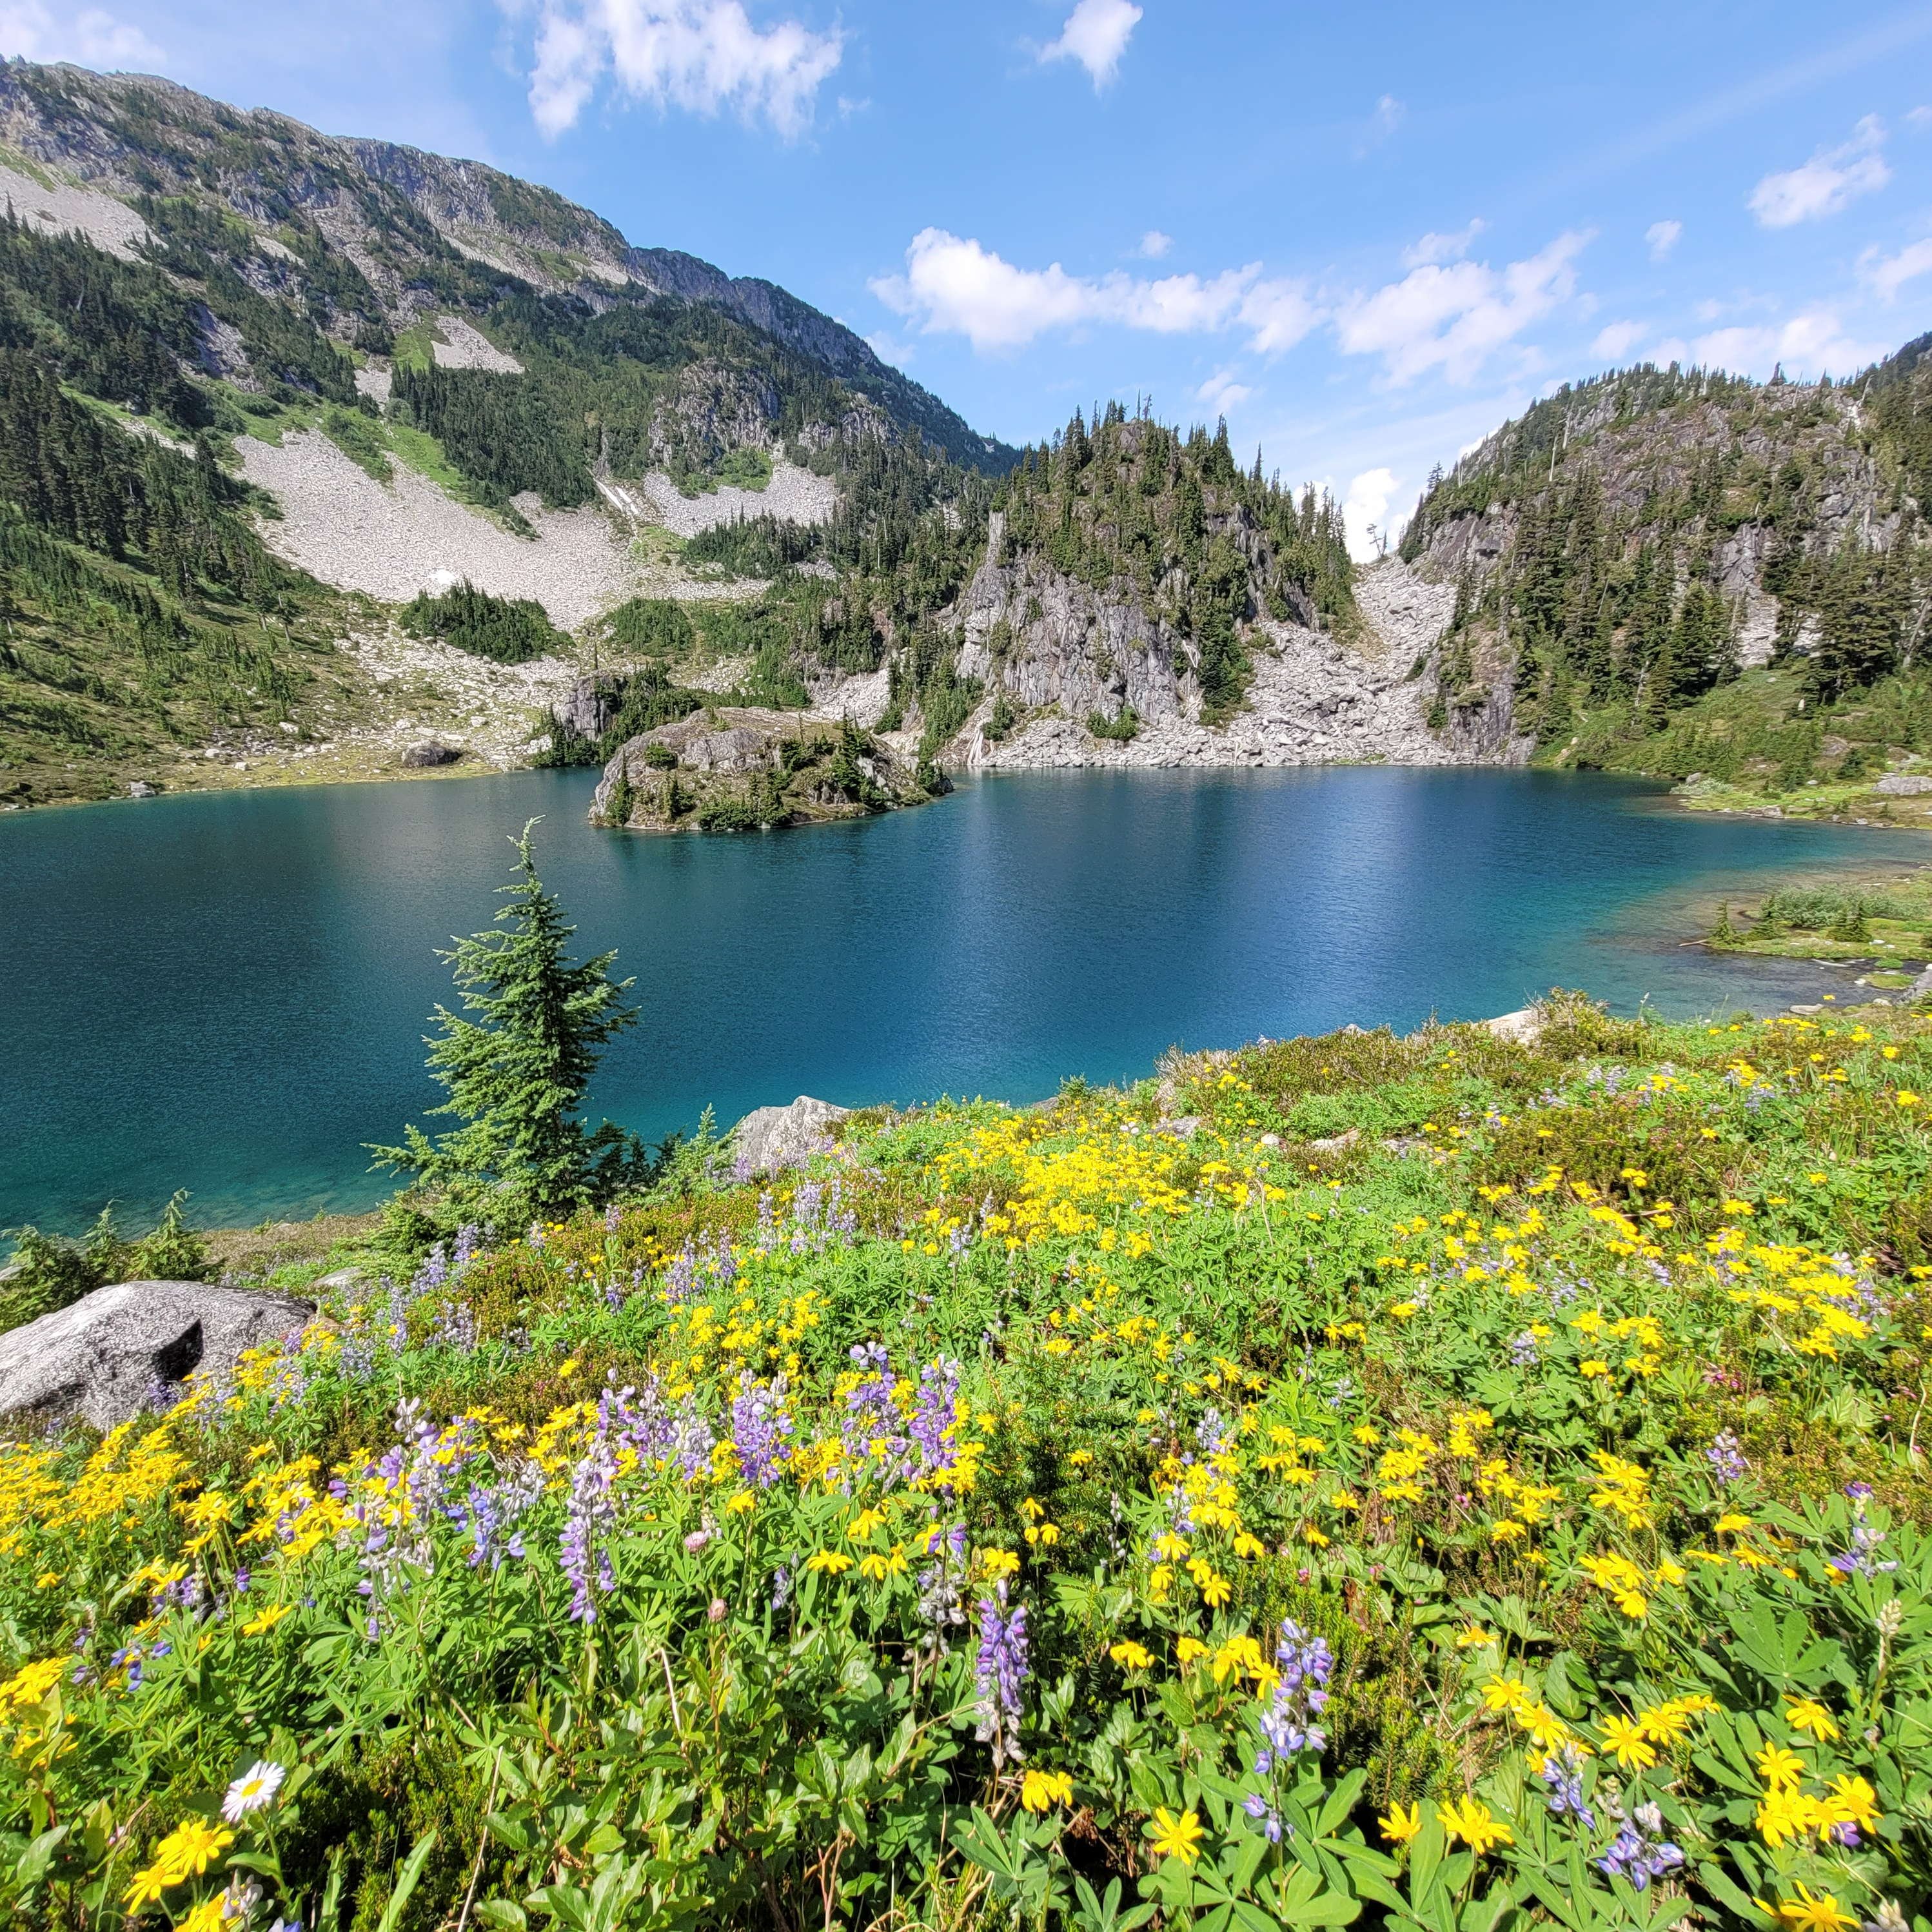
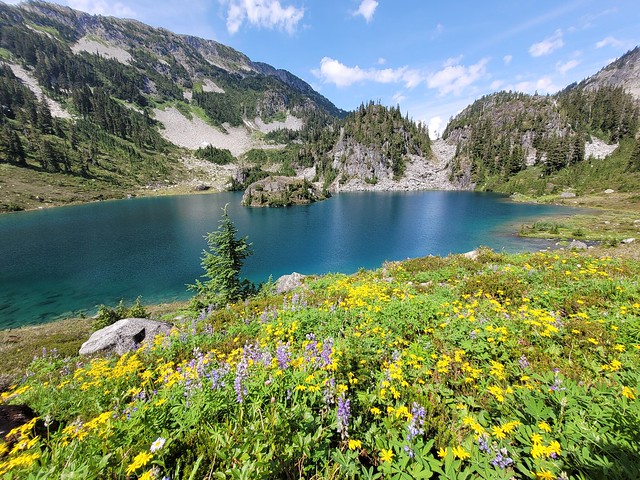
Blanca Lake is another campsite located northwest of Squamish. In general, I would say this road is in better shape than the road to Tricouni, but it’s further away. The trailhead is located off E300 on the Elaho Mainline. The trail is 4.5km, with almost 500m of elevation gain. It starts off pretty steep, but then levels out along the middle. The view from Blanca Lake is incredible and there is tons of space for camping. Give yourself extra time to explore around the alpine once you get to the lake. There are no facilities, so be prepared to hang your food and dig catholes.

Conglomerate Flats / Manson Ridge

PSX_20230807_175855

Both of these campsites are located on the HBC Heritage Trail that runs 70km between Hope and Tulameen. Manson’s Campsite is located on the Hope end of the trail (off Peers Creek Road), so you don’t need 4×4 to access this site, but if you want to access Conglomerate Flats for a night, then you need 4×4 to get the trailhead at Jacobson Lake Rec Site (off Tulameen FSR). Both sites are beautiful, though Conglomerate Flats is the more stunning of the two. It’s 6.5km and 600m of elevation gain to Manson’s Camp from the southern trailhead, and 2.5km and 150m of elevation gain to Conglomerate Flats from Jacobson Lake. Both campsites have outhouses and bear caches.
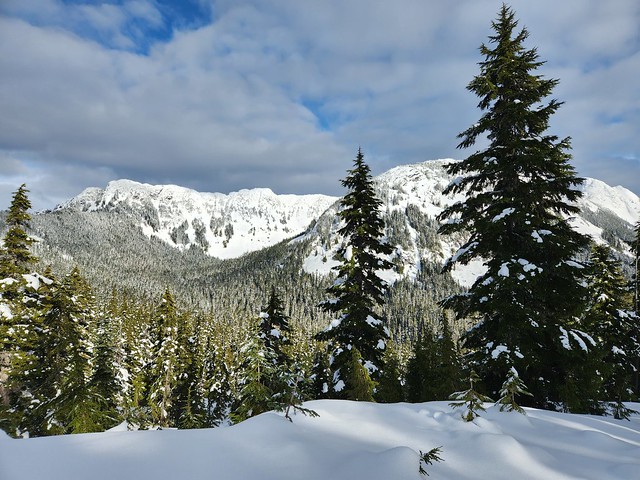
Winter Campsites

Falls Lake / Zoa Subpeak

PSX_20210314_215122

Both of these sites are located in the Coquihalla Summit Rec Area off highway 5. Falls Lake is a great site for beginners because you only have to snowshoe 1km along the road (which isn’t plowed in the winter) and 1km to the lake. Zoa subpeak is a bit more challenging as it’s 550m of elevation gain over 4km. Both trails are located in simple terrain, but make sure to stop at Zoa Subpeak – if you try and snowshoe all the way to the true peak, you will be entering challenging avalanche terrain. I’ve never actually been to Falls Lake, but I believe there is an outhouse. There are no facilities at Zoa Subpeak.

Ottomite Peak

20230204_135419

Ottomite Peak is also located in the Coquihalla Summit Rec Area off highway 5. The trailhead is at the Zopkios Rest Area. It’s a 4.5km trail with 300m of elevation gain to get to the summit. It was completely empty when I camped there, but the general area is popular among ski tourers, so you may see people along the trails for the day. The trail is in simple terrain, but always exercise caution – in general, I always recommend taking an AST1 course. It’s not a challenging trail, but there are no facilities.

Water Access Campsites

Widgeon Creek

A photo of a line of canoes on the shore of Widgeon Creek at the Widgeon Campsite in Pinecone Burke Provincial Park, with the mountains and trees in the background on a cloudy day in BC.

Widgeon Creek is located near the lower mainland and is extremely popular on summer weekends. It’s a ~5 paddle across the Pitt River and up Widgeon Creek to get to the campsite. You can rent canoes or kayaks at Pitt Lake. There are lots of campsites and great facilities, including a large bear cache and 2 outhouses. But I recommend getting their early on a nice weekend to beat the crowds. From the campsite, you can do a day hike to Widgeon Falls.

Twin Islands / Granite Falls

20240810_114057

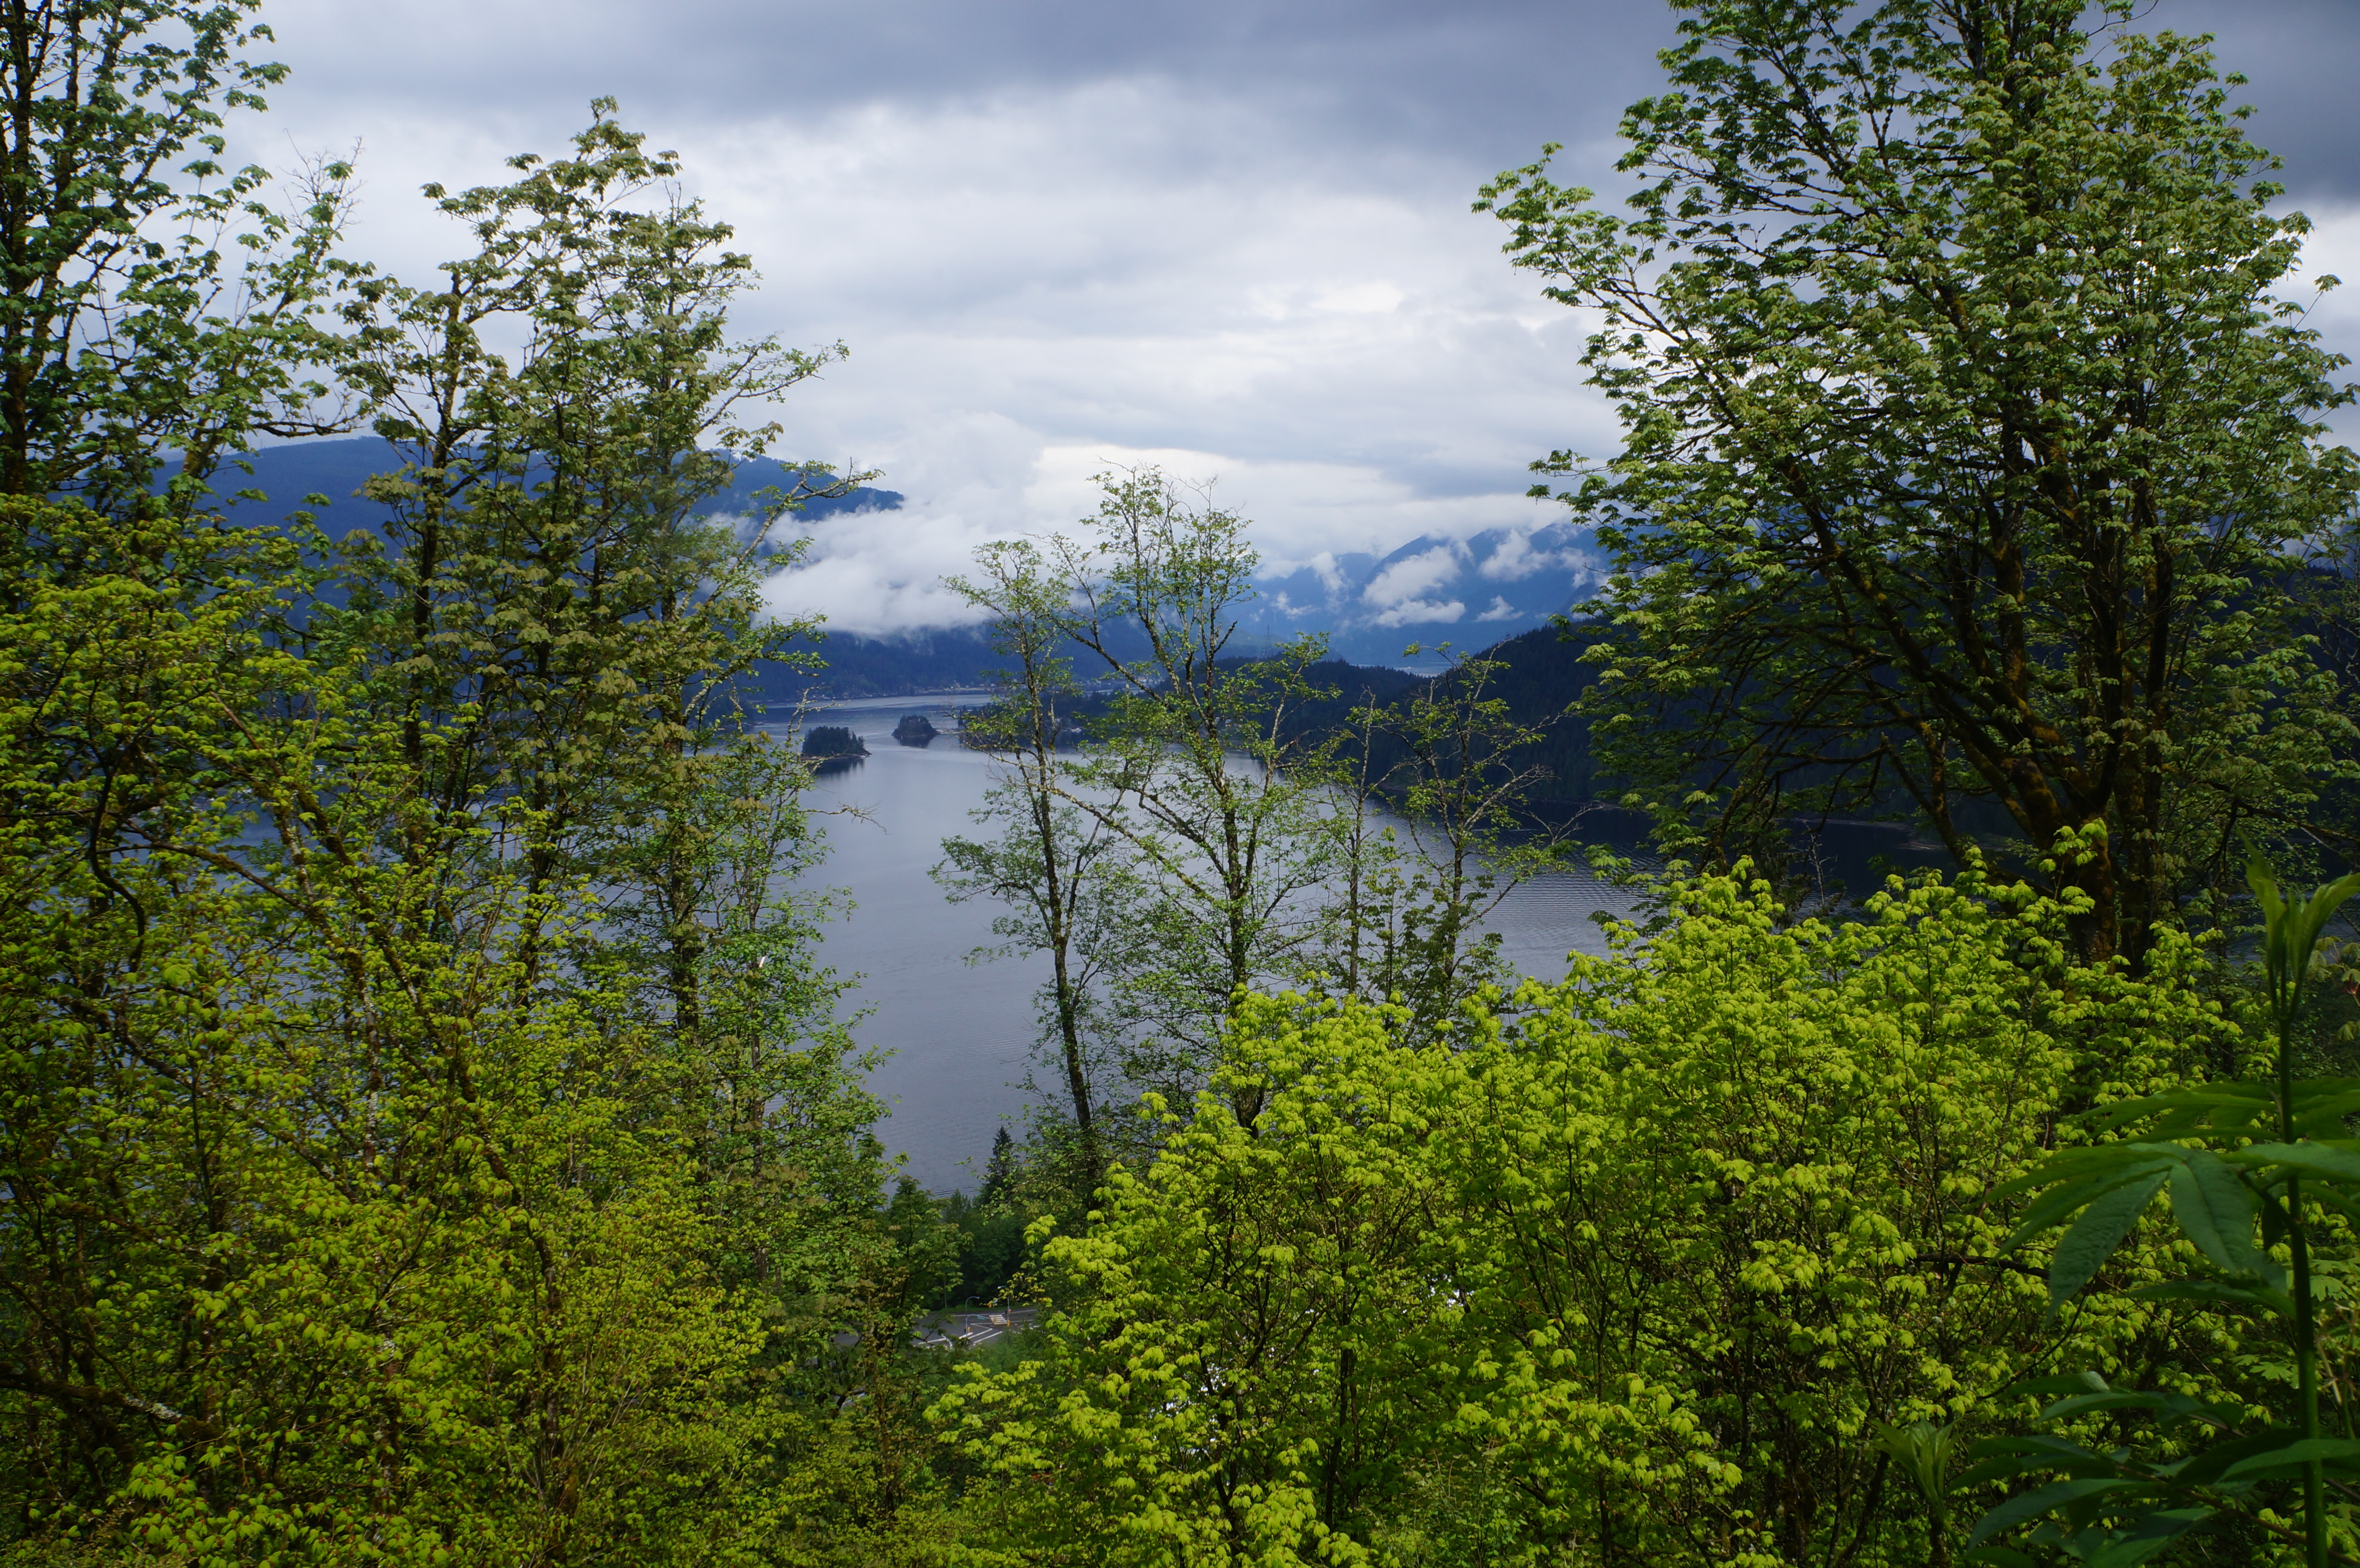
Twin Islands and Granite Falls are two campsites located in Indian Arm, so they are very accessible from the lower mainland. As a result, they are very popular on summer weekends, attracting paddle boats and motorized boats. You can rent kayaks from Deep Cove. It’s only 5km to paddle to Twin Islands, so this is the easier campsite to access. You’re only allowed to camp on the north island, but it has an outhouse (no bear cache since it’s an island). Granite Falls is at the far end of Indian Arm and is an 18km paddle from Deep Cove, so you should be an experienced paddler if you want to do this trip. It has 2 outhouses and a bear cache, but it’s severely undersized. Be prepared for northern afternoon winds.

Nine Mile Point / Kunechin Point

A photo from Kunechin Point in Sechelt Inlet on a kayaking trip, with the water and mountains in the background on the Sunshine Coast in BC.

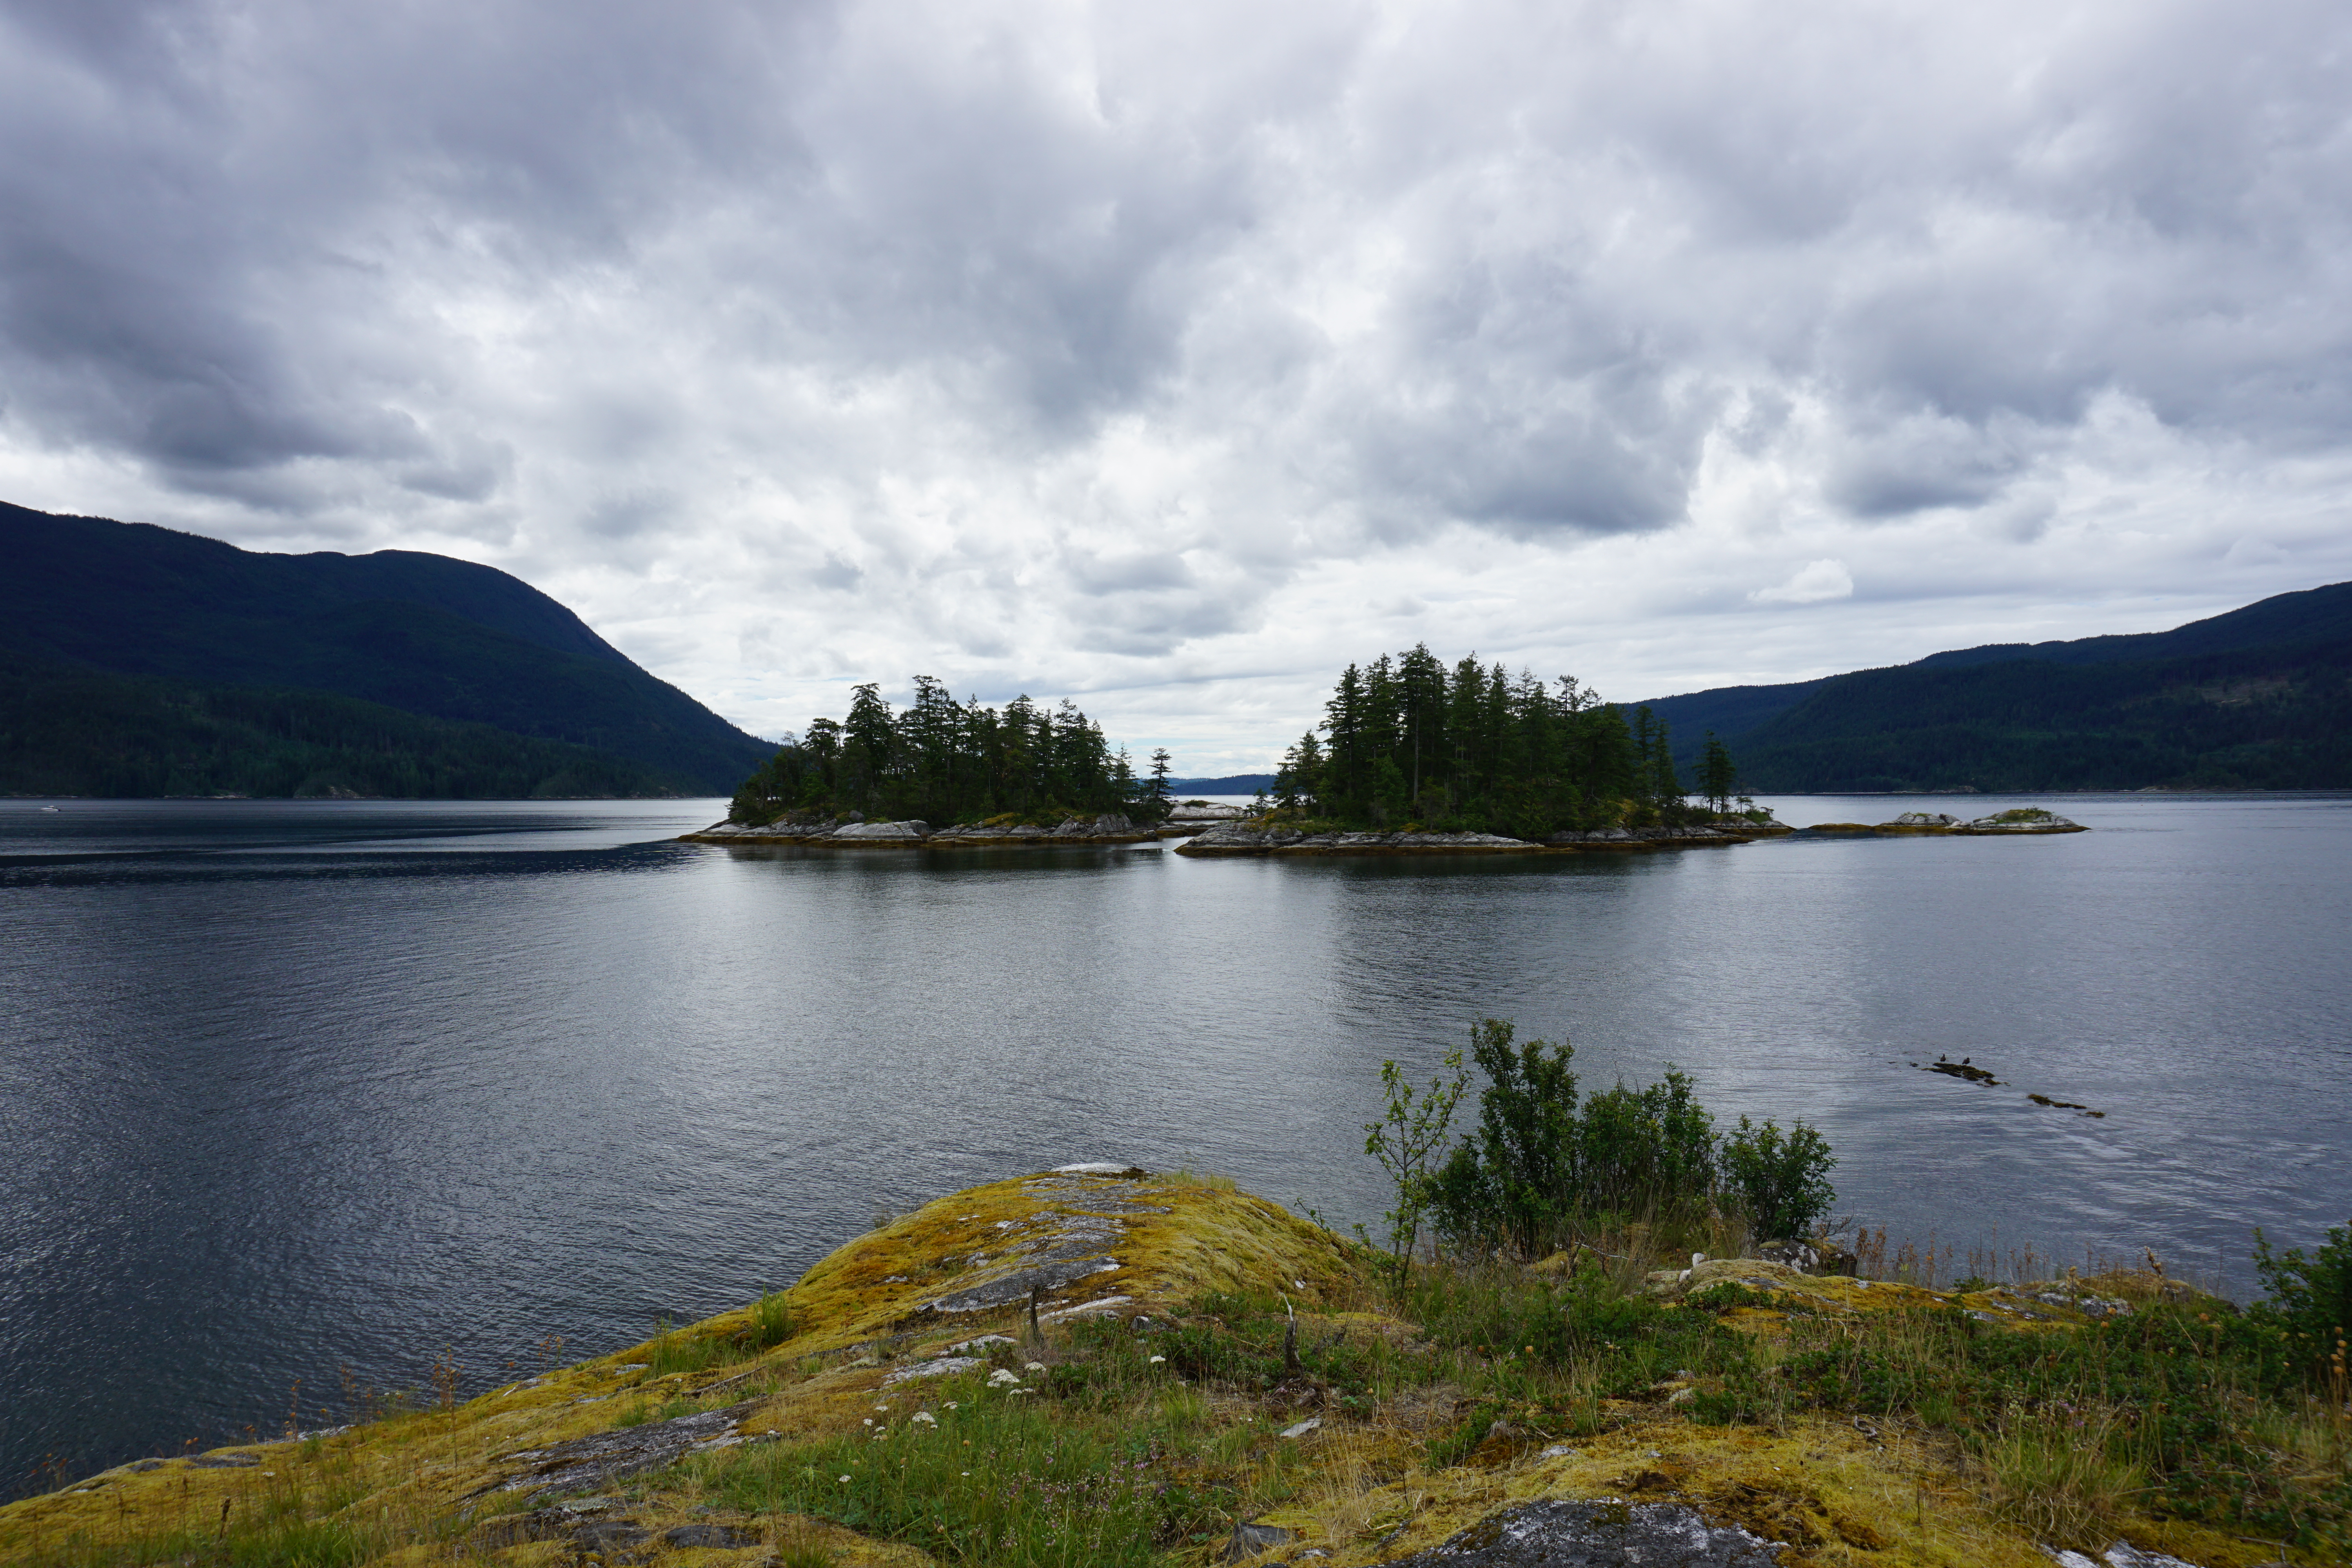
Nine Mile Point Beach and Kunechin Point Campsite are both located in Sechelt Inlet on the Sunshine Coast. There’s a kayak rental place at the end of Sechelt Inlet Road, where you can launch from. It’s ~6km to paddle to Nine Mile Beach and ~10km to paddle to Kunechin Point, but the latter involves crossing the arm of the inlet, which can get windy. Both are beautiful sites and have outhouses, but no bear caches.

10 Epic Loop Hikes in BC

I recently did a post featuring some of the most epic thru hikes available in BC. Thru hikes are great if you have a bigger group or access to 2 vehicles, so I wanted to complement that post with a blog about some of the best loop backpacking trails! These are great if you only have access to one vehicle, or want to limit your driving/coordination time. 

If you’re a beginner, check out my Guide to Backpacking and Overnight Trips for Beginners posts, as well as my safety resources instead.

Gold Creek Trail

Photo of two small backpackers on a rocky beach with a clear river flowing alongside them and a large green forest and mountain in the background, shrouded in fog. Taken from Viewpoint Beach in Golden Ears Provincial Park, on the Gold Creek Trail, in British Columbia, Canada.

This is the closest trail to Vancouver on the list (by a long shot) and the most beginner friendly. There are a ton of backcountry sites located along the Gold Creek Trail in Golden Ears Park, and it’s easy to do them as standalones or as a loop. Park at the north lot at Gold Creek and start your hike to Viewpoint Beach, taking either the East Canyon Trail (for the most direct route) or the Lower Falls Trail (for a more scenic route). Camp at Viewpoint Beach and consider doing a day hike up and back to Half Moon Beach

Then you can head up to Alder Flats for a second night and loop back to the parking lot on the West Canyon Trail. There’s another option to day hike up to the Golden Ears Summit, but this is a steep hike and definitely not beginner friendly, so plan accordingly. You can customize the trip to whatever length you want, with lots of opportunities for side trails! Without side trips, it’s ~13km total to hike the loop to Viewpoint Beach and Alder Flats. A backcountry permit is needed for these campsites and can be obtained 2 weeks prior to your trip at camping.bcparks.ca

Flora Lake Loop

The view of Chilliwack Lake from Flora Peak on a sunny cloudy day, with the snow capped mountains in the background in Chilliwack Lake Provincial Park on the Flora Lake Loop Trail in British Columbia, Canada.

The Flora Lake Loop trail is a 20km trail in Chilliwack Lake Provincial Park that hits 3 alpine lakes and Flora Peak. I’ve never actually hiked the entire trail, but have done large sections of it in both directions. The trail climbs up to Lindeman Lake, which is a very popular trail, and then continues to the back of the lake and up to Greendrop Lake. From there, you continue climbing uphill until you reach Flora Lake. All 3 lakes have campgrounds, but Lindeman Lake is the most frequented.

From Flora, you continue up to the top of Flora Pass, where you have the option to do a side trail up to the Flora Lake Lookout. After the pass, it’s a giant downhill back to the trailhead. There’s 1000m of elevation gain along the hike, so you can either spread it out between campsites when circling the lakes, or reverse the trip and do it all in one go on the way up the Pass. With so many campsites, you can take anywhere from 1-3 nights to complete the trail. A backcountry permit is needed for these campsites and can be obtained 2 weeks prior to your trip at camping.bcparks.ca

Frosty Mountain

A landscape photo of the larch trees turning yellow during Autumn, with a snow covered Frosty Mountain in the background on a cloudy day. Taken in E.C. Manning Park, British Columbia, Canada.

Frosty Mountain is one of the most popular Fall hikes near Vancouver, but it makes for a great backpacking trip any time of year. Most people go up and back on the same trail, but there’s actually a 27km loop option that goes around the back of the mountain. There’s a campsite on either side of the summit, so you can do it as a 1 or 2 night trip. There’s also the option to add on a side trip to the PCT monument, Windy Joe, or Lightning Lakes. 

This hike has a lot of elevation gain, more than 1200m, so it’s good to do over multiple days. If you go in the Fall, it will be really busy when the larches turn yellow, but the view from the summit is great year-round. The only downside is having to carry a large backpack over the pass to the summit. A backcountry permit is needed for these campsites and can be obtained 2 weeks prior to your trip at camping.bcparks.ca.   

Tricouni Meadows

A photo of Pendant Lake on the way to Tricouni Meadows, with yellow and purple wildflowers in the foreground and a blue alpine lake and mountains in the background on a sunny, blue sky day. West of Squamish in British Columbia, Canada.

Tricouni Meadows is a bit of a stretch for a loop hike, but it is a gorgeous trail! It’s located southwest of Squamish and requires driving up Squamish Valley Road, before merging onto Branch 200. 4×4 and high clearance are recommended to access this hike. The climb up Branch 200 is quite steep and there is a pretty big washout a few kilometres before the trailhead. I’ve heard the washout has gotten worse since I visited, so it might be necessary to add on a few extra kilometres walking on the road. The hike up to the meadows is only 4km from the trailhead, so it’s easy to add a few extra kms of road walking without overdoing it.

The loop part of this trail is because you can actually hike up to the meadows on either side of the river to Pendant Lake. The terrain isn’t that different, but it does make for a nice change of scenery. From Pendant Lake, there’s a bunch of camping available, but there are no facilities (bear cache or outhouse). You can do the trip in one night, but there are several lakes to explore and if you add a second night, you could use the extra time to climb up Tricouni Mountain!

Russet Lake

A photo of Russet Lake with the grassy meadows and the mountains in the background on a smoky summer day in Garibaldi Provincial Park near Whistler, British Columbia, Canada.

Russet Lake seems to be one of the lesser frequented trails in Garibaldi Park, but it’s no less scenic than its neighbours. The challenge with Russet Lake is that most people take the Whistler gondola to the top, which costs $100. Fortunately, there are several options available for this hike. For a true loop hike, you can enter or exit from Whistler base by climbing up the Singing Pass Trail, which follows the valley between Whistler and Blackcomb Mountains (and saves you the cost of the gondola). The challenge with this option is that there is over 1200m of elevation gain spread over 15km. Alternatively, you can take the gondola up the mountain and follow either the High Note Trail (from Peak Chair), or the Musical Bumps Trail (from Roundhouse). This route is easier, but still has over 500m of elevation gain spread over 12km, as you summit several small peaks (but is much more scenic)

You only really need one night at Russet Lake, but if you stay a second night, you can explore some of the surrounding peaks. On the way back, you can take any of the 3 trails mentioned above. At the time of writing, Whistler doesn’t ticket on the way down, so even if you hiked up, you can still take the gondola back down at no charge. This hike does require camping reservations, which release 4 months in advance of your date from camping.bcparks.ca.  

Chilcotin Loop

A photo of the hiking trail in South Chilcotin Provincial Park that runs to Lorna Pass. The trail is covered in yellow wildflowers in the middle of the forest, with the mountains peaking out in the background on a cloudy day in British Columbia.

South Chilcotin Mountains Provincial Park is mostly frequented by mountain bikers, but even in peak season, the park is relatively empty. It’s a beautiful park with lots of options for loop trails. If you only have a few days, there’s a nice loop trail around Taylor Creek that is ~26km long and can be explored over 2 nights, with side trips to the High Trail or Camel Pass. If you have more time, there’s a 5-6 night loop in the core area of the park that can be accessed from Tyaughton Creek, which goes over Deer Pass and along the valley to Spruce Lake. It’s ~70km long, but can be extended with side trails up to Lorna Pass, Warner Lake, or Lizard Creek. 

Many of the campsites in the core area are serviced by BC Parks and have bear caches and outhouses, but wild camping is also permitted and there are a few nice sites without facilities if you want to slow down your pace. There are grizzly bears in the park, but since there are so few visitors, they haven’t been known to bother hikers. It’s a remote part of BC that I really enjoyed getting to see.

Tetrahedron Park

A landscape photo of the trees, mountains, and ponds, from the top of Mount Steele in Tetrahedron Provincial Park on the Sunshine Coast of British Columbia, Canada.

Tetrahedron Park is located north of Sechelt on the Lower Sunshine Coast and is another great trail for beginners. The park has 4 huts that are managed by the Tetrahedron Outdoor Club and they are the only option for camping in the park (tenting isn’t allowed, neither is swimming because it’s in the watershed). 

With 4 huts, it’s easy to customize your trip to however many nights you’d like. The loop part of the trail comes from the trail from Edwards Cabin to Mayne Lake and back to Batchelor Cabin, but there are some great side trails to the Mount Steele and McNair Cabins. The hiking is pretty easy, though it can be muddy at certain times of year. The distance is customizable based on your route and could extend from 12-30km. Reservations are made through the Tetrahedron Outdoor Club facebook page and are $15 per person, per night.

Assiniboine

A photo of Mount Assiniboine and Sunburst Mountain and Cerulean Lake at sunset from the Nub in Assiniboine Provincial Park in British Columbia, Canada.

Assiniboine was also on my list of thru hikes, but it’s such a versatile hike, it can also be done as a loop trail! When you enter the park via the Mount Shark trailhead in Kananaskis, you can access Assiniboine through either Assiniboine Pass or Wonder Pass. They share a common trail to Marvel Lake, but then they branch. I’d recommend doing Assiniboine Pass on the way in and Wonder Pass on the way out because it is a steep trail to climb up. There are some restrictions on Assiniboine Pass at certain times of year, so make sure you check for any trail closures.

Once you get to the core area, you can spend a few days exploring the highlights of Assiniboine Park before you return. Not including side trails, the loop is ~52km, so I’d recommend 4-5 nights. It’s a long hike into the park and I personally prefer to do it over the span of 2 days, followed by 2-3 nights in the core area. Both of the entry trails are in Banff National Park and camping permits can be booked through Parks Canada, which release sometime in March for the entire season. Backcountry reservations for Assiniboine are available 4 months in advance at camping.bcparks.ca.

Iceline Trail

A female hiker walks with her hiking poles and hood up, facing away from the background view of large mountains and glaciers on the Iceline Trail in Yoho National Park in British Columbia, Canada.

The Iceline Trail is an incredibly scenic trail in Yoho National Park. The loop trail is 22km and can be done as a big day hike, but it is also nice to enjoy over 2-3 days. The trail leaves from the valley at Takakkaw Falls and climbs up to the alpine for ~6km of exposed trail before going back down to the valley. There are tons of options for camping at Yoho Lake, Little Yoho, Laughing Falls, Takakkaw Falls, or if you’re an ACC member, Stanley Mitchell Hut. 

There are also tons of options for side trails and day hikes, such as Twin Falls, Whaleback Mountain, and the Highline Trail. Reservations are made for the Yoho Backcountry on Parks Canada, and all of the reservations release for the season sometime in March. This is a great alternative trail for those not lucky enough to get permits for Lake O’Hara. 

Lake O’Hara

A photo of red canoes on the bright blue lake water of Lake O'Hara, with the mountains in the background on a cloudy day in Yoho National Park, in British Columbia, Canada.

Lake O’Hara is one of the most popular hikes in the Canadian Rockies. It’s located in Yoho National Park and it is no small feat to secure permits for it. I’ve written an entire blog post on the challenge. You can visit as a backpacker, for which you need camping permits that include a bus ride along the 11km access road. Or you can visit as a day hiker, for which you either need a bus pass, or plan to hike an extra 11km each way. All permits are available from Parks Canada and release some time in March for the entire season.

Once you get to the base, the core trail is the Alpine Circuit, which is approximately 13km if you do the entire circuit. It sounds short, but it climbs through 3 key parts of the trail and shouldn’t be underestimated because of the considerable elevation gain. Fortunately, you can customize the trail to include either the Wiwaxy Gap, the Yukness Ledges, Opabin Prospect, and/or All Souls. The entire hike is in the alpine and one of the most scenic trails I’ve ever done. There’s also lots of options for side trails to Lake McArthur, Linda Lake, or Odaray Grandview.

Favourite Hikes in Southwestern BC: Part IV

If you’re thinking, “didn’t she just post her 10 favourite hikes last week?” You are correct, I did. But I have a severe backlog of trails to post about, so Part III featured my favourite trails from 2019-2020, while this post focuses on my 2021-2022 era. Part III was my “covid era”, so it featured a lot of trails closer to Vancouver. In my opinion, Part IV has some really scenic hikes because post-covid, all I wanted to do was hike and I discovered some real gems! Check out Part I, Part II, and Part III.

20220716_174404

#10 Hut Lake – Let’s start off with a really obscure hike. The snow pack was insanely high in 2022, which postponed my alpine hiking season. In our desperation to find somewhere low elevation to camp, we stumbled upon Levette and Hut Lake outside Squamish. Levette is well known by the locals, but if you continue past Levette, you’ll eventually come to the much less popular Hut Lake Rec Site. It seems to be mostly used by the 4×4 community, but we had it to ourselves on a weekend in mid-July. The hike is entirely in the forest and it’s not the most memorable lake, but I still had the best time swimming in the insanely warm water and recommend it as a good Spring hike or rainy day trail. (8km, 500m elevation gain, 4 hours)

20220916_094024

#9 Bedwell Lake – Bedwell Lake is a popular trail in Strathcona Provincial Park. It’s located at the back of the park and ease of access can depend on the current state of the road. When we visited, a normal AWD SUV would access it fine, but I’ve heard sometimes you need 4WD or high clearance. Parts of the trail are a bit technical, with some ladder sections, but you’re rewarded with beautiful views of the lake and surrounding mountains. We wanted to continue on to Cream Lake, but unfortunately we got rained out on our visit. I’m keen to return to see it in the sun! (10km, 600m elevation gain, 6 hours)

HOP_6405

#8 Slesse Memorial Trail – There are some real gems in Chilliwack Valley. Slesse is a challenging one to get to as you definitely need 4WD and high clearance. It’s a bit of a somber hike because it’s the location of a plane crash, but it also has gorgeous views of Chilliwack Provincial Park and across the border. With over 1000m of elevation gain, it is a slog to get to the top and the views are relatively limited until the summit. But once you hit the ridgeline, there’s a glacier in front of you and a wall of mountains behind you, so you really get a pay-off. (15km, 1100m elevation gain, 9 hours)

#7 Barnet Trail – One of the things I love about living near Vancouver is that you don’t have to go way into the wilderness to hike and the Barnet Trail on Burnaby Mountain has become one of my favourite semi-urban hikes. We hike here regularly with Sadie and I love the views from Burnaby Mountain Park and through the forest. We always start at Burnaby Mountain Park, and I have to admit, the best view of the hike is at the trailhead, but it’s the perfect hike to get your body moving when you don’t want to drive anywhere or have limited time. (9km, 300m elevation, 3 hours)

20220914_104306

#6 Myra Falls – I debated for a long time about whether to put this on this list or not. At 1.5km, it barely qualifies as a hike and is definitely more of a walk, but it’s such a beautiful waterfall! It’s also located in Strathcona Provincial Park and it’s so beautiful Brandon and I had to visit it twice! It’s an easy walk down to the Falls from the parking lot and then you can explore around the area. Definitely exercise caution as there are some steep sections, but after swimming in the waterfall, Brandon and I hiked down over the rocks to also swim in Buttle Lake. (1.5km, 50m elevation gain, 1 hour)

20211011_121231

#5 Seed Peak – I did this trail in the late Fall of 2021 and even before I finished, I knew I’d have to return some day. There was already snow on the ground when we visited and I was having a rough day physically, so we didn’t even finish the hike, but I was still astounded by the views. Access is a bit tricky for this one as it’s way off the beaten track outside Squamish and I’d recommend 4WD and high clearance. Part of the trail is actually located in the far north end of Pinecone Burke Park (which starts in Coquitlam) and there are gorgeous views of the backcountry everywhere you look. We only made it to the base of Seed Peak, but I definitely need to return for the rest of the hike! (13km, 800m elevation gain, 8 hours)

20220820_132359

#4 Tricouni Meadows – My apologies for including so many 4WD access hikes on this list, this is the last one, but I couldn’t leave it off! Tricouni Meadows is located way up in the wilderness north of Squamish Valley. It’s a slog to get to the trailhead and another slog to get to the lake, but you are rewarded once you get there. There are several lakes at the base of Tricouni Peak and it’s a bit technical travelling between them, but there’s space for several campsites. We visited Pendant Lake (my favourite), Spearpoint Lake, and Reflection Lake. From reflection Lake, you can continue up to the top of Tricouni Peak, which I didn’t do, but would like to return and complete as a backpacking trip. It’s a surprisingly busy campsite for such challenging access, so get there early! (8km, 500m elevation gain, 8 hours)

20220827_123959

#3 Skywalk North – This hike is north of Whistler and better known as Iceberg Lake. It’s a popular hike, but most people only hike to the lake and back. It’s a bit longer, but I recommend turning it into a loop hike by doing with the Skywalk North or South trail. We chose the North Trail, it’s longer, but more scenic. It’s a long hike through the trees, but once you hit the lake, you continue hiking up to another summit above the lake with incredible views looking back. From there you continue through several meadows before arriving at Screaming Cat Lake and returning through the trees. Pay special attention to the trail stats though, this is a rewarding, but challenging hike. (22km, 1200m elevation gain, 10 hours)

HOP_6327

#2 Opal Cone/Mamquam Lake – If you go back to my previous posts, you’ll find Elfin Lakes on my first list. Elfin Lakes remains one of my favourite hikes to this day, but I can finally add Opal Cone and Mamquam Lake to the list! This are both continuation hikes from Elfin Lakes and are not intended to be done in a day. Camp at the lake and do either one or both of these as a day hike. Personally, I like Opal Cone better, which is in peak alpine terrain, but it was rewarding to finally make it to Mamquam Lake after a failed attempt back in 2018. (14-22km, 1000m elevation gain, 9 hours)

20220905_082625

#1 Sunshine Coast Trail – No other trail had any chance of the number one spot with the Sunshine Coast Trail in the mix. I hiked this entire 180km trail in 2022 and I’m in love with every inch of it! You don’t need to hike the whole thing, there are so many highlights on this trail and lots of them are accessible as day hikes or 2-3 day trips. The backcountry huts are what make this trail so special, but my favourite sections include Tin Hat, Walt Hill, Manzanita Bluff, Sarah Point, Appleton Canyon, Inland Lake, Rainy Day Lake, and Fairview Bay – basically the entire trail. (180km, 7-12 days)

Continue on to Part V.