I hiked to Blanca Lake around the third week in July and it was the first weekend where it really started to feel like summer. The snow melt was very late in the mountains and I’d been tracking the hike via satellite all week. 5 days before we went, the entire lake was still frozen, but it was melting fast and by the time we hiked up there, it was almost entirely gone.
Blanca Lake is not a well known hike, but it is starting to get more popular. It’s located pretty far up Squamish Valley Road and it does require 4×4 to get to the trailhead. The hike is only 4.5km, but the road to the trailhead is long and exposed, so I wouldn’t recommend hiking the extra distance on a hot day. We ended up picking up a few hikers along the road and they were about to give up and turn around before we drove by because it was so hot.

We had a great crew for this trip. Seth and Sadie both joined me for their second hike of the summer, and of course Brandon was ready with his 4runner. We were also joined by our friend Adriana, who we hiked Tetrahedron with last year, and a new friend, Victoria, who we met when hiking Hozomeen Lake several weeks earlier. I downed a lot of gatorade along the drive as we convoyed up to the trailhead in two cars. It’s a pretty long drive on Squamish Valley Road, as well as on the FSR. The road isn’t in that bad shape, but there are several water bars along the way and a sketchy washout before the top. A few cars parked before the washout as it’s not a long walk from that section.
To make the occasion more special, it was Brandon’s birthday! We ate sandwiches at the car and then started the hike up to the lake. The trail is flat for a short distance, but then you immediately do a big climb up through the trees. It was challenging because it was so hot, but at least we were in the shade. After the climb, the trail stays in the trees and is pretty flat again. You traverse through some small meadows and eventually come to a stream crossing before starting to climb again.


Some of the group was able to get across the stream crossing with their boots on, but I opted to just put on my sandals and wade through it. It was much easier and we all did it on the return trip. We encountered a few groups who were day hiking on their way down, but otherwise we didn’t see a lot of people. You continue through the trees again and then eventually come out on a boulder field that follows the river to the top. Seth really struggled from the heat on this section and the hike took longer than we expected it would, but eventually we all made it to the beautiful wide open view at the top.

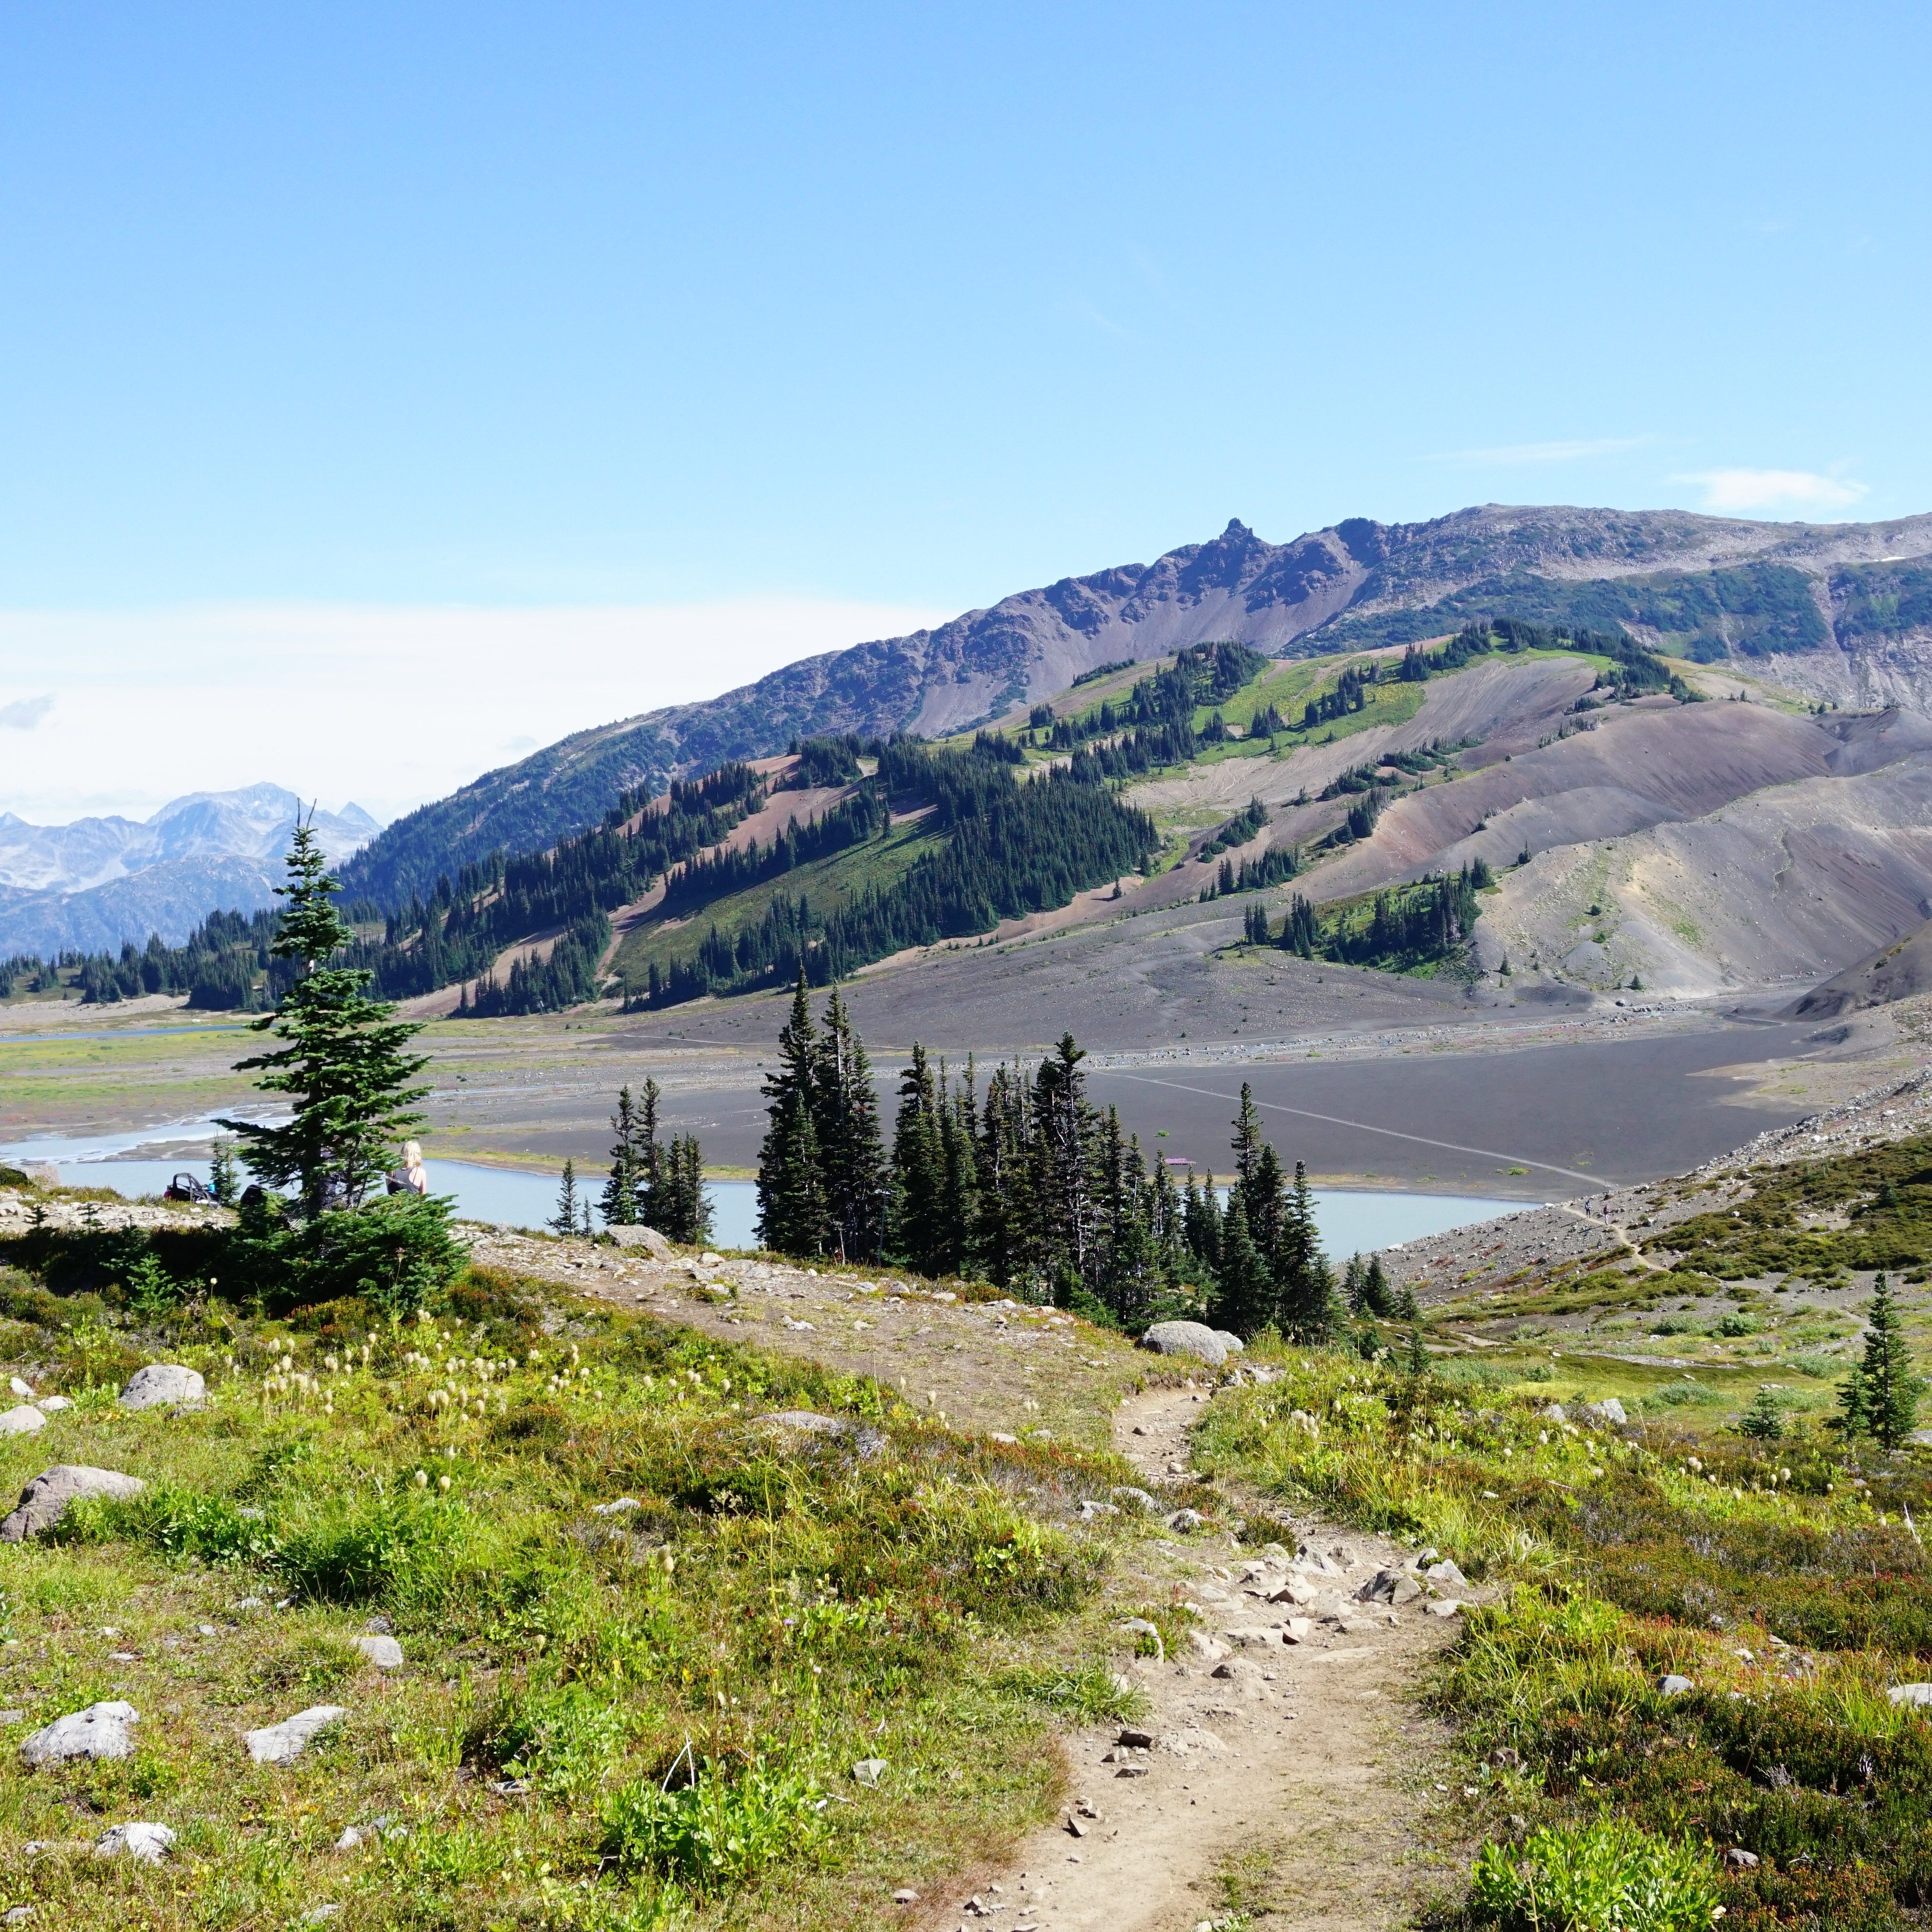
The final section of the trail and the lake are all in the alpine. Blanca Lake is really at the start of the alpine and if you have 2 nights to spare, it’s definitely worth it to stay up there for an extra day and explore around on your own. There aren’t any trails, but the terrain is easy to navigate and you can do a scramble to some of the other lakes and peaks.
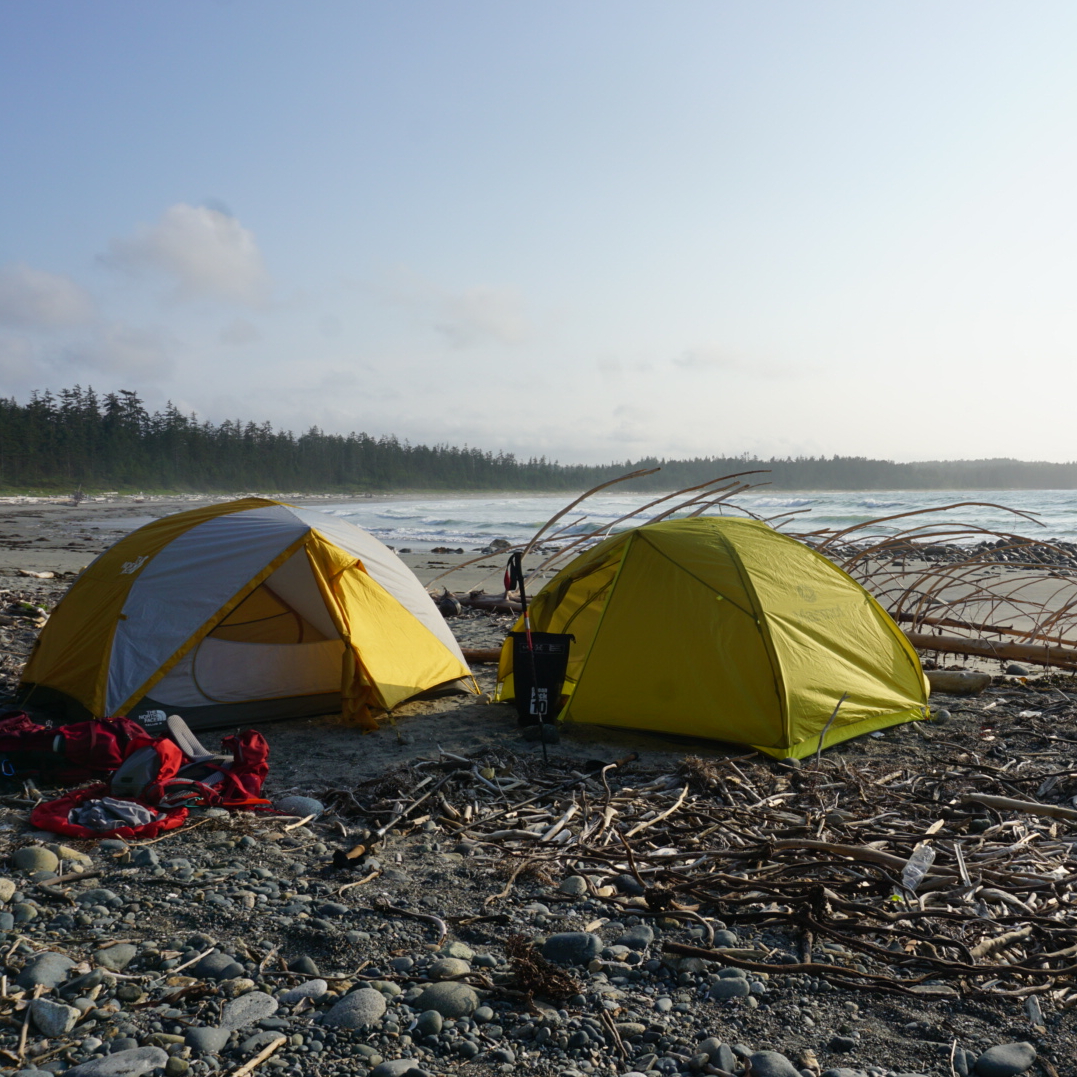
Blanca Lake is the biggest lake, but there are several other lakes nearby, as well as a lot of tarns. I decided to swim in Blanca as soon as we arrived and it was so hot even Seth joined me! It was freezing cold (it had literally only finished melting 2 days ago), but it was refreshing. Adriana and Victoria opted to swim in the small lake just below Blanca, which was warmer, and Brandon scoped out a secluded place to pitch our tents by an even smaller tarn.


There were quite a few people camping on Saturday night. Most of them camped right next to Blanca Lake, but there’s lots of room to spread out. I liked our spot over by the tarn because then Sadie wasn’t distracted by or a nuisance to the other campers. I swam in the smaller lake and 2 tarns, but not the other 2 large lakes. I can’t see any names for them on Gaia, but there’s a big circular lake west of Blanca, and another lake to the South. I hiked over to view both, but they were a bit farther away, so I didn’t swim in either.
We sent up the tents and proceeded to have an excellent evening hanging out in the alpine! We brought party hats for Brandon and celebrated his birthday with some cherry liqueur that I’d brought home from Portugal. We had Brandon’s infamous thai chicken curry for dinner and had a great time hanging out and enjoying the view during golden hour.


There’s no facilities at Blanca Lake, so be prepared to dig catholes for your bathroom. There are some trees around, but it’s pretty barren, so we brought bear vaults and bear bags rather than hanging our food. It should be possible to find somewhere to hang your food, but it was definitely a lot easier using Carolyn’s bear vault, which I borrowed for the trip.
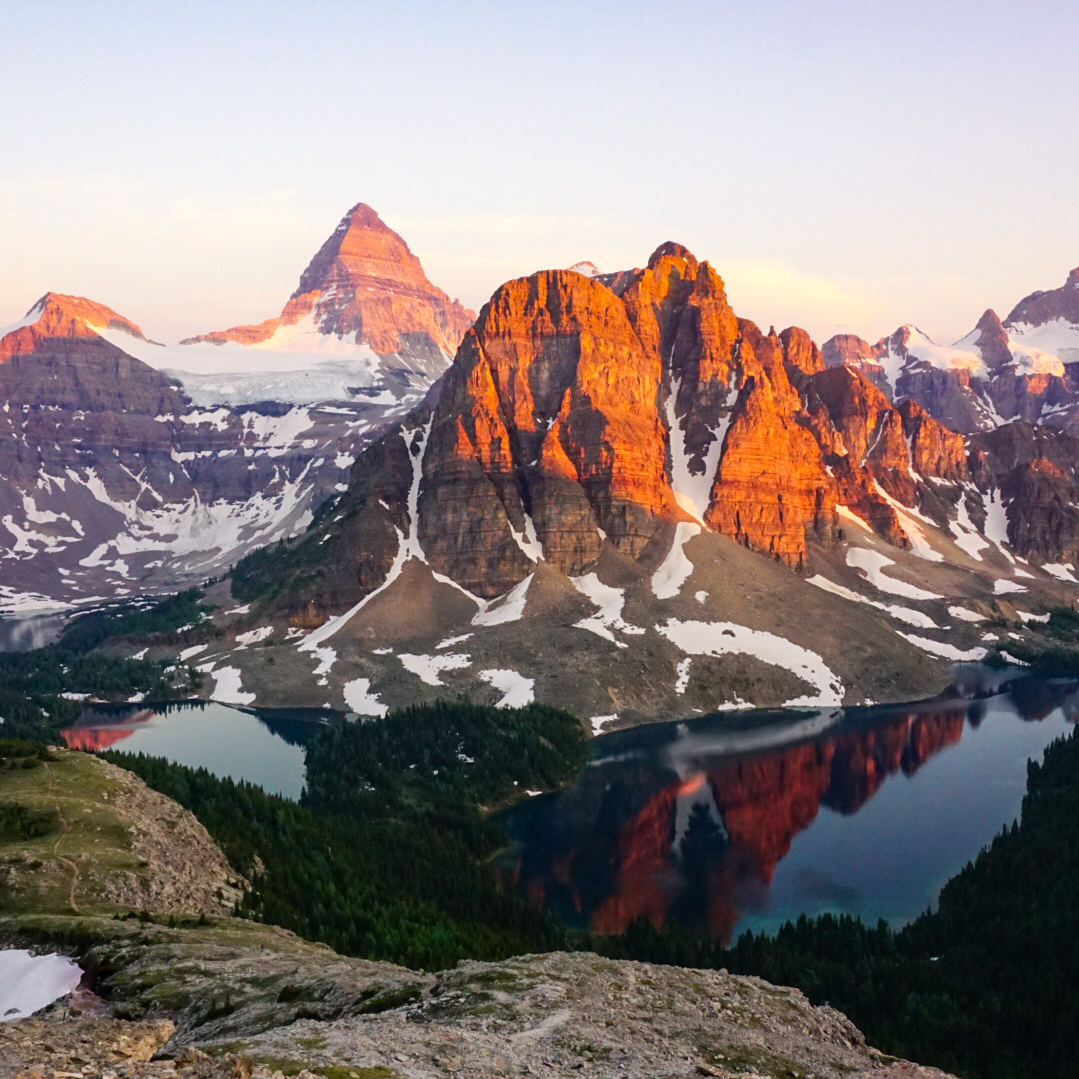
It was an absolutely gorgeous evening and we spent most of the night taking photos of each other. The sunset turned everything orange around us and we shared snacks to celebrate Brandon’s birthday. I made everyone worms and dirt (a girl guide classic!), but I guess our sugar tolerance is lower than my girl guides because we all ate way too much!


I was the first one up in the morning thanks to Sadie. It gets bright so early and she wants out of the tent, so I decided to let everyone else sleep in and take her for a walk. She was my little dog sherpa and carried our essentials in her bag. Like I said, there’s a lot to explore, so we did a short hike up to some of the ridges to view the other lakes and have our breakfast. Blanca is cool, but in my opinion, the lake to the west has the most beautiful view. I wish we’d had more time to explore, but I’ll have to add it to my long list for a return trip.

We took our time having breakfast and packing up and as a result, we were the last to leave. The campsite was completely empty, so I think it’s really only busy on the weekends. The hike back down the valley was nice and there were a lot of wildflowers around. We stopped for lunch shortly after crossing the river and then continued back to the cars. We stopped at the Water Shed in Squamish for dinner and then closed the books on a really nice weekend in the mountains! I took way too many photos on this trip, so here’s a few more!