Hut Series: Elfin Lakes

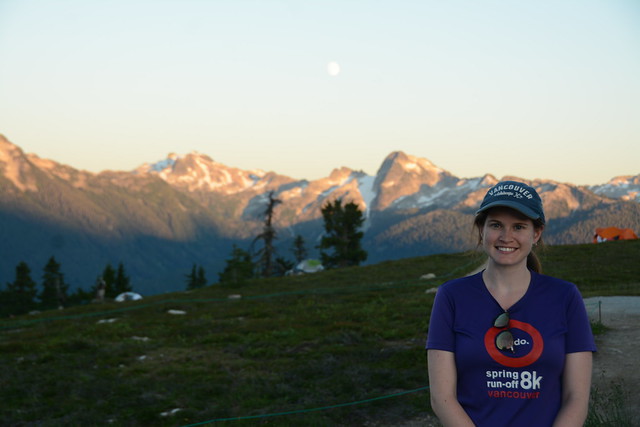
Are you tired of reading about my trips to Elfin Lakes yet? I’ve visited Elfin Lakes more than any other trail, but I’m still not tired of writing about it because I feel like every time I go there I experience something new!

Despite having spent a lot of time at Elfin Lakes, this was only my second time going there in the middle of winter, and it was my first time actually staying in the hut! So it prompted me to kick off a new blog series about BC’s extensive hut system. Aside from the Sunshine Coast Trail, which has a 180km network of huts, and Tetrahedron, I believe this was my first time staying in a hut, especially in the winter. So it might take me a bit of time to build up some hut content, but we all start somewhere! After many years of thinking about it, I finally signed up to be a member of the Alpine Club of Canada, so I’m hoping there will be a few more hut trips in my future.

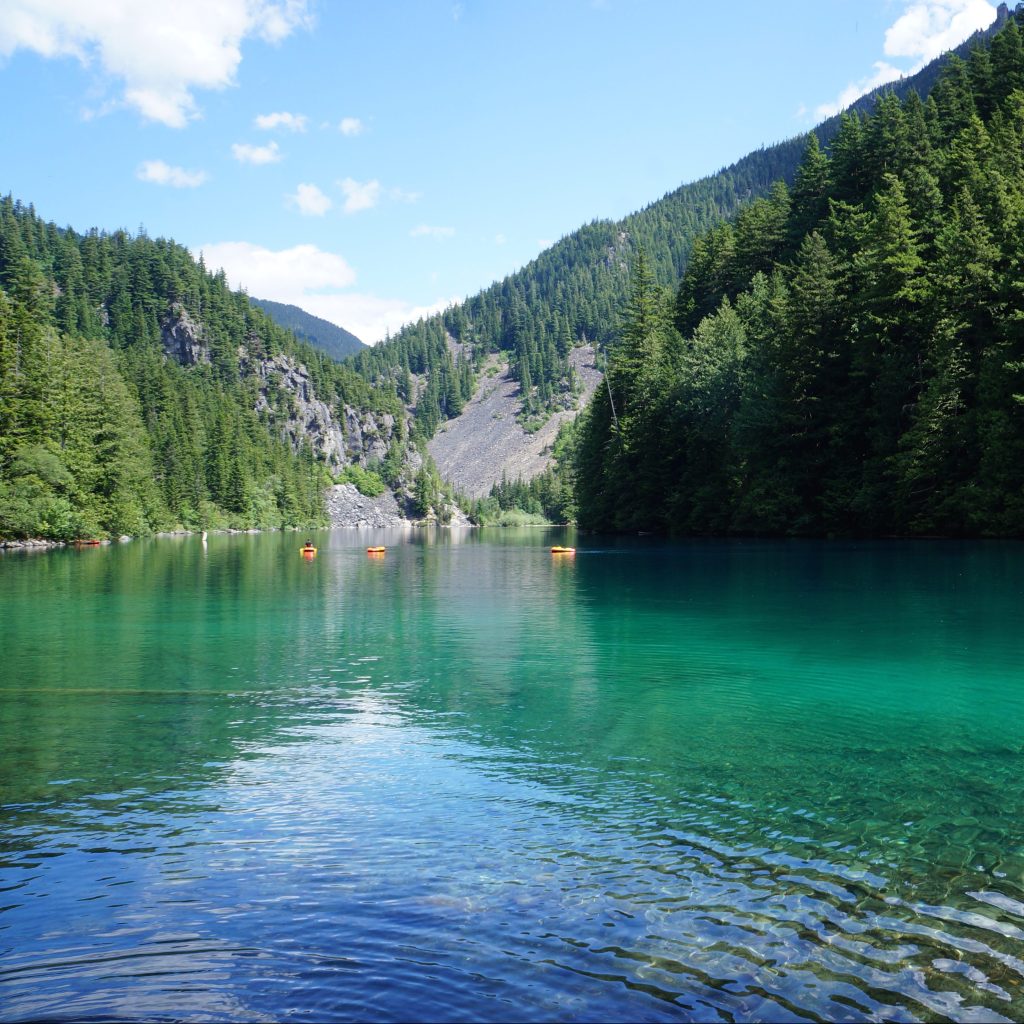
But let’s talk about Elfin Lakes! If you’re not familiar, it’s a very popular trail in Garibaldi Provincial Park. You can visit it any time of year as a day user, but you do need a reservation and permit to camp overnight in the park. These are fairly easy to get on weekdays, but if you want to visit on a weekend, make sure you book as soon as the reservations release, which is 4 months before your desired trip dates. My friend Victoria took care of the bookings for us and 4 of us planned to go up to the hut during the first weekend in January.

20250104_091823
PSX_20250109_114912

The parking lot for Elfin Lakes is called the Diamond Head Parking Lot, and from there it’s an 11km hike to the shelter. In the winter, snow tire chains are required to reach the parking lot. You can drive most of the way there with winter tires, but the last 2km are steep and chains are mandatory. If you don’t have them, you can park at the lower lot and add 2km to your trip. We drove in Brandon’s 4runner and made it all the way to the trailhead. 

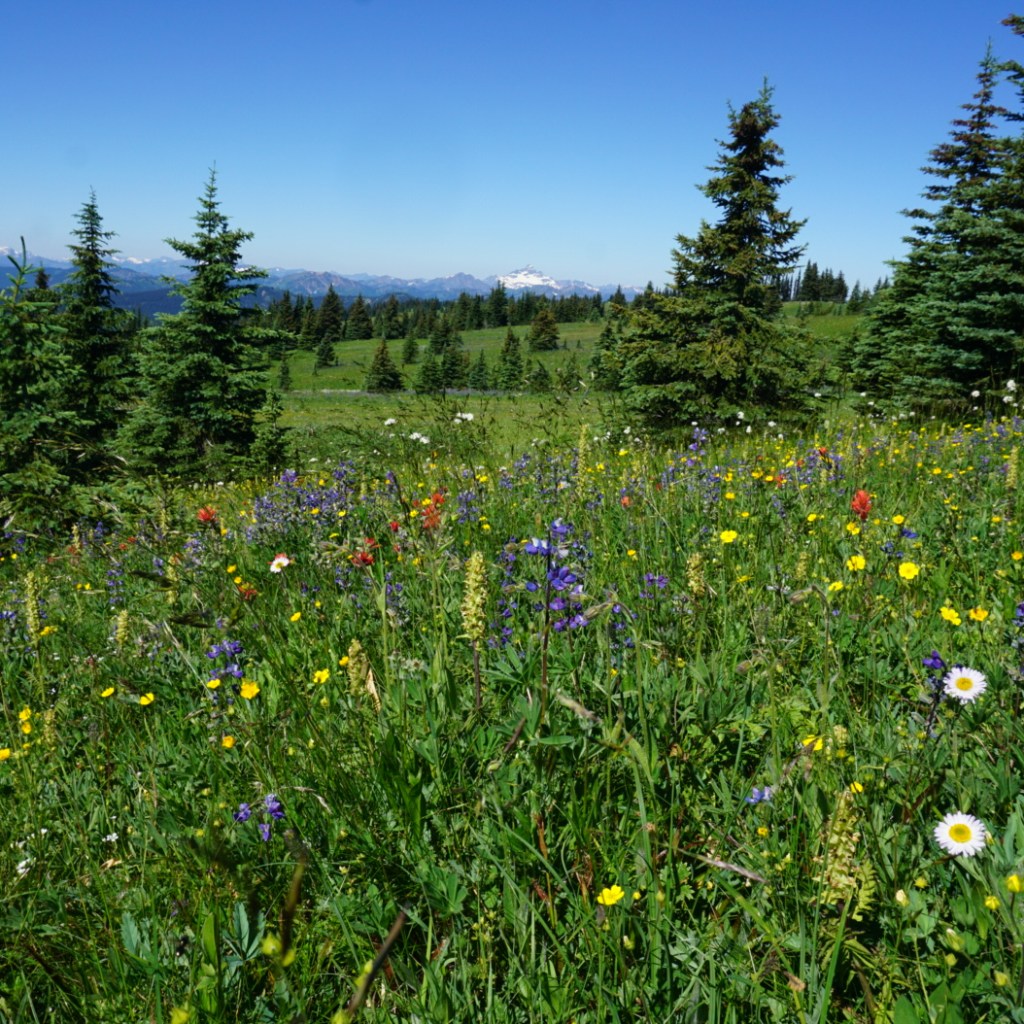
The first 5km of the trail is super easy. It follows an old logging road up to the Red Heather Hut. It’s a fairly wide trail through the trees. There was fresh snow when we visited, so it looked really scenic, but sometimes the snow does melt at the lower elevations, so while it’s a gentle incline up to Red Heather, there’s not always snow all the way from the parking lot. Red Heather Hut is a picnic hut for day use only (you can’t camp in it). It doesn’t see much use in the summer, but it is really popular in the winter. From December to April, you can get a backcountry permit to snow camp at Red Heather (or Elfin Lakes), and these usually don’t sell out. The permits for the Elfin Lakes shelter will sell out on weekends.

PSX_20250109_185052
20250105_140448

Red Heather is most popular for day users in the winter. From Red Heather Hut, it’s another ~1km to hike up to the top of Round Mountain, which is really popular among backcountry skiers and split-boarders. People put skins on the bottom of their skis to climb up to the top of Round Mountain, and then ski a few laps down to the hut, before returning to the parking lot. The last time I visited Elfin Lakes in the winter was in 2019. We snowshoed to the lake and snow camped outside the shelter. This time, I hiked up on touring skis! There were 4 of us in total, me and Victoria were on skis, while Brandon and Emma were on split-boards. 

We stopped at Red Heather Hut for lunch and then continued our hike up to the top of Round Mountain. This is the steepest part of the journey and we were pretty tired by the top we reached the top. We didn’t do any skiing from Round Mountain because we had to continue another 5km to reach the Elfin Lakes shelter. 

20250104_143640
IMG_6317

Because Elfin Lakes is so popular, it’s easy to think that means it’s a safe area. It is relatively safe. I don’t think the trail is in avalanche terrain at all up to Red Heather Hut, but after the hut, there is definitely some avalanche risk. The first time I snowshoed there, I didn’t have my AST training and was definitely taking a risk by hiking there. Now that I know better, I wouldn’t recommend it. Get your AST1 and avalanche safety equipment before attempting to visit Elfin Lakes. I’ve written a whole blog post on avalanche safety as part of my Let’s Talk safety series.

The avalanche risk was moderate on the day we visited. The two sections of trail where you need to exercise extra caution are: around the back of Round Mountain and around Paul’s Ridge. The section behind Round Mountain in particular goes through challenging avalanche terrain. We all had beacon, probe, and shovel, and once we hit this section, we put more distance between each other as we crossed through the more technical terrain. I was leading at the time, so I would go through a section, wait for Victoria to clear it, and then proceed to the next section while she waited for Emma. We did this section by section to ensure that if there was an avalanche, we wouldn’t all be buried. 

20250105_083250

We’re all relatively new to touring – it was their first season for Brandon, Victoria, and Emma. Brandon and Emma struggled on the way to Elfin because they are both boarders and still getting used to being on skis, so it was good to have the group split in half. Me and Victoria mostly looked out for each other, while Emma and Brandon did the same. The last 5km are easier than the first half of the trail, it’s more flat, with small uphill and downhill sections, but it took the boarders some time to adjust. That said, they improved really quickly and we made much faster time on the way back! 

One thing to be wary of when visiting Elfin Lakes is that there is a different trail from Round Mountain to Elfin Lakes in the winter. BC Parks stakes the entire trail, so it’s very easy to follow, but if you’re relying on GPS, make sure you upload the winter trail and don’t try and follow the route for the summer trail. This section of trail is incredibly scenic and it was my favourite part of the day. Unfortunately, it was completely overcast on our way there, so we didn’t see any of the surrounding landscape, but it wasn’t windy, so the conditions were good. It was quite windy when I snowshoed there in 2019, which makes for a much more challenging traverse. 

PSX_20250109_184537
20250105_085948

It’s a lot more fun crossing this section on skis. There’s a fair bit of downhill on the way to the shelter. Not enough to remove your skins and clip into your skis, but it made it a lot more fun to travel across the ridge. Everyone had a few wipeouts along the way! We dubbed our new ski club, “the turtles”, because you look/feel like a turtle whenever you wipe out due to the weight of your overnight packs pulling you backwards. Plus we were ecstatic to realize there were 4 of us and that we matched the 4 teenage mutant ninja turtles! (I’m Raphael)

It took us ~6.5 hours to get to the hut, including our lunch break, so we were traveling at a speed of ~2km/h. Once the split-boarders get a little more experienced, I think we could probably shave an hour off the time (every time you wipeout, it takes a while to unclip from your skis and get ready again, especially with the overnight pack). We arrived at the hut around 3:30pm in the afternoon and spent the rest of the evening relaxing! It’s a two story hut that can sleep ~30 people. There’s a bunch of picnic tables on the main floor, along with shared propane burners and a propane furnace. There are lots of large pots to use for melting snow and people mostly used the communal pots and burners as a shared resource for melting snow for drinking water. Generally, everyone could help themselves to the water and then just add some more snow to the pot. Most people had their own stoves for cooking food.

PSX_20250108_110719
PSX_20250109_184934

Emma brought a wheel of camembert cheese to share, along with bread and charcuterie! She baked the cheese wheel and it was a delicious afternoon snack! We took it easy for the rest of the evening, played some cards and ate dinner. Most people at the hut were on skis, but there were a few snowshoers there as well. Given that there were 30 people in the hut, I was expecting that there would be at least a few noisy partiers and was prepared to not sleep well. So I was thrilled when it turned out everyone at the hut were early-to-bed campers! The hut was completely silent with everyone in bed by 8:45pm!!! I still didn’t sleep well, but there were no really noisy snorers, so it was really the best sleeping conditions we could have hoped for.

As a result, everyone was also up early for a big day of touring. Some people continued to go skiing around the Saddle, but most people were heading back to the parking lot. We had a bit of a slow start after Victoria had a mishap with her breakfast. She frantically woke us up with the choice phrase of, “we’ve been robbed!”, which left us all a little confused as she tried to explain exactly what had happened.

PSX_20250115_210234
20250105_105218

She had brought a huge breakfast to share with Brandon and Emma (I declined on this occasion because I was trying to keep my pack light). She hung her food bag high on the porch to keep it cool overnight and unfortunately something walked off with the entire bag of food! We thought the only visitors would be mice, but there’s obviously some other animals prowling the area. My guess is it was either a bobcat or a lynx. We felt really bad about an animal getting access to human food and the plastic waste that will now be somewhere in the wilderness, but all Victoria was able to find were a few small scraps of her dry bag. So a lesson learned for us!

Fortunately, we all were prepared with extra food (especially Emma, who brought 3 extra sandwiches out of fear of excessive hunger), so it wasn’t hard to scrounge up a substitute breakfast. We ended up leaving the hut around 11am and the return trip was a lot faster. In contrast to the previous day, we had amazing conditions! It was a sunny, blue sky day and we could see the breathtaking views of the Garibaldi backcountry! There was a little bit of fog moving around throughout the day, but it honestly just made the views even more scenic. I loved skiing along the ridge back to Round Mountain. 

PSX_20250106_224916
PSX_20250112_125126

Once we got around Round Mountain, we stopped to take off our skins and strap into our skis (and boards). From Round Mountain, it’s all downhill back to the parking lot, so we were able to properly ski. The section from Round Mountain to Red Heather is the most exciting, with lots of open area to explore. There was A LOT of powder. It might be the most powder I’ve ever skied, which sounds exciting, but was a new challenge to manage. Victoria and Emma blasted down to the hut, but I took my time. It was really fun in the powder, but it is a challenge to balance with the overnight pack. I did have one pretty spectacular wipeout where I picked up too much speed and my pack tipped me over when I tried to turn. 

We ate lunch at Red Heather Hut again and it only took us about a half hour to ski the 5km back down the logging road to the car. The sun was definitely heating up the trails and it felt like spring skiing. There wasn’t as much snow as we approached the base and I had to avoid a few thin patches. But the lighting through the trees was gorgeous and we all had a great time despite the aching thighs!

PSX_20250110_121506
PSX_20250107_141752

I feel like this trip was very much the realization of a dream I’ve been working on for the past 3 years. I’ve always been intrigued about touring, but I was intimidated by it for a long time and didn’t want to invest in the equipment. When I decided to replace my downhill skis 3 years ago, I knew it was time to finally get a backcountry set-up. I loved pretty much everything about this trip!

The conditions were amazing, the company was fantastic, and the views were gorgeous! As fun as it is to go downhill, traversing the ridge ended up being my favourite part of the adventure. I felt a lot more confident on my touring skis and it was more fun than snowshoeing. Even though the ridge is fairly flat, it’s somehow way more fun on skis! I’ve always wanted to stay in the Elfin Hut and it was a great first overnight touring trip. I felt that we were all safe and made good decisions. I absolutely can’t wait to keep exploring on my skis, improve my skills, and have more adventures! Thanks for coming along for the ride!

IMG_6393

Top 10 Unbeatable Trails in Southwestern BC

I’ve been living in British Columbia for almost 11 years now. Every 2 years I compile a list of my top 10 favourite hikes in Southwestern BC during that period. This means that I have almost 300 hikes in my overall hiking log and 50 hikes in my “favourites” list. I decided to create one more ultimate top 10 list using only the trails from my last 5 compilation posts (Part 1, Part 2, Part 3, Part 4, Part 5). Most of these are very well known hikes, with good reason, though there are a few slightly lesser known trails. After a decade living on the West Coast, these are the trails that I’ll never stop recommending!

#10 Howe Sound Crest Trail

DSC07622

The Howe Sound Crest Trail is a quintessential hike located just outside of the lower mainland. It is a very challenging hike, but iconic due to its proximity to the city and the towering Lions mountains. The hike leaves from the top of Cypress Mountain and hikes 30km of ridgeline parallel to Howe Sound, ending at Porteau Cove. It can be done in a single day as a trail run, but it’s a very technical and challenging hike and I recommend at minimum, 1 night on the trail (I did 2 nights). The trail passes through the Lions and then hikes up and down several peaks to the halfway point at Magnesia Meadows. From there, you can summit both Mount Harvey and Mount Brunswick, before continuing back in the forest to campsites at Brunswick Lake and Deeks Lake. It’s a beautiful trail, but there is a lot of elevation gain and it should not be underestimated. (30km, 1500m elevation gain, 2-3 days)

#9 South Chilcotin

20240731_113802

There are tons of hiking trails available in South Chilcotin Provincial Park and it is a great place to escape the crowds. Day hiking definitely isn’t possible here, but if you really want to escape out of the city and spend an extended period of time in nature, this is a great choice. The route I took involved hiking into the park along the Tyaughton Creek Trail and doing a loop around the park. Highlights included hiking up to the top of Lorna Pass and over Deer Pass. There are some beautiful lakes on the south side of the park. I did a 90km route over 6 days and I’m already dying to go back and explore more of the park. (30-90km, 2-6 days)

#8 Cheam Peak

DSC06554

Camping isn’t allowed on Cheam Peak, so this hike can only be done as a day hike. It’s extremely popular, but notoriously difficult to access. 4WD and high clearance are definitely required to get to the trailhead, so don’t even try to take a small vehicle up there. There are a lot of water bars and they start early, so don’t try and park on the road either as it will only create more barriers. But if you can find a ride to the top, this is a truly iconic hike in the Fraser Valley. The entire hike is in the alpine and you start by hiking into a grassy meadow before a steep slog up the mountain to the top. From the top, you can see the entire Fraser Valley on one side and the sweeping backcountry on the other. I’ve done this one twice and always enjoy it, despite the crowds. (10km, 650m elevation gain, 1 day)

#7 Mount Price

HOP_0525

Mount Price is the secret version of Panorama Ridge. I haven’t done this hike since 2018, so it may have gotten more popular since then, but when I visited, it was empty compared to the crowds in the rest of the park. Similar to Panorama Ridge, this trail is located in Garibaldi Provincial Park and can be completed in a day, but is best done overnight at the lake. While the Panorama Ridge trail goes up the north side of Garibaldi Lake, the Mount Price Trail goes up the south side. You walk along the lake doing some light bushwacking, before you hit a large boulder field that you have to scramble up to the large flat top of Mount Price. From there, you can admire the Garibaldi backcountry in every direction! Enjoy the gatorade blue hues of Garibaldi Lake, the towering glacial peaks of Mount garibaldi, and the iconic Black Tusk, home of the Thunderbird. (29km, 1400m elevation gain, 1-3 days) 

#6 Russet Lake

IMG_4814

Mount Price is only one of many breathtaking hikes in Garibaldi Provincial Park. Another gorgeous hike can be found along the High Note and Musical Bumps trail to Russet Lake. In theory, this could be done as a day hike, but I really recommend it as an overnight hike due to the length and late opening time of the gondola. The Russet Lake trail starts in Whistler and can be accessed from either the top of Peak Chair (which comes with a hefty price tag, but is worth it in my opinion), or from the base of the mountain along the Singing Pass Trail. The Singing Pass Trail is free, but is mostly in the trees and involves a lot of elevation gain. The route from Peak Chair follows the High Note Trail to Flute Summit, before merging with the Musical Bumps Trail. The entire trail is in the alpine and breath-takingly gorgeous, but it does involve doing several mini summits, so it is still a very tiring trail. It’s highly worth the payout! (24km, 550m elevation gain, 2 days)

#5 Panorama Ridge

HOP_0804

I’m just realizing how many of the hikes on this list are in Garibaldi Park! I don’t think this hike needs any introduction. Panorama is the crown jewel hike of Garibaldi and one of the most iconic hikes in the entire province. I admit that I am a bit resentful of this hike because of the huge number of people it attracts, but I’ve still made the trek up there on more than one occasion to admire the views. Lots of people do it as a big day hike, but I’ve always camped at the lake. My preferred way to visit Panorama Ridge is to thru hike from Garibaldi Lake to Helm Creek and stop at Panorama Ridge along the way. Helm Creek is another stunning area of the park and makes for a fantastic thru hike. If you want to avoid some of the crowds, you could enter the park from the Cheakamus Lake entrance and day hike Helm Creek, since most people come via the Rubble Creek entrance. (30km, 1500m elevation gain, 1-3 days) 

#4 Heather Trail

DSC05851

We’ve almost concluded the Garibaldi Park hikes, so let’s talk about my other favourite park, E.C. Manning Provincial Park. I absolutely adore Manning Park, which has always attracted less visitors than Garibaldi Park, but the crowds are definitely increasing in recent years, especially in the Fall on the Frosty Mountain Trail. But the Heather Trail is where I’d rather spend my time. If you just want to do a day hike, drive to the top of Blackwall Road and hike out and back to 3 Brothers Mountain, which captures a lot of the highlights of the trail. You do most of the elevation gain in the car, so most of the hike is located in the alpine and is very well known for its alpine wildflowers. But I like to extend the trip by backpacking the Heather Trail, which continues further to Nicomen Lake. From Nicomen, you can turn around and hike back to your car, or continue on the Grainger Creek Trail and thru hike to Cayuse Flats, which is what I did. (38-42km, 1000m elevation gain, 2-3 days)

#3 Skyline II Trail

HOP_5700

As much as I love the Heather Trail, the Skyline II Trail is my favourite trail in Manning Park! It gets less crowds than the Heather Trail, but it is becoming more popular in recent years. If you just want to do a day hike, follow the trail up to Snow Camp Mountain and back, which features a breaktaking viewpoint before Despair Pass, and beautiful alpine meadows after the pass. The most iconic mountain on this trail is Hozomeen Mountain, which is located just across the border. My preferred trip is to backpack to Mowich Camp and then do a day hike to Hozomeen Ridge on the second day. I returned to my car along the same route, but you can thru hike the Skyline II Trail down the other side of the mountain into Skagit Valley Provincial Park if you have two cars. (17-40km, 500m elevation gain, 1-3 days)

#2 Elfin Lakes

HOP_6418

Elfin Lakes is the last hike on my list from Garibaldi Park. It’s also a very popular hike, but not on the same level as Panorama Ridge. That said, of all the trails in Garibaldi Park, this one is by far my favourite and I keep returning to it year after year (I think I’ve been up there 7 times now)! This trail can be done as an overnight or a day hike, in all seasons (although there is some avalanche risk in the winter). You can either tent or stay in the shared hut. The reason I love this hike is because the views from the tent are absolutely phenomenal and it’s great for stargazing. Plus, there are several options for day hikes from the campsite and I’ve had a lot of fun exploring the Gargoyles, Opal Cone, and Mamquam Lake over the years. I never get tired of this hike! (22-42km, 600m elevation gain, 1-3 days)

#1 Sunshine Coast Trail

20220905_082625

The Sunshine Coast Trail will always top my list and is a very sentimental trail to me. It’s a 180km trail that can be done in sections or as one large thru hike. I did it in 2 sections in 2022. I did the first 50km with my sister, and the second 130km alone. It remains the only trail I’ve ever backpacked on my own. The trail has a large system of huts that you can stay in and is maintained by a committed network of volunteers. While the trail does have a number of gorgeous viewpoints, it is a lot of forest walking. I can’t quite pinpoint what is so special about this trail, I think it’s a combination of all the elements of the experience, but it will always have a special place in my heart. The highlights for me included Sarah Point, Manzanita Bluff, Appleton Canyon, Inland Lake, Tin Hat Mountain, Walt Hill, Rainy Day Lake, and Fairview Bay. So basically, the entire trail! (180km, 7-12 days)

Overnight Hikes for Beginners Near Vancouver

Last week, I shared a Beginner’s Guide to Backpacking for those looking to make the transition from hiking to backpacking. A large part of trip planning is selecting a good trail, especially as a beginner, so I’ve put together a list of trails near Vancouver that I think are appropriate for new backpackers.

There are literally hundreds of trails within a 3-hour drive of Vancouver and it can be difficult to know where to start. My biggest recommendation is to keep it simple by choosing easy trails and campsites with access to basic facilities. It can be an adjustment getting used to carrying a large backpack, so pick shorter trails with less elevation gain, and a first-time trip can be made a lot simpler with access to an outhouse, bear cache, and cooking shelter. See my Guide for more information on how to select and book campsites.

Here are some of my preferred hikes for beginners, in order of level of difficulty (easiest trips first):

3 Brothers Mountain (Buckhorn Campsite)

Region: E.C. Manning Provincial Park
Distance: 4km each way
Elevation: 200m
Reservation: yes ($10pp, per night)
Amenities: outhouse, bear cache, tent pads, cooking shelter, picnic tables
Season: July-September
Drive time from Vancouver: 2.5 hours
Trip Report: found here

Buckhorn Campsite is my pick for best experience for beginners. Manning Park is my favourite park near Vancouver and I think this hike is ideal because it’s short, has a lot of amenities, and is absolutely beautiful. You have to drive up all the way up Blackwall Road to get to the trailhead, so most of the elevation gain is done in the car. You get to enjoy brand new tent pads and a gorgeous cooking shelter, surrounded by alpine wildflowers. The reservation system for this site is new in 2024. This campsite is ideal for 1 or 2 nights and is a great base if you want to day hike to 3 Brothers Mountain on your second day.

Cheakamus Lake

Region: Garibaldi Provincial Park
Distance: 4-7km each way
Elevation: 250m
Reservation: yes ($10pp, per night)
Amenities: outhouse, bear cache
Season: June-October
Drive time from Vancouver: 2 hours
Trip Report: found here

There are two options for Cheakamus Lake, the first campground is called Cheakamus Lake and is located 4km from the parking lot along mostly flat terrain. The second campground is called Singing Creek and is located 7km from the parking lot, and is still mostly flat terrain. Either campground is a great option for a 1 night hike. If you’d like to do 2 nights, camp at Cheakamus Lake and do a day hike to Singing Creek and back on your second day. Be diligent with bear safety on this hike as there is a history of bears in this area.

Viewpoint Beach

Region: Golden Ears Provincial Park
Distance: 4.5km each way
Elevation: 200m
Reservation: no (permit is $5pp, per night)
Amenities: outhouse, bear cache
Season: May-October
Drive time from Vancouver: 1 hour
Trip Report: found here

Viewpoint Beach was the first place I ever took my girl guides and it’s a great option for beginners. It’s a short and easy walk from the parking lot to the campground and there is an outhouse and a bear cache available. However, because there are no reservations, I recommend to leave earlier in the day to secure a campsite. You can camp on either side of the river, but don’t attempt to cross the river. The bear cache and outhouse are located at Viewpoint Beach. The other side of the river is called Hikers Beach and can be accessed by crossing the large wooden bridge 500m before Viewpoint Beach. You can extend this trip to 2 nights if you’d like to do a day hike up to Alder Flats.

Tetrahedron Park

Region: Tetrahedron Provincial Park
Distance: 3-6km each way
Elevation: 250m
Reservation: yes ($15pp, per night, paid to the Tet Outdoor Club)
Amenities: sleeping hut, outhouse
Season: June-October
Drive time from Vancouver: 1 hour + ferry
Trip Report: found here

Tetrahedron Park is a really unique experience and is a great option if you don’t have a tent yet. Tenting is not allowed in this park and all users must stay in one of the huts. There are 4 huts, but I recommend either Bachelor Cabin or Edwards Cabin for beginners (though Bachelor Cabin is often used by families, so please be respectful of children). These sites are managed by the Tetrahedron Outdoor Club. First, join the Tetrahedron Outdoor group on facebook and do a search for your dates to see how many other people are already going then (the cabin sleeps ~12), then post your booking on facebook and pay on the website. This location is great for multi-day trips, as you can do a day hike up to Mount Steele from Edwards Cabin, but the mountain may have snow until July.

Lindeman Lake

Region: Chilliwack Provincial Park
Distance: 1.5km each way
Elevation: 225m
Reservation: no (permit is $5pp, per night)
Amenities: outhouse, bear cache, tent pads
Season: May-October
Drive time from Vancouver: 2 hours
Trip Report: found here

Lindeman Lake is a very popular trail, so if you opt to camp here, I recommend going very early or visiting on a week day. There are a small amount of tent pads and room for tents, but it can get very crowded. It’s an attractive hike because it is very short, but there is significant elevation gain over a short distance, so be prepared for a steep hike. Sites are not reservable, but you do need a backcountry permit, which can be obtained 2 weeks before your trip. This is a great option for a two night trip if you want to do a day hike up to Greendrop Lake, but you may encounter snow past Lindeman Lake until July.


In my opinion, the first 5 hikes on this list are the most ideal for true beginners planning their first ever overnight hike. They are shorter and have less elevation gain. The rest of the hikes on the list are starting to get more advanced in that they are longer and have more elevation gain, but are still good options for newer backpackers and second trips. I recommend these trips to people who are are already experienced hikers; those new to both hiking and backpacking should stick with the hikes listed above.

Joffre Lakes

Region: Joffre Lakes Provincial Park
Distance: 5.5km each way
Elevation: 400m
Reservation: yes ($10pp, per night)
Amenities: outhouse, bear cache
Season: July-September
Drive time from Vancouver: 3 hours
Trip Report: found here

Joffre Lakes is another insanely popular hike and you will have to be diligent in booking exactly 4 months ahead of your planned dates to secure a permit. However, it’s popular for a reason and is actually a relatively straightforward trip for the incredible views. Be prepared for a climb, but it’s not too steep, so it just requires a little bit more effort for a great reward.

Fairview Loop Trail

Region: Upper Sunshine Coast
Distance: 6-12km (customizable)
Elevation: 250-400m
Reservation: no (recommend a donation to qPAWS)
Amenities: sleeping hut, outhouse, bear cache, picnic tables
Season: May-October
Drive time from Vancouver: 2 hours + 2 ferries
Trip Report: found here

We’re definitely starting to get a little more technical with this trail. The Fairview/Rainy Day loop is located in Saltery Bay, directly after you get off the ferry. To save money, park at Earl’s Cove and walk on the ferry as you don’t need your car on the other side. This loop trail is part of the Sunshine Coast Trail and has two huts on it, Fairview Hut and Rainy Day Lake Hut. It’s 6km (250m gain) to Fairview hut (counterclockwise) and 4km (350m gain) to Rainy Day Lake hut along the road (road is recommended as it’s significantly longer and steeper to take the trail). You can do the trail as a loop to visit both huts (12km total), but this is a more challenging option as there’s 700m of climbing to do both huts. The huts can get very busy, so you should bring a tent in case they get full.

Elfin Lakes

Region: Garibaldi Provincial Park
Distance: 11km each way
Elevation: 600m
Reservation: yes ($10pp, per night)
Amenities: sleeping hut, tent pads, outhouse, cooking shelter, bear cache, picnic tables
Season: July-September
Drive time from Vancouver: 1.5 hours
Trip Report: found here

Elfin Lakes is the longest trail on the list, so you should be prepared for ~4 hours of hiking with your backpack. However, I include it because the elevation gain is spread out over the distance, so it’s never too steep and it’s a very wide and easy trail. This is another hike that books up fast, but you can stay either on a tent pad or in the hut, but they have separate bookings, so make sure you book the correct one. The views from the campsite are some of the best of any hike. Watch out for bears on this hike, especially in the Fall.

Garibaldi Lake

Region: Garibaldi Provincial Park
Distance: 9km each way
Elevation: 800m
Reservation: yes ($10pp, per night)
Amenities: outhouse, bear cache, cooking shelters, picnic tables
Season: July-September
Drive time from Vancouver: 2 hours
Trip Report: found here

This is the final hike on the list. It has the most elevation gain and you should be prepared for 3 hours of hiking up switchbacks in the first 7km. The trail is not technical, but it is very boring until you reach the lake. However, if you like amenities, it’s a great option. You can camp at either Garibaldi Lake or Taylor Meadows, which have composting toilets, cooking shelters, and picnic tables. I recommend this trip only for those who are already experienced hikers.


There are 3 more trails I want to note because they are easy trails, but I didn’t include them in my main list because they don’t have outhouses or bear caches. There are enough other challenges to contend with on your first hike, so I don’t recommend these. But once you get comfortable with digging a cathole and making your own bear caches, these are good options. However, please note, these are all on crown land, so while there’s no permit required, the sites also don’t receive any maintenance, so please respect the natural environment, leave no trace and pack out everything, including your toilet paper!

Falls Lake – a 1.5km hike on the Coquihalla Summit Rec Area. It’s totally flat and is a great option for a beginner snow camp as well.

Levette/Hut Lake – you can drive up to Levette Lake (which can get very busy), and it’s only another 4km to Hut Lake, which doesn’t get many visitors.

Semaphore Lakes – a 2.5km hike, but this one is a bit steeper (300m gain). There are limited trees for a bear cache here, so a bear canister is recommended.

If you’re looking for more advanced trips, check out my posts on Thru Hikes and Loop Hikes.