Hozomeen Lake Backpacking Trip

Disclaimer: I’ve heard that this border crossing is now closed and I don’t believe it’s possible to do this hike from the Canadian side anymore. Below recounts my experience doing the hike in 2024, I wouldn’t advise doing this hike at this time.

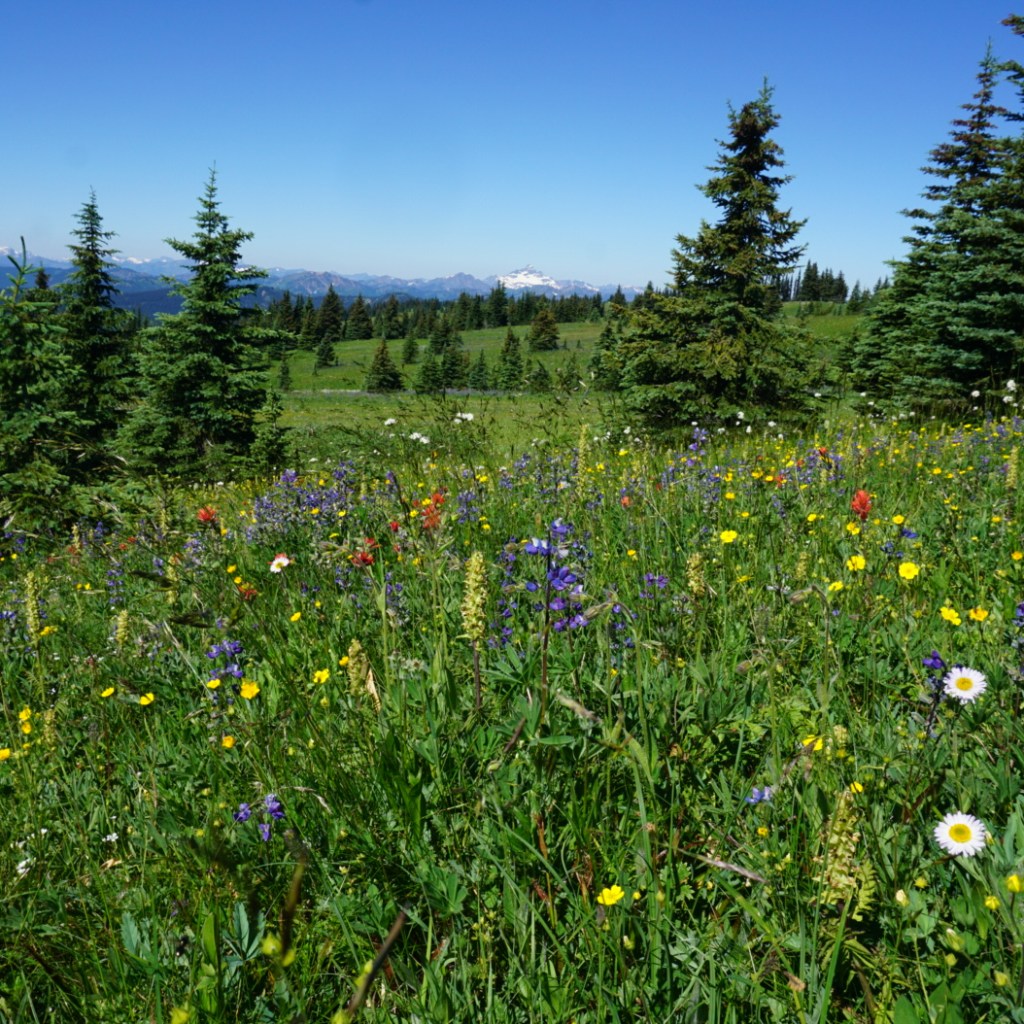
The thing I love about BC is that there’s something to do in every season. I love skiing and snowshoeing in the Winter, and kayaking in the Spring, but there’s no question that backpacking season is my favourite. As soon as the warm weather hits, I always get the itch to go to the mountains. But it takes the snow a lot longer to melt in the mountains than in the city, so I always have to impatiently wait until almost July for alpine hiking (though there are still opportunities at lower elevations). 

It was a very poor ski season last winter, so I was expecting an early alpine season this year. Unfortunately, we ended up getting a lot of late season snow, and it’s been a cooler and rainier Spring than normal, so by the time July hit, there was still a lot of snow in the mountains. In the long run, I know this is a good thing for wildfire season, but it left me scrambling to find a trip for the Canada Day long weekend.

PSX_20240704_180704
PSX_20240704_181919

I monitor the snow in the mountains in several ways. First, I always check Sentinel Playground/Copernicus Browser, which has satellite imagery that allows you to check the snow levels. Availability of data depends on having a cloudless day when the satellite rolls over your area of interest, but generally you can get data on the conditions within the last 2 weeks. Second, I check AllTrails for trail reviews from other users, and finally, I search the location on instagram for recent photos. All this effort confirmed that most of the trails on my hiking list were still inundated with snow.

I spent weeks scouring the internet and maps, looking for an alternative that I hadn’t already done, wouldn’t have permits, and would be appropriate for my husband, Seth, and our dog, Sadie. After much searching, I stumbled upon a very interesting option – the Hozomeen Lake Trail.

PSX_20240703_210130
20240630_152059

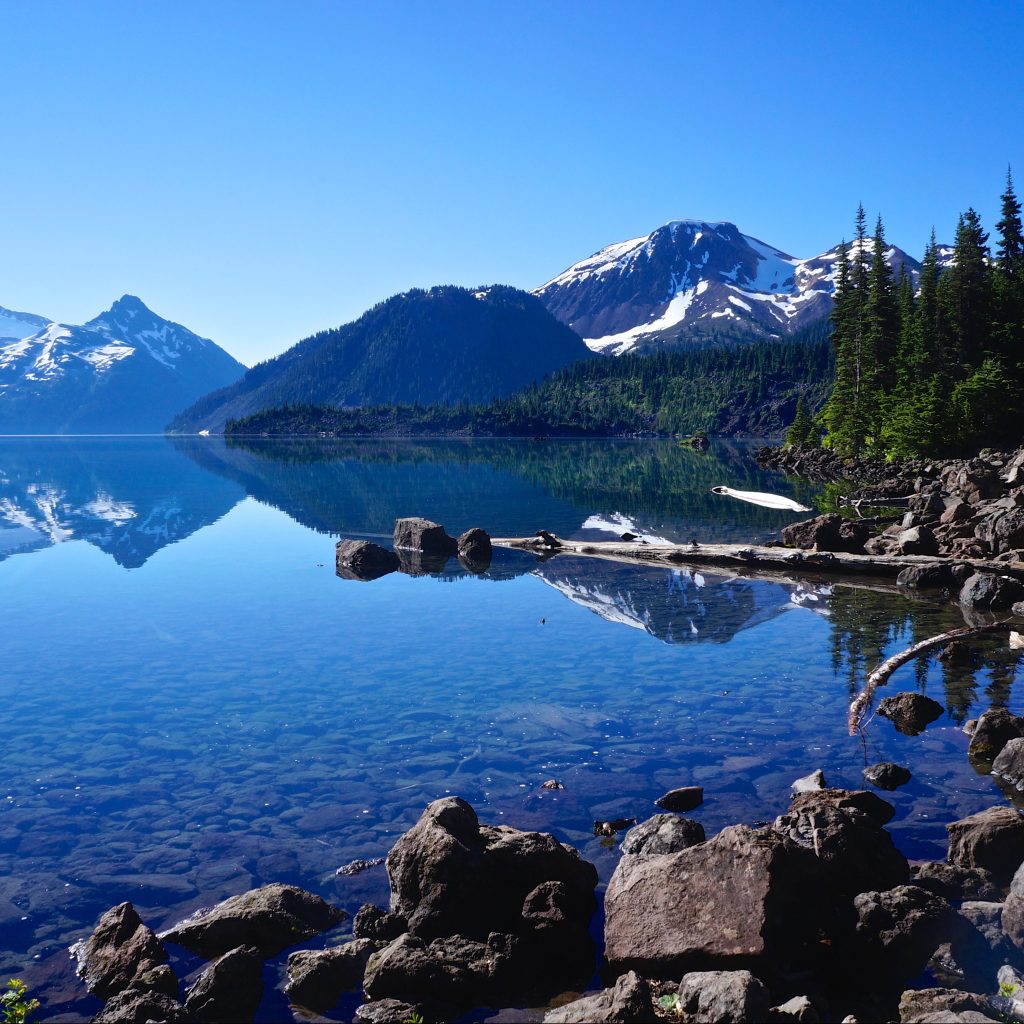
Hozomeen Lake is located in North Cascades National Park in Washington State. It’s just south of Skagit Valley Provincial Park and east of Ross Lake. What makes this hike unique is that it’s primarily accessible from Canada, but there’s no formal border crossing. Silver Skagit Road continues through the entirety of Skagit Valley Park, and a few kilometres past the border, but it’s not a manned crossing, so there’s no border control (though there are cameras). Pre-pandemic, you could drive across the border and there were a series of frontcountry campsites located on Ross Lake. But the gate has been closed to vehicles since the pandemic and the campsites are no longer maintained. 

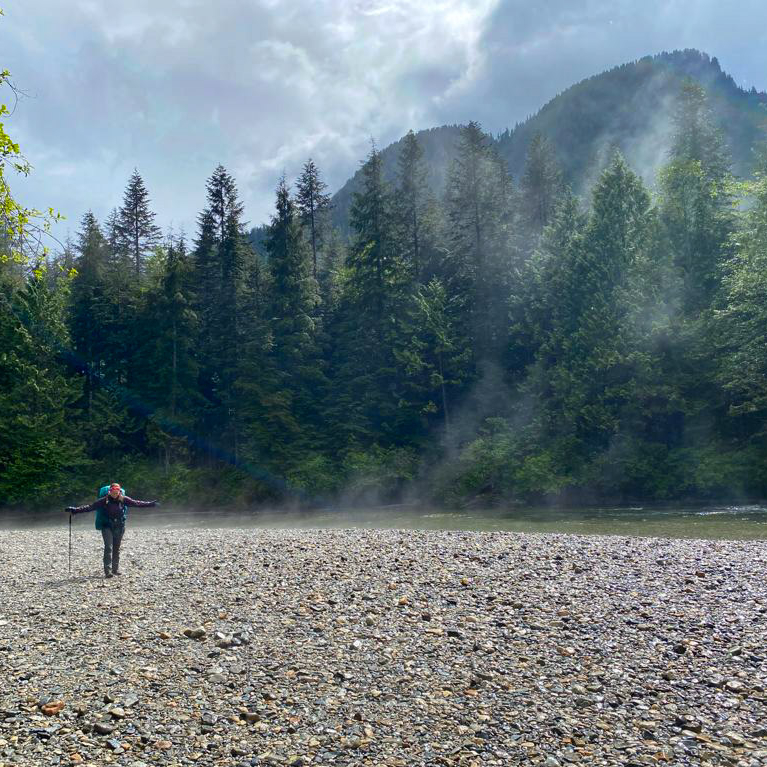
Fortunately for us, there is a series of backcountry trails that extend all the way down to Highway 20 in the US, and it appears that they are still being maintained. It’s a 2km hike on the road to the trailhead, and then ~6km of hiking along a forest trail to Hozomeen Lake, which sits at the base of Hozomeen Mountain. Me and Brandon hiked to the base of Hozomeen Mountain via the Skyline II and Hozomeen Ridge Trail in Manning Park in 2017, so we were excited to explore the trail from the other side of the mountain. 

PSX_20240702_083250
PSX_20240711_231338

Hozomeen Lake is beautiful and doesn’t receive many visitors, so it was a great pick for my extremely anxious dog. It does require a camping permit to stay there, which can be obtained from the National Park Service (NPS) via email. They only issue permits on the day before your trip, but the Ranger is really nice and called me the morning before the hike. I guess some other people emailed ahead of us because he told me the campsites were already full, but he kindly let us use the group site and gave us a permit for two nights. 

There’s only a few campsites, maybe 3 or 4, but it turns out the group campsite is actually the nicest one! They’re all located in the trees and have tenting areas (but no pads) and eating areas with a fire pit. But the group site is the closest to the lake, which is what makes it the nicest. There’s 2 open-air pit toilets, one for the single sites and one for the group site. The campground was full on our first night, but we didn’t meet any of the campers because everyone had a dog, so we kept our distance since Sadie doesn’t like other dogs. But on the second night, there were only two women at one of the other sites and Sadie adopted them into our herd. 

20240630_095934(0)
20240629_192944

It’s a pretty easy hike and the trail is super well maintained. The walk along the road is flat and easy for 2km. The first half of the trail is uphill with 400m of elevation gain, but it levels out as you get closer to the lake. It’s pretty much entirely in the trees, but it’s a nice walk and we didn’t see anyone (human or bear) on the way in or out. There was some evidence of bears on the trail, but none at the lake. 

It was overcast on our first day, but very humid, so we hiked in shorts. There was rain in the forecast, so we quickly set up our tents and tarps upon arriving and me and Seth went for a little skinny dip in the lake. Campfires were allowed when we visited, so we collected some firewood to store under the tarp for the next evening. It started to drizzle during supper, but it didn’t properly rain until 11pm, which was after we had gone to bed. It’s a gorgeous lake campsite, the only downside is that there is no bear cache. It took me and Brandon a long time to set one up, and I admit, it wasn’t our best work.

20240630_121648
PSX_20240711_230210

It rained pretty hard all night, but tapered off around 8am when we got up. It still sprinkled a little bit while we had breakfast, but then it stopped and didn’t rain anymore on the trip. We had a slow lazy morning by the lake and me and Brandon improved our bear cache until it was acceptable. We packed up our day bags and set out on a hike around 11:30am. 

The trail continues on for miles and miles and there’s a lot of backcountry to explore. We decided to hike to Willow Lake, which is approximately 3.5km further along the trail. Brandon seemed keen to go all the way to Nightmare campsite, which is another 3.5km, but we wanted to swim in the lake again later and opted not to (plus, the name didn’t sound super appealing). 

PSX_20240711_230655
20240630_173436

Hozomeen Lake is definitely a much nicer campsite than Willow Lake, but it was a great spot to stop for lunch. If you push through some of the brush, you can walk out over the dried up flats to the edge of the lake. This may have only been possible because the water level in the lake was super low! We ate on the banks of the lake and it proved a great spot for watching wildlife. We saw tons of different birds, amphibians, and insects. 

Seth and Brandon spent most of the hike back trying to identify the forest plants and we arrived back at Hozomeen Lake around 3pm. The temperature of the lake is really nice – it’s cold, but not glacier fed – so we spent a lot of time in the water. We befriended the new campers, who were also from Vancouver, and we all marveled at how awesome the campsite is and how there’s so few people!

PSX_20240704_183734
20240630_201953

We ate dinner by the lake and then had a campfire at the fire ring. Always practice fire safety and only collect dead wood on the ground (don’t destroy any natural habitat). There was lots of blowdown for firewood, which is another indicator the site doesn’t get a lot of visitors. Sadie was absolutely pooped after 2 days of hiking and snoozed for most of the evening.

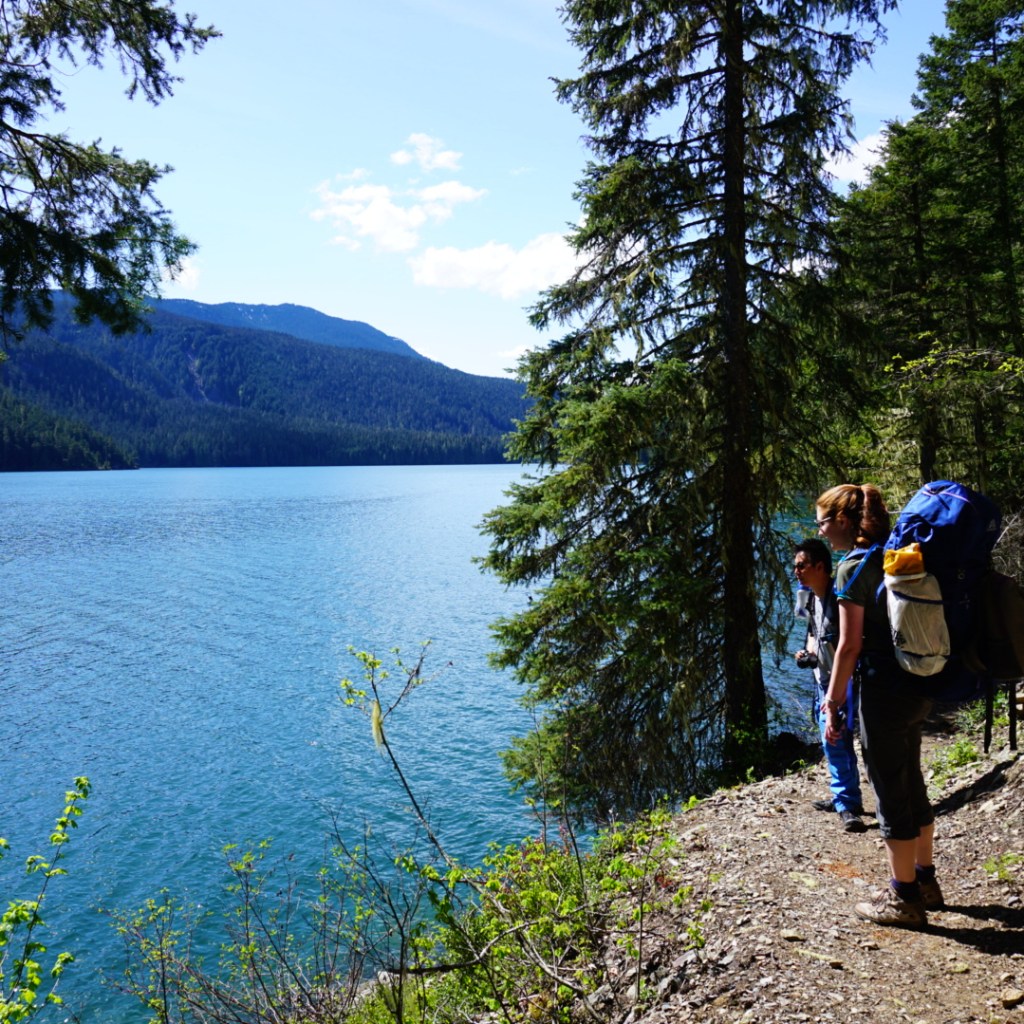
In the morning, we packed up to head home again. It’s an easier hike on the way back and we stopped at the overgrown frontcountry site to admire the view across Ross Lake. Ross Lake is currently super low and dry for the entire 2km of road walking, but the mountains across the lake are pretty. Our new friends told us there were bats living in one of the outhouses, so that was a cool side trip on the way back. 

PSX_20240703_205508
20240701_130729

It is a fairly long drive to get to Ross Lake, the worst part being an hour and half on gravel road from Hope to the lake. We stopped in Hope for ice cream and then weathered the long drive back on the highway with all the other long weekend warriors. But overall, we all absolutely loved this trip! It was much more chill than some of my other backpacking trips, with the lake and lack of crowds being the main highlights! I would definitely recommend! 

20240630_080856

Overnight Hikes for Beginners Near Vancouver

Last week, I shared a Beginner’s Guide to Backpacking for those looking to make the transition from hiking to backpacking. A large part of trip planning is selecting a good trail, especially as a beginner, so I’ve put together a list of trails near Vancouver that I think are appropriate for new backpackers.

There are literally hundreds of trails within a 3-hour drive of Vancouver and it can be difficult to know where to start. My biggest recommendation is to keep it simple by choosing easy trails and campsites with access to basic facilities. It can be an adjustment getting used to carrying a large backpack, so pick shorter trails with less elevation gain, and a first-time trip can be made a lot simpler with access to an outhouse, bear cache, and cooking shelter. See my Guide for more information on how to select and book campsites.

Here are some of my preferred hikes for beginners, in order of level of difficulty (easiest trips first):

3 Brothers Mountain (Buckhorn Campsite)

Region: E.C. Manning Provincial Park
Distance: 4km each way
Elevation: 200m
Reservation: yes ($10pp, per night)
Amenities: outhouse, bear cache, tent pads, cooking shelter, picnic tables
Season: July-September
Drive time from Vancouver: 2.5 hours
Trip Report: found here

Buckhorn Campsite is my pick for best experience for beginners. Manning Park is my favourite park near Vancouver and I think this hike is ideal because it’s short, has a lot of amenities, and is absolutely beautiful. You have to drive up all the way up Blackwall Road to get to the trailhead, so most of the elevation gain is done in the car. You get to enjoy brand new tent pads and a gorgeous cooking shelter, surrounded by alpine wildflowers. The reservation system for this site is new in 2024. This campsite is ideal for 1 or 2 nights and is a great base if you want to day hike to 3 Brothers Mountain on your second day.

Cheakamus Lake

Region: Garibaldi Provincial Park
Distance: 4-7km each way
Elevation: 250m
Reservation: yes ($10pp, per night)
Amenities: outhouse, bear cache
Season: June-October
Drive time from Vancouver: 2 hours
Trip Report: found here

There are two options for Cheakamus Lake, the first campground is called Cheakamus Lake and is located 4km from the parking lot along mostly flat terrain. The second campground is called Singing Creek and is located 7km from the parking lot, and is still mostly flat terrain. Either campground is a great option for a 1 night hike. If you’d like to do 2 nights, camp at Cheakamus Lake and do a day hike to Singing Creek and back on your second day. Be diligent with bear safety on this hike as there is a history of bears in this area.

Viewpoint Beach

Region: Golden Ears Provincial Park
Distance: 4.5km each way
Elevation: 200m
Reservation: no (permit is $5pp, per night)
Amenities: outhouse, bear cache
Season: May-October
Drive time from Vancouver: 1 hour
Trip Report: found here

Viewpoint Beach was the first place I ever took my girl guides and it’s a great option for beginners. It’s a short and easy walk from the parking lot to the campground and there is an outhouse and a bear cache available. However, because there are no reservations, I recommend to leave earlier in the day to secure a campsite. You can camp on either side of the river, but don’t attempt to cross the river. The bear cache and outhouse are located at Viewpoint Beach. The other side of the river is called Hikers Beach and can be accessed by crossing the large wooden bridge 500m before Viewpoint Beach. You can extend this trip to 2 nights if you’d like to do a day hike up to Alder Flats.

Tetrahedron Park

Region: Tetrahedron Provincial Park
Distance: 3-6km each way
Elevation: 250m
Reservation: yes ($15pp, per night, paid to the Tet Outdoor Club)
Amenities: sleeping hut, outhouse
Season: June-October
Drive time from Vancouver: 1 hour + ferry
Trip Report: found here

Tetrahedron Park is a really unique experience and is a great option if you don’t have a tent yet. Tenting is not allowed in this park and all users must stay in one of the huts. There are 4 huts, but I recommend either Bachelor Cabin or Edwards Cabin for beginners (though Bachelor Cabin is often used by families, so please be respectful of children). These sites are managed by the Tetrahedron Outdoor Club. First, join the Tetrahedron Outdoor group on facebook and do a search for your dates to see how many other people are already going then (the cabin sleeps ~12), then post your booking on facebook and pay on the website. This location is great for multi-day trips, as you can do a day hike up to Mount Steele from Edwards Cabin, but the mountain may have snow until July.

Lindeman Lake

Region: Chilliwack Provincial Park
Distance: 1.5km each way
Elevation: 225m
Reservation: no (permit is $5pp, per night)
Amenities: outhouse, bear cache, tent pads
Season: May-October
Drive time from Vancouver: 2 hours
Trip Report: found here

Lindeman Lake is a very popular trail, so if you opt to camp here, I recommend going very early or visiting on a week day. There are a small amount of tent pads and room for tents, but it can get very crowded. It’s an attractive hike because it is very short, but there is significant elevation gain over a short distance, so be prepared for a steep hike. Sites are not reservable, but you do need a backcountry permit, which can be obtained 2 weeks before your trip. This is a great option for a two night trip if you want to do a day hike up to Greendrop Lake, but you may encounter snow past Lindeman Lake until July.


In my opinion, the first 5 hikes on this list are the most ideal for true beginners planning their first ever overnight hike. They are shorter and have less elevation gain. The rest of the hikes on the list are starting to get more advanced in that they are longer and have more elevation gain, but are still good options for newer backpackers and second trips. I recommend these trips to people who are are already experienced hikers; those new to both hiking and backpacking should stick with the hikes listed above.

Joffre Lakes

Region: Joffre Lakes Provincial Park
Distance: 5.5km each way
Elevation: 400m
Reservation: yes ($10pp, per night)
Amenities: outhouse, bear cache
Season: July-September
Drive time from Vancouver: 3 hours
Trip Report: found here

Joffre Lakes is another insanely popular hike and you will have to be diligent in booking exactly 4 months ahead of your planned dates to secure a permit. However, it’s popular for a reason and is actually a relatively straightforward trip for the incredible views. Be prepared for a climb, but it’s not too steep, so it just requires a little bit more effort for a great reward.

Fairview Loop Trail

Region: Upper Sunshine Coast
Distance: 6-12km (customizable)
Elevation: 250-400m
Reservation: no (recommend a donation to qPAWS)
Amenities: sleeping hut, outhouse, bear cache, picnic tables
Season: May-October
Drive time from Vancouver: 2 hours + 2 ferries
Trip Report: found here

We’re definitely starting to get a little more technical with this trail. The Fairview/Rainy Day loop is located in Saltery Bay, directly after you get off the ferry. To save money, park at Earl’s Cove and walk on the ferry as you don’t need your car on the other side. This loop trail is part of the Sunshine Coast Trail and has two huts on it, Fairview Hut and Rainy Day Lake Hut. It’s 6km (250m gain) to Fairview hut (counterclockwise) and 4km (350m gain) to Rainy Day Lake hut along the road (road is recommended as it’s significantly longer and steeper to take the trail). You can do the trail as a loop to visit both huts (12km total), but this is a more challenging option as there’s 700m of climbing to do both huts. The huts can get very busy, so you should bring a tent in case they get full.

Elfin Lakes

Region: Garibaldi Provincial Park
Distance: 11km each way
Elevation: 600m
Reservation: yes ($10pp, per night)
Amenities: sleeping hut, tent pads, outhouse, cooking shelter, bear cache, picnic tables
Season: July-September
Drive time from Vancouver: 1.5 hours
Trip Report: found here

Elfin Lakes is the longest trail on the list, so you should be prepared for ~4 hours of hiking with your backpack. However, I include it because the elevation gain is spread out over the distance, so it’s never too steep and it’s a very wide and easy trail. This is another hike that books up fast, but you can stay either on a tent pad or in the hut, but they have separate bookings, so make sure you book the correct one. The views from the campsite are some of the best of any hike. Watch out for bears on this hike, especially in the Fall.

Garibaldi Lake

Region: Garibaldi Provincial Park
Distance: 9km each way
Elevation: 800m
Reservation: yes ($10pp, per night)
Amenities: outhouse, bear cache, cooking shelters, picnic tables
Season: July-September
Drive time from Vancouver: 2 hours
Trip Report: found here

This is the final hike on the list. It has the most elevation gain and you should be prepared for 3 hours of hiking up switchbacks in the first 7km. The trail is not technical, but it is very boring until you reach the lake. However, if you like amenities, it’s a great option. You can camp at either Garibaldi Lake or Taylor Meadows, which have composting toilets, cooking shelters, and picnic tables. I recommend this trip only for those who are already experienced hikers.


There are 3 more trails I want to note because they are easy trails, but I didn’t include them in my main list because they don’t have outhouses or bear caches. There are enough other challenges to contend with on your first hike, so I don’t recommend these. But once you get comfortable with digging a cathole and making your own bear caches, these are good options. However, please note, these are all on crown land, so while there’s no permit required, the sites also don’t receive any maintenance, so please respect the natural environment, leave no trace and pack out everything, including your toilet paper!

Falls Lake – a 1.5km hike on the Coquihalla Summit Rec Area. It’s totally flat and is a great option for a beginner snow camp as well.

Levette/Hut Lake – you can drive up to Levette Lake (which can get very busy), and it’s only another 4km to Hut Lake, which doesn’t get many visitors.

Semaphore Lakes – a 2.5km hike, but this one is a bit steeper (300m gain). There are limited trees for a bear cache here, so a bear canister is recommended.

If you’re looking for more advanced trips, check out my posts on Thru Hikes and Loop Hikes.

Torres del Paine Backpacking Trip Part III

Following up from Part I and Part II. The weather forecast for Day 3 was our worst while on the trail. There wasn’t any heavy rain in the forecast, but more concerning was the alert for 80km/h winds. It was only 11km to our next campsite, but we wanted to attempt the day hike up to Mirador Britannico, which is another 11km round trip, so overall, it was our longest day of hiking in Torres del Paine.

PSX_20240408_101139

The clouds looked pretty foreboding when we left Paine Grande, and as anticipated, it was incredibly windy. But the moody weather produced some of the most striking photos of the stunning landscape! The dark clouds hung around the mountains, without always obstructing them, and occasionally the sun would break through, splintering rays of sunshine across the hillside. It was really pretty and we both loved the hike from Paine Grande to the ranger station at Italiano, which is where the day hike starts.

We arrived around lunch time, so we ate at the picnic tables as it started to rain. There’s a washroom with a big overhang for bag storage, so everyone leaves their backpacks while hiking up to the mirador. We re-packed our bags, putting everything we didn’t need in Seth’s, and everything we might want in mine. A lot of people just do the hike with a water bottle, but conditions were marginal and it is a remote trail, so I’m glad we brought all our essentials, as we did use them.

20240302_105053
PSX_20240408_100815

I struggled with the hike to Mirador Britannico. I think my biggest problem was that I’d heard from other hikers that it was an easier-than-expected trail. Even though there is 600 metres of elevation gain, I heard that it was pretty gradual and I didn’t properly manage my expectations. A large portion of the hike is a gradual incline, but it’s not the full story. The first kilometer of the trail is pretty flat, but then it gets quite steep very quickly and is surprisingly technical, with lots of tree roots and boulders. It was raining throughout the entire climb and I started overheating in my rain pants, so I got pretty cranky, despite gorgeous views of the surrounding glaciers.

20240303_122956
PSX_20240408_121306

After a while, the hike definitely flattens out, with one steep push to the top at the very end. About halfway to the summit, the rain transitioned to snow, so the visibility was pretty poor. I definitely questioned turning around, but couldn’t quite bring myself to do it. I picked up a lot of the slack for Seth on day 1 (giving him my hiking poles and carrying a bunch of his gear), and he came through for me on day 3. He ended up really liking this section and carried our shared pack most of the way there. On day 5, we transitioned again and I carried the pack for our sunrise hike when he was struggling, so overall, I guess we do make a good team!

20240302_172900
20240302_152046

We were pretty slow, but eventually we made it to the top! We didn’t get much of a view, but it was still a pretty cool experience. My new problem was that it was very cold and my pants were soaked through from the lack of breathability in my rain pants. This was definitely a flaw in my set-up, so I’m glad we had brought lots of extra emergency layers in our backpack and we layered up and enjoyed our snacks. Fortunately, my pants are quick dry, so they dried out really fast on the way down, which was helped by the fact that it finally stopped raining.

There were a lot of day hikers doing the mirador when we were hiking up, but somehow we got passed by almost all of them. We only passed a handful of people on our descent and by the time we got back to Italiano, there were less than a dozen bags remaining. So this wasn’t our swiftest hiking trip, but we stopped to take more photos and videos on the way down and my mood improved a lot.

PSX_20240415_221054

We hiked the last 2km to Frances Campground, where we’d be staying for the night. There’s no big refugio at Frances, just some small dome structures, but they are expensive, so we opted to stay in one of the permanent tents instead. Both Frances and Chileno Campgrounds have elevated tents that you can book. They’re basically those platform tents that people set up on top of their cars, but in this case, they were elevated platforms in the woods. They were massive inside, so it was pretty cool, but a bit annoying to climb in and out of. We were later arriving to the campground than other days, so we quickly ate supper and went to bed!

Lucky for us, the weather started to shift on Day 4. There was still some wind and rain in the forecast, but it tapered off throughout the day. We had to hike 16km from Frances Campground to Chileno Campground. Chileno is a smaller site, but it’s one of the most popular because it’s the closest campsite to the Towers. We left Frances and had a pretty easy walk to Los Cuernos Campground, which is a bigger and nicer site than Frances. It has a proper refugio, unlike Frances, but it’s still smaller than Grey or Paine Grande.

20240303_084303
20240302_111802

The morning hike was mostly in the trees, with a short walk along the lakeside beach. It sprinkled rain for an hour or so, but it cleared up after that and we didn’t get any more rain on the trip. Most of the day was a slow ascent along the mountainside, which looks out over Lago Nordenskjold, an absolutely massive lake. The trail peaks after ~7km at Mirador Cuernos, and we decided to stop for lunch, it has a gorgeous lakeview, but it’s still pretty windy.

The weather improved in the afternoon and the clouds started to disperse as we continued meandering along the mountainside. Eventually you come to a branch and you can either continue back towards the park entrance, or take a connector trail up towards Chileno. It’s a great shortcut when you’re hiking the W-trek and it’s an absolutely beautiful section of trail. It’s mostly meadows as the trail ascends through the foothills towards the pass to the Towers, but the real benefit was that it was almost completely empty (we only saw 4 people)!

20240303_132045

The sun finally showed its face in the late afternoon and it was the first time on the trail where we could hike in shorts and t-shirt. We took another break to enjoy the view, before continuing our trek up to the main trail. The trail merges just before Windy Pass, which is a high point along this section. It was surprisingly not windy in the pass and there’s a gorgeous view looking down over a canyon to the Rio Ascencio. The trail was much busier, but it was mid-afternoon, so not as busy as it would be in the early morning when everyone is starting their climb to the Towers.

From Windy Pass, you descend along the open canyon trail to Chileno Campground. It’s a really cool campsite in that it overlooks the river and has a nice bar where you can enjoy a drink after hiking the Towers. But it was the least accommodating campsite we’d visited. The refugio at Chileno is tiny, so most people who stay there, stay in the platform tents (which is what we did).

20240303_142931
20240303_141042

The problem is that this refugio is highly focused on profits – if you’re not staying in the campground, they charge you to use the bathrooms (which are NOT well maintained), and they want everyone to pay for meals in the dining hall, so they only provide one single 4-person table for everyone who wants to cook. It was extremely annoying considering we did pay a lot of money for a tent. Plus, you’re only actually permitted to use this table when they’re not actively serving dinner, which means there’s a blackout between 5:30 and 8:30pm. So we ate very early and then hung out before going to bed.

An early night was required because we were planning to hike up to the Towers for sunrise. We got some experience sunrise hiking on the Sendero al Fitz Roy, but the hike to the Towers is double the length of what we did in Argentina, so we planned for a very early rise. However, we got incredibly lucky with the weather. The clouds continued to clear all evening and when I woke up in the middle of the night to pee, I almost lost my mind over the star-speckled sky that greeted me. We were incredibly remote, so it was easy to see the milky way and I stumbled around in the dark enjoying the night sky before heading back to bed. Check back for the final story in Part IV.

20240303_150653
20240303_174457