If you’re thinking, “didn’t she just post her 10 favourite hikes last week?” You are correct, I did. But I have a severe backlog of trails to post about, so Part III featured my favourite trails from 2019-2020, while this post focuses on my 2021-2022 era. Part III was my “covid era”, so it featured a lot of trails closer to Vancouver. In my opinion, Part IV has some really scenic hikes because post-covid, all I wanted to do was hike and I discovered some real gems! Check out Part I, Part II, and Part III.

#10 Hut Lake – Let’s start off with a really obscure hike. The snow pack was insanely high in 2022, which postponed my alpine hiking season. In our desperation to find somewhere low elevation to camp, we stumbled upon Levette and Hut Lake outside Squamish. Levette is well known by the locals, but if you continue past Levette, you’ll eventually come to the much less popular Hut Lake Rec Site. It seems to be mostly used by the 4×4 community, but we had it to ourselves on a weekend in mid-July. The hike is entirely in the forest and it’s not the most memorable lake, but I still had the best time swimming in the insanely warm water and recommend it as a good Spring hike or rainy day trail. (8km, 500m elevation gain, 4 hours)

#9 Bedwell Lake – Bedwell Lake is a popular trail in Strathcona Provincial Park. It’s located at the back of the park and ease of access can depend on the current state of the road. When we visited, a normal AWD SUV would access it fine, but I’ve heard sometimes you need 4WD or high clearance. Parts of the trail are a bit technical, with some ladder sections, but you’re rewarded with beautiful views of the lake and surrounding mountains. We wanted to continue on to Cream Lake, but unfortunately we got rained out on our visit. I’m keen to return to see it in the sun! (10km, 600m elevation gain, 6 hours)

#8 Slesse Memorial Trail – There are some real gems in Chilliwack Valley. Slesse is a challenging one to get to as you definitely need 4WD and high clearance. It’s a bit of a somber hike because it’s the location of a plane crash, but it also has gorgeous views of Chilliwack Provincial Park and across the border. With over 1000m of elevation gain, it is a slog to get to the top and the views are relatively limited until the summit. But once you hit the ridgeline, there’s a glacier in front of you and a wall of mountains behind you, so you really get a pay-off. (15km, 1100m elevation gain, 9 hours)
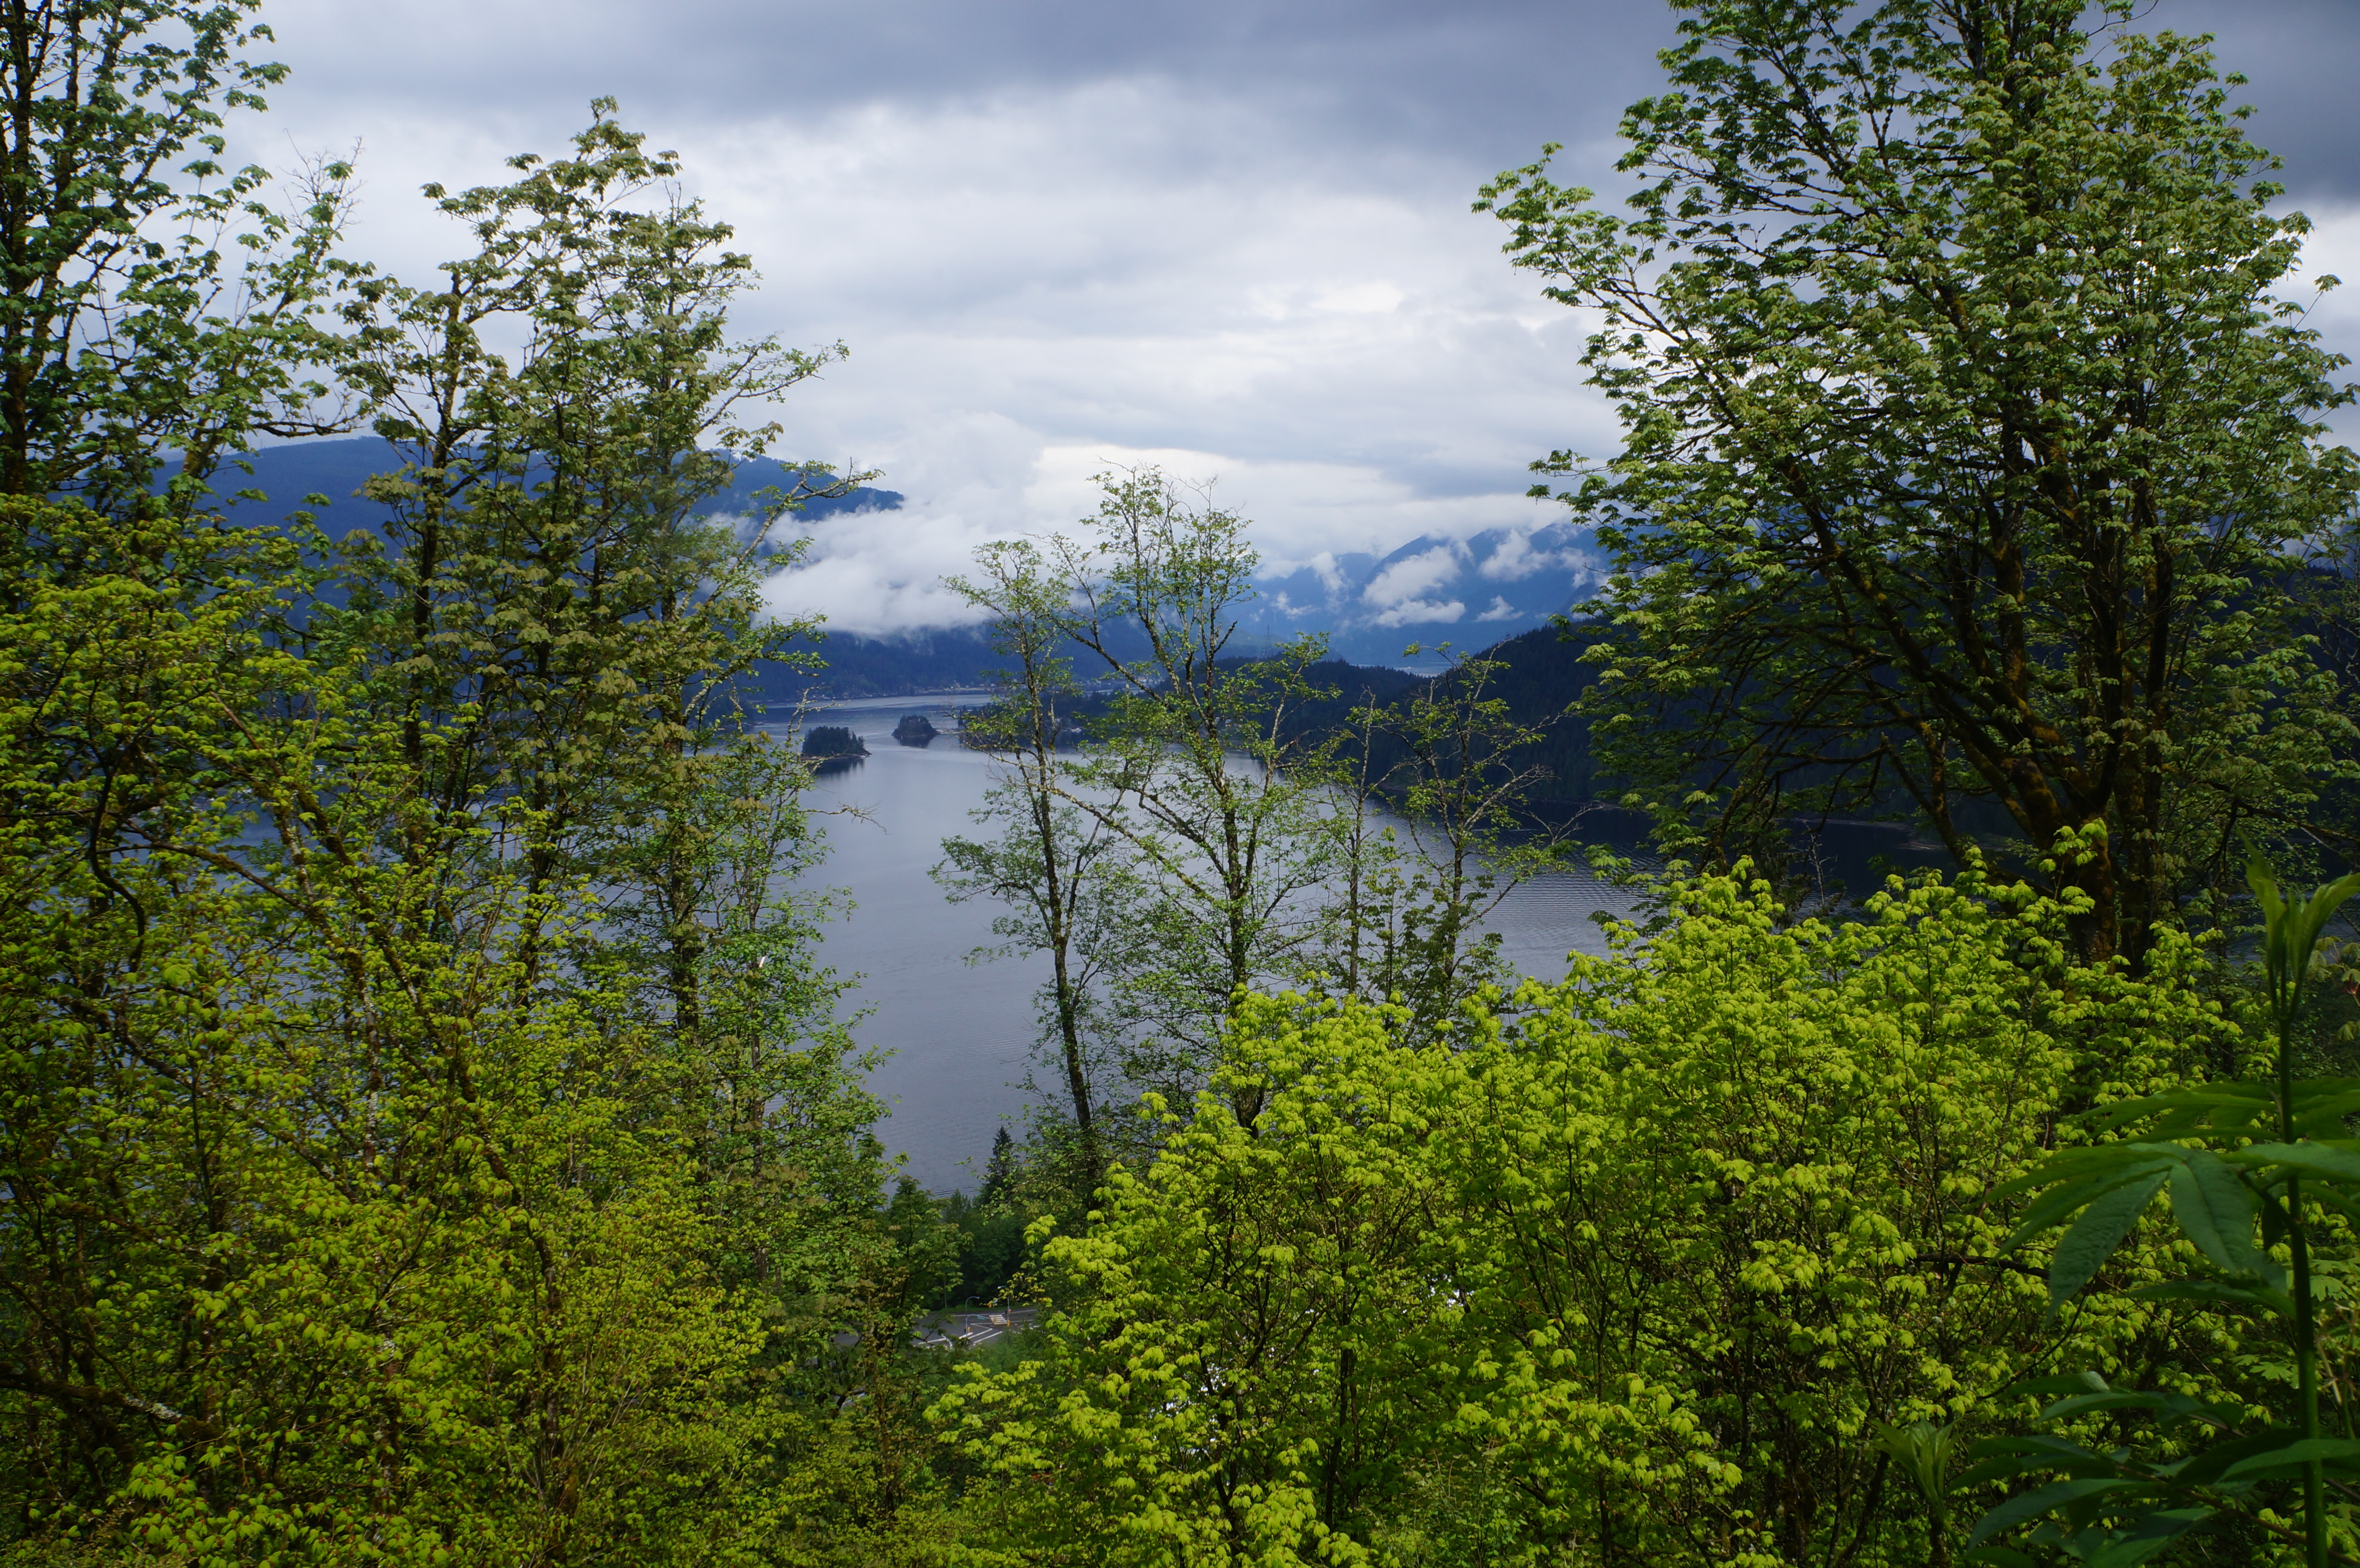
#7 Barnet Trail – One of the things I love about living near Vancouver is that you don’t have to go way into the wilderness to hike and the Barnet Trail on Burnaby Mountain has become one of my favourite semi-urban hikes. We hike here regularly with Sadie and I love the views from Burnaby Mountain Park and through the forest. We always start at Burnaby Mountain Park, and I have to admit, the best view of the hike is at the trailhead, but it’s the perfect hike to get your body moving when you don’t want to drive anywhere or have limited time. (9km, 300m elevation, 3 hours)

#6 Myra Falls – I debated for a long time about whether to put this on this list or not. At 1.5km, it barely qualifies as a hike and is definitely more of a walk, but it’s such a beautiful waterfall! It’s also located in Strathcona Provincial Park and it’s so beautiful Brandon and I had to visit it twice! It’s an easy walk down to the Falls from the parking lot and then you can explore around the area. Definitely exercise caution as there are some steep sections, but after swimming in the waterfall, Brandon and I hiked down over the rocks to also swim in Buttle Lake. (1.5km, 50m elevation gain, 1 hour)

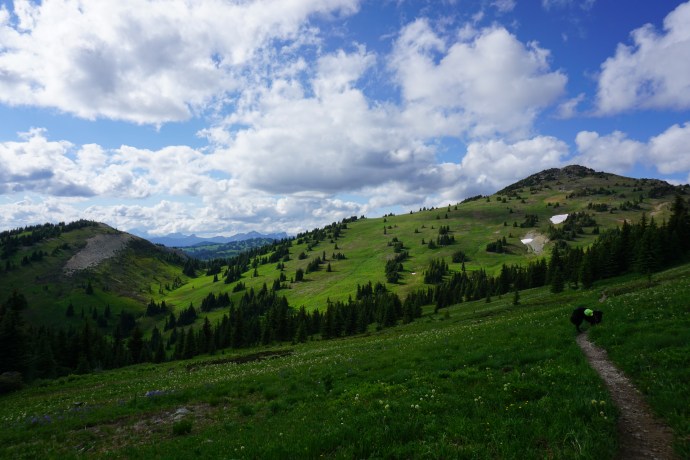
#5 Seed Peak – I did this trail in the late Fall of 2021 and even before I finished, I knew I’d have to return some day. There was already snow on the ground when we visited and I was having a rough day physically, so we didn’t even finish the hike, but I was still astounded by the views. Access is a bit tricky for this one as it’s way off the beaten track outside Squamish and I’d recommend 4WD and high clearance. Part of the trail is actually located in the far north end of Pinecone Burke Park (which starts in Coquitlam) and there are gorgeous views of the backcountry everywhere you look. We only made it to the base of Seed Peak, but I definitely need to return for the rest of the hike! (13km, 800m elevation gain, 8 hours)
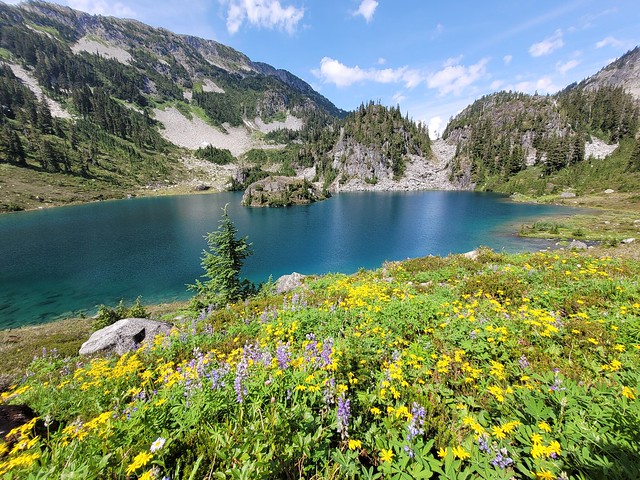
#4 Tricouni Meadows – My apologies for including so many 4WD access hikes on this list, this is the last one, but I couldn’t leave it off! Tricouni Meadows is located way up in the wilderness north of Squamish Valley. It’s a slog to get to the trailhead and another slog to get to the lake, but you are rewarded once you get there. There are several lakes at the base of Tricouni Peak and it’s a bit technical travelling between them, but there’s space for several campsites. We visited Pendant Lake (my favourite), Spearpoint Lake, and Reflection Lake. From reflection Lake, you can continue up to the top of Tricouni Peak, which I didn’t do, but would like to return and complete as a backpacking trip. It’s a surprisingly busy campsite for such challenging access, so get there early! (8km, 500m elevation gain, 8 hours)

#3 Skywalk North – This hike is north of Whistler and better known as Iceberg Lake. It’s a popular hike, but most people only hike to the lake and back. It’s a bit longer, but I recommend turning it into a loop hike by doing with the Skywalk North or South trail. We chose the North Trail, it’s longer, but more scenic. It’s a long hike through the trees, but once you hit the lake, you continue hiking up to another summit above the lake with incredible views looking back. From there you continue through several meadows before arriving at Screaming Cat Lake and returning through the trees. Pay special attention to the trail stats though, this is a rewarding, but challenging hike. (22km, 1200m elevation gain, 10 hours)

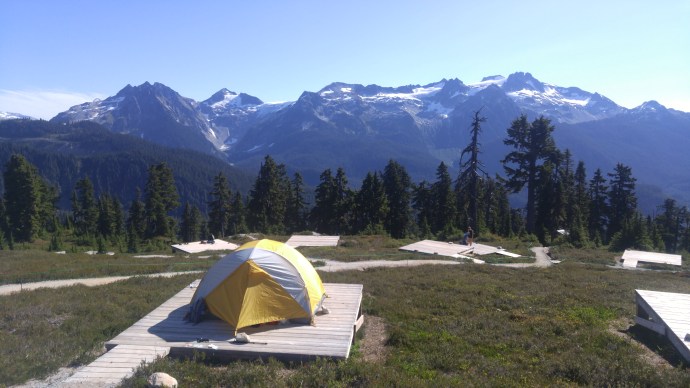
#2 Opal Cone/Mamquam Lake – If you go back to my previous posts, you’ll find Elfin Lakes on my first list. Elfin Lakes remains one of my favourite hikes to this day, but I can finally add Opal Cone and Mamquam Lake to the list! This are both continuation hikes from Elfin Lakes and are not intended to be done in a day. Camp at the lake and do either one or both of these as a day hike. Personally, I like Opal Cone better, which is in peak alpine terrain, but it was rewarding to finally make it to Mamquam Lake after a failed attempt back in 2018. (14-22km, 1000m elevation gain, 9 hours)

#1 Sunshine Coast Trail – No other trail had any chance of the number one spot with the Sunshine Coast Trail in the mix. I hiked this entire 180km trail in 2022 and I’m in love with every inch of it! You don’t need to hike the whole thing, there are so many highlights on this trail and lots of them are accessible as day hikes or 2-3 day trips. The backcountry huts are what make this trail so special, but my favourite sections include Tin Hat, Walt Hill, Manzanita Bluff, Sarah Point, Appleton Canyon, Inland Lake, Rainy Day Lake, and Fairview Bay – basically the entire trail. (180km, 7-12 days)
Continue on to Part V.