One of my favourite local hikes to date is Cheam Peak – which is interesting because the first time I hiked it was in 2018 and in much less than ideal conditions. Cheam Peak is a well known hike in the Fraser Valley, whose sharp peak dominates the skyline as you drive out Highway 1 past Chilliwack. Though you can easily see the mountain from the Highway, you have to enter the trail from the South on Chilliwack Lake Road. I wasn’t expecting it to be a busy hike because you need 4WD to access to the trail head, and it was a pretty smoky day when we hiked it in 2018, so I was shocked when we arrived at the trailhead to find the parking lot packed with trucks and SUVs. As far as 4WD hikes go – I can also assume this is one of the more popular since the mountain peak is so iconic.
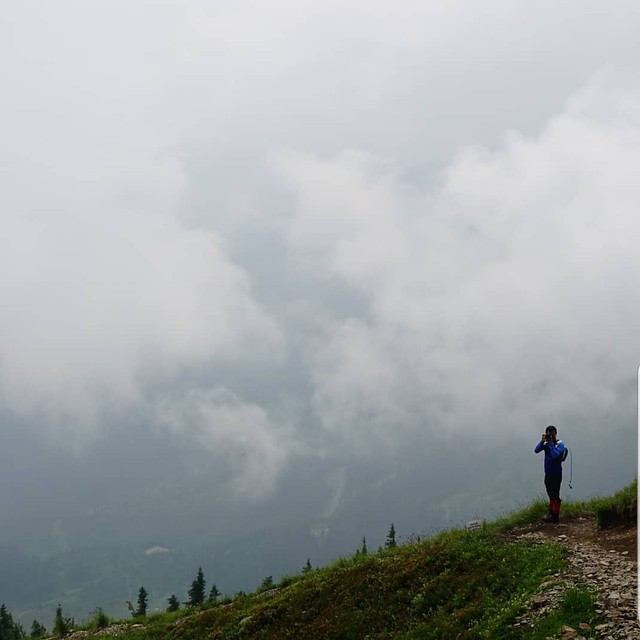
5 of us piled into Brandon’s 4Runner to get to the trailhead – a drive that was a lot more fun for Brandon than the rest of us. The higher we drove along the road, the worse the visibility got. 2018 was one of the worst summers for forest fires and the city was filled with smoke for weeks on end, making it hard to do much of anything outdoors without coughing up a lung. The smoke hadn’t peaked yet, but it was also an overcast day and we were high enough to be up in the clouds – so the smoke and fog together made for some really terrible visibility.

The conditions didn’t impact my enjoyment of Mount Cheam though and even with the poor visibility, between the alpine meadows and cute little Spoon Lake, I was in hiking heaven. The meadows start pretty much at the trailhead and are gorgeous and green, with this tiny little swimming hole that looks like it’s been punched out of the landscape. Plus there’s lots of wildflowers if you go at the right time of year. From the meadow, I think you can see up most of the mountain, but unfortunately for us, the meadow was the only part of the trail not shrouded in fog. As we started to ascend, we immediately entered the clouds and lost all sight of anything around us. I’ve hiked a few times in the fog, but this was definitely the worst. The closer we got to the top, the worse it got. It’s not the longest trail, only 9km round trip, but you tackle a lot of elevation gain in that hike, approximately 650m. So it’s pretty steep for most of the hike, with lots of switchbacks and at times I literally couldn’t see my friends if they were more than 6 feet away.
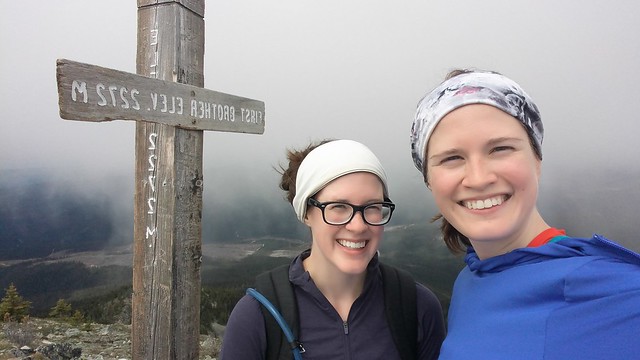
We weaved our way up the mountain until we reached the ridgeline along the top. It was super creepy in the conditions because the fog was getting caught up on the other side of the ridge (towards the highway), so we could see down the ridge a little bit, but the highway side was just a bank of milky white fog. It’s made weirder by the fact that when you reach the top, you get over the mountain sound barrier, so all of sudden you can hear all the traffic from down on the highway. From the peak, Mount Cheam looks down on the highway, but since we were hiking it from the back, we were totally surrounded by the backcountry. Since you can’t see any of the traffic on the way up, you feel like you’re in the middle of the wilderness, it makes for a really weird experience.

We hung out at the bottom of the ridgeline for a bit and had our lunch. We figured there was no use racing to the top when we couldn’t see anything anyways, so we took our time. The fog did eventually start to thin, so we continued on to the very top, but we never did get a view down into the Fraser Valley. We hung out for a long time taking funny pictures of the fog and messing around, but we eventually gave up on our hope of catching the view and started to head back down again. Despite all the fog and not being able to see the view, I still had a great time on the hike, which I attribute to my companions, who had just as much fun taking photos in the fog as we would have with an amazing view!
The fog continued to thin as we made our way back down again. We could see more of the mountain around us and eventually the fog got high enough that we could see all the way down to the meadow. This was my favourite part of the hike and it made for a nice, scenic walk back. Me and Lien are a bit obsessed with swimming, so we had big plans to take a dip in the little hobbit pond, formally known as Spoon Lake, at the bottom. We didn’t waste any time and both dove right into the water as soon as we got there. It’s a small waterbody and it was the middle of the summer, so it was actually really warm and we had a great time swimming around. From Spoon Lake, it’s just a short walk back out of the meadow and about a kilometre along a gravel road back to the parking lot. So even though the weather conditions weren’t the best, we still had a great time on the hike and will have to keep in on our bucket lists to return on a clearer day!
Fast forward to 2020. 2 years after our first hike to Mount Cheam, we decided to return and see if we could actually catch the view. It was Sunday morning back in mid July and it was one of the hottest days of the summer. Me and Emily spent all Saturday trying to get into any of the lakes in the lower mainland and were rejected from Buntzen and Sasamat, so we figured cute little Spoon Lake would make for a great end of hike swim the next day.
Even though I never saw the view the first time, I’d loved everything about Mount Cheam, particularly swimming in Spoon Lake, which looks like its been carved out of the hillside. So I was excited to return, this time with Emily, Seth, and Sadie in tow. We drove separately and then all piled into Brandon’s 4×4 for the 9km ride up to the trailhead. I remembered there being some pretty bad waterbars along the forestry road the first time, but I also remembered us driving up it pretty fast. I don’t know if I mis-remembered or if the road has gotten worse, but it seemed in much poorer condition then the last time. It ended up taking us over an hour just to go the 9km! I wasn’t sure how well Sadie would do on the drive. As a puppy she had really bad car sickness, but has mostly grown out of it. Fortunately she seemed to love the 4×4 road! She was running back and forth across me, Seth, and Lien in the back seat to look out the windows as we drove up.
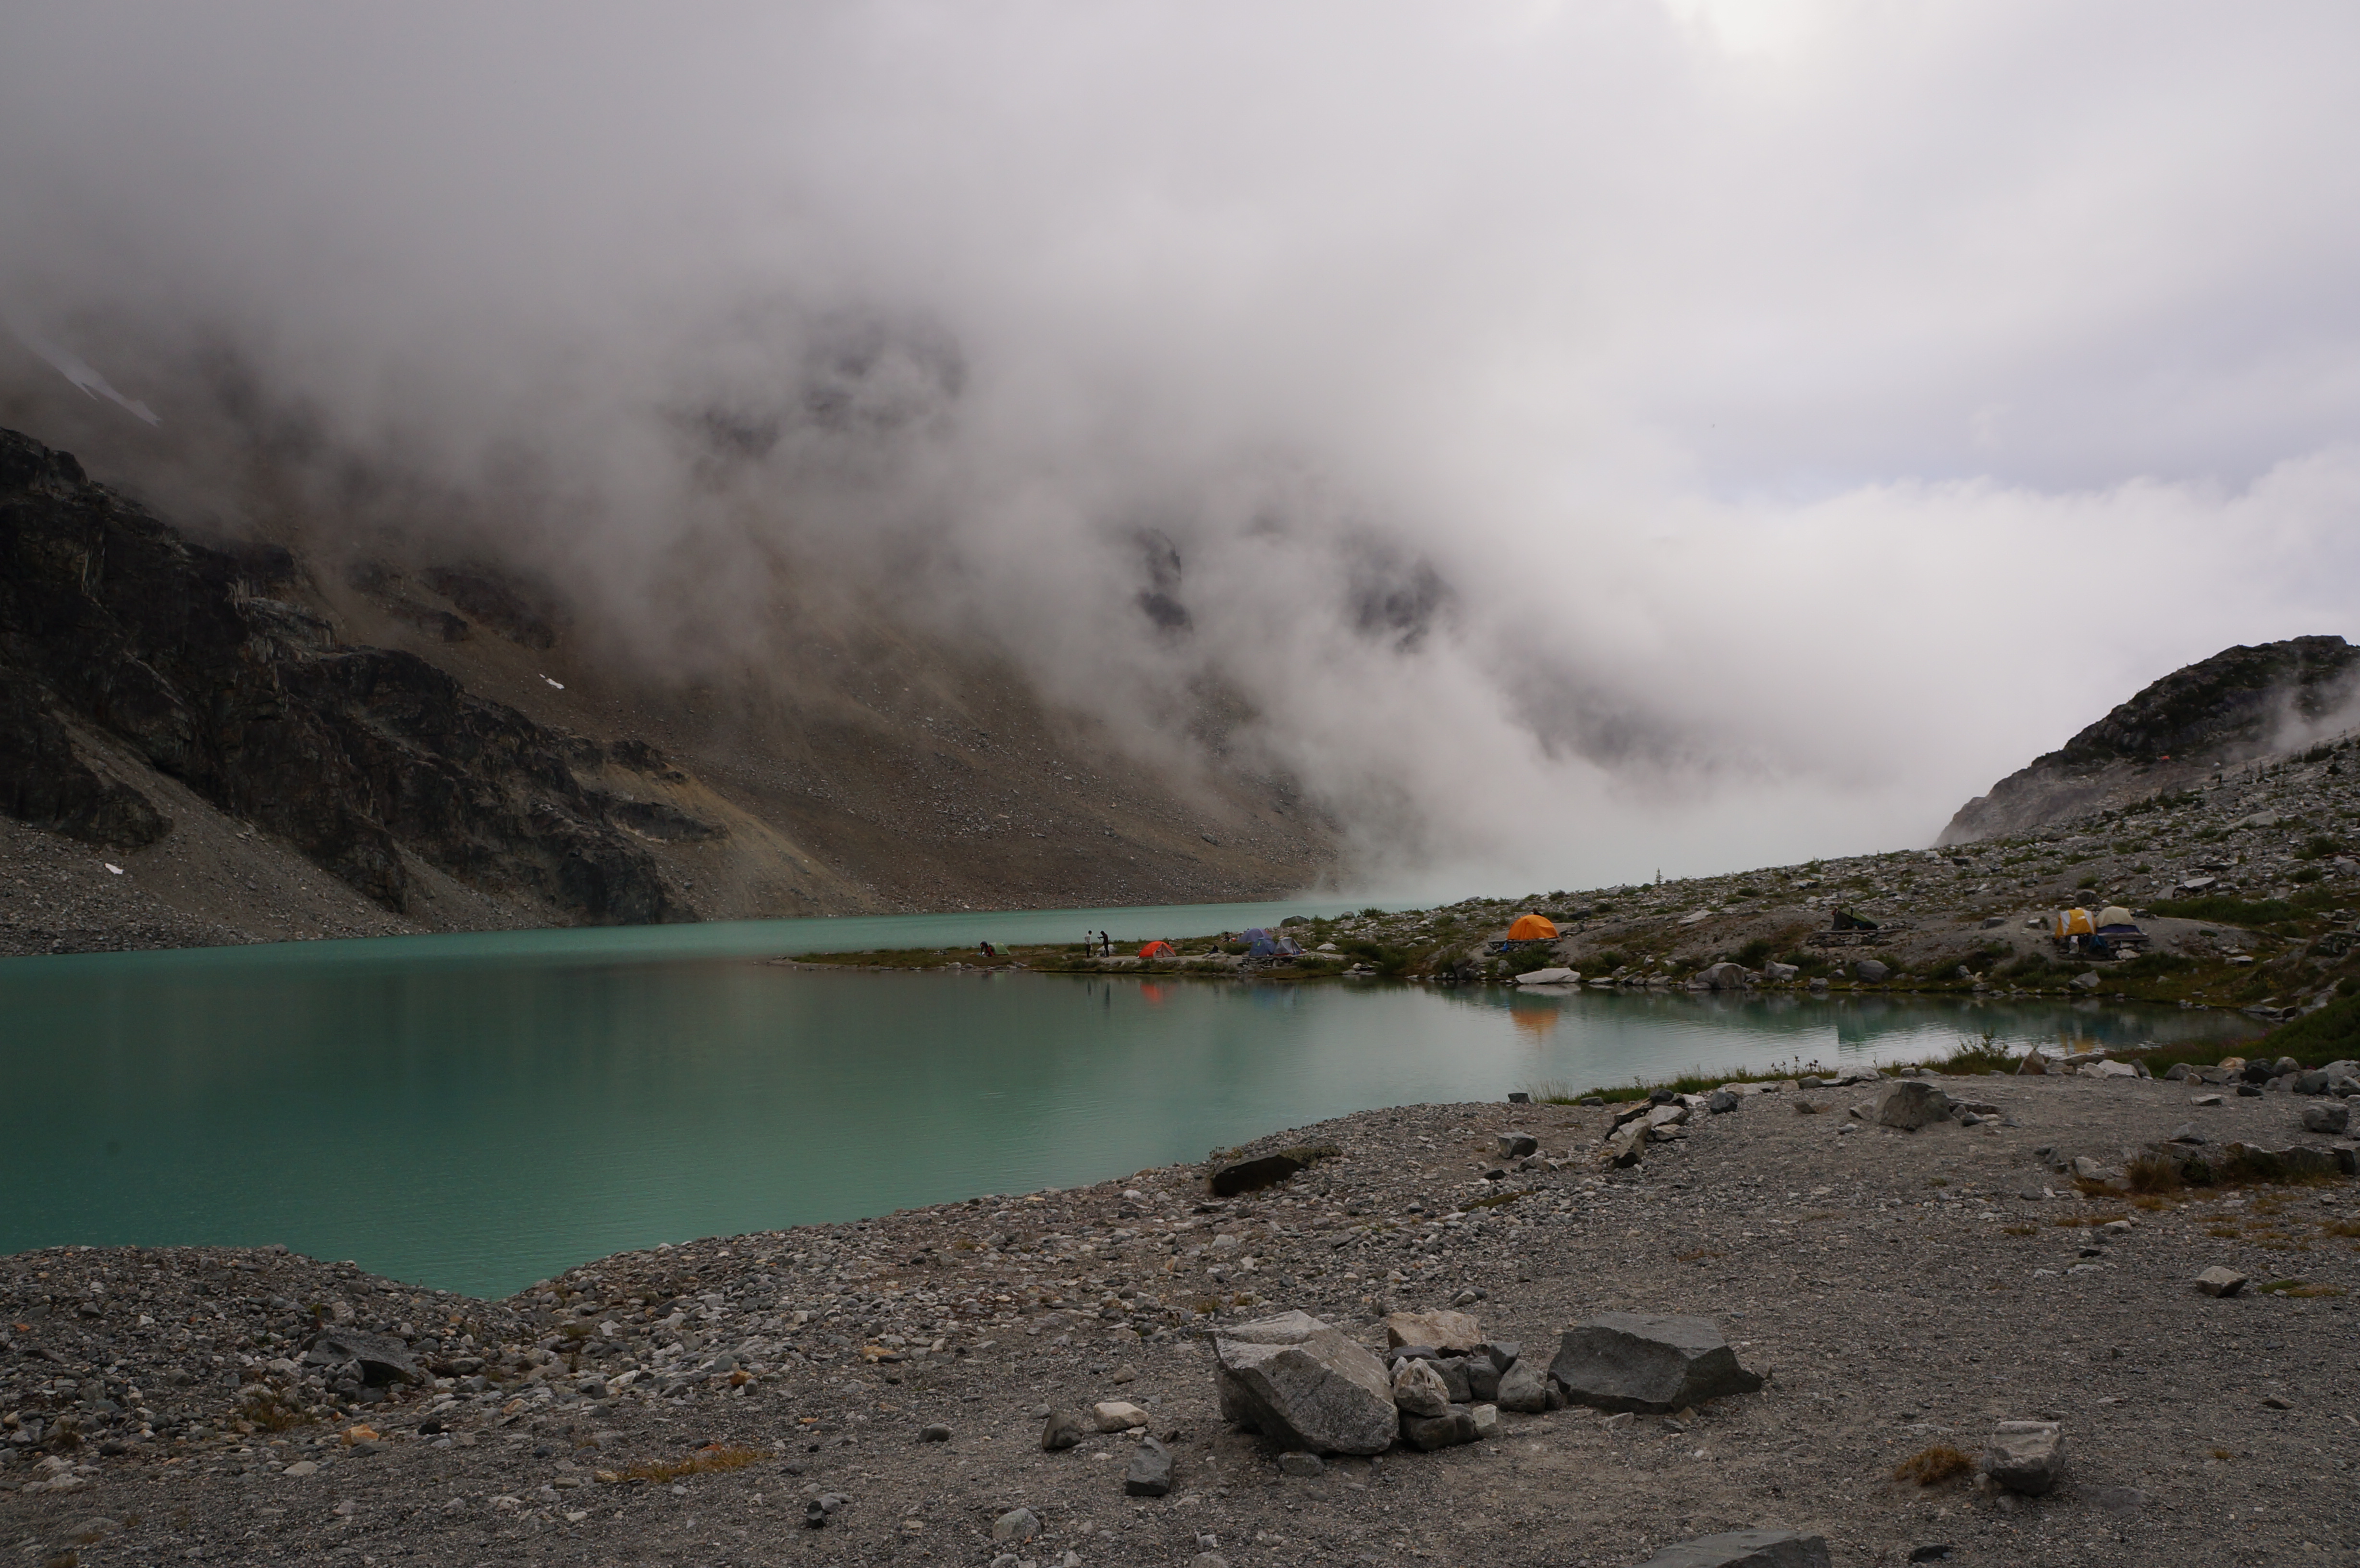
It was a slow year for the snowpack melting, so there was still quite a bit of snow on the trail when we visited in mid-July. Fortunately we had microspikes, but since the snow was so sporadic, it’s a pain constantly taking them on and off, so we mostly went without. Sunglasses are a must with so much snow though – Emily sunburned her eyes crossing the snow fields. Walking into the meadow from the parking lot we could see there was a fair amount of snow left and we were concerned the lake might still be frozen. You can’t see it until you’re pretty much on top of it, so we were anxious as we approached, praying we’d be able to swim in it. Unfortunately, the lake was a real mess. The whole area coming down to the lake looked more or less in shambles. Since our last visit, it looked like there’d been an avalanche in the area. There’s several trees knocked down and a ton of debris coming down into the lake. It looked like there was a bunch of debris from the slide that had been knocked into the lake and was now covered with snow and dirt. We were convinced it would never be swimable again, but I’ve since seen photos of the lake on Instagram later in the summer, and it looks totally fine now, so most of it must have been snow, or the debris suck to the bottom. So we were quite sad at the time, but thrilled to see it more or less seems to have recovered.

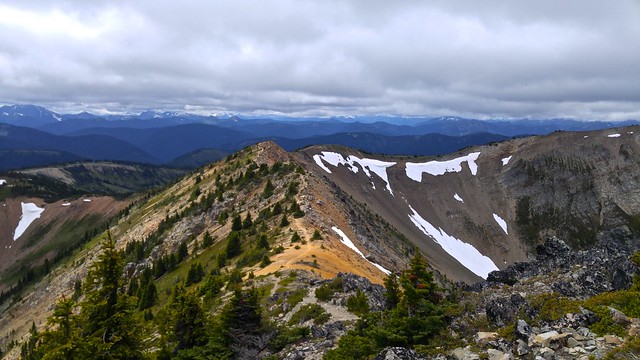
The hike ended up being more challenging than I remembered. Like I said above, it’s a short hike, but has a lot of elevation gain. I’m not sure if I was having a bad day or if I’m just out of shape from the pandemic, but it was a challenging hike, even after completing the NCT. I’m inclined to blame it on the heat though because it was well over 30 degrees. From the lake it’s a steady climb for the rest of the hike, the main difference being that this time we got to enjoy the views! A lot of the hike is going back and forth across exposed boulder fields, some of which were still under snow, so caution is definitely advised. On our way down we saw a few people trying to take shortcuts up the boulder field, don’t do this, it’s deceivingly hard, it’s dangerous (loose rock and steeper) and it damages the landscape.
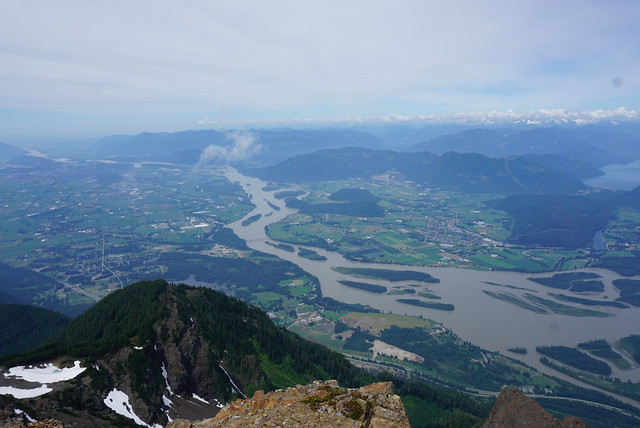
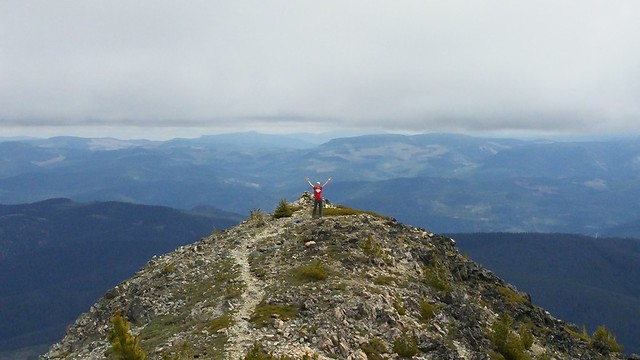
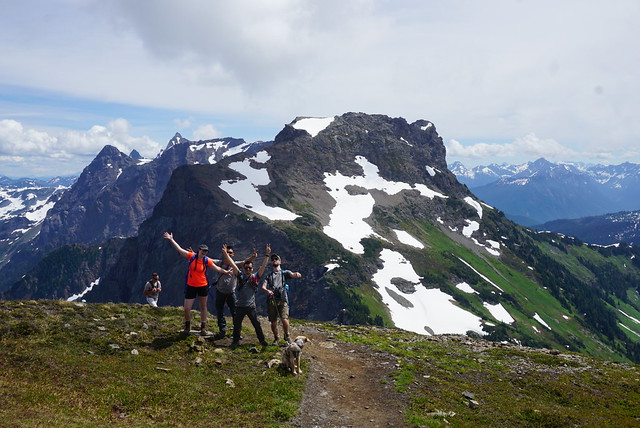
It was a slog, but we reached the top to gorgeous blue sky views of the surrounding area. Looking north you can see Highway 1 all the way out to Harrison Lake, and south is a cacophony of snowy peaked mountains all the way to the States. We sat at the very peak to enjoy our lunch before heading back down again. This was Sadie’s first major hike, so we weren’t sure what to expect, but she LOVED it. She’s definitely an outdoor dog and has a ton of energy. She thrives on steep difficult trails, so she was right in her element on Cheam. Also, she’s obsessed with the snow and loves playing it. I’m not sure if it’s just because it was so hot, but she couldn’t get enough of running around throughout the snow fields. She was totally pooped by the end of the hike though. She was all wet and muddy from running around and we didn’t want her sitting in our laps, so we made her sit on the floor in the back seat and she immediately lay down and fell asleep for most of the car ride back (a feat for Sadie who rarely settles down).
So despite the setbacks with the lake, it was still a great day! It’s a challenge to get to, but well worth the visit, my only recommendation is to leave early to avoid the crowds and go prepared for any condition because you will be a long way from help! Happy hiking everyone!