5 Overnight Hikes for Beginners

Backpacking can be very intimidating when you first get started. Hiking with an overnight pack is a lot different than day hiking, so you don’t want to start with too challenging of a hike. Figuring out what gear and food to bring is enough work without also having to stress about a difficult trail or having access to facilities at the campsite. So keeping in mind that you want to focus on shorter distance, less elevation, and easy access to facilities, here are some of my hiking recommendations for beginners.

Cheakamus Lake

DSC08878

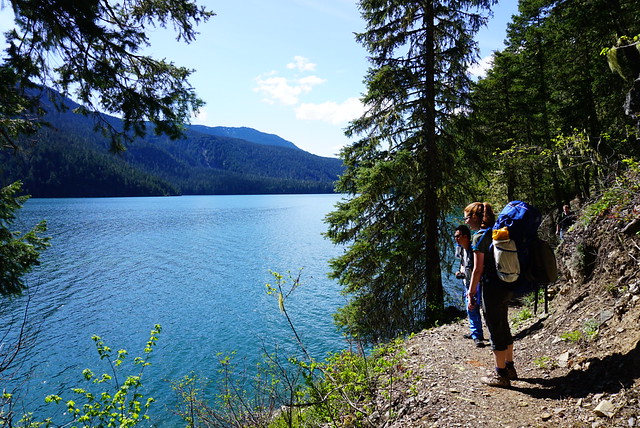
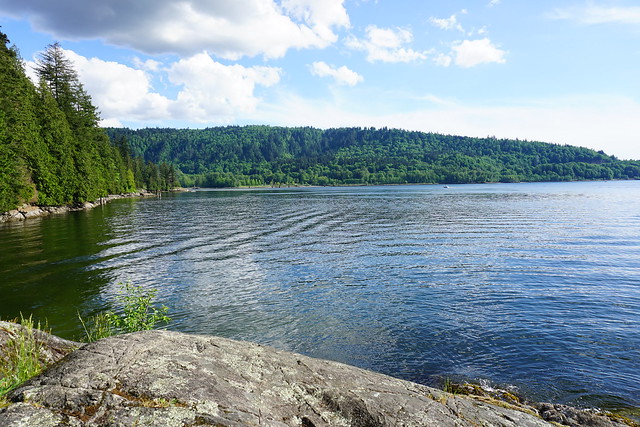
In my opinion, this is the ultimate trail for beginners! It’s located in Garibaldi Park and is a short distance hike with very minimal elevation gain. It has outhouses and bear cache facilities, and you can book your site online in advance so that you don’t have to worry about fighting other hikers for a camping spot.

There are two campsites to choose from – the first one (Cheakamus Lake) is located right at the head of the lake and requires the least amount of hiking, approximately 4km. The campsites are located next to the water and have a decent amount of privacy. The second site (Singing Creek) is another 3.5km and is located at the midpoint of the lake. This site lends itself better to group camping as it’s a series of campsites right next to each other in the woods. That said, there is a really nice beach to hang out and cook from. If you’d like to visit both, you could always camp at the first campsite and then do a day hike out to visit the second! Both sites have an outhouse and bear cache. Reserve here for $10 per person, per night (listed under Garibaldi Park).

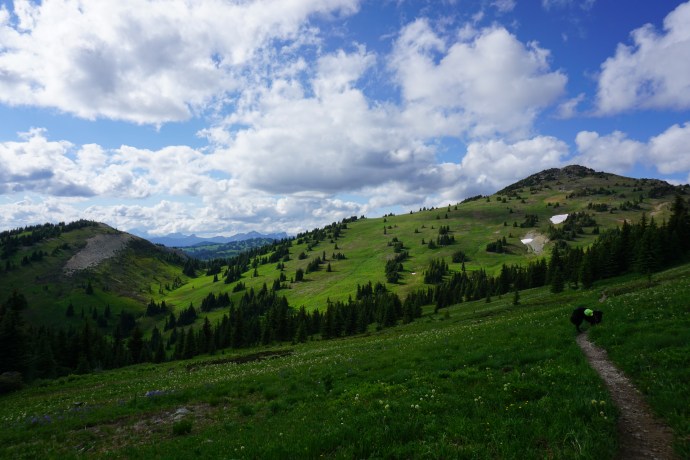
Buckhorn Campsite on the Heather Trail

DSC05738

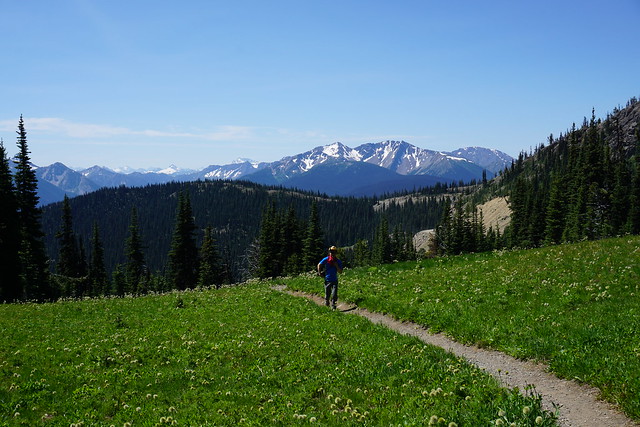
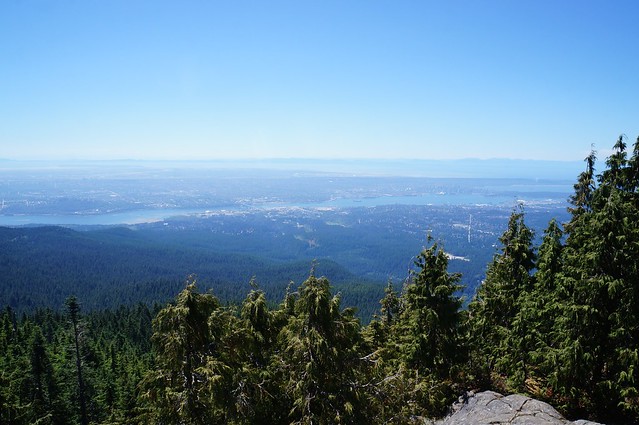
The Heather Trail is a 21km one-way trail in Manning Park. While I definitely don’t recommend doing the whole trail for beginners, the first campsite (Buckhorn) is only 4km in, which makes it the perfect spot for beginners! The Heather Trail is most popular in late July/early August for the colourful wildflowers that pop up all along the trail. What makes it so great for beginners is that you do most of the elevation gain on the drive up. You park at the top of Blackwall Road and from there is a steady incline down to Buckhorn Campsite. The views are beautiful right from the start of the trail.

Buckhorn has an outhouse, bear cache, tent pads, and even picnic tables! You do need a backcountry permit to stay overnight, but sites are first come, first serve, so you don’t need to pre-reserve. You can purchase here for a Manning Park backcountry permit for $5 per person, per night (you will need to create an account to see the system – entry and exit points are Blackwall Peak) . If you have the time, stay for two nights and make a day trip out to 3 Brothers Mountain for unreal views of the alpine meadows and surrounding mountains. Even if you can’t make it all the way to 3 Brothers, explore a little further beyond buckhorn to experience the alpine meadows. Be aware, in the early season this hike will still have snow until end of June.

Viewpoint Beach

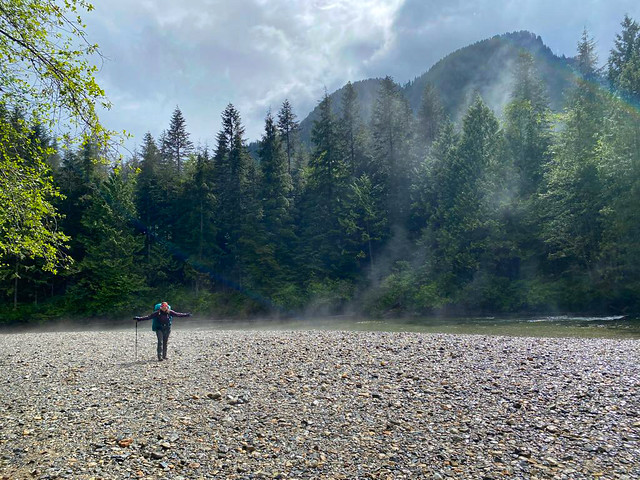
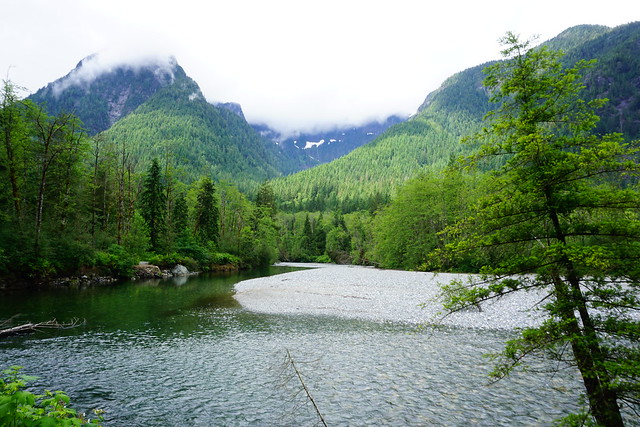
Viewpoint Beach is very similar in difficulty to Cheakamus Lake. It’s a 4.5km hike in Golden Ears Park with minimal elevation gain. Similar to Buckhorn, the campsites are first come, first serve, and you can get a permit online for Golden Ears before you go for $5 per person, per night (entry and exit points are West Canyon). There aren’t any really obvious places to camp, but most people pitch their tents along the tree line on either side of the river since the beach itself is pretty rocky. Plan in advance which side you want to camp on – if you want to camp on the far side, make sure to cross the river at the bridge before you reach the campsite. Both are nice but there tend to be less people on the far side of the trail.

There is an outhouse at this site, but when I visited last year, there wasn’t a bear cache, so we did have to make our own, which you may prefer not to do as a beginner. BC Parks has been spending a lot of time re-vitalizing this trail, so I suspect they will probably install a bear cache soon, but either way, check before you go. If you’re not comfortable hanging your food, you can purchase a bear proof container at most outdoor stores. These don’t need to be hung, but can be a little pricey.
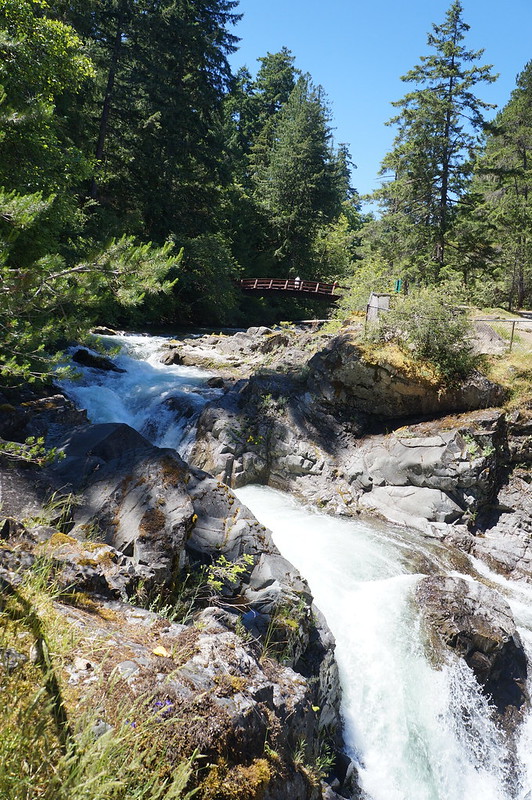
Lindeman Lake

DSC09918

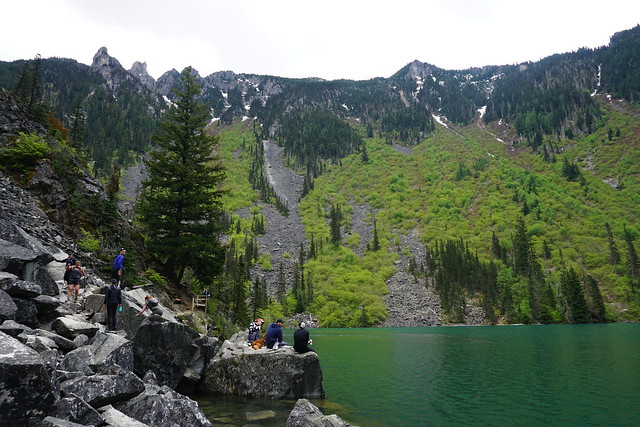
Lindeman Lake is located in Chilliwack Provincial Park. At 3.5km round trip, it’s the shortest hike on the list, but it has 300m in elevation gain in under 200m, so be prepared for a climb. If it’s your very first time carrying a pack, I’d recommend a flatter trail, but if you’re trying to increase your stamina, this is a great practice trail for beginners because it’s steep but short. Same as the previous sites, there’s no reservations for this campsite, but purchase a Chilliwack Lake permit online before you visit for $5 per person, per night.

There are a limited number of tent pads, but there’s lot of ground space to set up your tent. There’s a bear cache right next to the water and a pit toilet up in the woods. As a heads up, the toilet doesn’t have walls, but the trees provide natural privacy and it’s personally never been a problem for me. After setting up camp, I recommend hiking the 1km to the back of the lake for even more amazing views, or if you have time to stay 2 nights, make a day trip up to Greendrop Lake on the second day.
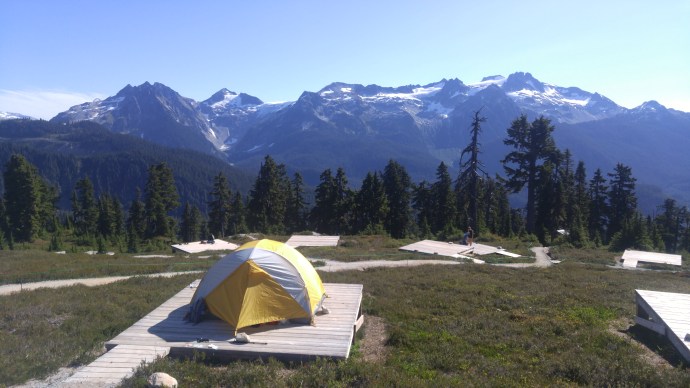
Elfin Lakes

DSC02679

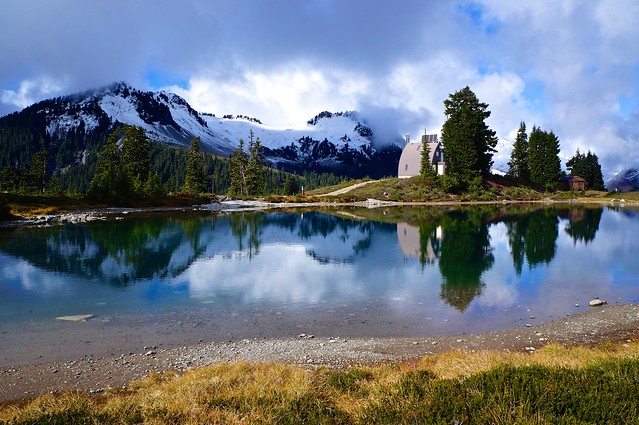
Elfin Lakes is a popular campsite located in Garibaldi Provincial Park. It is the longest trail on the list and definitely the most strenuous. However, I include it because even though it’s a bit longer, 11km one way to the campsite, it is a very forgiving trail and has lots of facilities along the way. The most challenging part of the trail is the first 5km, which is a steady incline up an old forestry road. The road ends at Red Heather hut, which is only meant for emergency overnight use, but has an outhouse and is a great place to stop for lunch.

From there, the trail meanders up and down through some truly beautiful scenery as you wind your way along the ridge to the Elfin Lakes hut. There are two options for camping – both require reservations – but you can either camp on the tent pads, or sleep on one of the bunks in the hut. The hut is the main reason I include it as a beginner trail because if you’re just starting out and want to try with a bit of a lighter pack, you can leave your tent at home and sleep in the hut instead. But if you’re willing to carry your tent up, the panoramic views from the tent pads are truly unreal! Elfin has a big outhouse facility with 3-4 toilets and there is a ranger living in the ranger’s hut. Campsites sell out fast, so book early. Purchase here for Garibaldi Park for $10 per person, per night. Don’t even think about coming up without a permit because the ranger will send you packing. Be aware, this trail usually has snow on it until end of June or even early July.

Advertisement

18 Scenic and Easy Hikes in Southwestern BC


I’ve featured a lot of hikes on this blog and while I try to write about all kinds of hikes, I have a tendency to focus on my big, backcountry trips. But I believe hiking is for everyone and I’ve done lots of great, short, easy hikes that I want to feature in this post. Just keep in mind that no matter where you’re hiking or how short the hike is – always be prepared. Check out my post on personal safety to learn more about trip planning and the 10 essentials.

Without further ado, here are all my favourite short hikes by region:

Sea to Sky

DSC07504
Brandywine Falls (1km, 0m gain) – Located right on the Sea to Sky highway before you get to Whistler. Walk out to this amazing waterfall viewpoint! You can extend the hike down to the bottom of the falls, but wayfinding skills are required as it’s not well marked.
DSC06113
Brohm Lake (4km, 100m gain) – Located just past Squamish on the Sea to Sky highway. Do the circuit around the lake, or extend the hike up to Tantalus Lookout or Brohm Interpretive Forest. A great place for swimming in the summer.
DSC05163
Alice Lake (1.5km, 0m gain) – Located in Alice Lake Provincial Park, just past Squamish. Hang out at the day use area and go for a stroll around the lake. Great for swimming in the summer.

North Shore

DSC03066
Lighthouse Park (6km, 0m gain) – Located down by the water in West Van, make your own adventure in this park! Hike to the lighthouse and hang out on the rocks or explore the many forested nature trails.
DSC08278 (3)
Bowen Island Lookout (4km, 110m gain) – Located in Cypress Provincial Park, you can do this trail all year, just use snowshoes in the winter. The trail is a little steep, but has amazing views of Howe Sound and Bowen Island.
DSC07267
Dog Mountain (5km, 0m gain) – Located in Seymour Provincial Park, this is another hike that can be done in summer or winter. The trail has great views of the city – add a kilometre and hike to Dinkey Peak on the way down for mountain views.

Tri-City Area

DSC05884
Belcarra Regional Park (5km, 0m gain) – There are two hike options in Belcarra: Jug Island and Burns Point, which leave in opposite directions from the parking lot. Both are 5km, but Burns Point is the easier hike. Jug Island hikes up and down while Burns Point follows the coast.
20200419_100643
Crystal Falls (7km, 0m gain) – Located in Coquitlam, this is one of the longer hikes on the list, but it’s totally flat and has rewarding views of the falls at the end! Wear appropriate shoes – this one can be muddy!
20200507_175716
Minnekhada Park (4km, 100m gain) – Located near Pitt River in Coquitlam, there are two lake loops that are ~4km each, or if you’d like more of a challenge, hike 7km up to High Knoll for a view of the valley. Great for birdwatching.

Heading East

DSC05202
Gold Creek East: Lower Falls (5.5km, 0m gain) – Located in Golden Ears Park, it’s a beautiful, flat hike along the river to Lower Falls. Extend the hike by continuing on to Viewpoint Beach.
DSC09663
Bridal Veil Falls (1km, 50m gain) – Located just off Highway 1 past Chilliwack, a short hike to a huge waterfall cascading down over the rocks!
DSC05738
Paintbrush Trail (3km, 0m gain) – Located in Manning Park, it’s a bit of a drive, but Paintbrush Trail has the most amazing views of the surrounding mountains and at the right time of year, is bursting with beautiful alpine wildflowers.

Coastal and Islands

DSC09010
Bowen Island Sea Walk Trail (2km, 0m gain) – Located at the Southwest end of Bowen Island, this short there-and-back hike to Cape Roger Curtis Lighthouse has beautiful ocean views.
DSC04332
Smugglers Cove (3km, 0m gain) – Located on the Sunshine Coast, Smuggler’s Cove is a beautiful coastal trail that winds through wetland and rocky coast outside Halfmoon Bay.
DSC00125
Mount Norman (2.5km, 200m gain) – Located on South Pender Island, Mount Norman is the steepest hike on the list, but has beautiful views of the Gulf Islands. Extend the hike to Beaumont Campsite (6km) to make this a truly coastal hike.

Vancouver Island

DSC00364
Mystic Beach (4km, 65m gain) – Located past Sooke on the far south of the Island, this is a great way to sample one of the highlights of the Juan de Fuca Marine Trail. Hike through the woods to a beautiful sandy beach.
DSC00396
Little Qualicum Falls (3km, 65m gain) – Located just off the Alberni Highway in Little Qualicum Falls Park, this short loop takes you along the river to several beautiful waterfalls!
DSC05061
Tonquin Beach Trail (3km, 65m gain) – Located in Tofino, Tonquin Beach is a great place to watch the sun set, hang out on the golden sands, fish, or have a campfire. Just bring your headlamp for the hike back.

The Best ‘Long Weekend’ Backpacking Trips

With the Labour Day long weekend coming up, I want to share some of my favourite long weekend backpacking trips! There’s lot of single night hikes in Southwestern BC, but long weekends are the best for backcountry hiking because the extra day enables you to explore further and to really escape from the hustle and bustle of the city. Whether you’re a first timer or a seasoned hiker, here’s 5 of my favourite backpacking trips near Vancouver:

For the Beginner: Lindeman Lake

Trail profile: Day 1 (2km, 300m gain), Day 2 (8km, 200m gain), Day 3 (2km, 200m loss)

Lindeman Lake is the perfect backpacking trip for beginners and one of my personal favourites for long weekend trips. I’ve been to Lindeman Lake twice for the May 24th long weekend and what makes it so great for beginners is that the campsite is only 2km from the parking lot, so it’s a great way to test out carrying a heavy pack for the first time. Once you set up camp, there are all kinds of options for what to explore over the rest of the weekend.

I wrote a post summarizing the different trails, but my recommendation for newbies would be to hike up to the campsite on Day 1 and then do a day hike to Greendrop Lake on Day 2. Greendrop Lake is approximately 8km roundtrip from Lindeman Lake, so it makes for a good day hike. Then on Day 3 you can hike back down to the parking lot and drive home. Lindeman Lake is located in Chilliwack Provincial Park, so you will need a backcountry permit, but there’s no reservation system and it’s only $5 per night, per person. Please remember that no campfires are permitted in this park at any time of year.


For the Bucket List Hiker: Garibaldi Lake

Trail profile: Garibaldi Lake Trail (18km, 820m gain), Panorama Ridge (15km, 610m gain), Black Tusk (11km, 820m gain), Mt. Price (11km, 620m gain)

I know, this hike is insanely popular and busy, but it’s popular for a reason! Garibaldi Park is only an hour and a half drive out of Vancouver and it boasts some of the most amazing views of the backcountry. I’ve only been in BC for 5 years and I’ve already done this iconic hike 3 times! There’s a lot to love about Garibaldi Lake, from the beautiful blue hues of the lake, to the breathtaking views of the glaciers and surrounding mountains, to swimming in the ice-cold lake and watching the sunset paint the mountains pink. But my favourite part of Garibaldi Lake is using it as a base from which to explore some of the surrounding trails. While Garibaldi Lake is gorgeous, the trail to the lake itself is a snooze-fest. It’s 9km of forested switchbacks, but has a huge payoff at the end. But from there, the rest of the trails in the park are breath-taking from start to finish!

There’s a few different ways to hike Garibaldi Park as a long weekend trip. I’ve done two long weekend trips to Garibaldi Lake and both times I left work a little early on Friday afternoon and hiked the 9km up to the lake on Friday night. From there, I stayed two nights at the lake and did day hikes on Saturday and Sunday, before hiking back out on Monday. However, if you’re a beginner I would recommend hiking up on Saturday morning instead and just doing one day hike on Sunday. Both times I hiked in Friday night, I started hiking around 5:30pm and got to the lake around dusk. If you’re a new hiker or not comfortable hiking or setting up in the dark, start your hike on Saturday morning instead.

Once you get to Garibaldi Lake though, there’s lots of options for day hikes. Panorama Ridge is my personal favourite and Black Tusk is also very popular. There’s also the lesser known Mount Price, which leaves the lake in the opposite direction of the other two hikes. Panorama and Black Tusk are both very popular and well marked trails, Mount Price is a bit more of a bush wack at times and isn’t well marked. So stick to the well marked trails if you aren’t familiar with way-finding.

However, if you’re making Garibaldi your destination for the long weekend, you’ll have to plan in advance. You must book a backcountry permit in advance for $10 per person, per night. The campsites release 4 months in advance of the date you book and they do book up fast. There is overflow camping at Taylor Meadows campsite, but it’s 1.5km away from the lake and definitely not as nice as the Garibaldi campsite. And as a final reminder, Garibaldi has been having problems with littering, so If you visit Garibaldi, make sure to pack out all of your garbage and leave no trace that you were there.


For the Through Hiker: Heather Trail

Trail profile: Day 1 (13.5km, 300m gain), Day 2 (9km, no gain), Day 3 (17.5km, 1000m loss)

Personally, I’m a big fan of through hiking. It’s great when you only have to set up camp once and don’t have to carry your heavy pack with you every day, but there’s something really fulfilling about through hiking and ending at a different location from where you started. It requires a bit more coordination as you’ll often need 2 vehicles, but it’s fun not to have to retrace your steps at any point.

Through hikes often require more time than just a long weekend, but one hike that can be done over 2 nights that I absolutely loved was the Heather Trail in Manning Park (it can also be done as a return hike, but I think it works best as a through hike). Manning Park is my favourite provincial park in southwestern BC and has some of the most scenic hikes. The Heather Trail is particularly well known for its wildflowers as the trail is mostly comprised of alpine meadows that burst into bloom in late July. The other highlights of the trail include walking the ridge along first brother mountain and camping at Nicomen Lake.

On Day 1, drive out to Manning Park and hike 13km to Kicking Horse Campsite. There is another camp called Buckthorn Campsite located at 5km, but it’s an easy walk to Buckthorn and not a scenic camp, so I’d recommend pushing all the way to Kicking Horse on the first day. Along the way, do the 1km summit up First Brother Mountain. On Day 2, it’s a more relaxing 9km hike to Nicomen Lake through meadow after meadow. Nicomen Lake is great for fishing if you’re so inclined, but bring your bug net because there’s a lot of flies. Nicomen Lake technically marks the end of the Heather Trail, but instead of turning around and hiking back 21km, I’d recommend hiking the Nicomen Lake Trail 17km back to the highway. 17km sounds like a lot, but the entire trail is downhill and we did it in just 5 hours. The benefit of hiking the trail this way is that there’s limited elevation gain. The hike starts at Blackwell Road, which is located 1000 metres up from the highway, so you do most of the elevation on the drive up. There’s no reservation system for this hike, but you do need a backcountry permit, which costs $5 per person, per night.


For the Long Distance Hiker: Elfin Lakes

Trail profile: Day 1 (11km, 600m gain), Day 2 (13-22km, 350-600m gain), Day 3 (11km, 600m loss)

I’m sensing a theme with this list because Elfin Lakes is another trail I’ve done 3 times! But my favourite was a 3 day trip that I did over the Labour Day long weekend in early September. Elfin Lakes is also located in Garibaldi Park and while it also gets a lot of visitors, it feels a lot less overwhelming than Garibaldi Lake. There’s a hut and tent pads at Elfin Lakes and you will have a similar problem as Garibaldi Lake in that you will need to book your reservation early if you want to be assured a site. The hut books up really fast in the winter and the tent pads book up really fast in the summer.

I say Elfin Lakes feels less overwhelming though because the campsite is much more wide open than Garibaldi and there’s a lot more area for people to disburse during the day, so it doesn’t feel quite as busy. You can swim in both lakes, but the Elfin Lakes are WAY smaller than Garibaldi Lake and therefore, much warmer and enjoyable for swimming. If it’s clear, you can also get an amazing view of the stars at night. My suggestion for Elfin Lakes would be to hike the 11km to the Lake on Day 1, then do a day hike to either Opal Cone or Mamquam Lake on Day 2, and hike out again on Day 3.

I call it the long distance hike because the options for your Day 2 hike are definitely nothing to scoff at. Opal Cone is a 13km round trip from the lakes, with about 350m in elevation gain and Mamquam Lake is a 22km round trip with 600m in elevation gain. I did the trip with my friend Brandon and we tried to get to Mamquam Lake on Day 2, but it was insanely hot and there’s a lot of elevation variation, so we never made it the whole way to Mamquam. We ended up turning back around 8km in, making for 16km in total. But the good news is, Opal Cone and Mamquam are the same trail, so even though we didn’t make it to Mamquam, we still got to do Opal Cone. There’s a lot of ground to cover on this hike, but with the exception of the first 5km from the parking lot, the entire hike is incredibly scenic!


For the Photographer: Skyline II Trail

Trail profile: Day 1 (12.5km, 610m gain), Day 2 (14km, minimal gain), Day 3 (12.5km, 610m loss)

Finally, the last hike on the list is not only my favourite hike on the list, but my favourite hike of all time! Like I said, I love Manning Park and for me, the Skyline Trail is the highlight of the park. It’s the most scenic hike I’ve ever done and it’s not even that crowded. Granted I didn’t do it on a long weekend, I took a Friday off to make it my own long weekend, so it might be busier on an actual long weekend. But that said, I did the same thing for the Heather Trail and it was definitely a lot busier.

I also hiked Skyline in peak wildflower season, which may have contributed to my love of the trail, but either way, I think I would have loved this trail because it has so many incredible views. The entire Skyline II Trail is 25km long and can be hiked with as a through hike or a return hike. The trail runs from Manning Park to Skagit Park, with Mowich camp smack-dab in the middle at 12.5km. I did the trail as a return hike from the Manning Side because the 2 trailheads are a 2 hour drive apart, so it’s logistically challenging (but not impossible) to coordinate. My recommendation is to start on the Manning side and hike to Mowich Camp on Day 1. From there, you can day hike along the Hozameen Ridge trail on Day 2, which branches off the main trail and continues towards Hozameen Mountain and the border.

Hozameen mountain is a very distinctive mountain and you’ll be staring at it all of Day 1, so it felt great to hike to the base of it. The trail continues on for a long time and actually ends on the American side of Skagit Valley. A good target for your day hike is to hike 7km to the Border monument. There’s a distinctive peak at the end of the ridge where you could end (because it is a steep downhill to the border monument), but I really wanted to see the monument, so we pushed through the last 500m to reach the monument – but the peak at the end of the ridge is a great place for lunch! We returned to Mowich Camp to sleep and then hiked back out the way we came on Day 3. But since the distance is the same on both sides of the Skyline Trail, you could hike out to the Skagit side instead if you wanted to make it a through hike. I’ve heard the Skagit side isn’t as scenic though and is mostly in the trees, so I didn’t mind hiking back along the same trail. The backcountry permit for this trail is the same as Heather Trail – no advance booking required, but the permit is $5 per day, per person.