First Time Snow Camping

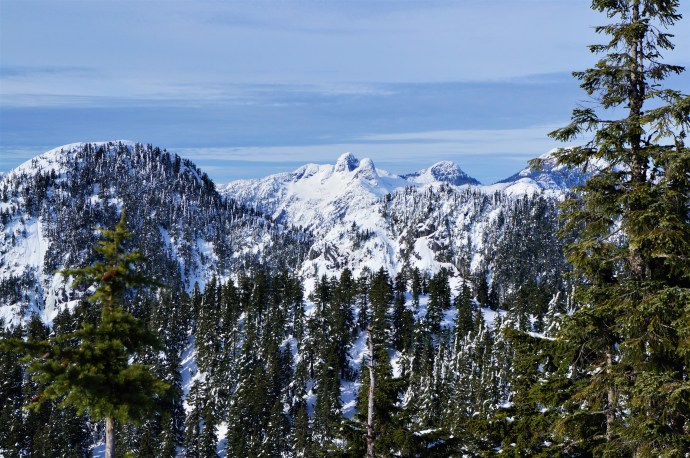
The weather in Vancouver is pretty mild most of the year, but the weather in the mountains is a completely different story. Spring hits Vancouver in March and April, but it’s often late June or even early July by the time the snow finally melts in the mountains, only to come back again in October. So the backpacking season isn’t that long. There are lots of trails you can do at lower elevations, but some of the more scenic mountain trails have a short window in which to hike them.

For this reason, me and my friend Carolyn got it into our heads that we wanted to try snow camping to get in some more backpacking trips in the off season. I only started backcountry camping in the summer of 2016, so it was definitely a bit of stretch for me to take up snow camping so quickly, but we did a bit of research and built up some of our gear and decided to give it a try last winter.

Camping gear is expensive, so we tried to be as thrifty as possible in acquiring winter gear. We both bought Teton synthetic sleeping bags on Amazon that are rated to -15 degrees celsius. I wouldn’t normally recommend Amazon for camping gear, but good winter sleeping bags cost hundreds of dollars and as newbies, we weren’t ready to sink that kind of cash into a sleeping bag. But the Teton bags are actually really compact and come at a great price, so neither of us have regrets about this purchase. We’re both cold sleepers, so for a bit of extra warmth, we also purchased the Sea to Summit Reactor Extreme bag liner, which claims to add another 14 degrees celsius to your bag rating. I don’t believe it actually adds that much, but it certainly warmed up our bags. Finally, we each bought cheap “closed cell” foamy sleeping pads to put under the 3-season pads we already owned. A sleeping pad with a R-value higher than 5 is recommended for winter camping, but these pads run in the neighborhood of $200-300, so doubling up our sleeping pads with a $20 foamy worked better for us.

These were the main items we bought to prepare for the trip. Fortunately I had an old 4-season tent that had been handed down to me from my parents, so we decided to use that, despite the fact that it’s old and weighs 10 pounds. I doubt many people have that option available to them, but I wouldn’t recommend it. The tent is from the 80’s and it didn’t really work for snow camping, but hey, live and learn, we still survived. The only other items that really differed from our normal gear is that we brought a small shovel with us, a thermos, and some extra layers of clothing.

For our first adventure, we decided to try Manning Park. Manning is one of my favourite parks near Vancouver and they have a snow camping site located just off the main road. We thought this was the safest plan because then we wouldn’t be too far from our car if we got really cold in the middle of the night. Unfortunately, nothing about our trip went according to plan and we ended up having to do a fair bit of improvising, but we still ended up having a really good time.

One thing you should know (or probably already know) about me is that I’m a big talker. Throw me and Carolyn together in a car and we’ll have a great time, chatting and laughing the whole trip. I’m usually a pretty decent navigator (and I maintain that I do have a good sense of direction, mostly because I love maps), but put me in a car with Carolyn and I will forget everything I know about navigating because I always get caught up talking and telling stories. We’re pretty good at getting lost because I tend to think as the driver Carolyn know’s what she’s doing and she tends to think as the passenger (and more often then not, trip planner), I’ll tell her what to do. So we tend to get lost a lot.

On this particular trip we got re-routed because an accident closed one of the highways, so we were a bit out of sorts (read, hungry) and when we left Hope, I thought it was just a straight shot to Manning and settled in for the 45 minute drive. 40 minutes later, just when I think we should be hitting the Manning Park lodge, I see this tunnel ahead that I know is actually on the Coquihalla highway (not the Manning highway) and realize the depth of my mistake. Hearing one “uh-oh” from me was all Carolyn needed to hear to know we’d made a mistake along the way (I will take full credit for it in this instance). We were pretty hangry from being re-routed once already and not into the idea of driving another hour and half in the opposite direction, so Carolyn quickly pulled us over and started making lunch, telling me I had until we finished eating to come up with a plan B.

Fortunately, we had landed ourselves in the Coquihalla Summit Rec Area, an area I hadn’t previously explored, and I had just enough cell coverage to check the avalanche risks for the area and work out a quick back-up plan. Instead of going back to Manning, we decided to commit to snowshoeing about 1.5km to camp at the trailhead to Falls Lake. The 1.5km is actually a forestry road that’s just not plowed in the winter and the “trailhead” is really just a parking lot, but hey, we’re adaptable. Plus, at the end of the trip, we both agreed that missing Manning was one of the best mistakes we could have made, because we ended up having a great time at Falls Lake and it forced us to camp further away from the car and to really commit to snow camping.

There wasn’t too many people around because we were about 2.5 hours away from Vancouver, but Falls Lake seems to be a popular hangout for snowshoers who want to check out the lake and backcountry skiers who want to hike up towards Zoa Peak and ski down. We did neither of these things, but we did have a nice flat area (parking lot) to try out our snow camping skills! Plus, we were the only people who stayed overnight.

We ended up having a blast! It was about -10 degrees celsius overnight, so it was pretty cold, but we worked up a nice sweat hiking in and then spent a fair bit of time digging down in the snow to set up our shelter, so the cold never really kicked in until later in the evening when we didn’t have anything to do anymore. We dug down about a metre and then stamped the snow as flat as we could with our snowshoes. We set up the tent and our bags just like any other trip and then started building ourselves a little snow kitchen. This mostly consisted of a kind of counter area where we could sit and put our stove.

After we finished setting up, we threw on some more layers to stay warm. I think one of the biggest things about snow camping is to avoid sweating in multiple layers of clothes, but to layer up as soon as you start moving to trap your body heat from exercising and to prevent yourself from ever getting cold. We didn’t find cooking in the winter to be any different than summer, we just made sure to use Carolyn’s white gas stove instead of my propane one because propane is prone to freezing in cold temperatures.

One of the biggest challenges actually proved to be melting snow for drinking water and cooking. As you can imagine, it takes a while to melt snow and a full pot of snow doesn’t translate into very much water. We kept filling up the pot and boiling a tiny amount of water, just to have to add more snow to do the whole thing again. One tip that we learned is that it’s best if you add a bit of your drinking water as a base and then add snow slowly as it starts to heat up. Don’t bother boiling the water until the end, just keep it hot enough so that any snow you add melts and then wait for it to heat up again before adding more.

Our second lesson learned was that you need to give yourself lots of time to set up camp, ideally about 3 hours. Fortunately we did have enough time, but digging a hole (with a single small shovel) takes a long time and so does melting snow, so give yourself enough time to set up camp because doing all those things in the dark wouldn’t be fun. The hardest part about snow camping was that it gets dark so early in the winter and there’s really nothing to do once it gets dark and you’ve finished eating supper. We’d been planning to maybe play cards in the tent, but it’s too cold once you stop moving that all you really want to do is climb into your sleeping bags. So prepare for an early night. I read to Carolyn on my kindle for a bit, but I think an audiobook might work well in the future.

Keeping warm at night is really the most important and challenging part about snow camping. We survived the night, but we definitely learned some trips to keep in mind for our next trip. I thought my sleeping bag and liner together would be enough to keep me warm, but you definitely need to wear the right clothes to bed. We initially didn’t wear enough layers and we were quite cold when we got into our bags. After about an hour, we got up again to put some additional layers on and that definitely helped. You want to have enough clothes on to keep you warm, but not too tight or too many layers that don’t allow you to trap some heat in your bag. It’s also important to stay away from the edges of your tent because your body heat will cause condensation on the inside of the tent that will then freeze and be really cold if it’s touching you. We’re both side sleepers, so our butts were getting cold from touching the side of the tent. It’s also better to sleep on your back because you get more warmth reflected back at you from your sleeping pad (easier said then done though if you never sleep on your back).

But we made it through the night! We had some lessons learned, but the tough bits weren’t enough to deter us from trying it again. We witnessed a beautiful purple sunset over the mountains and did a little hike in the morning up a nearby hill to get the cutest photos of our little tent down below. It’s not the easiest experience, but I had a lot fun trying something new with Carolyn and it makes you feel like a real bad-ass to sleep outside in the winter! We never did make it to Manning for snow camping and this was the only snow camping trip we tried in 2018, but stay tuned because we recently went on our second snow camping trip, which I’m working on a follow-up post for!

Favourite Hikes in Southwestern BC: Part II

About 2 years ago I compiled a list of my Favourite Hikes in Southwestern BC. At the time I’d hiked about 40 trails and narrowed it down to my top 10 favourite trails. Some of those trails would definitely still be in my top 10 hikes, but since then, I’ve surpassed 100 trails and decided it was time to compile a new list! I haven’t included any of the hikes from the first list, so check out that post if you want to see my original list, but this list features even more awesome trails! All photos taken by yours truly.

#10 Lightning Lakes – I’m a little bit obsessed with EC Manning Provincial Park (as you’ll soon see from this post) and what I love about Lightning Lakes is that it’s got a little bit of something for everyone. The entire Lightning Lakes Chain Trail is actually 24km long and travels through the valley past 4 different lakes, but I’ve actually only done shorter loop around the first two lakes (but I’d love to do the whole trail someday). But I love this trail because it is pretty flat, so it makes for a great beginner trail and because there’s multiple lakes, you can customize it to whatever length you want. It has the most gorgeous views of the blue lakes and the surrounding mountains, as well as it’s a great place to swim and hang out in the summer. Me and my friends go every year to chill and BBQ at the first lake. (24km, no elevation gain, you decide the time and length!)

#9 Dam Mountain and Thunderbird Ridge – Located at the top of Grouse Mountain, I’ve never explored these trails in the summer, but I had a blast when I snowshoed them in the winter. It’s annoying to have to pay the gondola fee to get up Grouse Mountain, but on a clear day with a fresh snowfall, this hike has the most gorgeous views looking out into the Metro Vancouver watershed. It’s an easy enough trail – a lot of people just snowshoe up to Dam Mountain and then turn around, but I’d recommend going the extra 2km along Thunderbird Ridge. I also have to say that I ran into some equipment issues (personal equipment) and the Grouse Mountain staff were so helpful in resolving them! (7km, 250m elevation gain, 3 hours)

#8 Ring Lake – Ring Lake would probably rank even higher on this list had it not been right in the middle of wildfire season when I went there. But even with the insane amount of smoke in the area, I still loved this hike and am now dying to go back at a clearer time of year. Ring Lake is located in the Callaghan Valley and is a very low traffic trail. The gravel road to get to the trailhead is a little dicey (I’d recommend high clearance) and it is in grizzly country, but it’s a great area to explore if you want to escape the crowds. It is a steep trail up to the top because most of the elevation gain is in the second half of the trail, but the views at Ring lake are fantastic. The only issue right now is that one of the bridges is out right before the lake and you can’t cross it in high flows, so I would definitely recommend visiting in August or September. Even if you don’t make it to the top though, it’s worth visiting for the berries and alpine meadows located just past Conflict Lake. (20km, 500m elevation gain, 8 hours)

#7 Flatiron/Needle Peak – Flatiron and Needle Peak share most of the same trail, but split towards the end with Flatiron one way and Needle Peak the other. I think you could easily do them both in a day, but there was snow when I went a few weeks ago (early October). so we decided to skip steep Needle Peak. But this hike still blew me away! It does have significant elevation gain, but I liked it a lot because after an initial push through the forest (45-60 mins), the rest of the hike is along the ridge looking up at Needle Peak. Flatiron continues on to a lake that would probably be great for swimming in the summer and boasts great views looking down on the Coquihalla. Breathtaking on a clear day, but bring a sweater, it’s cold up there! (11km, 800m elevation gain, 6 hours)

#6 Frosty Mountain – The second hike from Manning Park on my list, I did a multi-day trip along the PCT and up Frosty Mountain (but you can do this one in a day). It’s definitely a steep hike, but the views are just amazing! my favourite part is the section running from what I call the “fake summit” to the actual summit, which goes right along the ridge up the peak with 360 degree views. I’ve heard awesome things about this trail in the Fall as well because the larch trees all turn bright yellow and make for some really vibrant pictures! (22km, 1150m elevation gain, 8 hours)

#5 Mount Price – A theme with my favourite hikes is that they tend to be some of the less crowded hikes. I did a 3 night trip through Garibaldi Park back in 2016 and hiked both Panorama Ridge and Black Tusk. My friend hadn’t been and asked me to join her for another 3 nighter, so I decided to switch things up and try out some new hikes while we were up there. While she was climbing Black Tusk (not a favourite of mine), I decided to hike the much less popular Mount Price. What a great decision because this hike is unreal! It’s basically Panorama Ridge, but on the other side of the lake and with hardly any people. It’s not a popular trail, so it’s not well maintained and does include a very dubious and steep hike up the side of Clanker Peak and then Mount Price, but the views from Mount Price are totally unreal! It has a very large summit, so I explored up there for over an hour without getting the least bit bored. It has great views across Garibaldi Lake of Black Tusk and Panorama Ridge, but it also has views looking back at the glacier and Mount Garibaldi. It was a tough hike, but ranks high on my list. (11km roundtrip from Garibaldi Lake, 600m elevation gain, 7 hours)

#4 Heather Trail – This one is a bit of a repeat from my last list since I included the Three Brothers Mountain in Manning Park, which is the first 11km of the Heather Trail. But I loved the Three Brothers hike so much that I had to go back and do the entire Heather Trail, and I definitely don’t regret it. If you love 360 degree views, the Heather Trail has it, but I personally love it for the alpine meadows. I’ve discovered I have a bit of thing for the alpine meadows (especially when wildflowers are in season) and I love hiking through meadow after meadow, there’s just so much open space and they make me feel like I’m living in the Sound of Music. I also really liked Nicomen Lake on this hike, but it was extremely buggy. The Heather Trail can be done as a through hike or return, we did it as a through hike by combining it with Hope Pass Trail from Nicomen Lake (38km through hike, 1000m elevation gain, 2 day hike)

#3 Cheam Peak – This one makes the list as well because of my recent obsession with meadows. It’s located in the Chilliwack Valley and you definitely need 4WD to get to the trailhead. But despite that, it was still a pretty busy trail because it boasts a great view looking out over the Fraser Valley. However, on the day we did it it was super foggy, so we didn’t actually see this view at all. But it really didn’t bother me and it still tops my list because the views looking back at the valley and the alpine meadows were breath-taking. In my opinion the fog made for some super interesting pictures and we had the most wonderful post hike swim in Spoon Lake, so the fog didn’t deter me at all. I felt like I was in middle earth for this hike, so I was content the whole time and would love to go back! (10km, 650m elevation gain, 5 hours)

#2 Juan de Fuca Trail – Okay, I know the Juan de Fuca is a bit of a stretch for this list, but it is still technically “Southwest BC”, it just involves a bit of travel time to get to the island if you live in the lower mainland. But it was seriously one of the highlights of my hiking experience over the past 5 years and I can’t not include it on this list. The Juan de Fuca is a 50km trail along the south-western coast of Vancouver Island and is known as the “West Coast Trail Lite”. I’ve devoted three whole blog posts to my experience on this trail and it was really unlike any other hike I’ve done before. The ocean speaks to that part of my soul that grew up in Newfoundland and this was my first multi-day through hike, so it felt like more of a journey than any other hike I’ve done before. I’d highly recommend this trail, I’d just say not to underestimate it. It is a very strenuous hike and it definitely kicked my ass, but it was the most rewarding hike I’ve ever done. (50km, 4-5 days)

#1 Skyline Trail/Hozameen Ridge – I had to end this list with one more trail from Manning Park. I really do love this park and I spent a lot of time exploring it over the last 2 years, and the Skyline Trail was definitely the highlight. With the exception of the first 5km, the entire hike runs along the “skyline”. You basically hike along the ridge from mountain to mountain with the most amazing views of the alpine meadows, wildflowers, and mountain range. You can do this trip in a single day if you’re ambitious, either as a through hike or return trip (25km), but we did it as a two night trip, base camping at Mowich Camp. On our second day, we day hiked along Hozameen Ridge to the border monument and the most incredible view looking out at the enormous Hozameen Mountain. I loved every second of this 3 day trip and would recommend to everyone. The first 5km are a pretty consistent incline, but after that, it’s not a difficult trail. (40km, 500m elevation gain, multi-day trip)

Continue to Part III.

Hiking the Juan de Fuca Trail – Part III

I haven’t been blogging here lately because I recently started a book blog and I’ve been doing a lot of blogging at The Paperback Princess instead. But I’m going travelling soon, so I logged back in to this blog to write a post and realized I wrote an entire post about my last day on the Juan de Fuca trail that I never posted. So if you’ve been waiting in anticipation for this for the last year, here’s some closure! I’ll follow up shortly with some information about the next trip I’m taking!

See my first 2 posts about the Juan de Fuca trail here: Part 1, Part 2


Day 3 had me feeling pretty nervous. The Juan de Fuca trail map marks this section as the “most strenuous” section of the trail. Most people do the trail the opposite direction as us to get the hard part out of the way first, but we wanted to get the longer distances done first, which is why we did the trail backwards.

About 20 minutes before we planned to get up we were woken by the pitter patter of rain drops on our tent. I have a good backpack and a good rain cover, but I still have irrational fears about hiking in the rain and having my sleeping bag get wet (even though the rain has never once seeped into my bag). I admit to a moment of weakness when I heard the rain on our tent. We had no way of knowing how long the rain would last and the idea of hiking through the “most strenuous” part of the trail in the rain was not appealing. I am now embarrassed to admit that I did float the idea of turning around and hiking back to Sombrio Beach to bail instead of finishing the 21km left of our journey.

We took our time getting ready in the morning – we boiled water for our oatmeal through the tent flap and tried to pack up everything inside the tent to keep our things from getting wet. While we packed we debated. Admittedly, the first two days of the trip had had some extremely challenging times and I struggled with the idea of two more days of wet and exhaustion. But I struggled more with the idea of giving up. I knew that if I gave up on the trail I would never come back and do it again.

Fortunately, the weather came back on our side and the rain started to clear out just when we got out of the tent to take it down. By the time we got the tent packed away, it had dissipated entirely and we decided to continue on our journey. I am so glad of that decision because it really was upwards from that point forward for the rest of the trip and we had a great time on the last 2 days of the trail!

It was definitely a wet start after the rain and we struggled to hoist ourselves up onto the rock at the end of the beach to get back on the trail. I believe we had to take our backpacks off 3 times in the first km to manoeuver around and over trees and boulders, but things shaped up after that.

It was still pretty muddy along the trail, but nothing we weren’t used to. The trail markers pretty much disappeared along this section, so we had no idea how far we’d gone, but we felt like we’d been making good time. We heard from other hikers that we would see a trail marker after 6km, which was our halfway point, so we made it our lunch goal again.

Day 3 was the first day where we finally actually made it to our lunch goal, which was huge cause for celebration! There was still some challenging, muddy sections along the way, but there were a lot of people passing us in the opposite direction and we were reassured by how remarkably clean they all were. We didn’t want to get our hopes up, but we were optimistic that the mud must clear up based on the state of everyone we passed.

Fortunately, it did about 5 km in, and though there were a lot of up and downs along this section, it was easily our best day on the trail to date! The hilly nature of this section is what gives it a “strenuous” rating, but me and Emily will take the hills over the mud any day! After the 5 km mark the mud all but disappeared, the sun came out, and we had a pretty great day ambling along the trail and silently mocking all the people we passed who were still trying to stay clean and avoid the mud. We knew they were in for a treat.

In retrospect, I’m even more glad we did the trail backwards because the last 15-ish km had pretty much no mud. I can’t imagine starting on the easy trail without mud and then having to deal with the trail getting progressively worse as we went (as well as the distance). So we were very assured in our decision to do the trail backwards and really enjoyed the last two days.

That’s not to say there weren’t still some challenging sections. There was a particularly awful river crossing where we had to haul ourselves up using a rope, but overall our spirits were much higher! We reached Bear Beach in record time for us, hitting the first campsite at about 4pm. Bear Beach is 2km long and has 3 campsites spread out along it. The first one didn’t look that great and we figured the furthest one would be filled with hikers who had been coming from the opposite direction, so we decided to head for the middle campsite.

There were only 3 other people at the campsite, so again, we had tons of space to ourselves and found a nice place to set up our tent. Since we’d arrived at camp 2.5 hours earlier than the other 2 days, we had more time to relax and we played a few games of cards. It was a little windier on Bear Beach, but we had a great view of the ocean and the clouds had cleared off entirely during the day, so we stayed up watching the tide slowly moves its way up the beach all evening.

Day 4, our final day on the trail, was easily the nicest. The sun came up early and there were blue skies all day. I’d been worried about Day 3 because Emily, who’s done more extended hiking than me, warned that from her experience Day 3 was the hardest on your body. Day 4 ended up being the toughest for me though. Fortunately, it was the easiest day on the trail by far (no mud and limited ups and downs), but without obstacles to distract me, my aching back was the only thing I could focus on. My body was definitely tired of carrying a pack and while it didn’t really slow down our pace, it was pretty uncomfortable.

The views along the trail were amazing though. We hiked mostly along the bluffs and with the clear skies, the ocean was the most fantastic shade of dark blue. We had 10km left to go on the final day, but we didn’t have a lunch packed, so we decided to push forward through 8km to Mystic Beach for our lunch stop. We snacked on the way there and planned to eat our way through all our remaining food for lunch when we reached Mystic Beach (for me this mostly consisted of the last of my jerky and trail mix and a mars bar).

We stopped for a few short breaks, but we made great time, arriving at Mystic Beach around 2pm. Mystic Beach was definitely one of the more beautiful beaches along the trail, mostly because it’s the only sandy beach. It was a bit jarring when we popped out on the beach though because it was like an immediate entry back into civilization.

Mystic Beach is only 2km from the trailhead, so it’s a popular destination for locals and tourists and was reasonably crowded with day-trippers. I was sad to leave the remoteness of the trail. When you’re on the trail, it’s just you and the trail and it’s easy to forget about the outside world. The trail feels like this living, breathing thing – it’s always changing, but you can’t change it. You can only adapt to it and push through. Sometimes it will reward you and sometimes it won’t. The trail really tested us throughout our trek, but I also feel like I learned from it and grew with it. It was my first through-trek, so it’s kind of hard to describe, but it felt so much more special to me, like I could now claim a piece of this trail for myself.

I know I don’t actually hold any claim to the trail, but I really felt like I could appreciate it more. Mystic Beach is beautiful and I understand why people flock to it – it’s a gorgeous place to spend the day and take pictures for your Instagram to make everyone else jealous. But it’s only a piece of the trail, arguably the most beautiful piece, but for me it made me appreciate all those other parts of the trail and the more subtle beauty. The rainy, rocky outcropping and tide-pools where we started our journey, the wet bridge crossing the river and falls at Payzant, when you first break through the forest onto the beach at Sombrio, rejoicing along the logging road, ambling up and down over the hills and through the sparse trees, the mink we saw running across the rocks on Bear Beach.

The trail really was more than the sum of its parts. Seth read my first blog and told me my account really didn’t make him want to do the trail. Yes, it was definitely a challenge, but I definitely don’t regret it. Through hiking is quite different from setting up a base camp and day-hiking, mostly it’s harder, but there’s the reward of really feeling like you’ve gone somewhere and accomplished something, physically and emotionally.

Arriving at Mystic Beach also felt very liberating. There were a ton of teenagers doing the whole dog and pony show in their little bikinis, running around the beach, posing under the waterfall, and playing in the water with their inflatables. So it was kind of freeing to walk onto the beach smelling and looking like actual death and just not giving a shit about any of it. You don’t care what you look like in the woods and when you’re on the trail your only concerns are your immediate needs. You eat when you’re hungry, you sleep when you’re tired – it’s simplistic. In that moment we wanted to lie on the beach and gorge ourselves on jerky and mars bars, so that’s what we did. We dumped our bags and kicked off our boots and didn’t care a bit what anyone else thought of us.

We lounged on the beach for quite a while – our reward at the end of the trail – before backing up our bags again for the final 2 km. We had a quite a laugh on the way out because the trail is, of course, pristine for the last 2 km. It’s all brand new fancy boardwalks, stairs, and bridges over the tiniest trickle of water or mud. So we were a little peeved all our trail fees were likely going into maintaining a 2 km section of trail for day-hikers who pay nothing, but hey, I’m glad it’s there for everyone to enjoy and I’m more often in the position of the day-hikers than the trekker.

I definitely was challenged by the experience, but I also learned from it. I’m a little addicted to backpacking now and I’m sure this will only lead to more and more adventures!