E.C. Manning Provincial Park is my favourite park in BC, so I’ve written about it a lot. I first day hiked to 3 Brothers Mountain in 2016, after which I backpacked the entire Heather Trail from Blackwall Road to Cayuse Flats. In 2022, I camped for two nights at Buckhorn Campsite with my Girl Guides and in 2026, I returned to spend one night at Kicking Horse Campground with my friends.
These campsites used to be first-come, first-served, but the trail has gotten so popular in the last few years that BC Parks introduced a reservation system. I think this was a good decision, given how crowded it can get, but I do wish they didn’t release all the sites so far in advance. In this case, we did not pre-reserve our campsites, but when another trip got interrupted by wildfires, we were able to snag two sites at Kicking Horse Campground at the last minute.
3 Brothers Mountain is located on the first half of the Heather Trail. Most people only hike as far as 3 Brothers, but if you continue on, you’ll arrive at both Kicking Horse and Nicomen Lake. The trail officially ends at Nicomen Lake, where you can turn around and hike back, or if you have two cars, continue on to Grainger Creek and Cayuse Flats (which is what I did on my 2018 trip). The most popular option for overnight trips is to camp at Buckhorn and day hike to 3 Brothers. There’s an impressive display of wildflowers in late July and early August along this section of the trail.
The trailhead starts at the top of Blackwall Road, so hikers can skip most of the elevation gain in the car. If you just want to see the wildflowers, you can do a short loop hike on the Paintbrush Trail, or you can hike downhill to Buckhorn Camp, followed by a short uphill through the forest to reach some truly breaktaking sub-alpine meadows. Like I said, I first hiked this trail in 2016, but I keep returning every couple of years because it’s just so damn scenic!
On this visit, I hiked with my girlfriends, Adriana and Amy. We arrived at the trailhead in time to eat lunch and then started the 13km hike to Kicking Horse Camp. The first 5km are mostly in the trees, but even in the forest, there are tons of wildflowers to steal your attention. It didn’t take us long to get to Buckhorn Camp, which is a huge site with a gorgeous cooking shelter and lots of tent pads. It is a bit of a slog through the forest after Buckhorn, but it’s quickly forgotten when you reach the meadows.
The rest of the trail boasts fantastic views of the backcountry. You hike through meadow after meadow until you reach the junction for 3 Brothers Peak. The peak is the most challenging part of the hike, with a steep uphill to the ridge, after which you get to meander along the ridgeline to the summit. We opted to skip the summit on the way in, instead continuing all the way to camp, determined to return and hike to the top the following day.
It was my 4th time doing 3 Brothers, but it was only my second time continuing past the junction. In my opinion, some of the most scenic meadows on the trail are between the junction and Kicking Horse. The trail is fairly easy through this section and it was mostly downhill to camp, but it still took us a while to hike because we stopped so frequently for photos. We took a long break in one of the meadows before strolling into camp shortly after 6pm.
Compared to the rest of the hike, the campsite isn’t particularly scenic. The last time I camped there, there were no reservations and I ended up with a pretty terrible overflow campsite, so having the reservation helped a lot. We found a nice tent pad near one of the meadows to settle in for the evening. There is a small view of some of the surrounding mountains, but overall, most of the sites are in the trees. Buckhorn Campsite was definitely recently upgraded, but in my opinion, Kicking Horse could use a facelift. The outhouse was getting very full, but at least there was a bear cache. Unfortunately the water source isn’t great. It’s just a small creek and it gets fairly low in the summer. We were still able to get water, but the creek at Buckhorn is much nicer.
We had a fun evening hanging out and making dinner, but it was very buggy. I find the mosquitoes usually don’t like me that much and if I set up my thermacell they’ll usually leave me alone. But Amy was another case entirely. I’ve never seen someone attract so many mosquitoes as Amy. It felt like the thermacell wasn’t working at all, but whenever Amy would leave, the mosquitoes would too, so I think the lure of her blood was just so compelling that it overpowered the thermacell.
Amy and Adriana shared a tent, leaving me to sleep by myself. Normally I wouldn’t mind, but it did get very cold overnight and I could have used a second body in the tent, but Amy and Adriana were both cold too. When I camped at Kicking Horse overnight in 2018, our water froze, so I don’t think it matters what time of year you visit, it’s always cold there. We did experience a very weird phenomenon while camping here though. Overnight it seemed that all of the sound was reversed around the tents. When someone would get up, we would hear them on the opposite side of the tent to where they actually were. It was kind of freaky and we recently learned that Manning Park is supposedly haunted, so maybe this was related (ooo, spooky!).
We returned to summit 3 Brothers the following day. It was hot, so it was a bit of a slog getting back to the junction as there is limited shade along the trail and several uphill sections on the way back. But saving the summit for Sunday was a good idea. I think a lot of day hikers stay in the frontcountry sites on Friday and Saturday night and it felt much less busy on the trail on Sunday. We dumped a bunch of our gear at the junction to lighten our packs for the climb, but we made sure to take all of our food and smellies with us so as not to attract bears. A lot of people just leave their entire backpack at the junction. Please don’t do this as we don’t want to attract bears to the area.
It’s only ~1km to the summit, but it is steep and exposed, so it was a bit tiring. There’s a little bit of light scrambling through a few sections of rock, but it’s pretty easy and I would say it barely counts as scrambling. We had lunch at the summit, but the enjoyment was interrupted by the mosquitoes. Eventually Amy gave up and started hiking back down the ridge and me and Adriana were able to get a small respite.
The hike out was as enjoyable as the hike in. The sad aspect of the hike was that with the uninterrupted view of the mountains, we could see several wildfires burning nearby. I expected to see water bombers attending to the fires, but unfortunately we didn’t see any. When I got home, I looked up the fires to see where they were and determined that all of the fires that were visible were actually burning across the border in Washington State. At the time, Trump was going on about how Canada needs to control its wildfire smoke, so it was particularly galling to see so many fires being left to burn near the border. This was in mid-July and several of these fires did end up crossing the border where they burned through kilometres of Manning’s forest. It’s been heartbreaking for me to watch, especially since I love this park so much. I feel like I’ve been grieving trees all summer.
We returned to the car in the mid-afternoon and treated ourselves to burgers in Hope before returning home. Unfortunately, we hit the Sunday evening rush back to the city and sat for far too long on Highway 1, but it was always be worth it to explore the little piece of paradise that is the Heather Trail!
Considering how long I’ve lived in Vancouver, it’s a bit shocking that this was my first time hiking to Pump Peak though it’s not been for lack of effort. Back in 2019, I tried to hike via Pump Peak on my way to Elsay Lake, but I ended up on the wrong trail and because of the time crunch to get to Elsay Lake, I ended up skipping Pump Peak entirely. I’ve also made several attempts to visit Pump Peak in the winter, but I always find myself completely exhausted by the time I reach Brockton Point and I’ve abandoned Pump Peak on more than one occasion.
I had to cancel a trip at the last minute in mid-June of this year, but I still wanted to get outside and do something, so I decided to make another attempt at Pump Peak, this time as an overnight objective. I was solo hiking with my dog, Sadie, so I thought Pump Peak would be a good option since it’s popular and so close to the city. I ended up having the best time, I can’t believe I waited so long to hike there!
I did this hike over the summer solstice and I had lots of daylight, so I didn’t end up leaving my house in Coquitlam until 5pm. Me and Sadie were ready to start hiking at 6pm and by 7:30pm, we were at the top. I knew it was a short hike, but I was still astounded at how quickly I went from my house to the summit. It’s a very achievable objective if you make a last minute decision to go backpacking.
For those who aren’t familiar. Pump Peak is located in Mount Seymour Provincial Park in North Vancouver. It’s very popular in all seasons because of its proximity to the city. In the summer, you can park in the main ski resort lot, unless you’re going overnight, in which case you need to park in Lot 2. In the winter, you need to park in the lot along the road (also known as Lot 1) since the ski resort is in operation. You also need to get a day use permit from BC Parks in the winter. These release 2 days in advance of your trip, at 7am. They are free, but they sell out fast. No permits are required in the summer.
The hike involves climbing the trail along the edge of the ski resort, or in the summer, you do have the option to walk right up the ski trails. I opted to take the side trail since there is more shade. The trail goes to Brockton Point, which also has great views of the city. In the summer, it took me an hour to get to Brockton Point, but in the winter, it takes me closer to 90 minutes. It’s approximately 2.5km and 250m of elevation gain, closer to 3km in the winter since the parking lot is farther away.
After Brockton Point, the trail continues for another 1.5km and 150m in elevation gain to the top of Pump Peak, also known as 1st Peak. In the summer, this took me another 30 minutes, but I’d budget for another hour in the winter. It is the steepest part of the trail as it winds along the back of the peak. There were a lot of mosquitoes in the summer, so be prepared with fly spray and a thermacell. Please be aware that in the winter, the portion of the trail between Brockton and Pump Peak is in challenging avalanche terrain. Don’t be lulled into a false sense of security by the crowds, you should have AST1 training and travel with the appropriate equipment in this area in the winter.
While Pump Peak is very popular for camping, please be aware that there is no campground and it is considered wild camping. This means there is no outhouse or bear cache. You should be prepared to dig a cathole if you need to poop, and you should bring a bear bin or bear bag for your food. There are not many trees, so it’s not really possible to do a bear hang. My sense was that most people camping in the area were not practicing proper bear safety and it’s important that we do, otherwise the area will become dangerous to bears and humans.
Finding somewhere to pitch your tent can be a little bit challenging because there are no established tent pads. Most likely you will be pitching your tent on bare rock. However, it wasn’t as bad as I thought it might be because there is so much space available to chose from. There were quite a few people camping, but everyone was very spread out and I didn’t have too much trouble finding somewhere to set up my tent that wasn’t crowded. I opted to set up near some of the trees so that I would have privacy when I needed to pee.
There is nowhere to set up on the actual summit and it will be crowded with people, so do not attempt to pitch your tent up there. Be aware that there is also no water source. There were a few small tarns around, which was helpful to Sadie, but I would not recommend trying to drink or even filter that water. Just hike up all the water you need for your trip, including for your dog.
It’s a beautiful place to camp though. There are incredible views of both the city and the backcountry. From the peak, you can enjoy a 360 degree view in all directions. We arrived well before sunset, so after setting up the tent, me and Sadie went up to the peak before looking for solitude underneath, in which to enjoy the sunset. Because it was the solstice, it was a particularly long sunset and the wind kept the mosquitoes away.
What was really annoying was that the summit is also a popular destination for sunrise enthusiasts. This would be fine, but on this particular day, a group a very noisy boys decided to hike up to the summit at 4:30am and were not shy about yelling and laughing very loudly. Sound travels really well in the alpine, so everyone on the mountain was privy to their conversation and it was very annoying. I had a similar experience when I did Golden Ears last year and it’s always men who act this way, so please try and have a little consideration that at 4:30am, most of the people in the nearby tents might be trying to sleep and they can definitely hear you.
My thermacell was definitely essential to enjoy breakfast the following morning as the mosquitoes returned in full force with the sun. A lot of people packed up their tents quickly to escape them, but me and Sadie were able to hang out for a little bit before heading back down the mountain.
What I really loved about this trip was the ability to start hiking late (I wouldn’t recommend going too early because the mosquitoes will drive you crazy) and the ability to arrive home early the following day. I felt like this trip enabled me to have a fun night outside while still leaving most of my weekend available to relax or pursue other interests. I’m used to driving so far away for my backpacking trips and having them take up the entire weekend, it was nice to still have lots of time to myself with this trip.
In conclusion, this is a really safe and convenient trip for those living in the lower mainland. I would definitely recommend it, but please respect the backcountry. Practice proper bear safety and leave no trace when wild camping. I did notice that people were also camping on Brockton Point and I’m not sure if that’s allowed. The BC Parks website says you can camp anywhere north of Brockton Point, but I’m not sure if that includes the Point itself.
Mount Assiniboine is located in Mount Assiniboine Provincial Park in BC and is one of the more iconic peaks in the Canadian Rockies. It’s been a few years since I hiked this trail, but there are a lot of options for how to do this trip, and I wanted to share my knowledge in the form of a backpacking guide to the trail. At the time that I hiked the trail in 2021, I wrote a 4-part trail report, which you can read starting here. Reservations for the 2026 season release at 7am PST, 3 months in advance of your planned start date.
The Park
Mount Assiniboine is located in the middle of Mount Assiniboine Provincial Park, but is surrounded by Banff and Kootenay National Parks, as well as Spray Lakes Provincial Park in Alberta. If you plan to hike there, you’ll have to go through one of the National Parks, with Banff being the more popular access point. There are two routes through Banff and one route through Kootenay, but they are all at least 25km long, so it is a big hike just to get into the park.
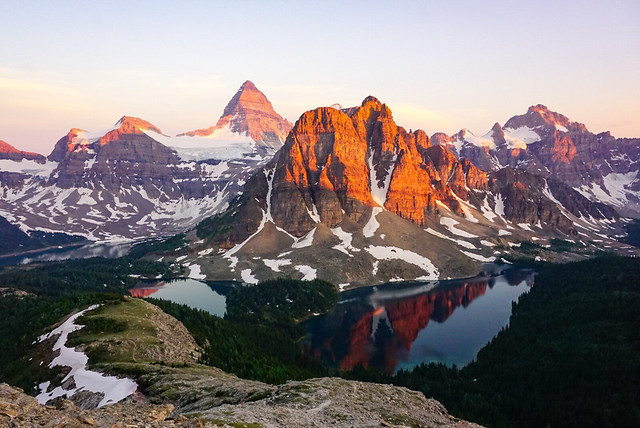
If you’re looking for a more direct approach to the park, it is possible to fly in from the Mount Shark trailhead via helicopter. This is a popular option if you want to maximize your time in the core area of the park. The core area of the park encompasses Magog Lake, Sunburst Lake, and Cerulean Lake, as well as the popular day hiking trail up to the Nub (or the Nublet/Niblet if you prefer a shorter option). The Nub is well known for its phenomenal sunset views of Mount Assiniboine, when the adjacent Sunburst Peak lights up orange as the sun goes down (see photo below).
There are limited options for where to stay in the park, which will likely be the restricting factor of your trip. The cheapest option is to stay at the Magog Lake Campground, if you can score permits. Otherwise you’ll have to pay more to stay in either the Naiset Huts or Assiniboine Lodge, both of which are privately owned and not cheap. The lodge is catered, but I’m not sure about the huts. There is another campground at Og Lake, but it’s approximately 5km away from the core area of the park, so it’s not ideal.
If you have limited time, I recommend flying into the park, but if you can spare a few extra days, you can do either a there-and-back trip or a thru hike. I opted to do a thru hike along the two access points in Banff National Park and it’s a very scenic hike. It’s best if you have 2 days each way (with a night spent halfway between), and then another 2 days to explore the core area of the park (6 days in total). Another option could be to fly in and then backpack out through Wonder or Assiniboine Pass, to experience the best of both options.
Sunburst Mountain and Mount Assiniboine at sunset from the Nublet
Time of Year
The best time of year to hike Assiniboine is in the Summer or early Fall. There may still be some snow on the trails if you go in late-June, but the later you go in the summer, the more likely that your trip might be impacted by wildfires. While most people prefer to backpack in the summer, late September is also popular due to the colourful larch trees through Wonder Pass. However, you should be prepared for snow and cold conditions at this time of year. I hiked the trail in late June and there was no snow, but it was during the early season heat wave of 2021, which melted remaining snow very quickly.
Getting There
There are 3 primary ways to access the park: the Mount Shark Trailhead, Sunshine Village, or the Simpson River Trailhead. Unfortunately, the park is not accessible by public transit. Similar to other popular Canadian parks, the easiest way to access is by driving. If you’re flying in, Calgary is the closest major airport.
Mount Shark: If you plan to fly into the park or hike in via Wonder or Assiniboine Pass, you will need to take Spray Lakes Road out of Canmore and drive to the trailhead at Mount Shark. There are two parking lots here, one for hikers accessing the trailhead, and another for those taking the helicopter. A National Parks Pass is not required to park here since the trailhead is technically in Spray Valley Provincial Park. However, you will need to pay for a Kananaskis Conservation Pass from Alberta Parks in order to park your car.
Sunshine Village: In my opinion, the Sunshine Village access is the easiest way to hike into the park. You can hike along the Citadel Pass Trail at the top of the Sunshine Village gondola. You park at the base of the ski resort, at the end of Sunshine Road off of Highway 1, and have the option of paying to the gondola to the top of the mountain. I highly recommend this as it will save you 5km of hiking and over 500m of elevation gain. A National Park Pass is required to park at the base as it is located in Banff National Park.
Simpson River: This is the least popular access point to the park as it’s the least maintained trail and the longest route to Magog Lake, as well as one of the lesser scenic routes. However, it is a great option if you’d like to avoid crowds or are unable to get permits to one of the halfway camps on the other routes. The trailhead is located off Highway 93 in Kootenay National Park, so a National Park Pass is required to park.
Using my thermarest to float on Sunburst Lake
Permits
Like most popular hikes in the Rockies, securing your camping permits will likely be the hardest part of your trip. This is a popular destination and while more people prefer to fly in rather than hike, it is challenging to get camping permits in the core area of the park. I’m not sure how difficult it is to book the lodge or the huts, but if you want to get camping permits, then it’s important to mark your calendar with the appropriate permit release dates. Unfortunately, because there are many different access points to the park, depending on your itinerary, you may have to obtain permits from both BC Parks and Parks Canada.
The permit release date for Mount Assiniboine Provincial Park is 7am PST, 3 months in advance of the start of your trip. They are released through BC Parks (camping.bcparks.ca) in a rolling window. These permits are considered “backcountry reservations” and they will likely sell out as soon as they release. So if you want a permit for July 1, you will need to be online at 7am on April 1 to make your reservation. Reservations are available for Magog Lake, Og Lake, and Porcupine Campsite. Bookings are $25 per person, per night (plus a booking fee).
If you are planning to hike in or out via Wonder or Assiniboine Pass, you may also want to make a reservation for one of the Parks Canada Sites (https://reservation.pc.gc.ca/), either Marvel Lake or McBride Camp. These campsites are all located in Banff National Park and the release date for 2026 was January 26, 2026 at 8am MST. Bookings are $15 per person, per night (plus a booking fee). Once booking opens, select “backcountry” in the tabs along the top of the booking page, and then select “backcountry zone”, followed by “Banff, Kootenay, and Yoho Backcountry”. The appropriate access point is “Bryant Creek Trailhead”. If you can’t get one of these sites, there are two more alternative sites, Big Springs or Allenby Junction Camp, though they are not located at the midpoint of the trail.
There are no reservations required if you are hiking via the Simpson River Trail in Kootenay National Park, but there are 3 potential campgrounds: Surprise Creek, Rock Lake, or Mitchell Meadows.
Here’s a few tips for getting your camping permits:
For permits from Parks Canada, get on the booking website 15 minutes early using as many devices as possible (computers, phones, ipads, etc). At release time, everyone on the website is entered into a random generator that assigns you a position in the queue. All of your devices will be assigned a place in line, then proceed to book your permits on whatever device has the shortest queue.
For permits from BC Parks, there is no queue, so there’s no benefit to using multiple devices. To save time, create and login to your account before 7am and check the system time at the top right corner of the page so that you click reserve right at 7am.
If you don’t see availability for your preferred date, keep refreshing for at least 15 minutes. With so many people trying to book campsites, dates are always disappearing and then becoming available again. Be flexible with dates.
If you can’t get the dates you want, you can track cancellations on Schnerp, which will notify you when a site opens up.
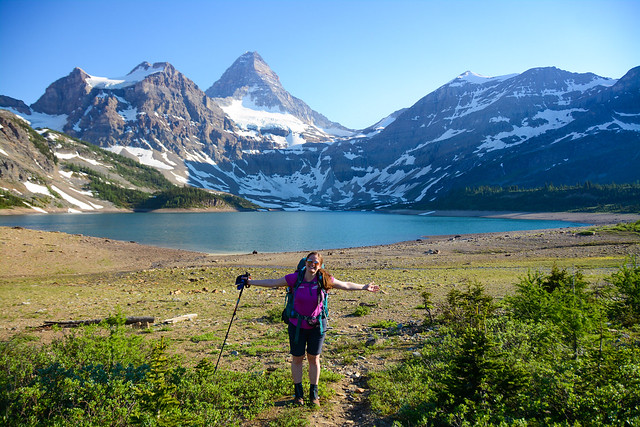
Mount Assiniboine and Magog Lake on the way down from Wonder Pass
Campsites
There are 3 backcountry campsites in Mount Assiniboine Provincial Park and 4 backcountry campsites along the Wonder/Assiniboine route in Banff National Park. There are 3 backcountry campsites in Kootenay National Park, but they do not require reservations. There is only 1 campsite in the core area of the park, Magog Lake, so this should be your priority booking. I’ll discuss itineraries below, but here’s an overview of the available campsites.
Magog Lake – This is the most centrally located campsite for your visit to the core area of Assiniboine Park. This should be your first priority for bookings and I recommend at least two nights at the campsite. It has 40 tent sites and a large open-air shelter, which you must use for all cooking. The campsite also has several outhouses and grey-water disposal, a water tap, and bear lockers next to the cooking shelter. Book this campsite through BC Parks, $25 per person, per night.
Og Lake – This campground is technically located in the core area of the park as well, but it is 5kms from Magog Lake and the Nub hike, so it’s not as ideal as the Magog Lake Campsite. It’s an alternative option if you can’t get into Magog Lake or a good stop on the way to Magog Lake via the Citadel Pass Trail from Sunshine Village. It has 10 tent sites, an outhouse, bear lockers, and grey-water disposal. There are picnic tables for cooking and water is available from the lake. Book this campsite through BC Parks, $25 per person, per night.
Porcupine – This campground is located near the midpoint of the Citadel Pass route between Magog Lake and Sunshine Village. This is the best option for camping if you are backpacking in or out of the park along this trail. It has 10 tent sites, an outhouse, bear lockers, and a cooking area. Book this campsite through BC Parks, $25 per person, per night.
Marvel Lake – This is one of 2 campgrounds located at the midpoint of the route into Mount Assiniboine from the Mount Shark trailhead, also sometimes called the Bryant Creek trailhead. This is the best campsite if you’re hiking in or out via Marvel Lake or Wonder Pass. Book this campsite through Parks Canada, $15 per person, per night.
McBride – This is one of 2 campgrounds located at the midpoint of the route into Mount Assiniboine from the Mount Shark trailhead, also sometimes called the Bryant Creek trailhead. This is the best campsite if you’re hiking in or out via Assiniboine Pass. Book this campsite through Parks Canada, $15 per person, per night.
Big Springs – If you can’t get a reservation at Marvel Lake or McBride, there are two alternative campgrounds. Big Springs is located at km 7 of the Bryant Creek Trail from the Mount Shark trailhead, also sometimes called the Bryant Creek trailhead. This is a good alternative camping option regardless of which route you’re taking (Wonder Pass or Assiniboine Pass), since it’s located before the trail junction. Book this campsite through Parks Canada, $15 per person, per night.
Allenby Junction – This campsite is located at km 17 of the Bryant Creek Trail from the Mount Shark trailhead, also sometimes called the Bryant Creek trailhead. It would be my last choice if I couldn’t get reservations at Marvel Lake or McBride. The campsite is located along the Assiniboine Pass route, so it can’t be used if you plan to hike via Wonder Pass. Book this campsite through Parks Canada, $15 per person, per night.
Surprise Creek, Rock Lake, and Mitchell Meadows – All 3 of these campsites are located along the Simpson River Trail in Kootenay National Park. I haven’t visited any of these campsites, but I’ve heard that Mitchell Meadows is the most popular. If you can’t get bookings at any of the other campgrounds, consider taking this route instead as there are no reservations required. However, the trail is not as well maintained as other options and I highly recommend doing further research to ensure it is an appropriate route for your party.
The view along the Citadel Pass Trail from Sunshine Village
Itineraries
With so many access points, there are many different ways to plan a trip to Mount Assiniboine. So I’ll try and keep this as simple as possible with a few different hiking strategies.
Helicopter Access: Helicopter into the core area of the park and spend as many days as desired camping at Magog Lake and exploring the core area of the park. Plan for a day hike up the Nub, as well as some time exploring around to the many lakes. If you have enough time, day hiking up to Wonder Pass is also incredibly scenic! (recommend 2-3 nights)
Half Thru Hike: If you want to experience backpacking, but don’t have enough time to commit to a full thru hike, plan to take the helicopter one way and backpack the other. This way you can experience the beauty of the backcountry, along with the core area of Assiniboine Park. My recommendation is to fly into the park from Mount Shark and then hike back via Wonder Pass. This works well because it’s a net elevation loss on the way out, your pack will be lighter after eating your food, and your car will already be parked at the Mount Shark Trailhead from taking the helicopter. (recommend 3-4 nights)
Full Thru Hike: If you have the time and access to two vehicles, it’s well worth it to commit to doing an entire thru-hike, enjoying a few days in the core area of the park in the middle of your trip. As discussed, there are 3 access points into the park, but my recommendation is to hike in via Sunshine Village along the Citadel Pass Trail and out via Mount Shark along the Wonder Pass/Bryant Creek Trail. Stay at Porcupine Camp on the way in and Marvel Lake Camp on the way out. This is the most ideal route because you can bypass a lot of elevation gain on the way up by taking the Sunshine Gondola, and it’s a net downhill hike through Wonder Pass. Hiking in through the Simpson River Trailhead is also an option, but it’s a lot of elevation gain and not as scenic as Citadel Pass. (recommend 5 nights)
Loop Trail: Another great option if you can’t afford the helicopter or don’t have access to two vehicles is to do a loop hike from the Mount Shark Trailhead. There are two ways to access Assiniboine along this route: Wonder Pass or Assiniboine Pass. Both trails share the Bryant Creek Trail for ~10kms and then branch into two different trails. The Wonder Pass trail goes along the edge of Marvel Lake and up over Wonder Pass, whereas the Assiniboine Pass Trail follows an easier route up through the valley. I haven’t done the Assiniboine Pass route, but would recommend hiking in along that trail since it has less elevation gain, and then hiking out through Wonder Pass. Just make sure to check for any trail closures as sometimes part of the Assiniboine Trail is closed for breeding and conservation. (recommend 5 nights)
Fast Packing: I have no experience with fast packing, but for those who travel ultralight or are experienced trail-runners, some people do visit the park by completing the entire backpacking access trail in a single day rather than over 2 days. In some instances, hikers have paid to have their backpack carried in by helicopter, enabling them to move faster and complete the hike with only a day pack. I don’t recommend this option unless you are experienced, but it is something you can consider. (recommend 3-4 nights)
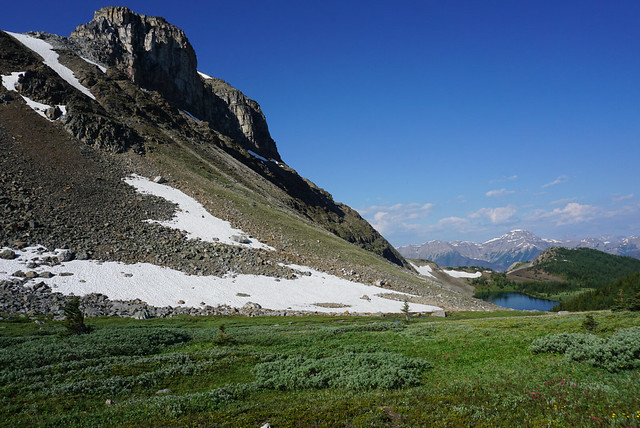
Wonder Pass in early summer (2021)
Day Hikes
There are several great options for day hiking in Mount Assiniboine Provincial Park. At the very least, I think everyone should hike up to the Nub or the Nublet and explore around the lakes, but there are several other options if you have the time. Here’s the trails I would recommend:
The Nub – If you want to get a birds-eye view of the park, this is one of the best day hikes. There is quite a bit of elevation gain from Magog Lake, but it’s well worth it for the incredible views. From the campsite, it’s a ~9km roundtrip trail with 600m of elevation gain.
The Niblet/Nublet – I highly recommend this trail for sunset. If you’re hiking up to the Nub, you’ll have to hike over both the Niblet and the Nublet, but if the Nub is too ambitious for you, these are great alternatives. The view from all of these locations is phenomenal at sunset as Sunburst Mountain turns orange when the sun goes down, but it is a long way down in the dark from the Nub, which is why the Nublet or the Niblet are great alternatives. From the campsite, it’s a ~7km roundtrip trail with 375m of elevation gain.
Wonder Pass – If you fly into the park or hike via one of the other access points, I highly recommend taking the time to hike up to Wonder Pass as a day trip. It’s much easier coming from Magog Lake than from Mount Shark. It’s a ~9km roundtrip trail with only 275m of elevation gain, so technically one of the easier hikes on this list. At the right time in the summer, the trail will be filled with wildflowers, and if you visit in the Fall, the larches will be turning yellow on the way up to the pass. From the top of the Pass, there’s an add-on hike up to Wonder Peak, but it’s fairly steep and not recommended for beginners. Please do additional research if you decide to attempt it.
The Lakes – There are 5 lakes in the core area of the park, not including Og Lake. If you have time to visit them all, I’d definitely recommend it, but at the very least, you must visit Magog Lake, Sunburst Lake and Cerulean Lake. Gog Lake and Elizabeth Lake are nice add-ons if you have the time. I made it my goal to swim in every single lake and I was successful! In my opinion, Sunburst Lake is the most scenic.
Og Lake – If I flew into the park, I would prioritize the other day hikes on this list over Og Lake, but if you have the time and are not hiking past it already, it is a fairly easy hike to go out and back to Og Lake from Magog Camp. It’s a 12km roundtrip trail, making it one of the longer hikes on this list, but there’s almost no elevation gain and it’s all through open meadows, so it’s not challenging. In the middle of the summer, there should be lots of wildflowers along this route, but keep in mind that on a hot day, the trail is completely exposed. There’s also the option to branch off and visit O’Brien Meadows if preferred.
Mitchell Meadows – I haven’t done this hike, but it’s an ~11km roundtrip trail to Mitchell Meadows, with minimal elevation gain, so it could be a nice hike if you have the time.
Mountaineering Routes – There are several mountaineering objectives in the area, which I will not discuss because I don’t have mountaineering experience and they shouldn’t be attempted by those without proper equipment. But other options for further research include Sunburst Peak, Mount Cautley, Naiset Peak, Cave Mountain, or Og Mountain.
Hiking around Marvel Lake on the way through Wonder Pass