Desolation Sound Kayak Trip Part II

Despite the name change in the blog title, this post is a continuation of my last post about Copeland Islands Marine Park, as I visited both parks in the same trip. Read Part 1 here.

I will admit that the wind gave me a lot of anxiety on this trip. I’m definitely a fair weather paddler, and while I’ve been out in less-than-favourable conditions, I’ve never paddled in outright dangerous conditions. It was surprisingly windy overnight, which made me a bit nervous for our second day of paddling, but the wind forecast wasn’t that high and it did calm down throughout the day. I’m used to the wind being calm in the morning and coming up in the afternoon, so that was an interesting change to have it reversed.

20230520_103252

We still got up reasonably early (7am) because we wanted to launch the boats while the tide was still high. Once the tide starts to go down, you lose the channel exit from our campsite and it adds a bit of extra paddling, plus you have to load the boats and gear further down the beach.

Fortunately, our timing was right on and we paddled out through the channel around 9am with just enough clearance to get over the newly forming beach. We crossed back over to the Malaspina Peninsula and said good-bye to the Copeland Islands as we made our way to Desolation Sound. There were some cool cliff features along the way, just past Bliss Landing, and we quickly arrived at Sarah Point, which marks the beginning of both Desolation Sound Marine Park and the Sunshine Coast Trail. It was a bit of a bittersweet moment for me as I have very fond memories of hiking the SCT last year and I loved seeing the Sarah Point hut again.

20230520_093410
20230520_095516

We had a quick break further along the beach at Sarah Point before continuing around the headland to Feather Cove, which is also on the SCT. It got a little windier as we rounded Sarah Point, but nothing to be concerned about. We spotted our second sea lion and then took in our first glimpse of the jaw-dropping beauty of Desolation Sound. I wasn’t able to successfully identify the mountains, but there are some gorgeous snow capped peaks in the distance as you first enter the Sound.

20230520_135657

We took another short break at Feather Cove before crossing Okeover Inlet to Zephine Head. The Inlet crossing was fine and the tide was rapidly dropping, so we were able to pull out at a beach just around the Head. At high tide, you might have to continue into Galley Bay for a pull-out though. We had our lunch there and since the conditions were favourable, we decided to do a direct crossing to Mink Island.

It’s about a 3km paddle from Zephine Head to Mink Island in open water. We tried to stay close to one another on the crossing, but the wind definitely picks up the further out you get, so I finally dropped my rudder and that helped me maintain my course a lot easier. Seth is pretty opposed to his rudder and never uses it, so he had some trouble staying on track. We managed to correct this the following day (which was windier), by both dropping our rudders and having Seth paddle directly behind me (since I’m the slower paddler) instead of trying to paddle side by side. Whenever we go side by side we tend to get separated, so this system worked better for us.

20230520_100200
20230520_130756

That said, it was still a pretty good crossing. The wind was low and we didn’t have any trouble making it over to Mink Island. Once we got to Mink Island, we had the wind working with us, so that was nice. Unfortunately, there weren’t a lot of good looking places to stop along the island, so we powered around the corner of the little arm on Mink Island (sorry I don’t know the name) and had a nice rest in the sheltered bay.

From there it’s not much further to the Curme Islands, which are the most popular attraction in the park, at least as far as I can tell. At the end of Mink Island, there are 3 small islands: South Curme, East Curme, and West Curme. The water was super calm at the end of Mink and around the Curme Islands, so we did a little paddle around each island. It was Seth’s turn to pick our site and he opted for East Curme Island, which I think was an excellent choice!

20230520_101046
20230520_134603

West Curme Island was really busy when we arrived, so I think that one might be the most popular. There was just one group on both East and South Curme, though a lot of people showed up to South Curme by motor boat later in the evening. But no one else joined us on East Curme, so it was just us and the other group (which is surprising considering it is the biggest of the 3 islands). We had a lovely site looking out to South Curme and Bold Head, and climbing up to the top of the island, another nice view looking down at West Curme.

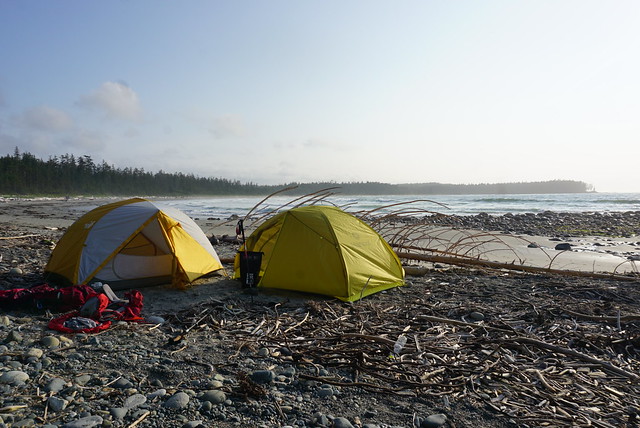
The tide was very low when we arrived again, but in contrast to North Copeland Island, it was a more challenging landing. It wasn’t hard at low tide, but it’s a bit of a climb up to the island and at high tide, there’s no beach at all. There was just enough room for 4 kayaks between us and the other group, so I’m not sure where everyone stores their boats when the campsite is full.

20230521_064232

Instead of dragging the boats up the rocks, we opted to tie them on and let the tide slowly float them up to the landing. It worked really well and when the water reached high tide around sunset, we popped them up on the bank.

After unloading the boats, we were really warm, so we opted to go for a swim almost immediately. Like Copeland, the water was incredibly warm, though there was a lot of seaweed floating around with the low tide. Even Seth went for a swim and we were in the water for the better part of a half hour. We had landed on the island around 2:30pm, and after our swim, I spent the rest of the day doing absolutely nothing. Seth had a nap and I just enjoyed drinking my ice tea and watching the seals play while the tide came up.

20230520_154453
20230520_205122

Seth wasn’t as excited about a sunset paddle on this day, but I convinced him to go out for a half hour since you can’t really see the sunset from East Curme. The water was calm again and it was approaching high tide, so we paddled in and around all the islands before calling it a night. We slept with the fly off again and set our alarms for 6am to get an earlier start on the following day.

This was on account of those winds I mentioned earlier that were making me anxious. The wind was supposed to come up a lot on our 3rd day and I was nervous about the big open water crossing. We discussed it in the evening and decided we would take the long route back to our next campsite. There’s two benefits to this. The first is that you get to explore new terrain by circling Desolation Sound from the other side instead of doing the same crossing back along Mink Island. The second is that you avoid the big 3km open crossing, instead doing a 0.5km crossing from East Curme to Otter Island, and then a second 1km crossing across Tenedos Bay. The other benefit is that these two crossings are done at the start of your paddle, which would be early morning for us, resulting in less wind.

Here’s a screenshot of our 2 paddling routes for some context. I’ll cover the rest of the trip in the Part III!

Desolation Sound screen

Copeland Islands Kayak Trip Part I

I finally crossed off a major bucket list item! Seth and I have been dying to visit Desolation Sound Marine Park since we got our kayaks and have had to cancel the trip 3 times in the last 2 years. I feel like this has been a common theme with a lot of my planned trips since the pandemic, but we finally made it happen over the May Long weekend this year!

20230519_140012

For those who aren’t familiar, Desolation Sound is a marine park north of Powell River on the Sunshine Coast. It’s located at the tip of the Malaspina Peninsula, which is where the northern trailhead is for the Sunshine Coast Trail. So it was a familiar location for me after making 2 trips to Powell River last summer to complete the SCT.

Originally we were focused on visiting Desolation Sound, but as I did some more research, I discovered it’s really easy to tag a second marine park onto the trip and we added Copeland Islands Marine Park to our itinerary as well. Here’s a map of the area:

Desolation Sound

Doing both parks in one visit requires a bit more coordination, but it ended up being easier than I anticipated. Getting to Powell River is always a bit of a pain, but we caught the ferry out of Horseshoe Bay on Thursday evening before the long weekend, following by immediately driving up to Earls Cove to catch the second ferry to Saltery Bay. There’s a provincial campground at Saltery Bay and we stopped to sleep there for the night. We didn’t book in advance since it was still Thursday and we were able to just drive in, but I always recommend getting reservations where possible on the weekends.

20230519_121707

It’s a nice little campground at Mermaid Cove, but we didn’t stay for long and headed straight for Powell River instead. After a quick restock at Canadian Tire for some items we forgot, we drove north to Lund (~30 min drive). Lund is a tiny little community that is easily accessible in any type of vehicle, though once you go north from Lund, you should really have high clearance 4WD. We unloaded our kayaks in Lund and then I called Powell River Taxi for a transfer from Okeover Arm back to Lund. I was expecting to have to wait a while for a car to come up to Lund, but there happened to be a driver nearby, so I rushed the car over to Okeover Arm to park it for our return.

Okeover Arm is on the other side of the Malaspina Peninsula and less than a 10 minute drive from Lund. It’s also a paved road and easily accessible. There’s a public wharf with parking registration if you’re using the wharf (either with a power boat or self-propelled). If you drive a little further past the public wharf, you’ll arrive at Powell River Kayaks and you can rent kayaks from there.

20230519_130817

I didn’t have any trouble finding the parking lot at Okeover, but figuring out how to pay for parking was super confusing. Start by driving down to the dock and at the end of the wharf there is a little shed with parking registration, you take a ticket, leave your money in the envelope, and put it in the drop box. It’s not really that complicated, but I had to tear my car apart looking for a pen to fill out the parking slip, so make sure you bring a pen with you! Parking is only $5 a day, so it’s a very good deal! As for camping permits, they’re also $5 a night, per person, which you can get online, but they don’t start charging until June 1 (in 2023 at least).

But lets get to the fun part, kayaking!

20230519_181723

I returned to Lund around noon and Seth had the kayaks mostly packed. It’s a bit confusing where to launch from because kayaks aren’t allowed on the boat ramp, but there’s a small beach behind the grocery store and we launched from there. Tide was very low, so it was a bit tricky, but there was very little wind, which was lovely!

What I liked about this trip was that, once you launched, you were pretty much immediately in the wilderness. We saw a black oystercatcher within 5 minutes of paddling (special to us because Seth did his M.Sc thesis on them) and more exciting, we saw our first sea lion within 30 minutes of paddling!! We’ve never seen a sea lion from our kayaks before, so it was exciting and a little intimidating. They’re a lot bigger than seals, but fortunately this guy kept his distance. We can’t be sure, but Seth thinks it was a Steller Sea Lion. We ended up seeing 3 in total over the course of the weekend, though we heard them from some of our campsites as well.

20230519_182118

In general, my understanding is that the Copeland Islands are more susceptible to adverse weather conditions than the route that goes through Okeover Inlet because it’s not sheltered and can get a lot windier. Our experience with wind was that it’s definitely calmer in Okeover Inlet, but that Okeover can get some pretty strong currents depending which way the tide is flowing up the inlet. Timing is really important, so give special consideration to the tides and wind when selecting your route. If windy, I’d stick with Okeover, but leave when the tide is going out.

Fortunately there was very little wind along the Copeland Islands when we visited, so we had a really nice paddle through the marine park. We followed the coast until we hit the islands and then immediately crossed over to paddle along the islands. Our experience with the marine parks was that it’s really important to pay attention to the tides. At high tide, there’s not a lot of beaches to land on and some of the campsites can even be tricky to get to; but at low tide, there are a lot more beaches and potential places to explore. The difference between low and high tide on our trip was 4.5m! So the difference can be quite extreme.

20230519_161319

Because the tide was very low when we started paddling, we took a break pretty early after arriving at the islands to eat our lunch on one of the beaches. The beach was absolutely covered in oysters! You are allowed to harvest them with a fishing license, which would have been amazing, but there was a red tide warning in effect, which makes it very dangerous to eat any shellfish, so we just enjoyed with our eyes.

Low tide exposes a lot more islands and we had fun paddling up to the campsites. We were moving pretty slow on Day 1 because of all the provisions we had packed into our kayaks. There wouldn’t be any freshwater sources on our entire 4 day trip, so we had about 35L of water (or 70 pounds) between our two kayaks, plus food and camping equipment! So I definitely felt sluggish on the first day, but it encouraged us to drink a lot of water. It was very hot (high 20’s), so this was probably a good thing!

20230519_163821

The first campsite is Middle Copeland Island. This campground is pretty exposed and while it has several tent pads, there’s not a lot of shade. I’d read online that North Copeland Island was nicer, so that was our final destination for Day 1. I don’t think anyone camped at the Middle Island that night, but there were several groups at the North Island. Fortunately there’s a lot of tent pads, so it didn’t feel crowded at all.

We saw some kayaks landing at the south beach on the Island as we approached. There’s two access points, so we decided to go around to the north beach to land our kayaks. Unfortunately we didn’t realize that with the low tide, the cluster of islands around North Copeland all become one big island, so we had to paddle around all of them and weave our way into the beach. There’s 3 main sections to the island, with a cluster of tent pads on the south, a few on the north, and then a bunch more on the west head. I wanted to camp at the head, but after we landed, we couldn’t find any way to get over there and ended up camping on the north side. It was a great choice as we had more shade and an incredible view! Plus all the other kayaks camped on the south side, so we had it all to ourselves. A motorboat landed on the head later in the evening and dropped off a few families, so I think that’s the only real way to access that area unless you land your kayak on the rocks.

20230519_202255

Unloading at low tide was a bit of a pain in the ass though. The beach was huge, so it took us a few trips to move all our gear up to the island and then we found one small grassy landing to store our kayaks. But overall, I loved North Copeland Island! I think it may be my favourite site on the trip. We arrived around 2:30pm after ~10km of paddling, so we had lots of time to enjoy and explore the island. I set up my hammock and watched as the tide started to come in. Once it got high enough, I decided to go for a swim and was shocked by how warm the water was! It was still only May, but after 2 weeks of consistently hot weather, it was incredibly warm and very comfortable for swimming. It honestly felt like it was mid-summer! Since visiting, I did a bit more research and apparently Desolation Sound gets some of the warmest water north of Mexico! Not sure if I believe that or not, but the evidence pointed to yes.

PSX_20230525_214202

I’m honestly not sure how we passed so much time on this trip. I didn’t really do anything on the island besides swim and lounge around. I didn’t read at all, but I was totally content to just sit in my chair or lie in my hammock and watch nature. It’s weirdly compelling to slowly watch the tide come up and we had a friendly seal hanging around all day. Seth did some exploring on the beach and we generally just took it easy, which was lovely.

The island itself is pretty interesting. It’s a decent size, but a lot of it isn’t really accessible to explore. From our tent pad, we could climb up to the top of the island and we spent most of golden hour up there enjoying the view. Before sunset, we decided we would go for a sunset paddle and since the tide was now so high, we were able to easily launch the kayaks. It was the nicest sunset of the trip and the water was dead calm, so we enjoyed paddling around for a half hour before heading to bed. It stayed warm into the evening and because we were so low in elevation, we slept with the fly off the tent to enjoy the view and the stars. The wind picked up a bit overnight, but it was a great first day of the trip! Check back for Part II.

PSX_20230529_083038

Maria’s Updated Gear Guide

I’ve already written one gear guide, but it’s a bit outdated compared to what I currently use, so I decided it’s time for an update! These days I’m a lot more focused on ultralite gear, so my set-up is quite different. I’ll try and share a few options for each key part of my camping set-up, depending on your preference!

Backpack

PSX_20220917_112741

My opinion hasn’t changed that much from my last post – I still think Gregory has some of the best value backpacks on the market. They’re lightweight and cheaper than brands like Osprey, while still being super comfortable and well designed. I don’t think you can go wrong with a Gregory pack, especially if you’re a beginner. However, if you’re looking for something ultralite, I swear by Gossamer Gear, which I think are super light without compromising on comfort or utility. A lot of ultralite packs aren’t super comfortable because they either don’t have any internal frame, or only a very small one. Gossamer Gear has a small metal frame providing some structure, but more importantly, they have a removeable sit-light pad that provides more structure to the bag and can also be used as a sit-upon. I hiked 180km with the pack on the Sunshine Coast Trail and it was so comfortable.

Can you use an ultralite pack even if you’re a beginner? You sure can! But make sure you assess your other gear first. Ultralite packs can’t carry as heavy loads as traditional packs. So assess how much your other gear weighs before committing to one. Beginners tend to have heavier packs because it’s expensive to buy a lot of gear at once and you typically have to compromise on quality to afford everything you need or borrow it, plus beginners tend to take a lot of comfort items while they’re learning. There’s absolutely nothing wrong with this approach, but consider how heavy your gear realistically is before getting an ultralite pack. In addition, most outdoor stores don’t stock many ultralite options, so they often have to be ordered from the US. There are a lot of benefits to trying your backpack on first to make sure it’s comfortable, especially for beginners, which is why I like to also recommend Gregory packs. If you’re a beginner and starting from scratch, I would probably start with a 60L pack. If you have smaller gear, I personally prefer a 50L pack or smaller (I use the Gossamer Gear Gorilla 50).

If you’re shopping for a day pack, always look for a pack that has waist straps as this will make hiking so much more comfortable. Consider what you’ll be using the pack for, if it’s mostly for summer, a smaller pack may suit you better (though I don’t like anything smaller than 20L because I always take my essentials); but if you plan to use it in the winter, you may want a larger pack to house your cold weather gear, or consider a pack with snowshoe straps or space for avalanche gear.

Note: keep in mind that while the Gossamer Gear backpacks appear similarly priced to Gregory, these are listed in USD and you will have to pay both shipping (~CAD$50) and duties (~CAD$60).

Best Value / Best for Beginners: Gregory Jade 53/63 (women’s); Gregory Amber 55/65 (women’s); Gregory Stout 60 (men’s)

Best Ultralite: Gossamer Gear Gorilla 50 (unisex); Gossamer Gear Mariposa 60 (unisex)

Best Summer Daypack: Gregory Maya 20 (women’s); Gregory Juno 24 (women’s); Gregory Miko 20 (men’s); Gregory Citro 24 (men’s)

Best Winter Daypack: Deuter Freerider 28 (women’s); Deuter Freerider 30 (men’s); Gossamer Gear Kumo 36 (unisex)

Sleeping Bag

DSC04795

In my opinion, if there’s one item you’re going to splurge on, make it your sleeping bag. There’s no compromise for a comfortable night’s sleep and a really warm and lightweight bag will cost you money. Personally I prefer down bags for warmth, but pay close attention to the comfort and survival ratings when choosing your bag. My experience is that cheap bags typically have a larger gap between the comfort and survival rating. The closer the ratings are to one another, the more I generally trust the rating. Women’s bags typically run a bit warmer and fit better (less empty space for cold air to settle), so consider a women’s bag if you’re female.

It’s hard to recommend sleeping bags because everyone is different and where you live will really govern how warm it needs to be. Living in Canada, I would never buy a bag rated less than -5 degrees celsius. When picking a bag, it’s really a balance of weight to warmth to cost. Consider how much money you’re willing to spend and how much weight you’re willing to carry. If you’re a beginner, I recommend a standard mummy zip bag, but if you’ve been backpacking awhile, do yourself a favour and consider buying a quilt.

A quilt compromises on weight by acting more like a blanket that’s strapped to your sleeping pad. They generally have an enclosed footbox, but no back. The bottom of your sleeping bag doesn’t give you very much warmth – the warmth underneath you comes from your sleeping pad, which insulates you from the ground – so by cutting out the back of the bag, you can save on weight and still be able to stay warm. However, this only works with a quality sleeping pad, so don’t compromise one for the other. I bought my first quilt last year that’s rated to -6 degrees celsius and I am obsessed with it! My quilt is from UGQ Outdoors – I love this option because every quilt is custom; and my sleeping bag is from MEC, which I think make quality bags with a decent price tag.

If you’re looking for a winter sleeping bag, there are limited options on the market and they will cost you a lot of money. I have a -30 degree bag for snow camping that I paid a lot of money for, but it’s not my favourite because it’s a unisex bag and it’s too big for me. It does keep me warm, but it’s a bit of work for me to get warm in such a large bag. I have lots of thoughts on winter bags if you ever want to DM me, but I don’t want to recommend a bag I haven’t tested.

3- Season Sleeping Bag: MEC Delphinus -9 (women’s); MEC Draco -9 (men’s)

Quilt: UGQ Bandit -6/-12

Sleeping Pad

It’s so easy to overlook your sleeping pad, but it’s such an important part of your sleep system. You could have the warmest bag in the world, but if you go to sleep on a crappy sleeping pad, you will still be cold. Personally I think Thermarest has the best sleeping pads on the market. They are expensive, but they are so warm and comfortable (some people think they are crinkly and noisy, but it’s never been a problem for me). For backcountry, I swear by the Neoair line because they are both the lightest and smallest on the market. I use the Xlite for 3-season camping (rated R4.5) and I use the Xtherm for snow camping (rated R7). I’ve recommended a few cheaper sleeping pads if you’re on a budget; I don’t find them as comfortable, but there’s nothing wrong with them, just make sure the R-value is 3.5 or higher, especially if you’re in Canada.

If you’re snow camping on a budget, just put a foamy under your 3-season pad for extra insulation. Otherwise, commit to the Xtherm, trust me, it’s the best.

Best 3-season: Thermarest Neoair Xlite (R4.5)

Best 4-season: Thermarest Neoair Xtherm (R7)

Budget 3-season: MEC Reactor (R3.8)

Tent

PSX_20220929_122048

If you’re trying to lighten your pack, you’ll get the most bang for your buck with your tent. A standard 2p tent can weigh 5-6lbs, which you can easily lighten by going with an ultralight or non-freestanding version. If you’re a beginner, I recommend sticking with a freestanding tent, they’re much easier to set up and generally more comfortable. But if you’re a little more experienced and don’t mind dealing with condensation and a more nuanced set-up, you can lighten your pack a lot with a non-freestanding tent (usually doesn’t come with poles and is erected using your trekking poles and tension from the pegs).

For freestanding tents, a lot of people swear by the MSR Hubba Hubba, but I’ve never tried it. Personally, I like Marmot for an easy-to-use lightweight tent. For non-freestanding tents, which are popular among thru-hikers, an important thing to understand is that most of them are single walled, meaning they don’t have a separate fly. They work great in California, but if you live in Canada and hike in the alpine, it means the inside of your tent will generally be filled with a lot of condensation every morning. I use a single walled non-freestanding tent from Gossamer Gear, but I’ve had some growing pains with it because I don’t like dealing with the condensation. The people who prefer them generally learn to deal with it, or else they don’t hike in the Canadian alpine and therefore don’t have to. Fortunately, there is a double walled non-freestanding tent on the market and unsurprisingly, it’s made in Canada! It’s a bit heavier than a single walled, but Carolyn has one and she loves it. So I will begrudgingly link my Gossamer Gear tent, which I love for it’s size and how easy it is to set up, but be prepared to deal with condensation.

Standard 2p Tent: Marmot Tungsten

Lightweight 2p Tent: Marmot Tungsten Ultralight

Non-freestanding (single wall) 2p Tent: Gossamer Gear The Two

Non-freestanding (double wall) 2p Tent: Durston X-Mid

Kitchen

IMG_0347

I don’t have as many opinions on stoves and pot sets as I do for the “big 4” described above. But I have learned a few things over the years.

For stoves, I like to use an isobutane stove. The stoves are very straight forward to use and fuel is relatively lightweight and easy to find. You can get away with an isobutane stove for most of the year, but if you’re going to be snow camping, consider getting a white gas stove instead (any of the white gas stoves from MSR). Isobutane can freeze in cold temperatures and a white gas stove is the most reliable option. Another alternative is an alcohol stove, but I don’t personally recommend these. I have 2 isobutane stove recommendations because I think one is better for solo trips (when you have a small pot) and the other is better for when you’re cooking on a full size pot.

Isobutane stove (solo trips): BRS mini

Isobutane stove (2+ people): Primus stove

White gas stove: MSR Whisperlite, Dragonfly, or XGK

For pot sets, I don’t have strong opinions. I have a small pot that I use for solo trips that I absolutely adore and is well priced. I don’t personally see the point in spending a lot of money on a pot set, they’re generally going to get beat up over time, so don’t break the bank on it. The most important thing for me is a well-fitting pot lid. Some people really like the sets that come with dishes, but I just like something that easily fits my stove inside it. For multi pot sets, I prefer to have a lid for each pot rather than a shared lid (but I’ve yet to find a set that comes with 2 lids and no dishes).

Solo pot: GSI Halulite Minimalist

Other Gear

Sit-upon: I’ve been using the MEC Seat Cushion for years and I love it!

Pillow: I used to use my sit-upon as a pillow too, but I recently switched to the MEC Pillow and it’s a lot comfier

Mug: GSI Infinity Mug 

Microspikes: I think every hiker needs a good paid of microspikes, I use Kahtoola Microspikes 

Communication Device: A satellite device could save your life, I used one in 2021 when my friend had a serious medical emergency and highly recommend the Garmin InReach Mini 

Clothing

You don’t need a bunch of expensive clothing for hiking. I try to avoid cotton, but you can find pretty much everything you need at Costco, you just need to time your purchases for some of their featured items. They sell nice merino shirts from cloudveil once a year in the Fall and they sell lightweight puffy jackets every winter. They also stock merino wool socks in the winter and have base layer merino year round from paradox (though be aware, this brand is only about 15% merino, but still made with poly and appropriate for the backcountry). Other items I’ve found throughout the years include a lightweight pair of puffy slippers for winter camping and hiking shorts from Eddie Bauer.

The only thing I don’t really trust from Costco is a quality rain jacket, so I decided to spend a bit more money on this item. If you’re looking for a more environmentally sustainable company than Costco, I personally like Patagonia.