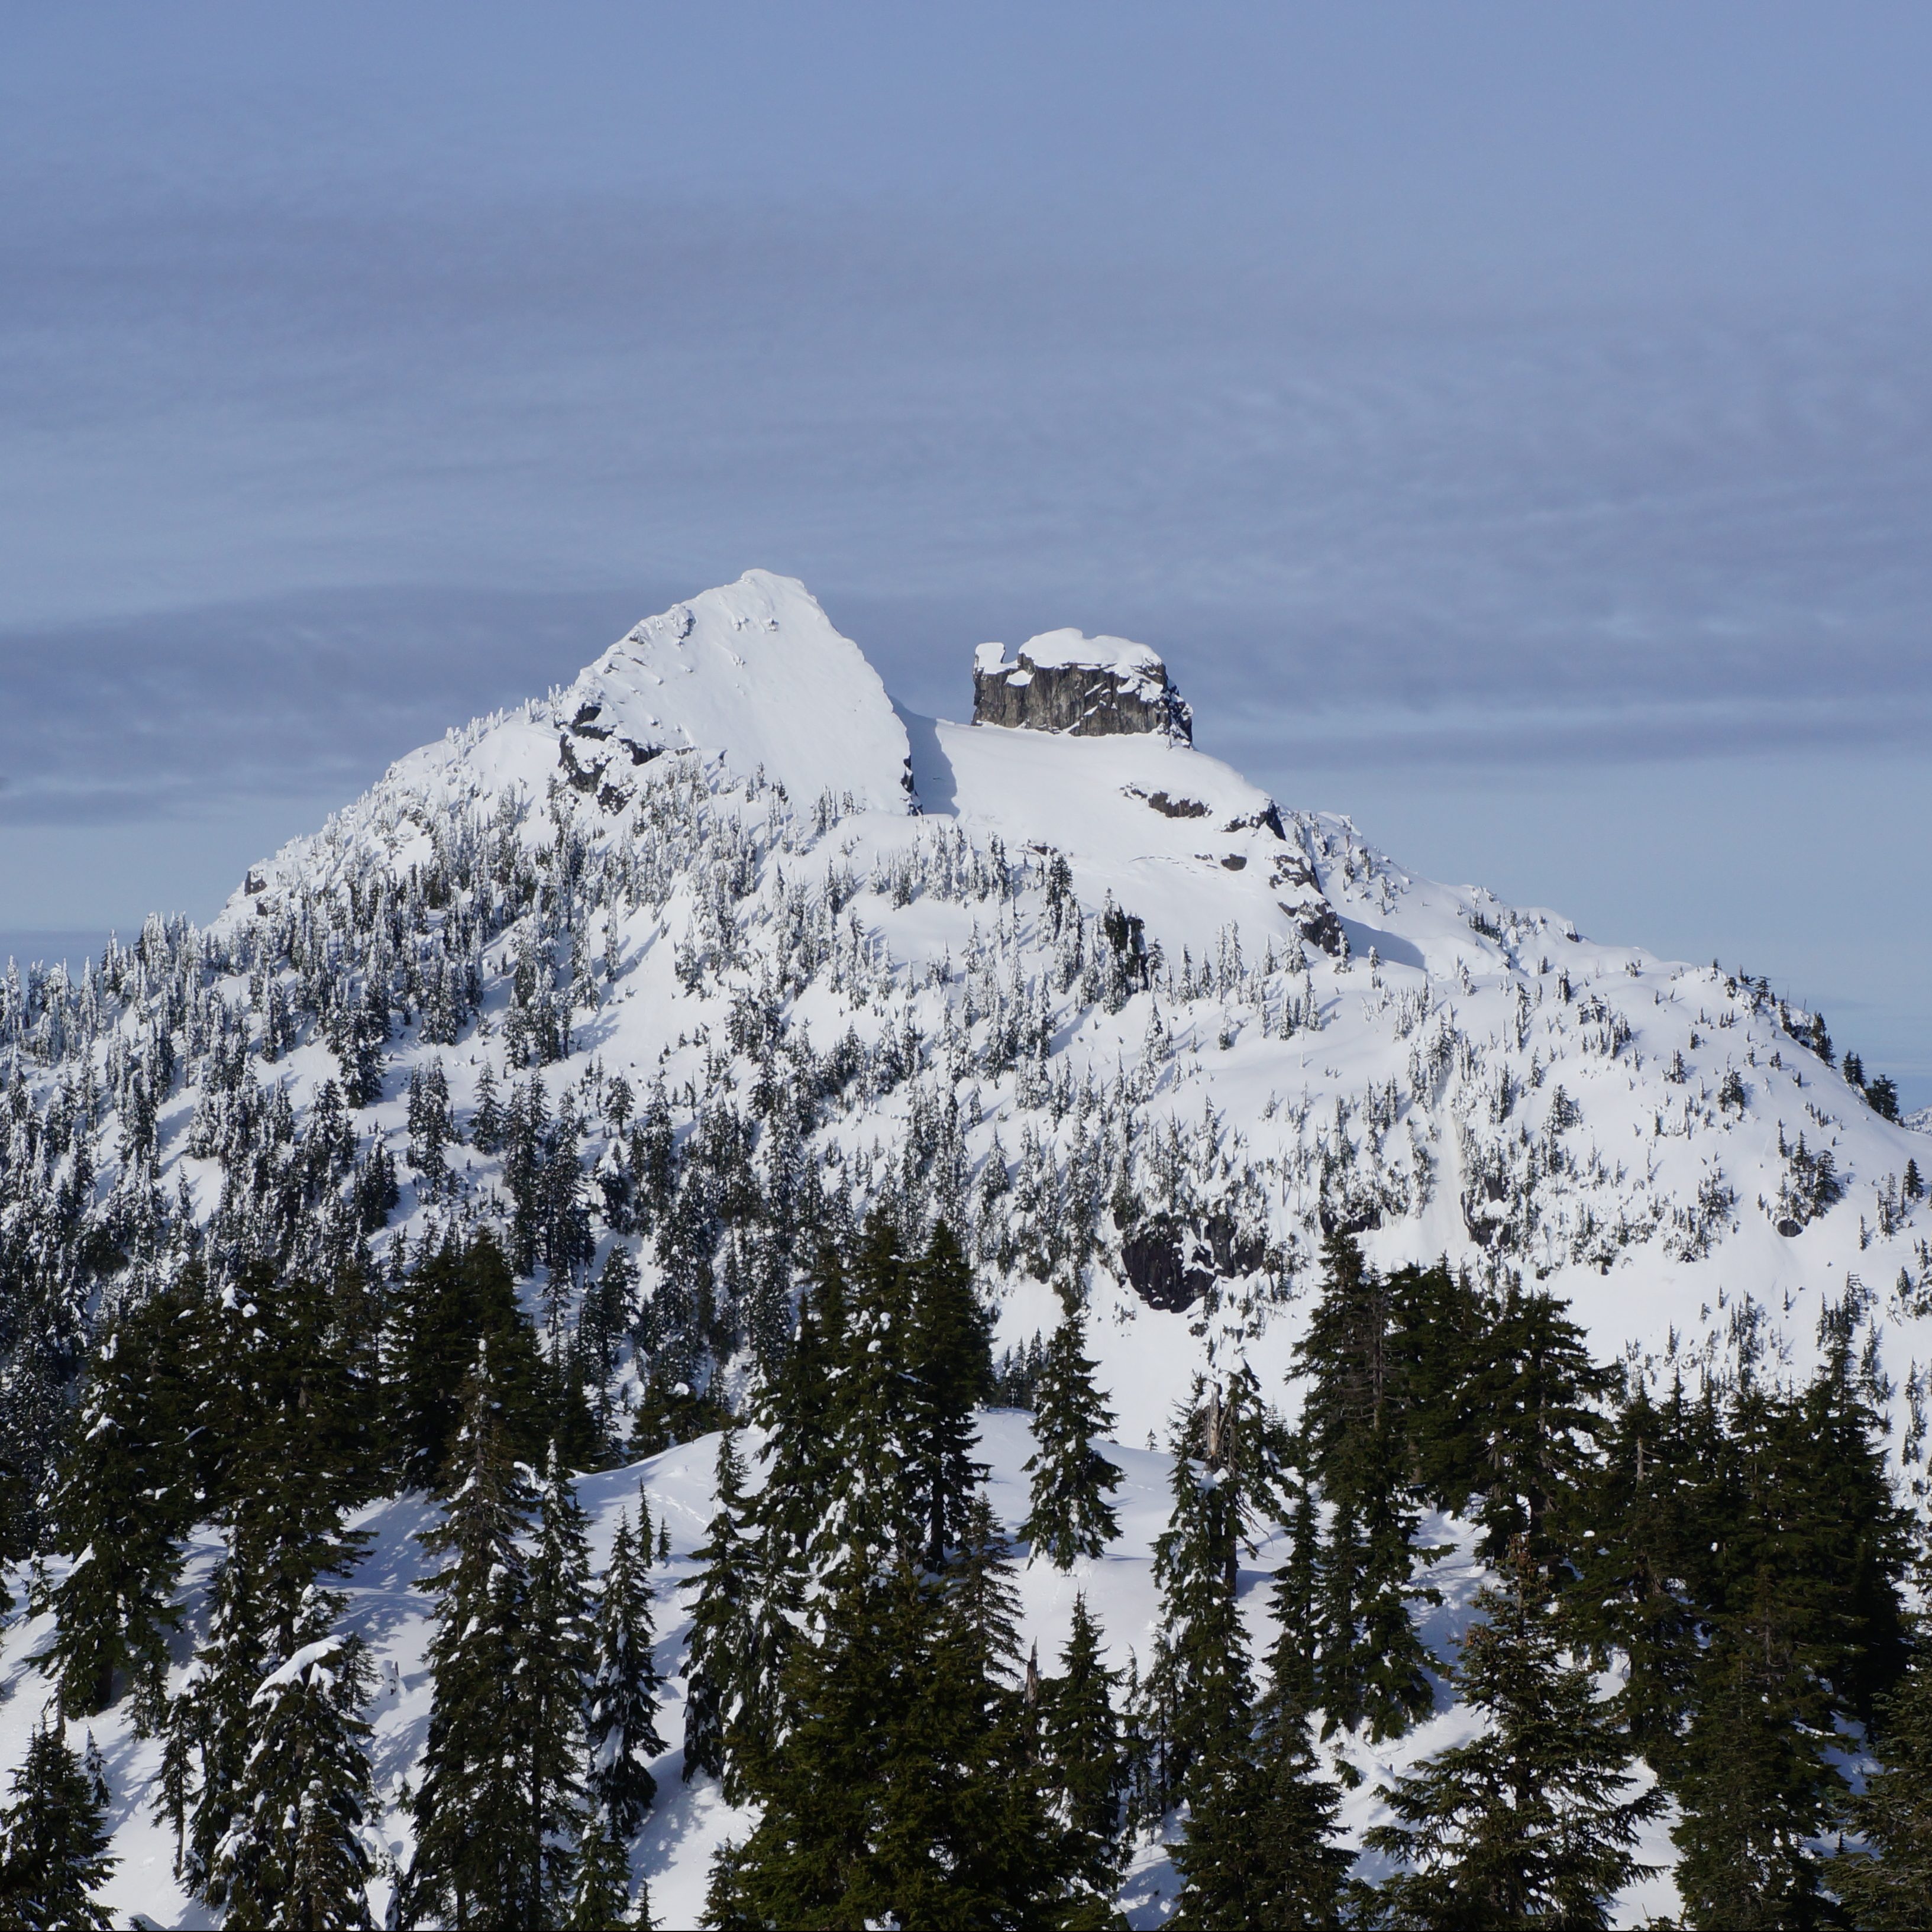
I was hoping to explore several new trails this winter, but life and avalanche conditions got in the way of most of my plans. In a last ditch effort to enjoy the snow before it disappeared completely, I decided to snowshoe up to Black Mountain on Cypress. For such an easily accessible trail, I’m surprised I haven’t ventured up there before!
Seymour and Hollyburn appear to be the most popular trails for snowshoeing near Vancouver, but there are a handful of trails near Cypress Resort that seem to get overlooked by the masses. Don’t get me wrong, they’re still busy, but the crowds seem tiny in comparison to the highway of hikers going to Dog Mountain on any given winter day.
When visiting Cypress, your first stop needs to be the Black Mountain Lodge. This is the lodge located towards the back of the main parking lot, not the ski lodge. This lodge serves a variety of functions, but one of them is a self-registration point for hikers. Whenever you’re going into the Cypress backcountry, you need to stop here and pick up a free hiking pass to attach to your bag. In addition, it’s a really nice facility, with a heated picnic room and flush toilets.
The two most popular trails from Cypress are Bowen Island Lookout, which is a great beginner trail, and Black Mountain, which is more advanced, mostly because it’s longer and steeper. If you’re really adventurous, I think some people continue past Bowen Island Lookout up to St. Mark’s, but I don’t recommend this without adequate experience and avalanche safety training because it is adjacent to challenging and complex avalanche terrain.
The Black Mountain trail follows the edge of the ski runs from Eagle Chair up to the top of the mountain. People do come up here on touring skis to ski down through the resort, but it’s fairly steep on the uphill, so be prepared for a slog. The snow was melting quite a lot when I snowshoed up there in early March, but it was a beautiful sunny day to be outside. It’s not an overly long trail – we tracked 6km round trip on my GPS, including a small loop at the top.
The trail is staked up to the top and it should be noted that the winter summit is different that the summer summit. If you continue around the loop at the top of the mountain, you’ll reach the winter summit. I was keen to also explore up to the summer summit, which branches off the main trail, but the snow was a bit slushy and we only had microspikes (not snowshoes). We started post-holing almost immediately and quickly abandoned the plan.
We stopped at the summit for a snack before finishing the loop. If you want to ski down, there is a side trail to the resort, but we didn’t check it out. You can also continue further to Eagle Bluffs, which is primarily in simple avalanche terrain, except for the summit. I haven’t done the Eagle Bluffs trail, so I’m not sure if that trail is also staked. We could see that it was not as frequently traveled as the Black Mountain trail and we would have been post-holing on that trail too without snowshoes.
Instead we just continued back downhill to the base after enjoying a nice day in the sun! It is a dog friendly trail, which was nice, so Sadie and Jasper joined us for the adventure. Overall, I don’t think I liked the trail as much as Bowen Island Lookout, Brockton Point, or Hollyburn, but it was definitely an easier trail than Hollyburn and comparable to Brockton Point in terms of difficulty. I would definitely pick Black Mountain over Dog Mountain though, as I find Dog Mountain too crowded.
In conclusion, it’s not as adventurous a trip as some of the plans I had to cancel, but it was really nice to get outside and hike somewhere new! We celebrated with a stop to The Shed on the way down the mountain to enjoy some delicious flatbread pizza and gorgeous views of the city!
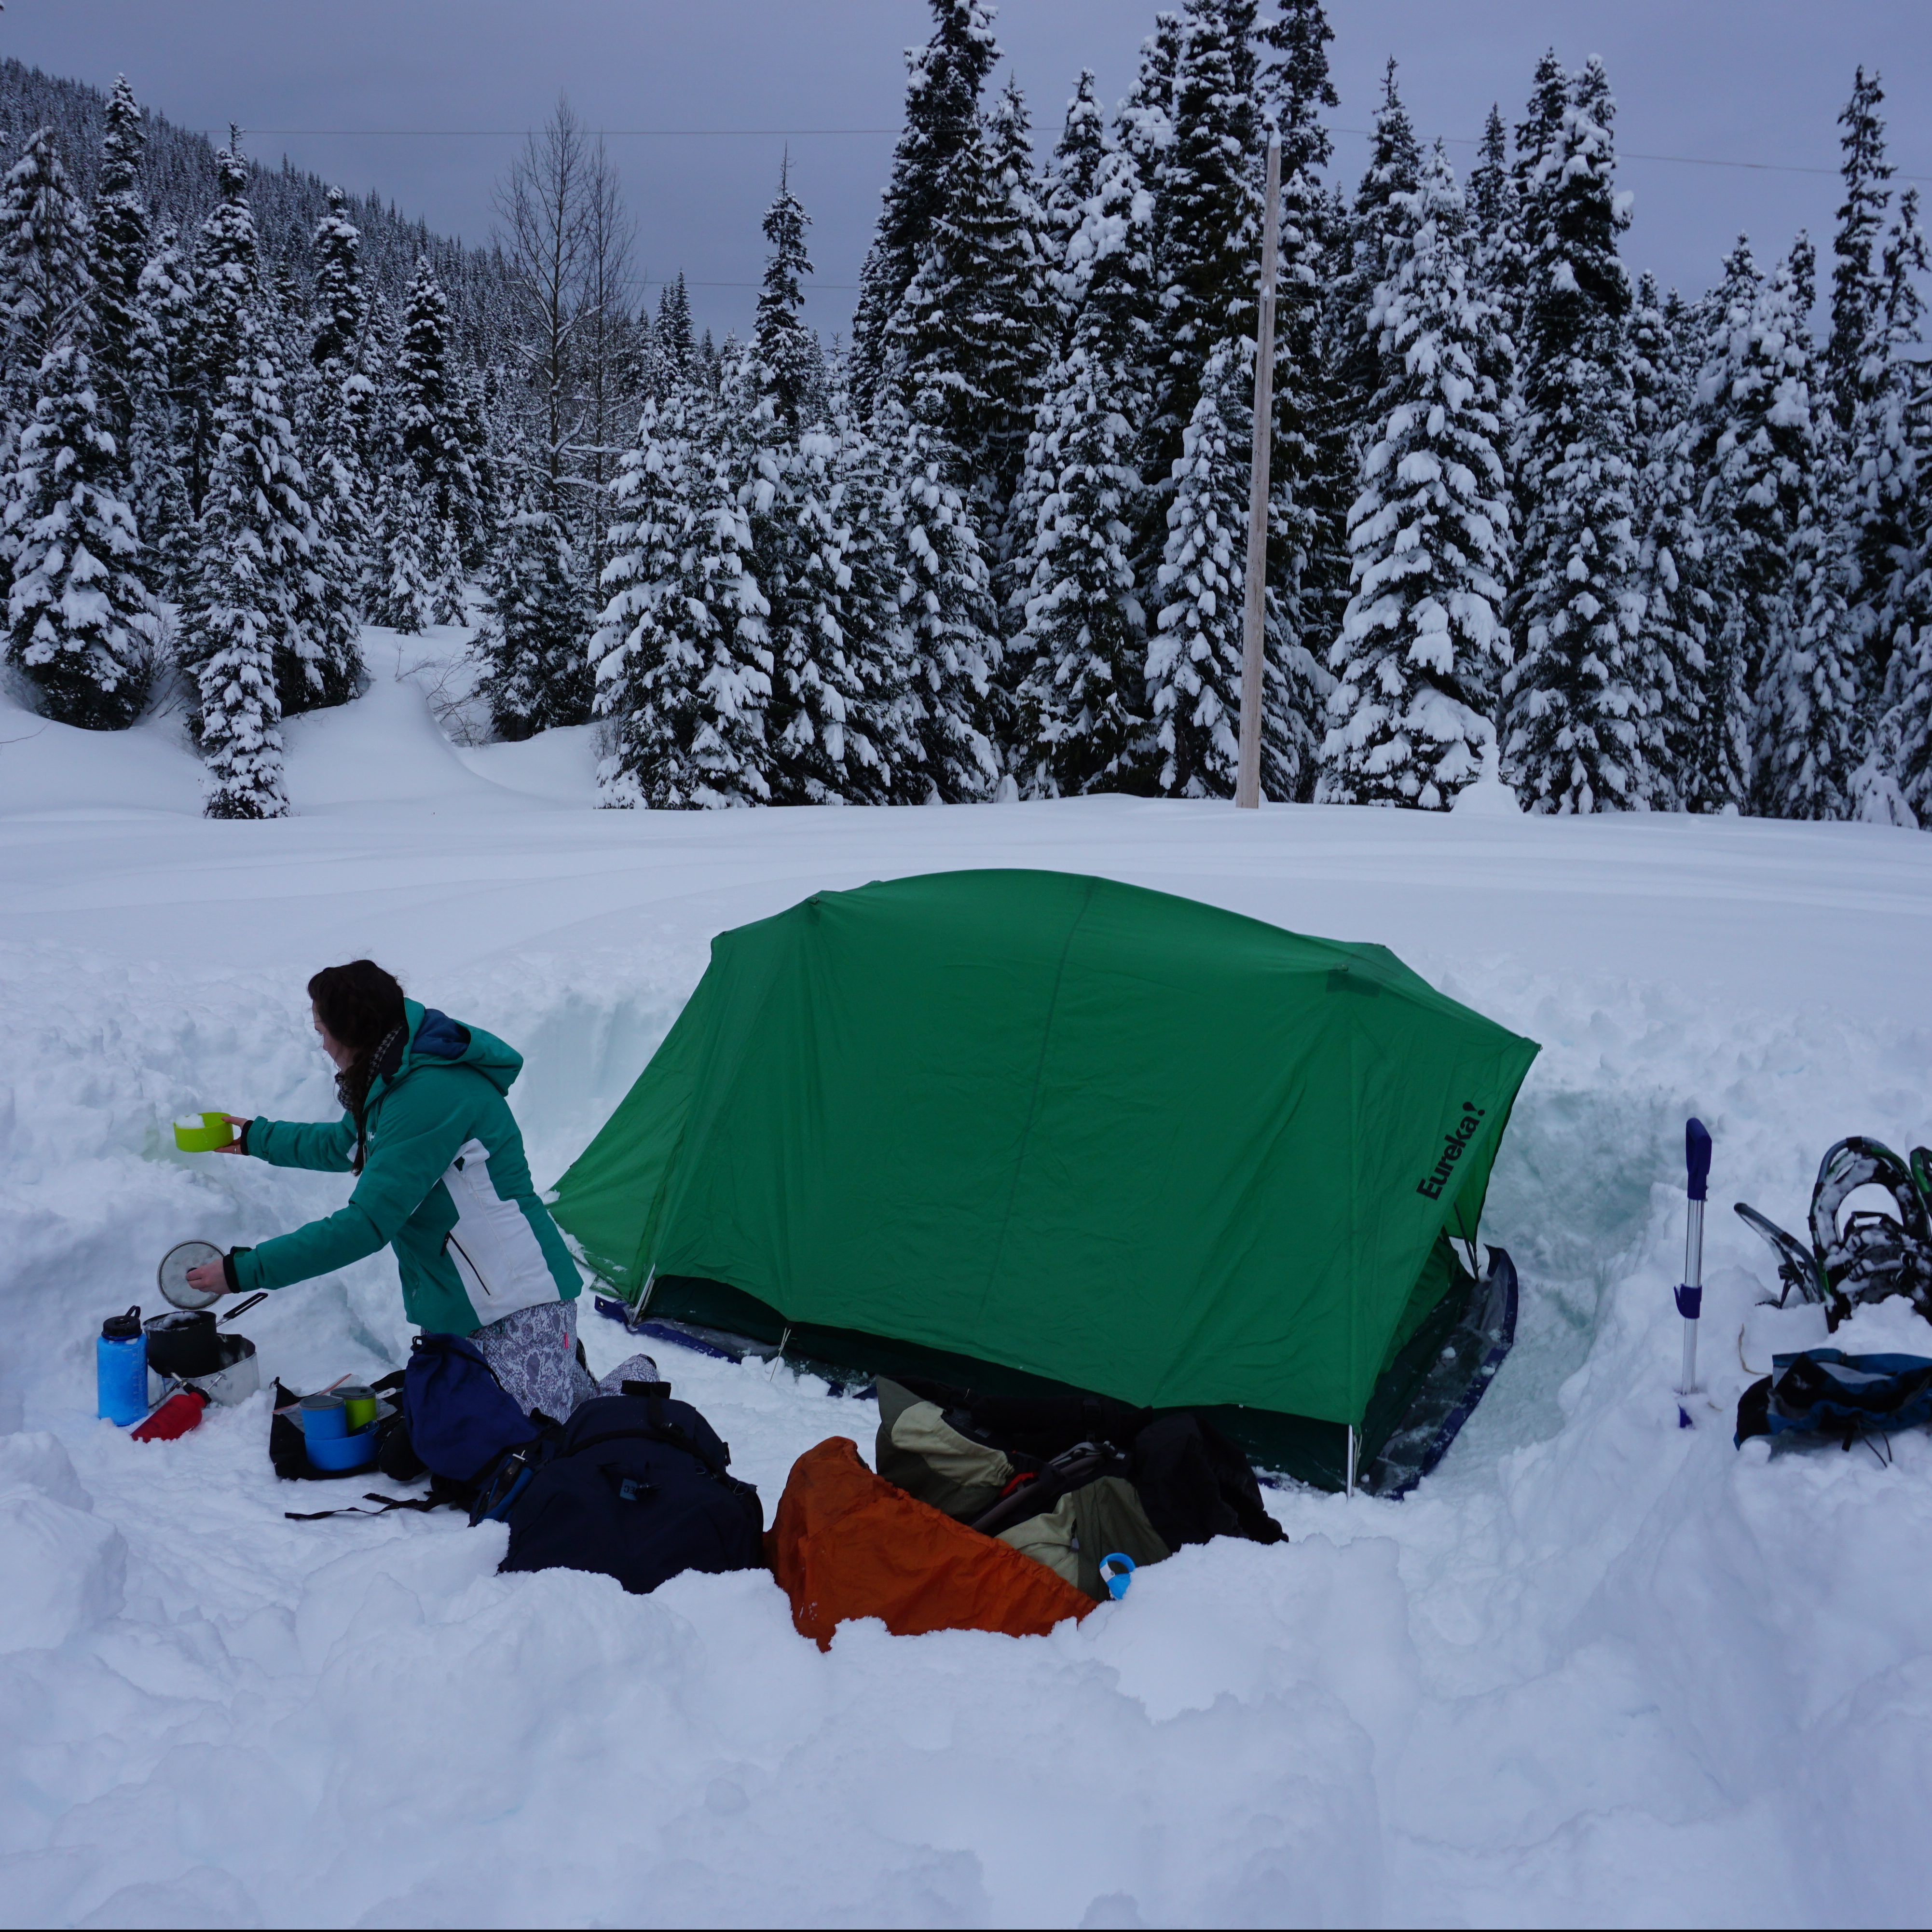
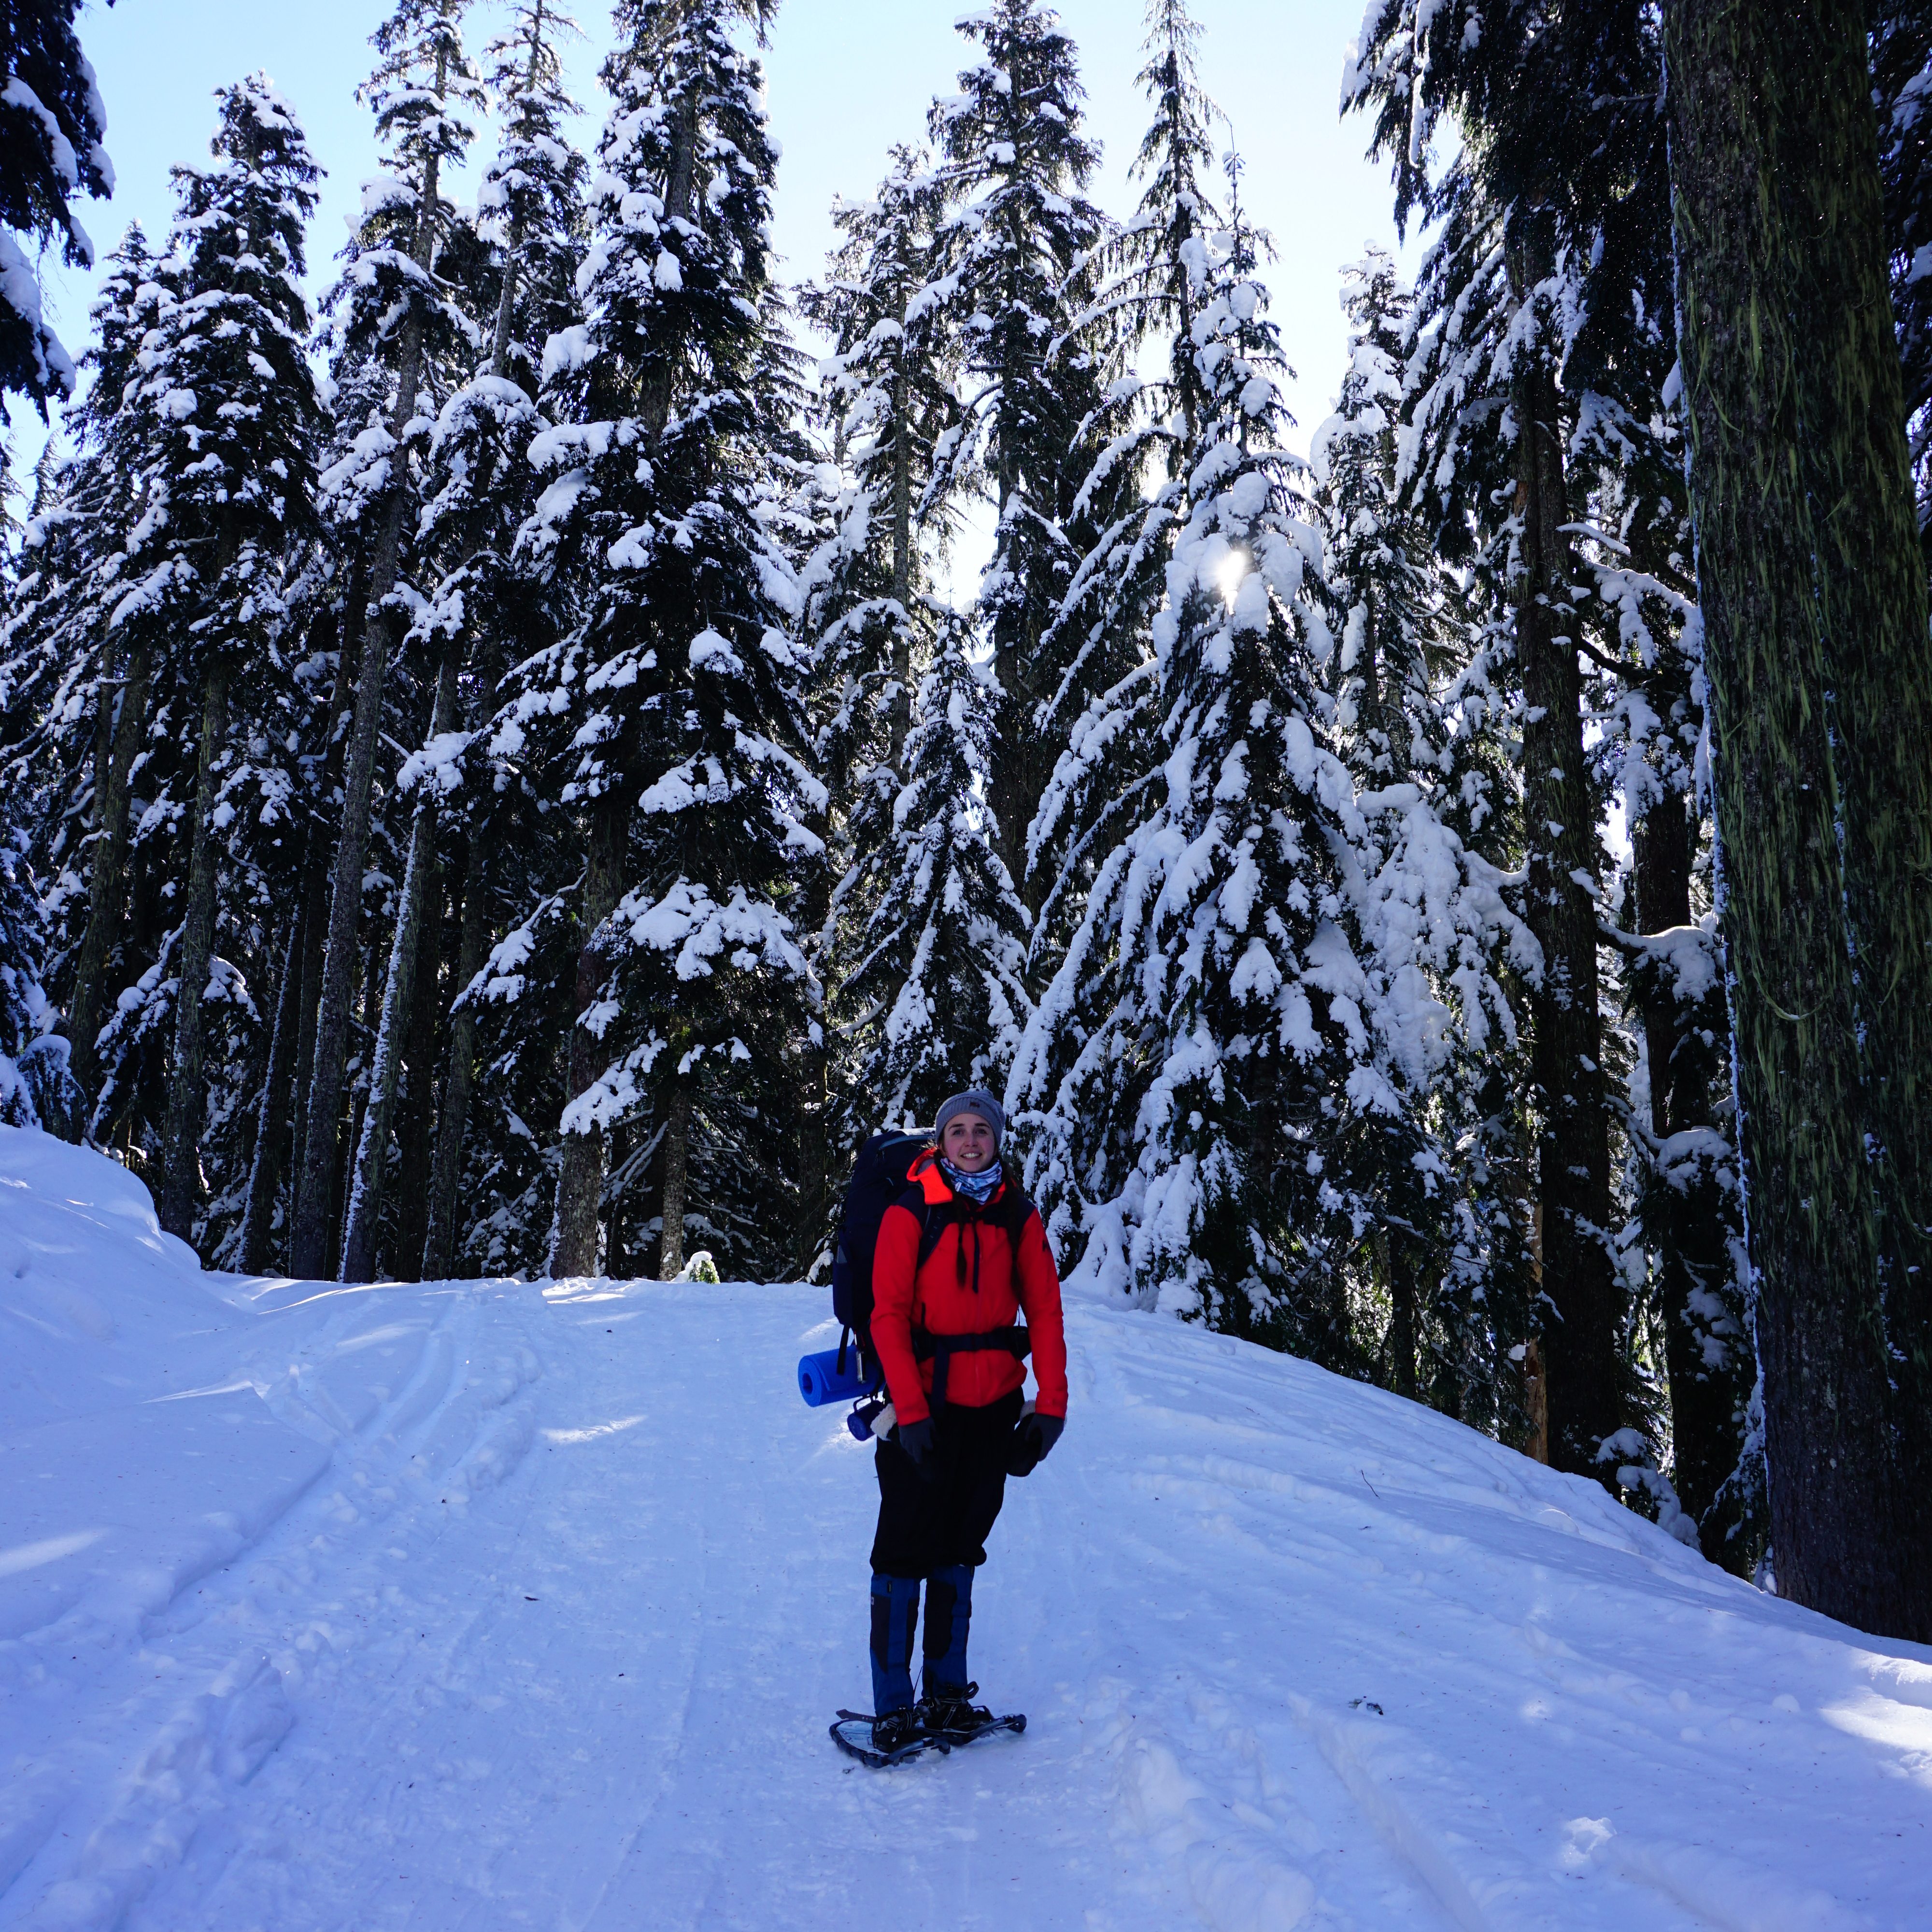
Camping is one of my favourite things to do in the summer, so I would always be sad when the season ends and I’d have to wait a whole year to sleep in the backcountry. I quickly came to the conclusion that I didn’t need to wait and decided to get into snow camping!
It’s definitely not for the faint of heart. It is much more intensive than camping in the summer and it is a lot of work to stay warm. Not to mention, quality 4-season camping equipment is not cheap. I’ve written an entire guide to winter camping and how to stay safe and warm. Once you’ve established you’re ready to try winter camping, the next dilemma is assessing where to go! First check out my guide to avalanche safety and then take a look at some of these recommendations.
This is my number one pick for snow camping if you’re brand new to it. The Lone Duck I Campsite is located in Manning Park and is a first-come-first-serve site through the winter. It has a field for tenting and a communal hut with a woodstove for eating and hanging out. You do need to bring your own firewood, but the benefit is that this campsite is only a couple hundred metres from your car. So if you don’t have the money to invest in quality winter camping equipment, you can just lug in a bunch of gear from your car and not have to worry about fitting everything in your backpack. The site is located right next to Lightning Lake and has immediate access to cross-country skiing and snowshoeing trails. Permits are available through camping.bcparks.ca
As the name suggests, this is a group campsite, so if you’d like to use it, please make sure you actually have a group. But if you do, this is one of the easiest and closest options to Vancouver for snow camping. Its located off Mount Seymour road, just below the ski resort. The site is a large field with a warming hut and outhouse, only 100 metres from the parking lot. Similar to Lone Duck, you can use the hut to keep warm and it’s easy to carry in lots of warm gear. Reservations are required and can be booked through camping.bcparks.ca
Falls Lake is my top pick for beginners that want to go backpacking because it’s only a short hike from your car. It gives the illusion of remoteness, but in a pinch, if you’re really cold in the middle of the night, it’s not too far to hike back out. Falls Lake is located off the Coquihalla Highway at the exit for Zoa Peak. In the summer, you can drive almost to the campsite, but the road isn’t plowed in the winter, so it’s a short ~2km hike to the lake along the unplowed road. There is an outhouse at the lake and reservations or permits are not required.
Lightning Lakes is another great option for snow camping when the lake is frozen. In the winter, the lake usually completely freezes except around the bridge between the first and second lake. Technically, there’s no official campground here, but there is some open forest area at the end of the second lake (~3km hike) where you can set up camp. I know some people will head as far as Flash Lake to get access to the summer campsites, but the trail to Flash Lake is adjacent to steep terrain where there could be overhead avalanche risk, so I haven’t gone past the end of the second lake. There is no outhouse, so only consider this location if you’re comfortable digging winter catholes. A permit is required from camping.bcparks.ca
Red Heather
Red Heather hut is located halfway to Elfin Lakes in Garibaldi Provincial Park. You can’t camp here in the summer, but snow camping is permitted in the winter. It’s a 5km hike up an old forestry road to get to the site. This hike is a bit longer than the other beginner options and is all uphill, but I include this in beginner backpacking because there is both a warming hut and an outhouse at this site. You cannot camp in the warming hut, you must set up somewhere in the meadow, but it’s a great option to have access to the hut. Chains are required to drive the last 2km to the trailhead (or you can park at the lower lot) and a backcountry permit is required from camping.bcparks.ca
Ottomite Peak is located off the Coquihalla Highway at the Zopkios Rest Stop. This trail is a bit longer than the beginner trails noted above and has uphill travel to the peak, but overall it’s not a challenging trail. It’s ~4.5km along an old forestry road and it passes through simple avalanche terrain only. There is no official campsite, but there’s a nice place to pitch a few tents at the top of Ottomite Peak. The area is more popular for ski touring, but I was the only one camping there where I visited. There’s no permits for this option, but also, no outhouse.
Zoa Subpeak is also located off the Coquihalla Highway and shares the same trailhead as Falls Lake. Park on the side of the road and hike in over the unplowed forestry road. Once you reach the summer parking lot, you can hike up along Pipeline Road until you hit the winter trail to Zoa Peak through the trees. The key with this trail in the winter is to only head as far as the subpeak, which is ~5km. The trail to the subpeak is a bit steep through the trees, but it’s all in simple avalanche terrain. The trail to the actual peak goes through challenging terrain, so I don’t recommend it. There’s lots of open space near the subpeak to camp for the night and I’ve heard it has better views than the actual peak. There’s no permit required, but again, no outhouse available either.
Poland Lake is located in Manning Provincial Park and has an actual campsite. The winter route to the campsite is a bit tricky because you can’t park at the ski resort overnight, so you have to park at Strawberry Flats. You can either walk along Gibson Pass Road, or you can take the trail that runs parallel to the road. However, it’s important to get off the trail partway to avoid going through the middle of the ski resort. You have to hike along the side of a beginner ski run to get up to the official trailhead. This trail is all in simple avalanche terrain, but I noticed a fair bit of overhead avalanche risk when I visited, so I think it’s better to have AST. The campsite is on the far side of the lake, but we opted not to hike across the lake, so I can’t confirm if there is actually an outhouse there. This trail is almost 8km, so it’s definitely a more challenging option due to length. A backcountry permit is required from camping.bcparks.ca
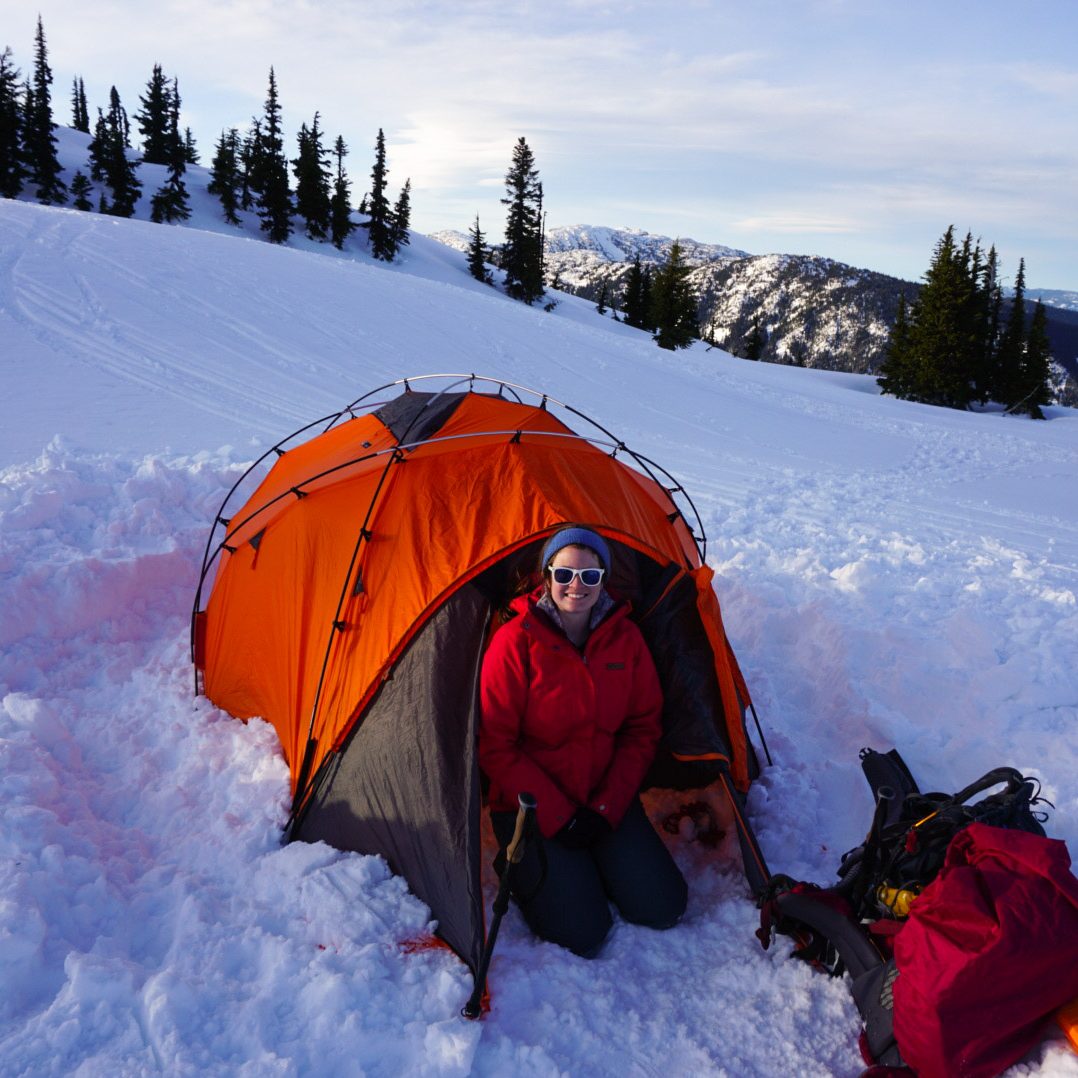
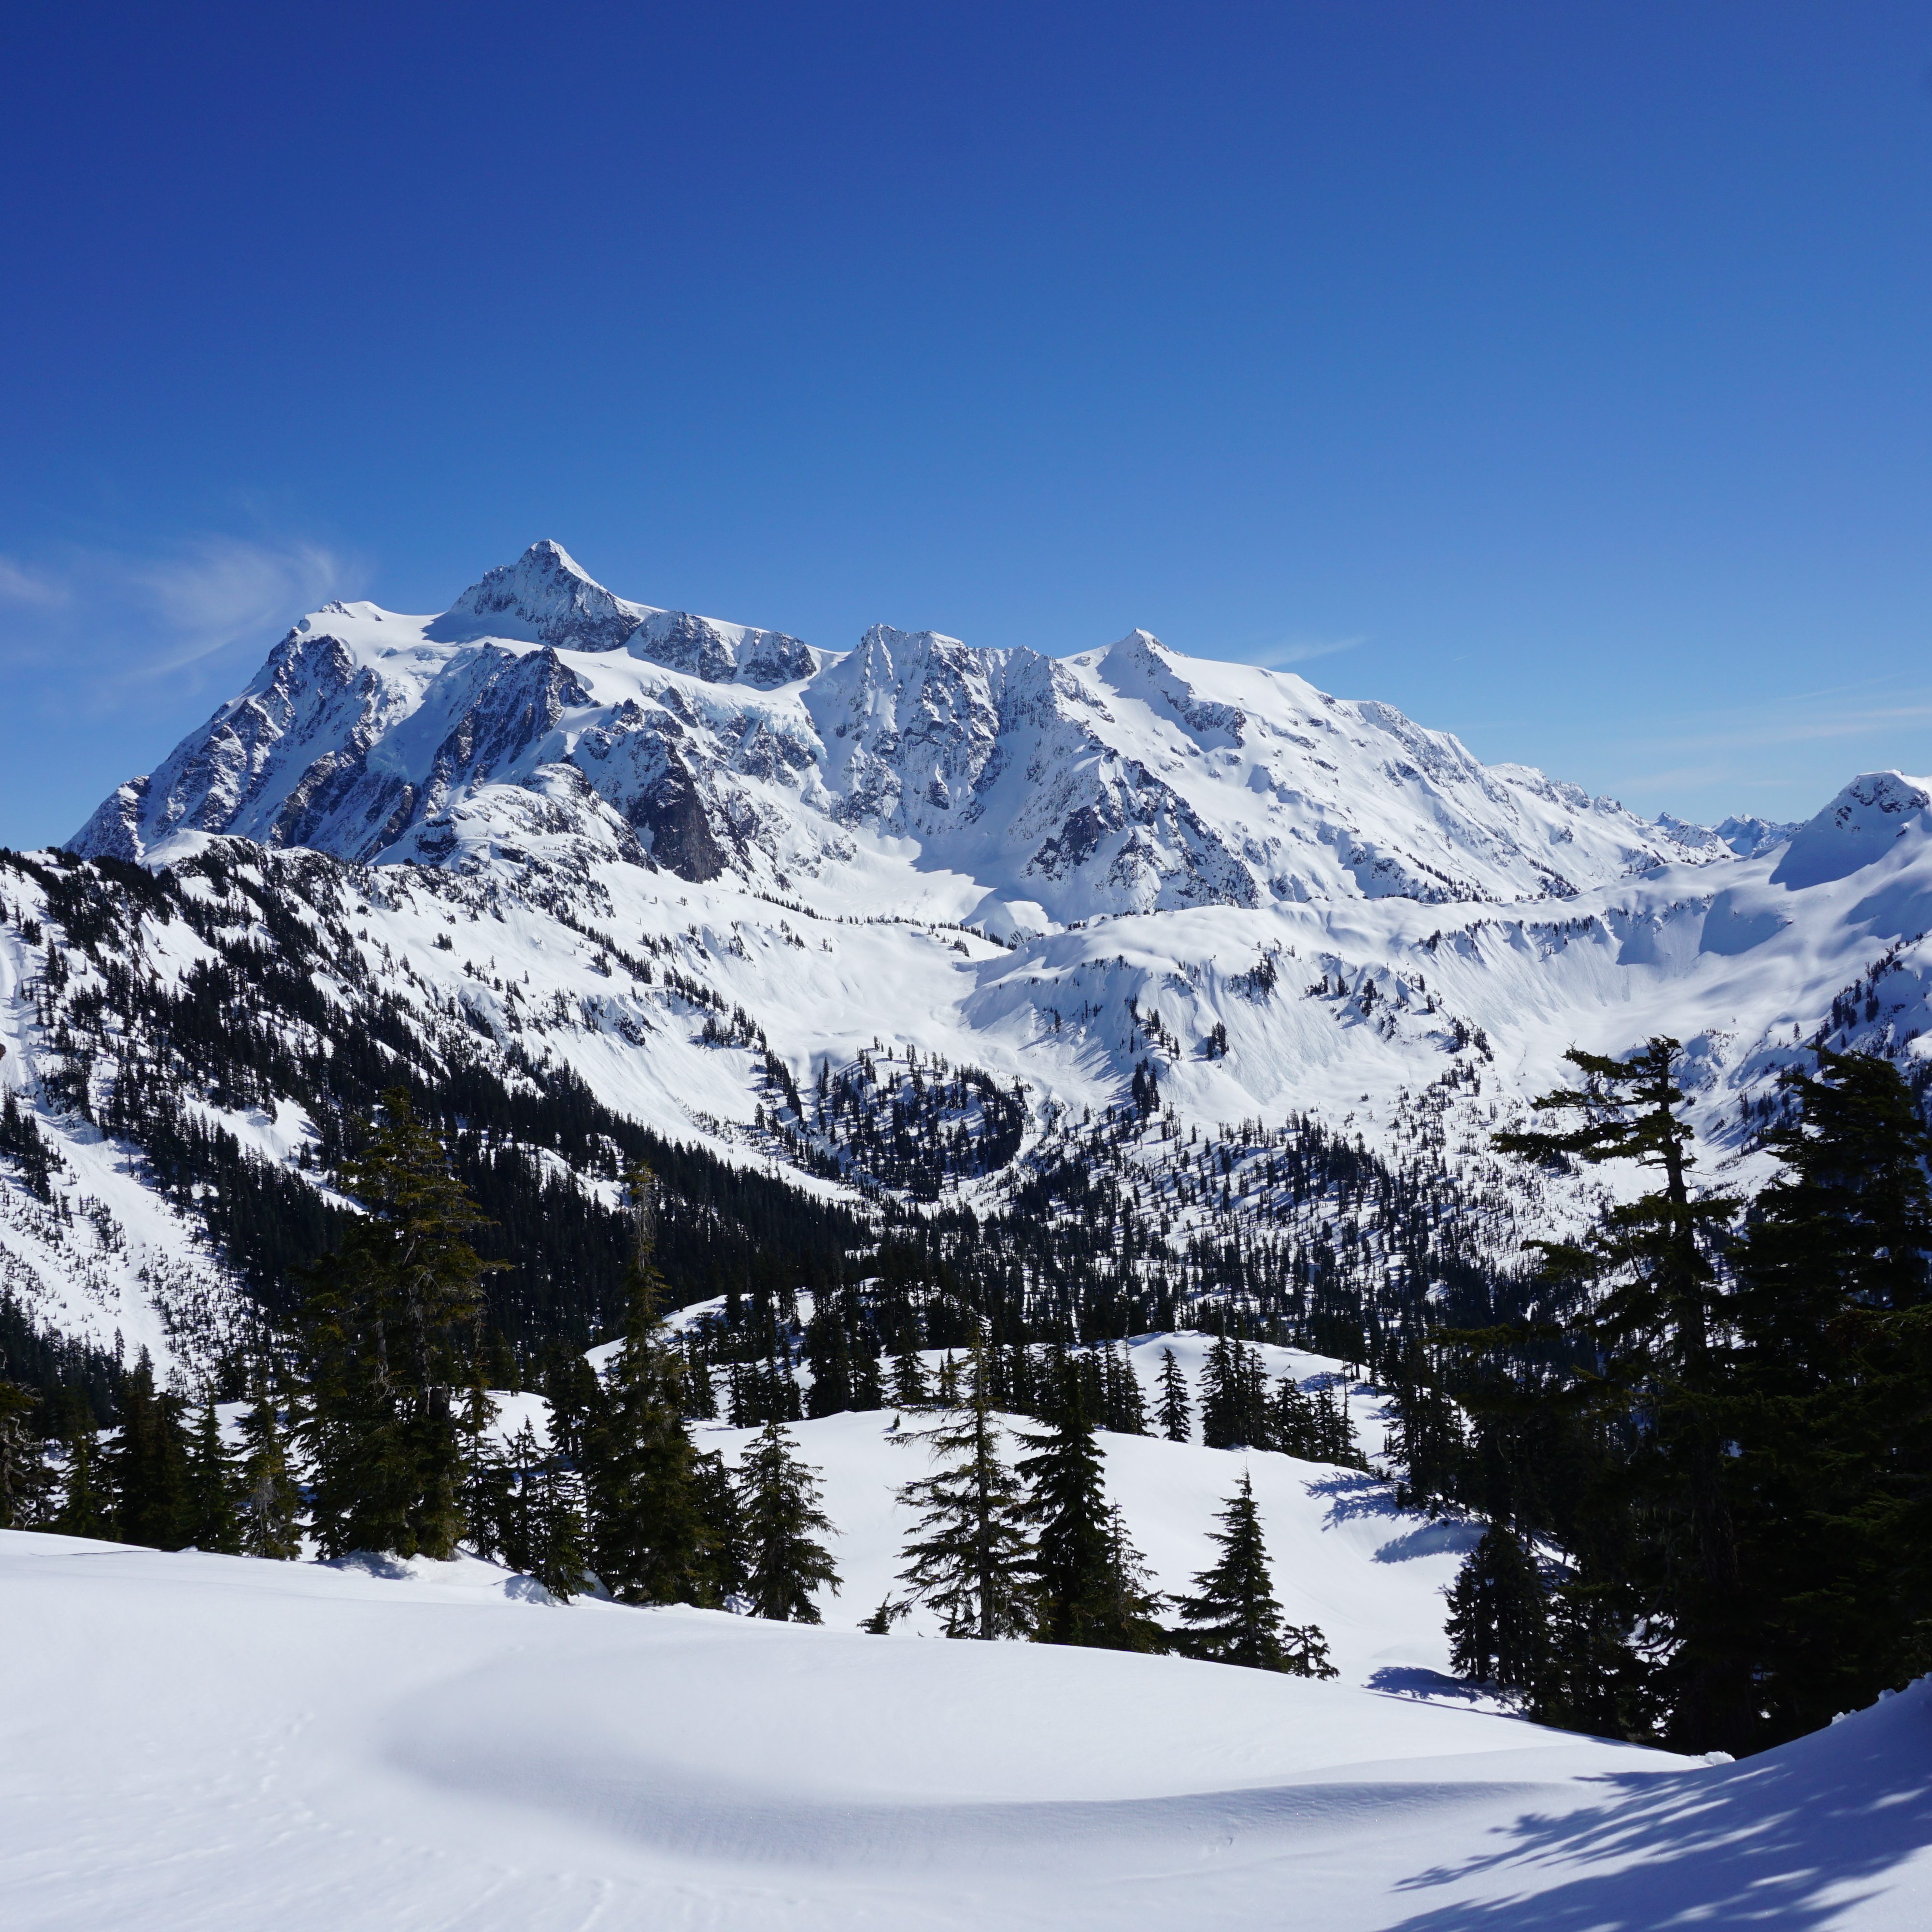
Elfin Lakes is a very popular campsite, which people can misconstrue to mean that it’s safe to go there. In the winter, you can opt to either book the hut (which is very popular and books early), or camp in the snow. At 11km, this is by far the most challenging trail on the list. 11km may not seem that long, but it can be very tiring in deep snow with a large pack. Plus, a lot of the trail is located along the ridge, which can be windy and have poor visibility. But the main thing to be aware of is that this trail passes through challenging avalanche terrain, so I don’t recommend it without AST. If you are comfortable in avalanche terrain, I highly recommend this campsite and trail, as both are very beautiful. Reservations are required for the hut and a permit is required for camping from camping.bcparks.ca
Pump Peak
I left Pump Peak for last because this trail and peak are both located in challenging avalanche terrain (whereas Elfin Lakes just passes through challenging terrain). Pump Peak is a super popular trail due to its proximity to the city and the incredible views. It definitely attracts a lot of people without AST, but I don’t recommend camping here without it. It’s a great option if you want to stay near the city, but I wouldn’t consider it a beginner trail. Once you feel comfortable in avalanche terrain and camping, check this one out. Permits are not required, but you do need a day pass in order to park at the base of the mountain, available at camping.bcparks.ca
I’ve been living in Vancouver for over 10 years now and I’ve been downhill skiing every single one of those years. Most of my time has been spent at Whistler Blackcomb, but I make a point to try and ski a new resort every year. I haven’t made it to every ski resort on this list, but I’m sure I’ll get to them all one day!
Cypress is the biggest of the local mountains and the first resort I skied in BC. The resort is split between Black Mountain and Mount Strachan and has 4 major chair lifts. It’s a very busy mountain on weekends, so my preference is hitting up the mountain after work for night skiing! The highlight of this mountain is the view of Howe Sound from the Sky Chair.
Seymour is a great family mountain. It has two lifts and is a great little mountain if you have kids or are learning to ski. It will be busy here as it’s a popular location for snowshoeing and touring as well. My favourite way to visit is to skin up to Brockton Point on my touring skis and then ski down through the resort. It’s a great place for night skiing and sunset views!
Grouse Mountain
Grouse is probably the most well known resort in the city as the ski slopes can be seen from all over the lower mainland, especially when they’re lit up for night skiing. Believe it or not, I have never actually skied Grouse, mostly because it’s the smallest resort and you have to take a gondola from the base to access anything, but I’ve heard the views are unparalleled!
Whistler Blackcomb is by far the most well known ski resort on this list, and for good reason. It’s a premier ski resort and it has access to an incredible amount of terrain. I ski Whistler Blackcomb for 5-6 days every year and I never get tired of it. It will always be busy, so embrace the early morning rise to get in a few good runs before the crowds really pick up! My favourite areas to ski are 7th Heaven on Blackcomb and Symphony on Whistler.
Sasquatch is a small resort north of Harrison. It’s surprisingly close to the city, but difficult to access because it has a gravel road that requires snow tire chains. But it’s a really nice resort with 3 chairs and low crowds (even on weekends). It didn’t have much powder when I visited it, but I’ve heard it can get a nice amount of powder and the runs seem designed around this, with lots of gladed tracks down the mountain.
Manning Park
Manning Park is another small resort. It’s further than Sasquatch, but generally easier to access. The challenge with Manning is that there are very limited accommodations near the resort. So plan to either drive up and back in a day, or stay in Sunshine Valley or Hope. I adore Manning Park for its unlimited recreation activities and while its cross country trails are much more well known, it has a nice downhill resort as well.
Mount Baker
I have explored a lot around Mount Baker, but I haven’t had the opportunity to ski there yet (not for lack of trying, I had to cancel 2 trips). Odds are, most of the people skiing Mount Baker will be from BC to take advantage of the high amount of powder they get. The North Cascades are a beautiful place to visit and I love spending time in this area. There’s no where to stay on the mountain, but you can stay in Glacier, Bellingham, or drive there and back in a day.
Sun Peaks is the next biggest resort after Whistler. It’s located just north of Kamloops and is a great ski destination! There are tons of accommodations and there is lots of terrain to explore. The runs span both sides of the highway and have a huge variety of alpine and glade runs. Some of the smaller resorts on this list can be visited in a day, but definitely give yourself at least 2 days at Sun Peaks!
Of all the resorts I’ve visited in the interior, Big White is probably my favourite. It gets great snow and it has some fabulous runs. It’s located east of Kelowna and has tons of chair lifts to keep you busy. I really liked the ski village in Big White – Sun Peaks felt really large, while other resort villages felt a bit small. I may have a soft spot for this resort because it was the location of my first group ski trip, but I definitely want to go back in the future.
Silver Star Resort is located north of Vernon and is smaller than Big White and Sun Peaks. It also attracts less crowds, but can feel busy due to the smaller number of chair lifts. I’ll admit, Silver Star wasn’t my favourite resort, but I think it’s mostly because it didn’t have great conditions when I visited. It has a really nice village and I’d definitely be willing to give it another try!
Apex is one of the lesser known resorts in the interior (or at least, it feels that way). It’s located further south, east of Princeton, but west of Penticton. It gets less crowds than the other resorts I visited, but it had some truly awesome powder! I’m not sure if this is a common theme, but I have heard it tends to get dumped on in the winter. It’s a small village, but my favourite part was the forest skate loop!
If you want to visit Vancouver Island, Mount Washington is pretty much your only option. Take the ferry to Nanaimo and then drive north to Courtenay. Mount Washington is on the boundary of Strathcona Provincial Park and while the road up the mountain isn’t it great shape, it is a really nice resort for skiing and snowshoeing!
I discovered this resort because it’s included in my edge card/epic pass for Whistler. It’s located east of Seattle and is incredibly popular among the locals. There’s no ski village, so we stayed in Skykomish and drove into the resort in the morning. Be prepared for terrible traffic coming out of Seattle and aim for an early start. The lift passes will sell out and the parking lot will fill up, both of which will result in you being denied entrance. But it’s a great ski resort with some nice terrain if you plan accordingly!