Hiking The Chief

There are lots of popular hikes in Southwest BC, but I would argue that The Chief in Squamish is one of the most iconic. I had experience hiking before I moved to BC, but my practical knowledge was very limited and has grown enormously since I moved here. The only trail I was aware of before moving across the country was the West Coast Trail and I thought it was similar to the East Coast Trail in that it extended down the entire West Coast and could be day hiked in sections like in Newfoundland. I was obviously very wrong and quickly learned that it is actually a remote hike that requires substantial backpacking skills over 7+ days.

20220501_095306

Similarly, somehow I heard about The Chief soon after moving here and decided it was a great trail on which to start my west coast hiking adventures. So one sunny day in early June 2014 when my Dad was visiting, we drove out to Squamish to tackle the beast. Looking back on the experience now, it’s a bit comical. We left Vancouver late in the morning and were amazed that we couldn’t find anywhere to park (not a problem in Newfoundland). We ended up finding a place at Shannon Falls (this was before the Sea-to-Sky gondola) and decided to hike up to the First Peak from there. It’s easy to judge people that head blindly into the backcountry with no experience, but that was also how I first started adventuring when I moved here, so I can relate. There’s a very different culture on the East Coast, and while I think East Coaster’s could be a little more prepared, the level of risk associated with hiking in the mountains is a great deal higher on the West Coast.

20220501_094634

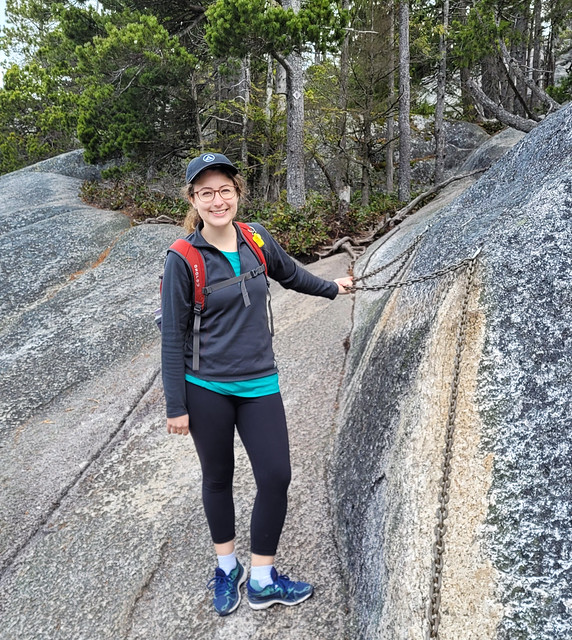
So I don’t think tackling The Chief as my very first hike was a great idea, but fortunately we didn’t get into any trouble on this hike, or any future hikes, while I was building up my safety and adventure smart knowledge. I remember the hike being very strenuous and it taking us a long time to hike up all the stairs to the top. I remember the rope and chain sections, but I don’t remember ever feeling unsafe on the trail. I bring this up because I recently re-visited this trail in May (8 years after my first visit) to hike to the Second Peak and it brought back a lot of memories that caused me to reflect on this trail and my journey since that very first hike.

The Chief is a hard trail. As my knowledge has grown and I’ve had experiences that required better trip preparedness and wilderness first aid, I’ve become both more safety conscious and risk adverse. It’s easy to walk blindly into situations that we are unprepared for in the wilderness and I’m not surprised to find that The Chief is one of the most visited places by BC Search and Rescue. I can’t quite trust my memory, so perhaps the First Peak is easier than the Second Peak, but returning there this year I felt quite astounded at how challenging The Chief is for how many visitors it receives.

20220501_091507

There are many rope climbs, narrow sections with steep drops, a ladder, and steep scrambles over slippery rock. The challenges are exacerbated by the crowds, which create bottlenecks at critical junctions. I’m sure this creates a sense of impatience among hikers that could result in mistakes at challenging locations if people are trying to hurry. I felt like it would be hard to lose the trail (though this does happen), but easy to get an injury. We were able to mostly avoid this with a very early hiking start, but it did make for a slower hike back down on the way out.

20220501_095607

So I definitely don’t recommend this hike for everyone. I’d like to return some day for the Third Peak, but after my last visit I can’t say I’m in a huge rush to do it again. Like I said, I’m reluctant to trust my memory, but given my recent experience with the Second Peak, I’m inclined to say that it’s a bit easier going up the First Peak (which I have done twice in the past). All 3 trails start at the same trailhead and it’s an easy flat walk through the walk-in campsites before you hit the stairs. Once you hit the stairs, it’s all uphill for the rest of the hike. It starts with constructed wooden staircase (which on its own is even challenging because the steps are very shallow and steep), but it quickly transitions to stone steps for the rest of the hike.

PSX_20220513_125703

Approximately 1.1km into the trail, there is a right branch that you can take to get onto the Sea to Sky trail or the branch to Third Peak. I’ve also done the Sea to Sky trail which climbs up to the gondola (you take the gondola down). It’s a very steep trail, but doesn’t feel as perilous as The Chief. I haven’t taken the branch to the Third Peak, but you can access it either through here or continuing on from the Second Peak. The topography looks a bit gentler than the trails to First and Second Peak, so if I do return for this peak, I’ll take that trail instead.

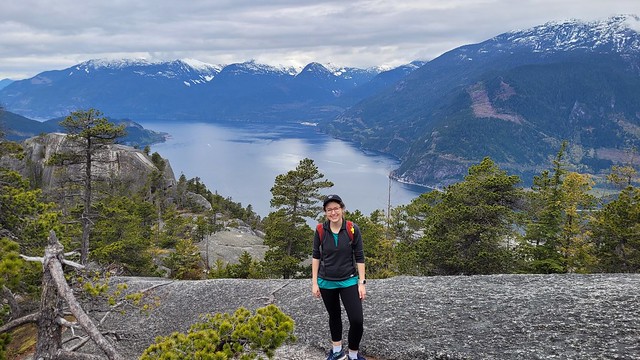
If you continue on past this branch, you’ll hit the second branch to the First and Second Peaks around 1.8km. It’s a shorter hike up to the First Peak – some apps show a trail connected the First Peak to the Second Peak trail, but it’s a climbing route, so do not attempt! In terms of views, both the First and Second Peaks have incredible views. The First Peak is the closest to Howe Sound, so if you want to snag some photos of the vibrant blue water, I’d pick this one. The Second Peak is higher and looks down on the First Peak and provides more of a bird’s eye view of Squamish.

20220501_092706_01

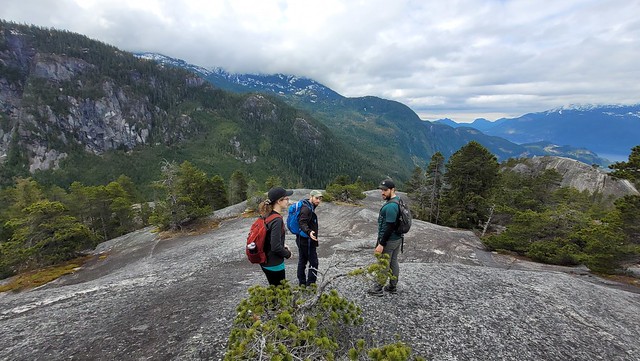
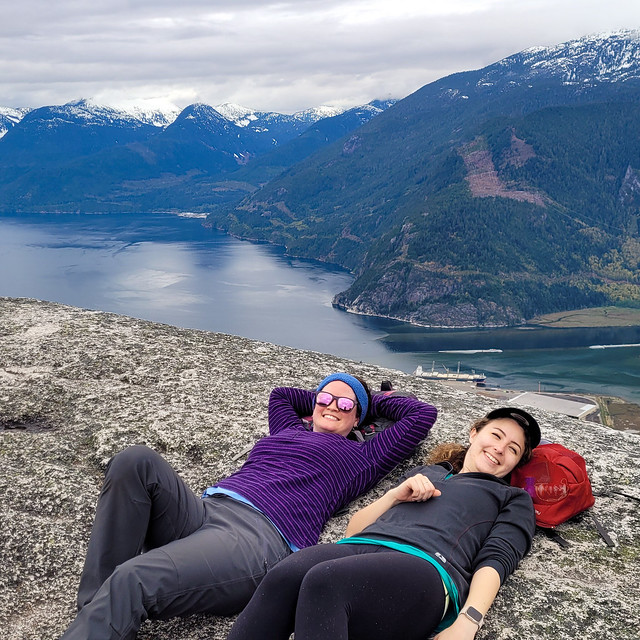
My visit to the Second Peak was a little sentimental because I hiked with Karen and Grant. Karen is my oldest friend (27 years and counting) and they recently moved back to Newfoundland after also spending the last 8 years in Vancouver. The Chief was my first ever hike here and also the last one that I did with Karen and Grant. We’ve all grown a lot since then and even though the climb is still strenuous, the stairs didn’t have us as breathless and panting as they did when we first moved here.

PSX_20220511_220643

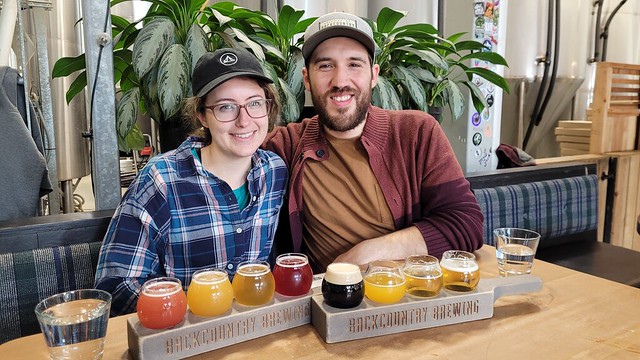
The Second Peak is quite exposed for the last section – there’s no marked trail, you just scramble up the rock until there’s no where higher to go. We had the summit mostly to ourselves due to our early start and we stayed up there for a while snacking and taking some photos before hiking back down to get beers and pizza at Backcountry Brewing. The climb is tiring, but I always find the hike down worse. Take your time and do the rope and ladder sections backwards. There’s one particularly challenging part before the ladder that me and Karen both struggled on because we are shorter. There were more people on the trail on the way back, which slowed us down, but we made sure not to rush on the top section and talked each other through it on the way back. My biggest word of advice would definitely be not to do this hike if it’s rainy as the rock will become a big slip’n’slide.

20220501_121541

So that is my assessment of The Chief. I feel really different about it now than I did 8 years ago and I think that comes from better understanding the risks. Sometimes a little knowledge is almost worse than no knowledge because you don’t understand the depth of your unknowns. If you’re new to hiking, I’d recommend taking the Sea-to-Sky gondola instead of hiking The Chief. It has just as incredible (if not better) views as The Chief, but has much easier and well-maintained trails. There’s no shame in doing the easier hike. I just want to present a bit of a different perspective on The Chief because I don’t want people to blindly walk into it the way that I did when I first moved here. I still think it’s a great hike, but something to work your way up to.

Snowshoeing Joffre Lakes

This post is a bit dated and has been a long time coming, but it was a fun trip and with Family Day coming up, it seemed like an appropriate time to write about it, so here we go! I’ve day hiked Joffre Lakes twice in the summer and I snowshoed it once in the winter of 2017 with Emily and Brandon during the Family Day Long weekend.

DSC03503

I’m not sure if Joffre Lakes is considered avalanche terrain or not as it’s not mapped on Avalanche Canada, but at the time I had read that it was pretty safe up to the second lake, so that’s where we decided to go. I’d read there was more risk going up to the third lake, so we decided against going that far and I would advise avalanche equipment and training if you go beyond second lake. Now that I’m a little wiser, I’d probably prefer to have avalanche safety equipment for the whole trail, but as I can’t remember the details of the terrain, make sure to do some additional research before visiting.

DSC03393

Fortunately we didn’t run into any problems in 2017 and were smart enough to check the avalanche bulletin before we visited. Emily wasn’t living in Vancouver at the time, but she came to visit me to go skiing and after a few days at Whistler, Brandon joined us for a little long weekend adventure around the Pemberton/Lillooet area. Our first stop was Joffre Lakes.

DSC03415

I don’t remember getting a particularly early start in the morning, but we had no trouble finding parking at the trailhead and the trail was relatively empty – some of the perks of visiting in the low season. We had a few false starts on the trail because Emily was trying to figure out what to wear and we ended up making a some adjustments. If you’re new to snowshoeing, which we were at the time, it can be a bit tricky because you want to stay warm without overheating. I like to pack my snow pants for when I stop to eat lunch, but I don’t like hiking in them. This means that you need to have a good pair of water resistant pants instead and wear high boots or gaiters to keep your legs from getting wet from the kickback of the snow on your snowshoes. These days I hike with long underwear, water resistant pants, and high boots.

DSC03404

One of the things I love about Joffre Lakes is that the first lake is only minutes from the parking lot, so you’re immediately rewarded with a gorgeous view! There’s less to see on the trail after that in the winter and I mostly remember being in the trees – although on the way down you get a beautiful view looking out over the surrounding mountains when you pass through the boulder field. There were quite a few people ski touring, so you just have to watch out for them as a snowshoer since they move so much faster (downhill anyways). While Joffre isn’t a particularly long or challenging hike in the summer, it is a bit steep in the winter, so I remember being pretty tired by the time we hit the second lake.

DSC03461

We had good weather when we visited, it was a bit overcast, but not so much that you couldn’t see the view. So we set up on the lake when we arrived to have our lunch. Unfortunately, it was a bitterly cold day, which was not improved by being out on the open lake. We got really cold, really fast. Even with snow pants, we had to bundle up immediately and Emily recalls it as being the coldest she’s ever been. I’m not sure if we were doing something wrong because I can’t ever recall being as cold in the snow as we were eating lunch at Joffre. It was particularly bad for Emily – I think she may not have had a sit-upon and been sitting right in the snow in her snow pants, so she did not want to stick around.

DSC03440

So unfortunately, we didn’t have long to enjoy the view before we were packing up again to keep moving. It was a good lesson in preparedness though. I don’t think we were overly underprepared, but it was a good reminder how inhospitable the wilderness can be. There’s no way we would have survived a night out there if something had gone wrong. So always bring lots of extra layers in the winter, as well as I’ve started hiking with a small stove and pot so that I’m able to make hot drinks to help stay warm. Items like a bivvy sack or an inreach can also save your life if you get stuck somewhere.

DSC03487

We warmed up again once we started moving and it was a quick hike back down to the bottom. We ended up spending the night in Lillooet (which has the most beautiful view of Seton Lake) and returned to Pemberton the following day. We’d been hoping to visit Keyhole hot springs, but a semi truck jack knifed on the road on the way to the springs, cutting off traffic in both directions, so we opted to cut our losses and did a bit of snowshoeing in the Pemberton area and Nairn Falls instead. Fortunately we weren’t stuck on the other side of the semi truck, in which case, make sure you have survival gear in your car as well because you never know how long you could be there!

20170212_081322

Snowshoeing Brockton Point

Vancouver got a lot of snow through the Christmas holidays in 2021 and when I returned from my trip to Newfoundland I was excited to get up in the mountains and enjoy it! So the first weekend back in January we woke up super early to be at Mount Seymour when the gate opened at 7am. We’re not quite on the ball enough to get there right on time, but we were able to get parking and hit the hill around sunrise. If you’re visiting these days, you will need to get a parking pass from BC Parks in order to park in the backcountry lot. These are available at https://bcparks.ca/reservations/day-use-passes/ and release at 7am, 2 days in advance of your trip. They are free, but will sell out on the weekends, so make sure to get it right away when it releases.

PSX_20220118_191016

Our desired destination was Pump Peak, which is located past the top of the ski lift, about mid-way to Mount Seymour. I hiked up the ski lift towards Pump Peak once in the summer on my way to Elsay Lake and I snowshoed to Brockton Point the previous winter during my avalanche training course. But it was pouring rain and foggy on that occasion, so I didn’t remember too much about the trek. It’s about 7km out and back to Pump Peak and we were planning to have breakfast at the top. We never ended up making it past Brockton Peak, which was for the best because we later learned that beyond Brockton Peak is avalanche terrain, so it is highly recommended that you take an Avalanche Safety Course and bring proper equipment with you if you are hiking past Brockton.

PSX_20220111_201923

It’s a bit of a slog to snowshoe up to Brockton Point, which is at the top of the ski lift. The snowshoe trail runs parallel to the ski run, but never connects. It’s a wide trail and it’s a pretty steady uphill trek, but boy is it beautiful! The weather blessed us on our visit and it was a gorgeous blue sky day with several inches of fresh powder from the day before. Once you get up to Brockton Point, there are beautiful views in all directions and you can see both out to the backcountry and down to Vancouver. We brought our dog Sadie with us and she had a lot of fun in the snow. However, she is a reactive dog (which basically means she doesn’t like strange dogs approaching her) – this is an on-leash trail, but a lot of dog owners ignore the rule and let their dogs run free, so be aware if off-leash dogs make you or your pup uncomfortable.

PSX_20220117_221628

If you’re looking for an easier day, I recommend stopping at Brockton Point, which is about 4-4.5km round trip from the main ski parking lot, but add another 1km each way from the backcountry parking lot, which is where you’ll be required to park. We started to hike towards Pump Peak, which is easily visible from Brockton Point. The trail descends from Brockton to do a bit of a round about of Pump Peak to climb up from the the back. We started towards it, but as we snowshoed, we checked the time and realized we might not have quite as much time as we needed. We weren’t really that slow, but we weren’t super fast either. We only had a day pass for the morning and Carolyn’s puppy Jasper was home alone, so we wanted to be back down to the car for noon.

20220109_093505

We could have pushed on to Pump Peak, but we would have had to turn around immediately upon getting there, so we decided to stop at a viewpoint near Brockton Point instead (which given the avalanche terrain concerns, was the right choice). We’d all brought our stoves to make breakfast and the views were gorgeous all along the ridge, so we didn’t mind missing out on the peak. Me and Seth made oatmeal, Carolyn and Steve made breakfast sandwiches, and Brandon outshined us all with mountaintop dim sum! It was a warm enough day with the sun shining down on us and we liked having a long relaxing break in the snow instead of rushing up and down to Pump Peak.

DSC00141_1

A few words of advice if you’re visiting Seymour – as I mentioned above, there is now a winter permit system to access the mountain. People have a lot of mixed feelings about this and I think the system has definite pros and cons, but it seems like it’s here to stay, so make sure to get your pass before visiting the mountain. Seymour Resort staff will be checking for permits at the base of the mountain, so you won’t get past the gate without a permit and you won’t get past the snowshoe parking lot without a ski pass. So be prepared for the extra walk up and back to the parking lot. I recommend going early because even with the new system, as this is a very popular destination and even with the pass, you might get stuck parking very far down the lot (which means more hiking added to your journey).

IMG-20220109-WA0011

A lot of people visit Seymour to hike Dog Mountain, which is an easier trail, but there are a lot of people recreating out to Pump Peak as well. The pass system has thinned out the trails a bit, which is nice, but be prepared to encounter lots of snowshoers, skiers, and dogs. A lot of the trail is multi-use, but there are a few places where it branches and skiers will often take slightly different routes, so my advice as a snowshoer is to follow the trail markers.

20220109_091301

As mentioned, you are entering avalanche terrain if you choose to go all the way to Pump Peak. The trail along the ski resort is in simple terrain, so you’re probably mostly okay without avalanche equipment if you’re only going to Brockton Point, but eventually you will reach a sign with the avalanche danger rating just before Brockton Point. After this point, you are leaving simple terrain and entering challenging terrain, so make sure you are familiar with avalanche hazards and take the proper equipment with you. See my post on avalanche safety for more details.

DSC00146

But if you’re prepared, Brockton Point/Pump Peak make for a great snowshoe adventure! I still haven’t made it to Pump Peak, which is why I titled this point Brockton Point instead, but whenever I don’t finish a trail, I just say it was because I had to leave something to come back for! So one day I’ll be back to finish this trail for real!

PSX_20220118_204616