This post is a bit dated and has been a long time coming, but it was a fun trip and with Family Day coming up, it seemed like an appropriate time to write about it, so here we go! I’ve day hiked Joffre Lakes twice in the summer and I snowshoed it once in the winter of 2017 with Emily and Brandon during the Family Day Long weekend.
I’m not sure if Joffre Lakes is considered avalanche terrain or not as it’s not mapped on Avalanche Canada, but at the time I had read that it was pretty safe up to the second lake, so that’s where we decided to go. I’d read there was more risk going up to the third lake, so we decided against going that far and I would advise avalanche equipment and training if you go beyond second lake. Now that I’m a little wiser, I’d probably prefer to have avalanche safety equipment for the whole trail, but as I can’t remember the details of the terrain, make sure to do some additional research before visiting.
Fortunately we didn’t run into any problems in 2017 and were smart enough to check the avalanche bulletin before we visited. Emily wasn’t living in Vancouver at the time, but she came to visit me to go skiing and after a few days at Whistler, Brandon joined us for a little long weekend adventure around the Pemberton/Lillooet area. Our first stop was Joffre Lakes.
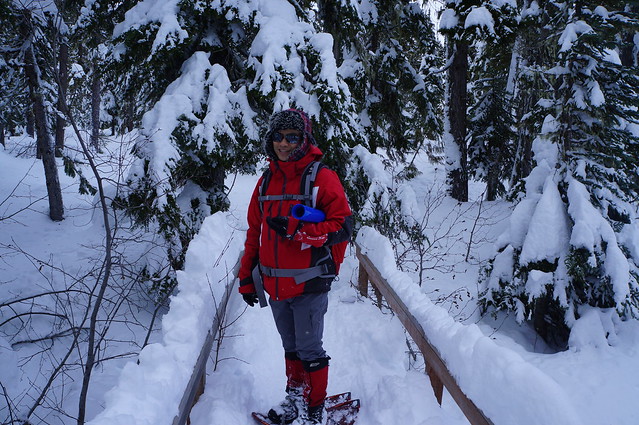
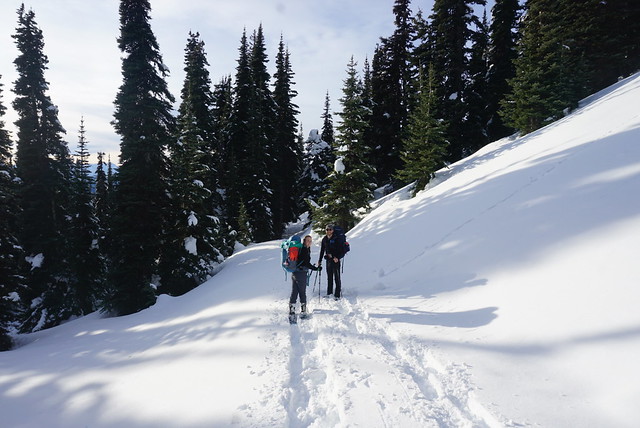
I don’t remember getting a particularly early start in the morning, but we had no trouble finding parking at the trailhead and the trail was relatively empty – some of the perks of visiting in the low season. We had a few false starts on the trail because Emily was trying to figure out what to wear and we ended up making a some adjustments. If you’re new to snowshoeing, which we were at the time, it can be a bit tricky because you want to stay warm without overheating. I like to pack my snow pants for when I stop to eat lunch, but I don’t like hiking in them. This means that you need to have a good pair of water resistant pants instead and wear high boots or gaiters to keep your legs from getting wet from the kickback of the snow on your snowshoes. These days I hike with long underwear, water resistant pants, and high boots.
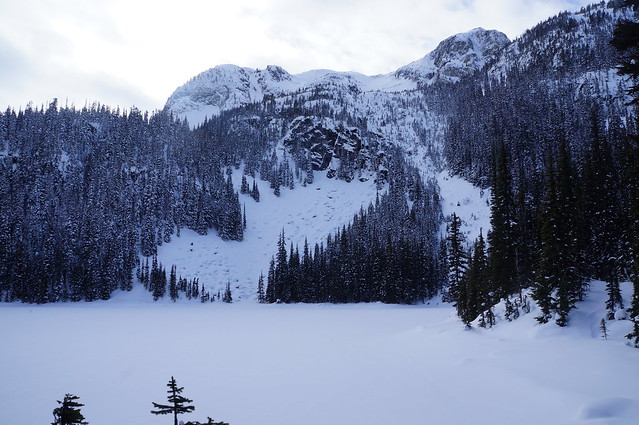
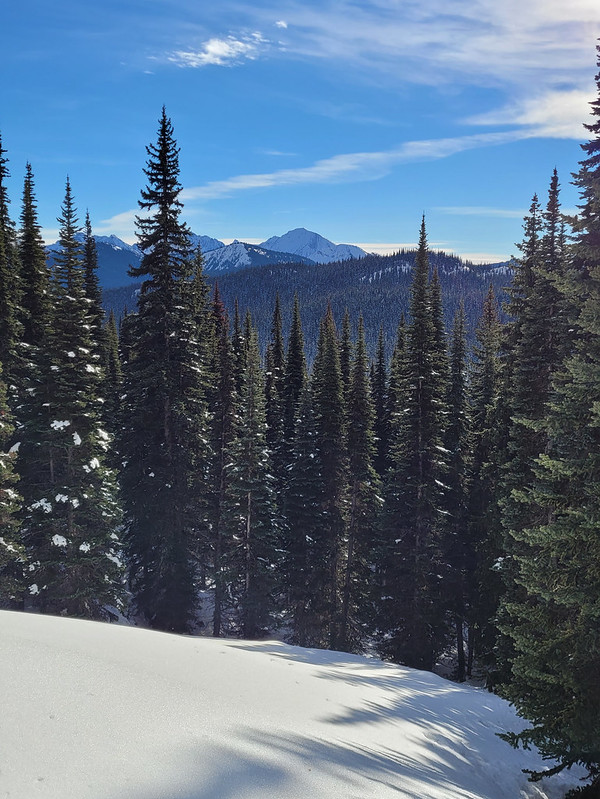
One of the things I love about Joffre Lakes is that the first lake is only minutes from the parking lot, so you’re immediately rewarded with a gorgeous view! There’s less to see on the trail after that in the winter and I mostly remember being in the trees – although on the way down you get a beautiful view looking out over the surrounding mountains when you pass through the boulder field. There were quite a few people ski touring, so you just have to watch out for them as a snowshoer since they move so much faster (downhill anyways). While Joffre isn’t a particularly long or challenging hike in the summer, it is a bit steep in the winter, so I remember being pretty tired by the time we hit the second lake.
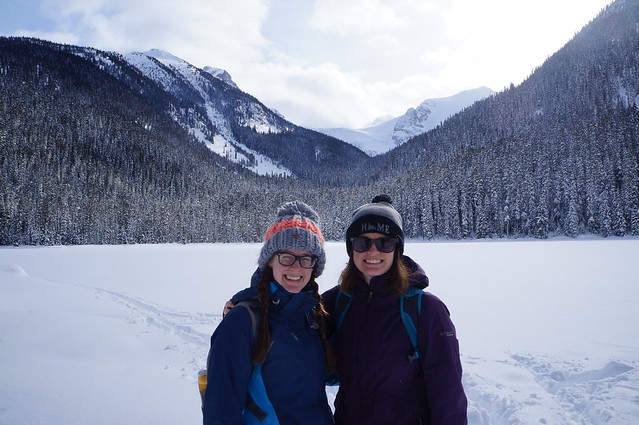
We had good weather when we visited, it was a bit overcast, but not so much that you couldn’t see the view. So we set up on the lake when we arrived to have our lunch. Unfortunately, it was a bitterly cold day, which was not improved by being out on the open lake. We got really cold, really fast. Even with snow pants, we had to bundle up immediately and Emily recalls it as being the coldest she’s ever been. I’m not sure if we were doing something wrong because I can’t ever recall being as cold in the snow as we were eating lunch at Joffre. It was particularly bad for Emily – I think she may not have had a sit-upon and been sitting right in the snow in her snow pants, so she did not want to stick around.
So unfortunately, we didn’t have long to enjoy the view before we were packing up again to keep moving. It was a good lesson in preparedness though. I don’t think we were overly underprepared, but it was a good reminder how inhospitable the wilderness can be. There’s no way we would have survived a night out there if something had gone wrong. So always bring lots of extra layers in the winter, as well as I’ve started hiking with a small stove and pot so that I’m able to make hot drinks to help stay warm. Items like a bivvy sack or an inreach can also save your life if you get stuck somewhere.
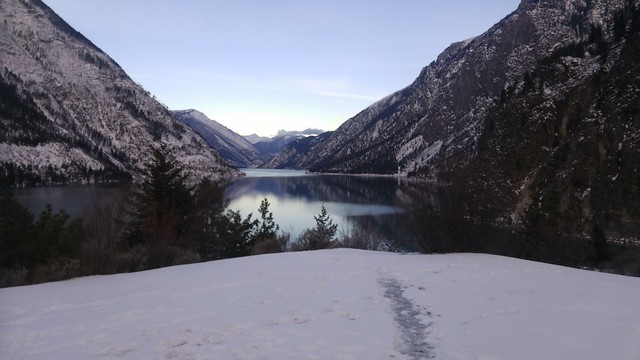
We warmed up again once we started moving and it was a quick hike back down to the bottom. We ended up spending the night in Lillooet (which has the most beautiful view of Seton Lake) and returned to Pemberton the following day. We’d been hoping to visit Keyhole hot springs, but a semi truck jack knifed on the road on the way to the springs, cutting off traffic in both directions, so we opted to cut our losses and did a bit of snowshoeing in the Pemberton area and Nairn Falls instead. Fortunately we weren’t stuck on the other side of the semi truck, in which case, make sure you have survival gear in your car as well because you never know how long you could be there!
One of my favourite activities every winter is to go snow camping! Carolyn and I have been going for 5 years running and the trip has expanded to include Brandon and Steve. Every year we plan where we want to go and then always end up having to change plans at the last minute. You have to be flexible when going into avalanche terrain and every year it seems that the avalanche bulletin likes to mess up our trip plan at the last minute. We have a very low tolerance for risk in the winter, so we’re always changing location to ensure the safest trip possible.
This year we’d been planning to go to Pump Peak (on Seymour), but Vancouver had a particularly warm spell of weather the week before the trip, so we decided to switch to Manning Park instead in hopes of finding fresh powder. It was also calling for beautiful sunny weather on the weekend we went, so we decided on Fat Dog trail in Manning Park, which is supposed to have nice views of the park above the treeline. Then Avalanche Canada issued a special warning a few days before the trip about how the backcountry was experiencing spring-like conditions due to thaw, which meant higher risk, so we decided to change our plans once more.
I don’t think Fat Dog is a particularly high risk trail, but you do pass through a valley that is in the run-out zone of avalanche terrain at the start of the hike, so we decided to do Poland Lake instead, which we read didn’t have avalanche terrain and is shown as simple terrain on Avalanche Canada. Poland Lake has been on our radar for years, but for some reason we thought it wasn’t a very nice trail and always considered in a back-up trail.
We’re so glad we went to Poland Lake, because we ended up loving this location! To access Poland Lake, you have to drive almost to the end of the resort road and park at Strawberry Flats. You can save about 2kms if you hike directly from the ski resort, but there’s no overnight parking at the resort, so if you’re camping, you need to leave from Strawberry Flats. The trailhead is on the north side of the road near the end of the lot where the cross country ski trail starts back towards the lodge. There’s an off-shoot trail that heads up towards the ski resort, running parallel the road. This is the route we took, but we regretted it because it is all uphill and adds 2km’s of hiking. If we did it again, we would plan to leave our bags at the resort and just walk up the road.
If you do the trail right, you’ll eventually reach a small fork in the trail where the left branch heads back down towards the road and the right branch heads up to the mid-point of the ski hill. In the summer, you can reach Poland Lake via the middle of the hill, but this route is not practical in the winter. You’re supposed to go back down to the bottom of the ski hill and hike up along the western edge of the large green run called Horseshoe. But there was no signage on the left fork and nothing shown on our GPS apps, so we continued along the summer route unknowingly. This was definitely our error, we should have read more about the trail description instead of relying just on GPS, so I caution you here to go back and start from the resort base. In our defense, the resort route is not marked at all and does not look like a proper trail, so we gave resort staff some feedback.
In any case, we continued up to the midpoint of the ski resort and ended up having to snowshoe ski runs across the entire mountain. This is definitely dangerous as the runs are not wide or intended for snowshoers. Our only saving grace was that the slopes were extremely empty and we didn’t encounter many skiers. Eventually we got off the ski runs and ended up in some of the glades. We didn’t encounter any more skiers, but it was very steep terrain and had we not been in the middle of a resort (where avalanche risk is managed), we would have turned around. There’s no signage because it’s not a winter route, so we relied entirely on our GPS and way-finding to get back on the trail. Eventually we tracked down the official entrance to the Poland Lake trail (which is at the top back of the ski hill) and saw tracks leading in from the other side of the resort, which is clearly where we were supposed to come up.
By this point we were really tired from so much uphill travel and worry about where the trail was, but happy to finally be on a proper snowshoe trail. We’d already hiked about 4kms and it’s another 4kms to the lake, but fortunately the trail is a lot flatter along this section. There’s lots of ups and downs, but they are very gradual. It still took us a long time though because we were very tired and by the time we reached the lake, it had taken us just under 5 hours to go 8km. One of the other contributing factors to our pace was that we ended up having to break the trail for the better part of 3 kilometres! We were sharing the trail up until shortly after the 1km mark, but then the tracks abruptly stopped and we had to create the trail to the lake. This is such a rare occurrence in BC, where the trails are always busy, so we were excited to snowshoe in fresh powder and the prospect of having the lake all to ourselves. It is a lot more work to break trail though, so it did slow us down.
We’re still new to avalanche terrain, but we were surprised while hiking along the Poland Lake trail that it was said not to have avalanche terrain. It is marked on Avalanche Canada as simple terrain, but it is below some challenging terrain and we thought the trail could easily be in the run-out zone of an avalanche along some sections. Fortunately we all had avalanche gear, so we crossed some of the more sketchy looking sections solo to minimize our risk, mostly around the mid section of the trail, south of Grassy Mountain.
The sun was starting to set when we finally reached Poland Lake and we quickly got to work setting up camp. The official campsite is on the far side of the lake and there is a small emergency shelter over there. Due to imminent sunset, we opted not to go around the lake and found a nice spot to set up camp with a view of the sun setting over the lake. I’m not sure if we’re just getting more experienced, or if it was just that the snow was super light and fluffy and easy to shovel, but we were particularly quick in digging holes for our tents on this trip and it didn’t take us too long to get shelter up. We broke our headlamps out just as we were finishing setting up the tent, so fortunately we had daylight for most of it.
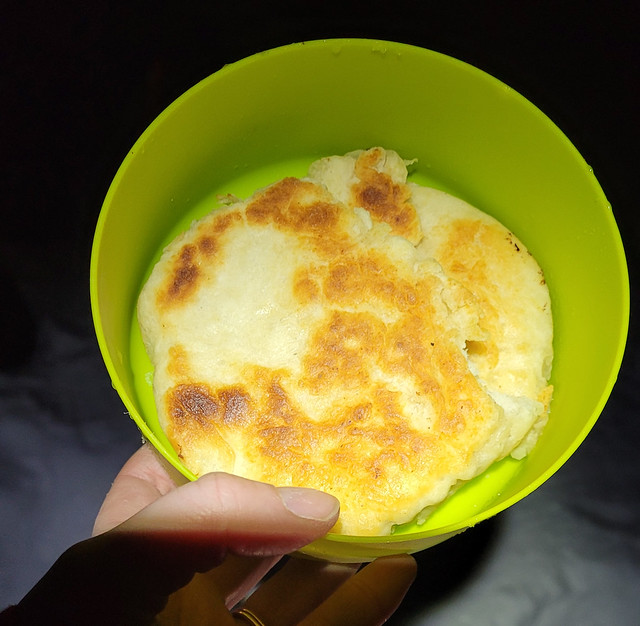
Unfortunately, we never took the time to build a proper snow kitchen on this trip. Once we got our beds set up it was dark and we were too tired to put in the effort. But we did have a delicious dinner! Brandon made us all miso soup and then me and Brandon had peanut soup and Carolyn and Steve had chicken soup. I tried something new and made bannock for dessert! It makes for a good backcountry bread because there’s no yeast, you just need to bring a bit of oil for frying. Honestly, it was delicious – I had practiced it at home, but it tasted way better in the backcountry. I just added the water right into the bag with the mix and kneaded it in the ziploc, so it didn’t even make any mess!
It had been a bit hit and miss with the sun all day, with it flitting in and out between the clouds, but in the evening all the clouds moved off and we had a completely clear night for stargazing! I bought a little star chart and had a good time trying to identify some of the constellations. I wasn’t planning to do any night photography, but the conditions were so good I ended up taking photos in the snow for the better part of an hour. I always get great star photos at Manning because it’s so far away from any ambient light!
Carolyn and Steve slept like the dead all night while me and Brandon listened to the cacophony of their snores. We had a bit of a lie in (for us) and got up around 8:30am. Meals are always a bit slow on snow camping trips because it takes so long to melt snow and boil water. Brandon decided to use his alcohol stove on this trip, which works well once it get’s going, but takes a long time to properly heat up. We concluded it’s good for cooking, but the traditional white gas stove is better for melting snow because the condensation on the pot was dripping into the alcohol stove and suppressing its burn.
After a leisurely breakfast we packed up everything to head back down the mountain. As always, when you’re done, make sure to fill in your holes so as not to leave hazards for future skiers. It was about noon when we left the campsite, but we made a much quicker descent than our 5 hour trek in. The actual Poland Lake trail is about 4km and it felt a lot easier after a day of rest. We went the correct way down the ski hill on the way back and hiked along the edge of the green run. We did see some signs pointing into the woods the for “Poland Lake trail”, but it was clearly a brand new trail that the resort was promoting and it didn’t look marked or established, so we opted not to use it. We did run into a resort employee in the parking lot and he confirmed it was new and said they were hoping to improve it, so hopefully next time we visit we’ll be able to use that trail!
We did encounter one odd thing on the trail that I wanted to bring up. When we were hiking along, we saw that someone had written “help” in the snow. It was right at the point where the previous tracks had stopped (where we started breaking our own trail), so we assume the individual turned around and went back. We did search around the area for anything suspicious and blew our whistle and did some voice calls, but didn’t find anything. We reported it at the resort before we left and they hadn’t received any missing person reports, so we think it was probably someone just messing around. Maybe it wasn’t, but something to think about when you are in the backcountry and what kind of message you are leaving for others.
Anyways, it only took us 2.5 hours to get to the bottom of the resort and then Steve and Brandon kindly offered to walk back the road to strawberry flats to get the cars. Me and Carolyn hung out and ate lunch while they were gone. I’ve been really into cold soaking my lunches lately and tried a cold soak taco salad that turned out amazing and was so delicious to eat! I’m working on lots of recipes for the upcoming summer season and hope to share them on the blog before then!
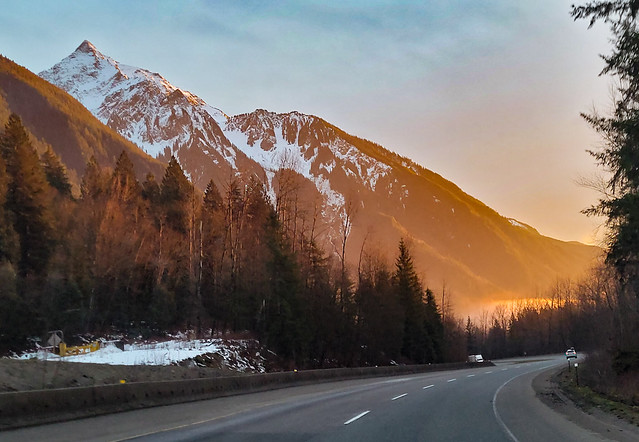
Otherwise it was a pretty uneventful trip back to Vancouver, although we did get a gorgeous sunset over the mountains driving back through Chilliwack! Definitely recommend Poland Lake after this experience, just make sure you take the winter route!
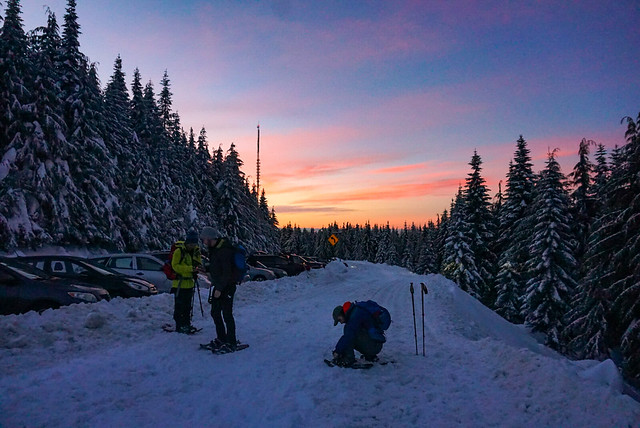
Vancouver got a lot of snow through the Christmas holidays in 2021 and when I returned from my trip to Newfoundland I was excited to get up in the mountains and enjoy it! So the first weekend back in January we woke up super early to be at Mount Seymour when the gate opened at 7am. We’re not quite on the ball enough to get there right on time, but we were able to get parking and hit the hill around sunrise. If you’re visiting these days, you will need to get a parking pass from BC Parks in order to park in the backcountry lot. These are available at https://bcparks.ca/reservations/day-use-passes/ and release at 7am, 2 days in advance of your trip. They are free, but will sell out on the weekends, so make sure to get it right away when it releases.
Our desired destination was Pump Peak, which is located past the top of the ski lift, about mid-way to Mount Seymour. I hiked up the ski lift towards Pump Peak once in the summer on my way to Elsay Lake and I snowshoed to Brockton Point the previous winter during my avalanche training course. But it was pouring rain and foggy on that occasion, so I didn’t remember too much about the trek. It’s about 7km out and back to Pump Peak and we were planning to have breakfast at the top. We never ended up making it past Brockton Peak, which was for the best because we later learned that beyond Brockton Peak is avalanche terrain, so it is highly recommended that you take an Avalanche Safety Course and bring proper equipment with you if you are hiking past Brockton.
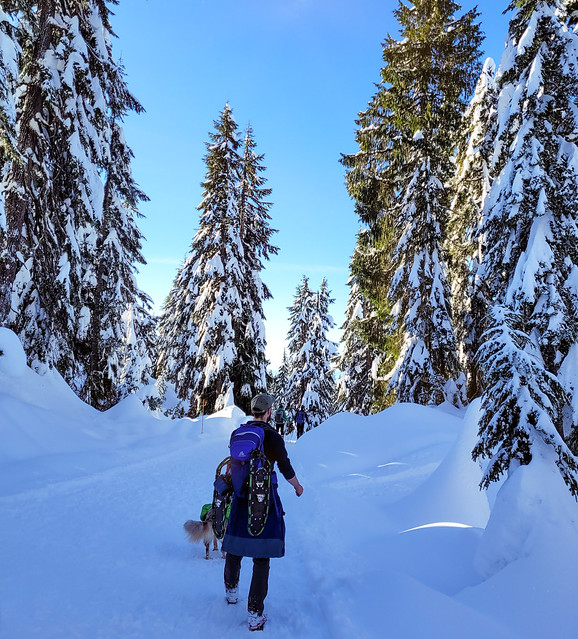
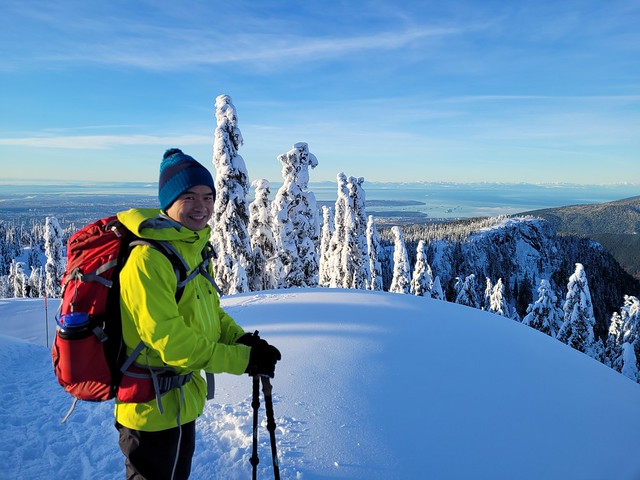
It’s a bit of a slog to snowshoe up to Brockton Point, which is at the top of the ski lift. The snowshoe trail runs parallel to the ski run, but never connects. It’s a wide trail and it’s a pretty steady uphill trek, but boy is it beautiful! The weather blessed us on our visit and it was a gorgeous blue sky day with several inches of fresh powder from the day before. Once you get up to Brockton Point, there are beautiful views in all directions and you can see both out to the backcountry and down to Vancouver. We brought our dog Sadie with us and she had a lot of fun in the snow. However, she is a reactive dog (which basically means she doesn’t like strange dogs approaching her) – this is an on-leash trail, but a lot of dog owners ignore the rule and let their dogs run free, so be aware if off-leash dogs make you or your pup uncomfortable.
If you’re looking for an easier day, I recommend stopping at Brockton Point, which is about 4-4.5km round trip from the main ski parking lot, but add another 1km each way from the backcountry parking lot, which is where you’ll be required to park. We started to hike towards Pump Peak, which is easily visible from Brockton Point. The trail descends from Brockton to do a bit of a round about of Pump Peak to climb up from the the back. We started towards it, but as we snowshoed, we checked the time and realized we might not have quite as much time as we needed. We weren’t really that slow, but we weren’t super fast either. We only had a day pass for the morning and Carolyn’s puppy Jasper was home alone, so we wanted to be back down to the car for noon.
We could have pushed on to Pump Peak, but we would have had to turn around immediately upon getting there, so we decided to stop at a viewpoint near Brockton Point instead (which given the avalanche terrain concerns, was the right choice). We’d all brought our stoves to make breakfast and the views were gorgeous all along the ridge, so we didn’t mind missing out on the peak. Me and Seth made oatmeal, Carolyn and Steve made breakfast sandwiches, and Brandon outshined us all with mountaintop dim sum! It was a warm enough day with the sun shining down on us and we liked having a long relaxing break in the snow instead of rushing up and down to Pump Peak.
A few words of advice if you’re visiting Seymour – as I mentioned above, there is now a winter permit system to access the mountain. People have a lot of mixed feelings about this and I think the system has definite pros and cons, but it seems like it’s here to stay, so make sure to get your pass before visiting the mountain. Seymour Resort staff will be checking for permits at the base of the mountain, so you won’t get past the gate without a permit and you won’t get past the snowshoe parking lot without a ski pass. So be prepared for the extra walk up and back to the parking lot. I recommend going early because even with the new system, as this is a very popular destination and even with the pass, you might get stuck parking very far down the lot (which means more hiking added to your journey).
A lot of people visit Seymour to hike Dog Mountain, which is an easier trail, but there are a lot of people recreating out to Pump Peak as well. The pass system has thinned out the trails a bit, which is nice, but be prepared to encounter lots of snowshoers, skiers, and dogs. A lot of the trail is multi-use, but there are a few places where it branches and skiers will often take slightly different routes, so my advice as a snowshoer is to follow the trail markers.
As mentioned, you are entering avalanche terrain if you choose to go all the way to Pump Peak. The trail along the ski resort is in simple terrain, so you’re probably mostly okay without avalanche equipment if you’re only going to Brockton Point, but eventually you will reach a sign with the avalanche danger rating just before Brockton Point. After this point, you are leaving simple terrain and entering challenging terrain, so make sure you are familiar with avalanche hazards and take the proper equipment with you. See my post on avalanche safety for more details.
But if you’re prepared, Brockton Point/Pump Peak make for a great snowshoe adventure! I still haven’t made it to Pump Peak, which is why I titled this point Brockton Point instead, but whenever I don’t finish a trail, I just say it was because I had to leave something to come back for! So one day I’ll be back to finish this trail for real!