As much as I loved skiing in Banff National Park, I can’t deny that one of the real highlights of the trip for me was when we went skating on Lake Minnewanka. Lake skating is such an iconic Canadian activity, yet I get so few opportunities to do it living in Vancouver. I was super keen to go skating while we were in the Rockies, so I crammed my skates into my checked luggage.
While you do have a lot more freedom to set your own schedule when you bring your own skates, it’s definitely not necessary. Emily didn’t bring it any, so we still had to rent them while we were there. We assumed we’d get the opportunity to skate on Lake Louise, but I was still keen to find a less commercial skating experience. The hardest part about free skating on natural ice is timing. You want the ice to be thick enough, but if you wait to late in the season, the ice will likely be covered in snow, resulting in a lot of work to shovel the skating surface. How the ice freezes will also play a large role in how easy the skating will be.
Since we were visiting in March, I figured our odds of getting to go lake skating were pretty slim. But it had been really cold and sunny the week before we visited, so I was hoping some lakes might be clear. It was calling for snow most of the week we visited, so the first thing we did was search for some ice before it got covered again in the following days.
There are several places to rent adventure equipment in Banff – we rented from Banff Adventures for $15. I was told Lake Minnewanka and Two Jack Lake were good places to try, but the rental place told Emily the surface wouldn’t be good, so we decided to try the outdoor rinks first (I think the rentals are hesitant to recommend lake skating for liability reasons, so do your own research).

If you’re nervous about lake skating, there are a few options in Banff, there’s a small natural rink by the train station and a bigger one behind the curling arena. Driving by the train station rink first (and seeing how small it was), we opted for the arena. I’m glad we went here first because it had been several years since either of us had been on skates and it was a comfortable place to get used to it again. There were a few people around with hockey sticks, but it wasn’t overly busy, so we had a good time doing laps.
But I was still really keen to at least check out the lakes while we had the rentals, so we decided to go to Minnewanka anyways, figuring if we couldn’t skate we could at least go for a little hike. You have to drive by Two Jack Lake on the way to Minnewanka, so we scoped it out, but it was a mix of very bumpy ice and snow, so we kept going to Minnewanka. Likewise, Minnewanka was a bit of a mix of ice and snow, but there were much larger ice patches and lots of people out exploring around on the ice, so we figured it was worth a try.
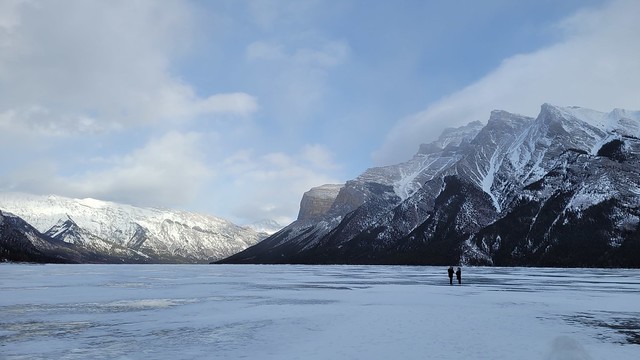
Minnewanka is a huge lake, extending 28km up through the mountains. It’s absolutely wild to me that such a large lake is able to completely freeze in the winter. The shallow part of the lake was completely covered in snow, so you have to walk about 500-1000m to get to the parts where you can skate. Always be cautious if you are going out of the ice. It had been -20 degrees the entire week before we got there and we’d read up that people had been out skating all the previous week before visiting. It is somewhat risky going out on the snow to get to the ice because it provides a relative feeling of safety, but you can’t see the ice quality until you’re further out.
It was jarring when we did finally reach the ice. The ice in Newfoundland generally doesn’t freeze very evenly and is usually completely opaque, but the ice in Minnewanka is clear and we could quickly see that we weren’t going to have any concerns about ice depth. From the ridges in the ice, you can easily see that it’s at least 1.5-2 feet thick. 6 inches is the safe depth for skating, so we weren’t worried about ice depth at all, just freaked out by how scary it is to be able to see right down through the ice!

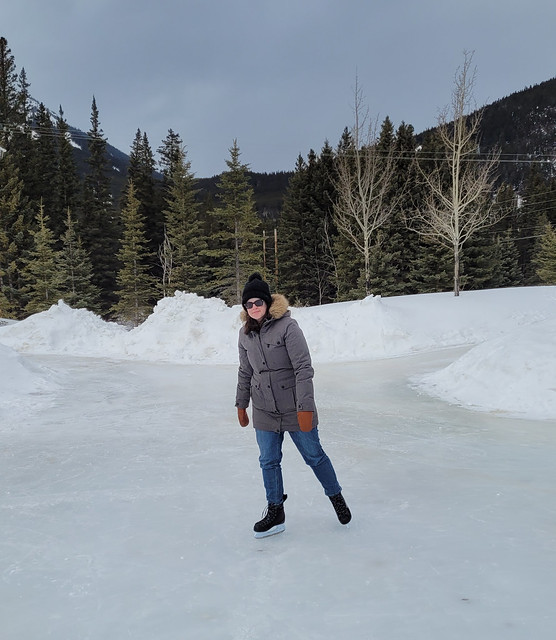
It was very cool though. When we got to the edge of the snow we laced up our skates and put our boots in our backpack to go for a skate. The ice was bumpy in places, but it was a much smoother surface than I was expecting and there was tons of room to skate all over the lake. You can see all the air bubbles frozen in the ice as they tried to rise to the surface and we kept skating around looking for interesting features. It was pretty windy skating on the lake, but I think that’s why more of the snow was gone. Pretty much every other lake we saw was snow covered, but I think the wind blows it off Minnewanka since it’s so large. It’s such a fun experience and frankly, I’ve never felt more Canadian then when ice skating on a frozen lake.
Fortunately, if you’re still a bit nervous about the idea of finding your own ice, you can skate on Lake Louise. It’s still not a totally risk free activity as the ice isn’t managed by anyone, but so many people skate there and it’s very close to shore, so I think it’s more manageable risk. Lake Louise does get covered in snow though, so you can’t skate on the entire lake, just the section at the end near the chateau where people keep in shoveled.

Later in the week we wanted to make a go for Lake Louise as well. It’s such an iconic place, so we figured it was worth skating there too. Unfortunately the day we visited was the worst weather we had on the trip. It was overcast most days, but on the day we went to Lake Louise it snowed pretty heavily and the clouds and visibility were really low. The rink wasn’t shoveled when we got there, so we decided to snowshoe across the lake instead. Cross country skiers traverse across the lake and walkers go up and down the edge to the back of the lake where there are some ice climbing opportunities.
Unfortunately we didn’t catch much of the views with the poor visibility, but we have been there in the summer, so we just tried to enjoy the snow on the trees instead. There were some people starting to clear the ice when we got back, but it was a relatively small surface and a lot of people, so we decided to skip it since we’d had so much success at Minnewanka already.
So that’s my advice on skating in Banff National Park. Definitely go for it because it is a super fun activity, but stick to your comfort level and always make sure the ice is safe before going out onto it!