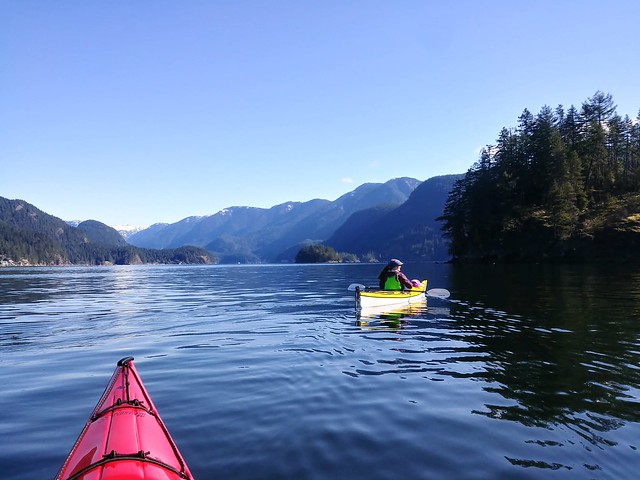
Seth and I started kayaking a few years ago in an effort to find a hobby that we both enjoyed. I love backpacking and camping and Seth likes hiking and camping, but he does not really like backpacking. Seth kayaked with his family as a kid and liked it, so I thought touring with sea kayaks might be a good shared hobby for us because we could get out in nature and go camping without having to carry packs. Turns out it was a great idea and we both loved it! We took a kayaking basics course in 2018 and have gone on a 3-day trip every year since, so this year we decided to get ourselves a pair of kayaks!
Kayaks are definitely not cheap and have a lot of costs that come along with them (roof rack, paddles, PFDs, skirts, etc). To date we’ve always rented kayaks, and while that’s not cheap either, you can still go on quite a few trips before it approaches the cost of buying your own. But we’d like to start doing day and evening paddles as well, so we decided it was worth the money and are super excited about our new boats! We got them at Skyview Outdoor Store in Surrey, which I would highly recommend. We both got Boreal Storm 16 kayaks, which means they are 16 foot long sea touring kayaks. To differentiate between the two, I got a yellow one and Seth got red.
We took them out on their maiden voyage over the Easter weekend in early April. We wanted to launch from the Belcarra picnic area, but we were a little too late getting started on Easter Sunday and couldn’t find parking, so instead we took them over to Sasamat Lake. It’s a nice little lake and it was fun to test them out there, but it’s a bit on the small side, so we returned to Belcarra early on Easter Monday to kayak to Jug Island. If you’re planning to explore (by foot or boat) from the picnic area, arriving early is a must as its a small parking lot and Metro Vancouver does close the road once it’s full. They have also introduced pay parking this year for $2 an hour. There is an upside though – you can get public transit to both Sasamat Lake at Belcarra from Moody Centre!
We had absolutely perfect weather for it on the day we went – blue skies with a dead calm on the water. I really like Belcarra Regional Park and I’ve hiked out to Jug Island a few times. It’s only a 5km hike, so I recommend checking it out on foot if you’re in the area, but this time I definitely preferred visiting by boat! We took our time paddling up the coast looking at all the giant homes along the water. It has a very urban feel until you reach the end of the peninsula, but once you round the corner you can see Jug Island and up Indian Arm and it feels much more remote.
We paddled around Jug Island and then pulled into the little beach at the end of the trail to have a snack. We didn’t see any other paddlers on the way out, but there were already quite a few hikers enjoying the view. We paddled a little further up to take a peak into Bedwell Bay and get some photos up Indian Arm before turning around and heading back. We saw a lot more paddlers on our way back and round trip it was about 7km of paddling. With the break at the beach looking towards Jug Island, I thought this was a really good half day beginner paddle!
Going in April though, you definitely need to play close attention to the weather conditions and dress for it. It was a gorgeous sunny day when we went and Seth even kayaked just in a t-shirt for part of it, but the water is freezing, so I had a merino layer under my waterproof jacket and gloves and headband to keep my ears warm (plus extra fleece layers in my dry bag). I’m planning to invest in some neoprene booties next because the water is cold on your feet so early in the season!
Now that we have kayaks, I’ll likely be posting a lot more content about kayaking. We have a few ideas for where we’d like to take them this year, but since we’re still new to the kayaking scene, would love to hear anyone else’s recommendations! Like I said, we have the Sea Kayaking Basics course from Paddle Canada, but we’re planning to upgrade to their Level 1 course soon to grow our knowledge and be more prepared on the water.
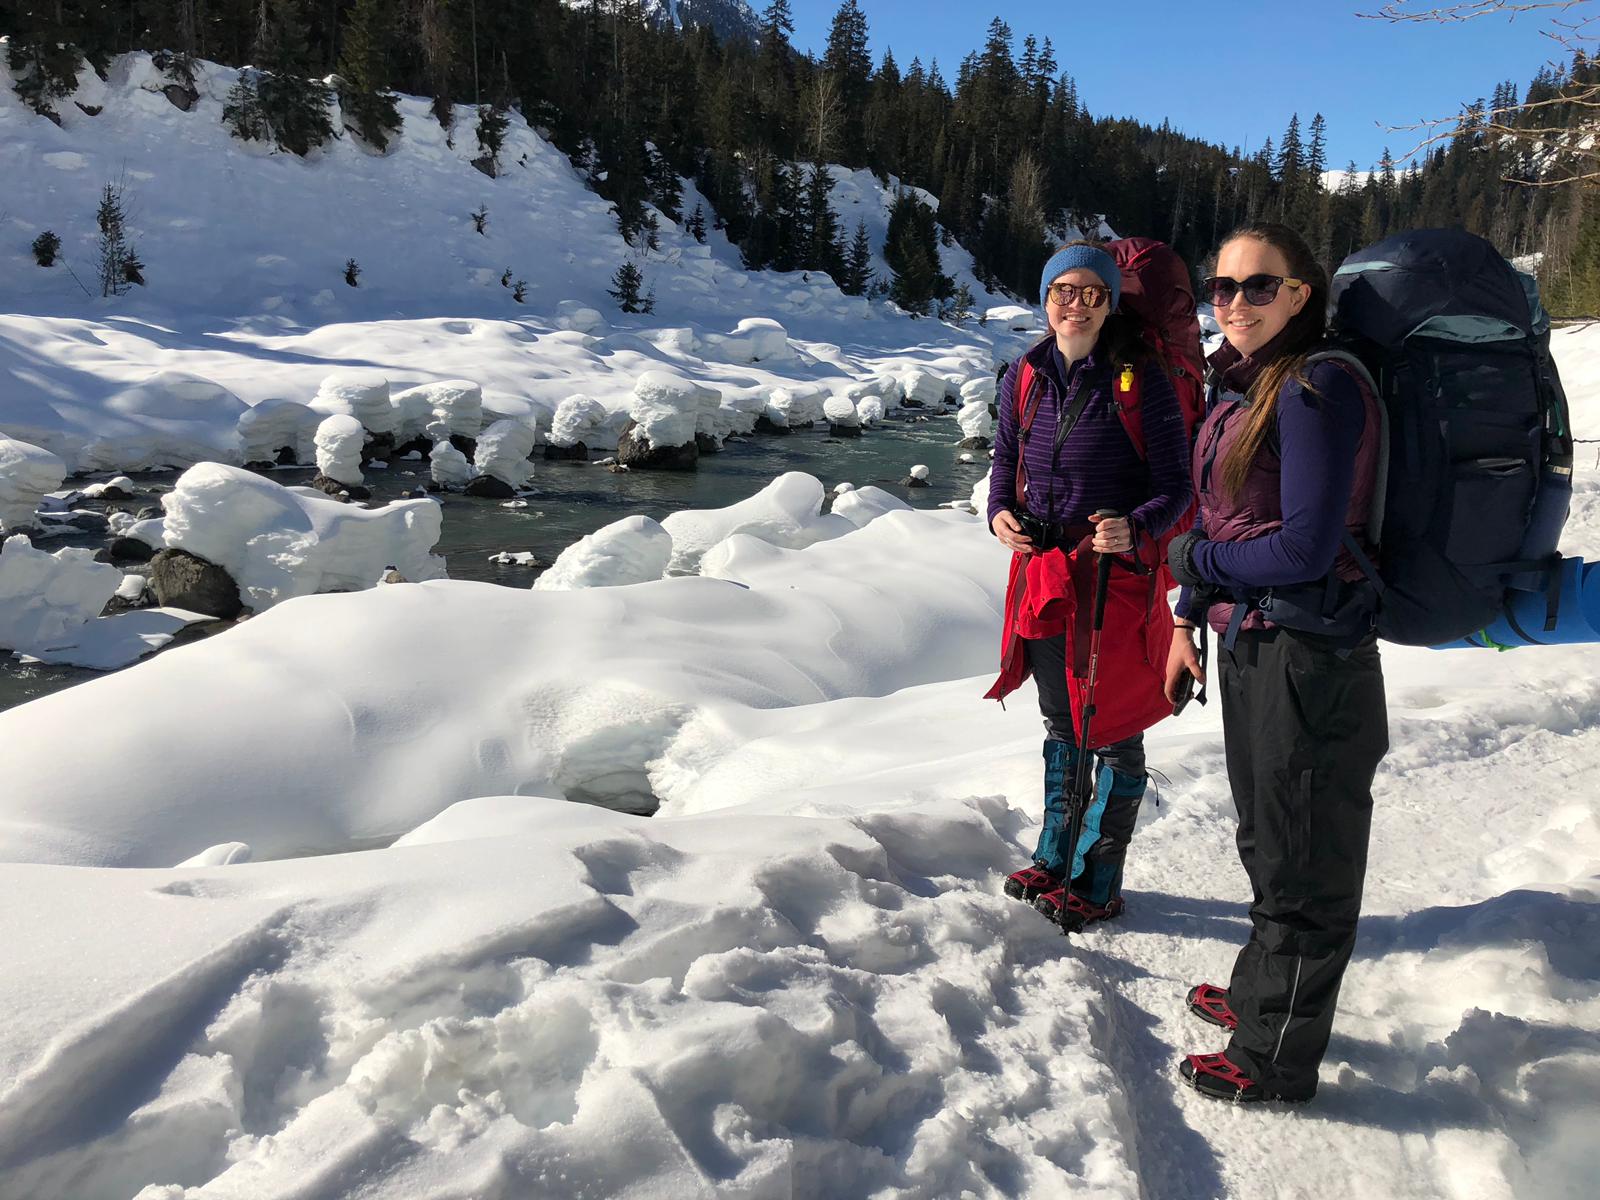
To-date, I’ve written about all of my snow camping adventures (find them here). All of my posts include useful information and lessons learned about snow camping, but I decided to make a guide to Winter Camping to compile the key things I’ve learned in one place for those debating taking up snow camping! It’s a lot more work than summer camping, but I find it hugely rewarding! Please keep in mind that I am still only a novice snow camper/snowshoer – I always stick to low risk avalanche zones and sleep in a tent – if you’re looking for advice on snow shelter construction or ski touring, you’ll have to look elsewhere.
Safety
Safety is the number one consideration if you’re thinking of taking up snow camping. I know the pictures of us hanging out and camping in the snow look awesome (at least I think they do, others *Emily* think it looks like a nightmare), but if you think snow camping may be beyond your ability or you’re not prepared, do not go. It’s not something you do for the ‘gram, it’s dangerous. But if you think you’re ready, be prepared with the 10 essentials and lots of warm clothing and sleeping gear. Wear proper footwear and bring lots of hand and foot warmers with you. See my blog post on personal safety for more information about the 10 essentials.
But the most important consideration is avalanche safety. Avalanche Canada is a wonderful resource for assessing avalanche risk and always check it before you go. There are lots of places to snowshoe and camp outside of avalanche terrain, but if we’re going into avalanche terrain, our personal rule is that we won’t go anywhere that’s higher than moderate risk, end of story. We’ve all taken the Avalanche Safety Training and Brandon owns a transceiver, probe, a shovel. Me and Carolyn just own shovels right now, but rent probe and transceiver when needed.
Even with training, we still avoid high risk areas, but taking the training allowed us to learn how to start identifying avalanche terrain and risk so that we are equipped with the knowledge to make decisions. Avalanche safety is about a lot more than just checking the bulletin. Even on days where the risk is low or moderate, you can still trigger avalanches and get into trouble if you don’t understand how to assess the conditions and control your exposure to risk. When in avalanche terrain, it’s not enough for 1 person to be experienced. Everyone needs to be equipped with the proper gear and knowledge.
Gear
I think that gear is probably the biggest bottleneck to getting into snow camping. Camping gear in general is expensive and in the winter you definitely benefit from warm and lightweight gear. It took us a while to get started with snow camping because we were weary of investing in a ton of expensive gear for something we might not enjoy, so we cut a lot of corners and bought some cheap gear to try it out. The downside was that because we loved snow camping, a lot of the gear had to be replaced again, which is a bit wasteful, but can generally be sold secondhand. Plus check what you can get second hand in the first place to help you get started!
My main tip for saving money is to supplement your existing gear. Buy a cheap blue foamy to go under your existing sleeping pad and a warm sleeping bag liner or blanket (or both) to increase the warmth of your existing sleeping bag. The downside is that this is not lightweight and you can expect to have a heavy pack on the first trip. The other alternative is to rent gear, which is a great option if you really think you’re going to love it. See the sections below for more detailed information on specific gear.
Shelter
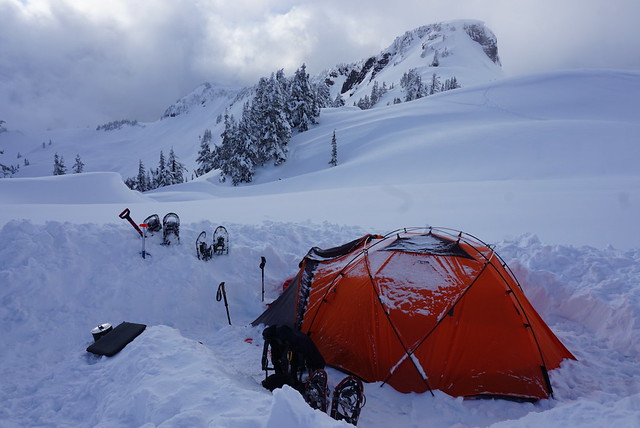
Shelter is obviously one of the biggest considerations when you’re snow camping and is one of the things that can be the most expensive, or the cheapest. The first time me and Carolyn went out we took my parents ancient 4 season tent, it held up, but was definitely not meant for snow camping and weighed a whopping 10lbs. Fortunately (for us) it was only a 2 person tent and Brandon decided he wanted to be included on these adventures, so he decided to invest in a winter tent so that the 3 of us could go together!
The main feature of a winter tent is that it’s double walled, so basically it has no fly and the poles are exposed, but the double wall and lack of mesh keep you warm inside. Brandon’s tent works great, but it came at a super high price tag, so it’s not practical if you’re just starting out. If this is the case, one thing you can consider is building your own snow shelter. I’d really like to try this some day, but we were a bit overwhelmed with everything we had to learn about snow camping that we didn’t want to add shelter building to the list. It’s something we hope to explore in the future though.
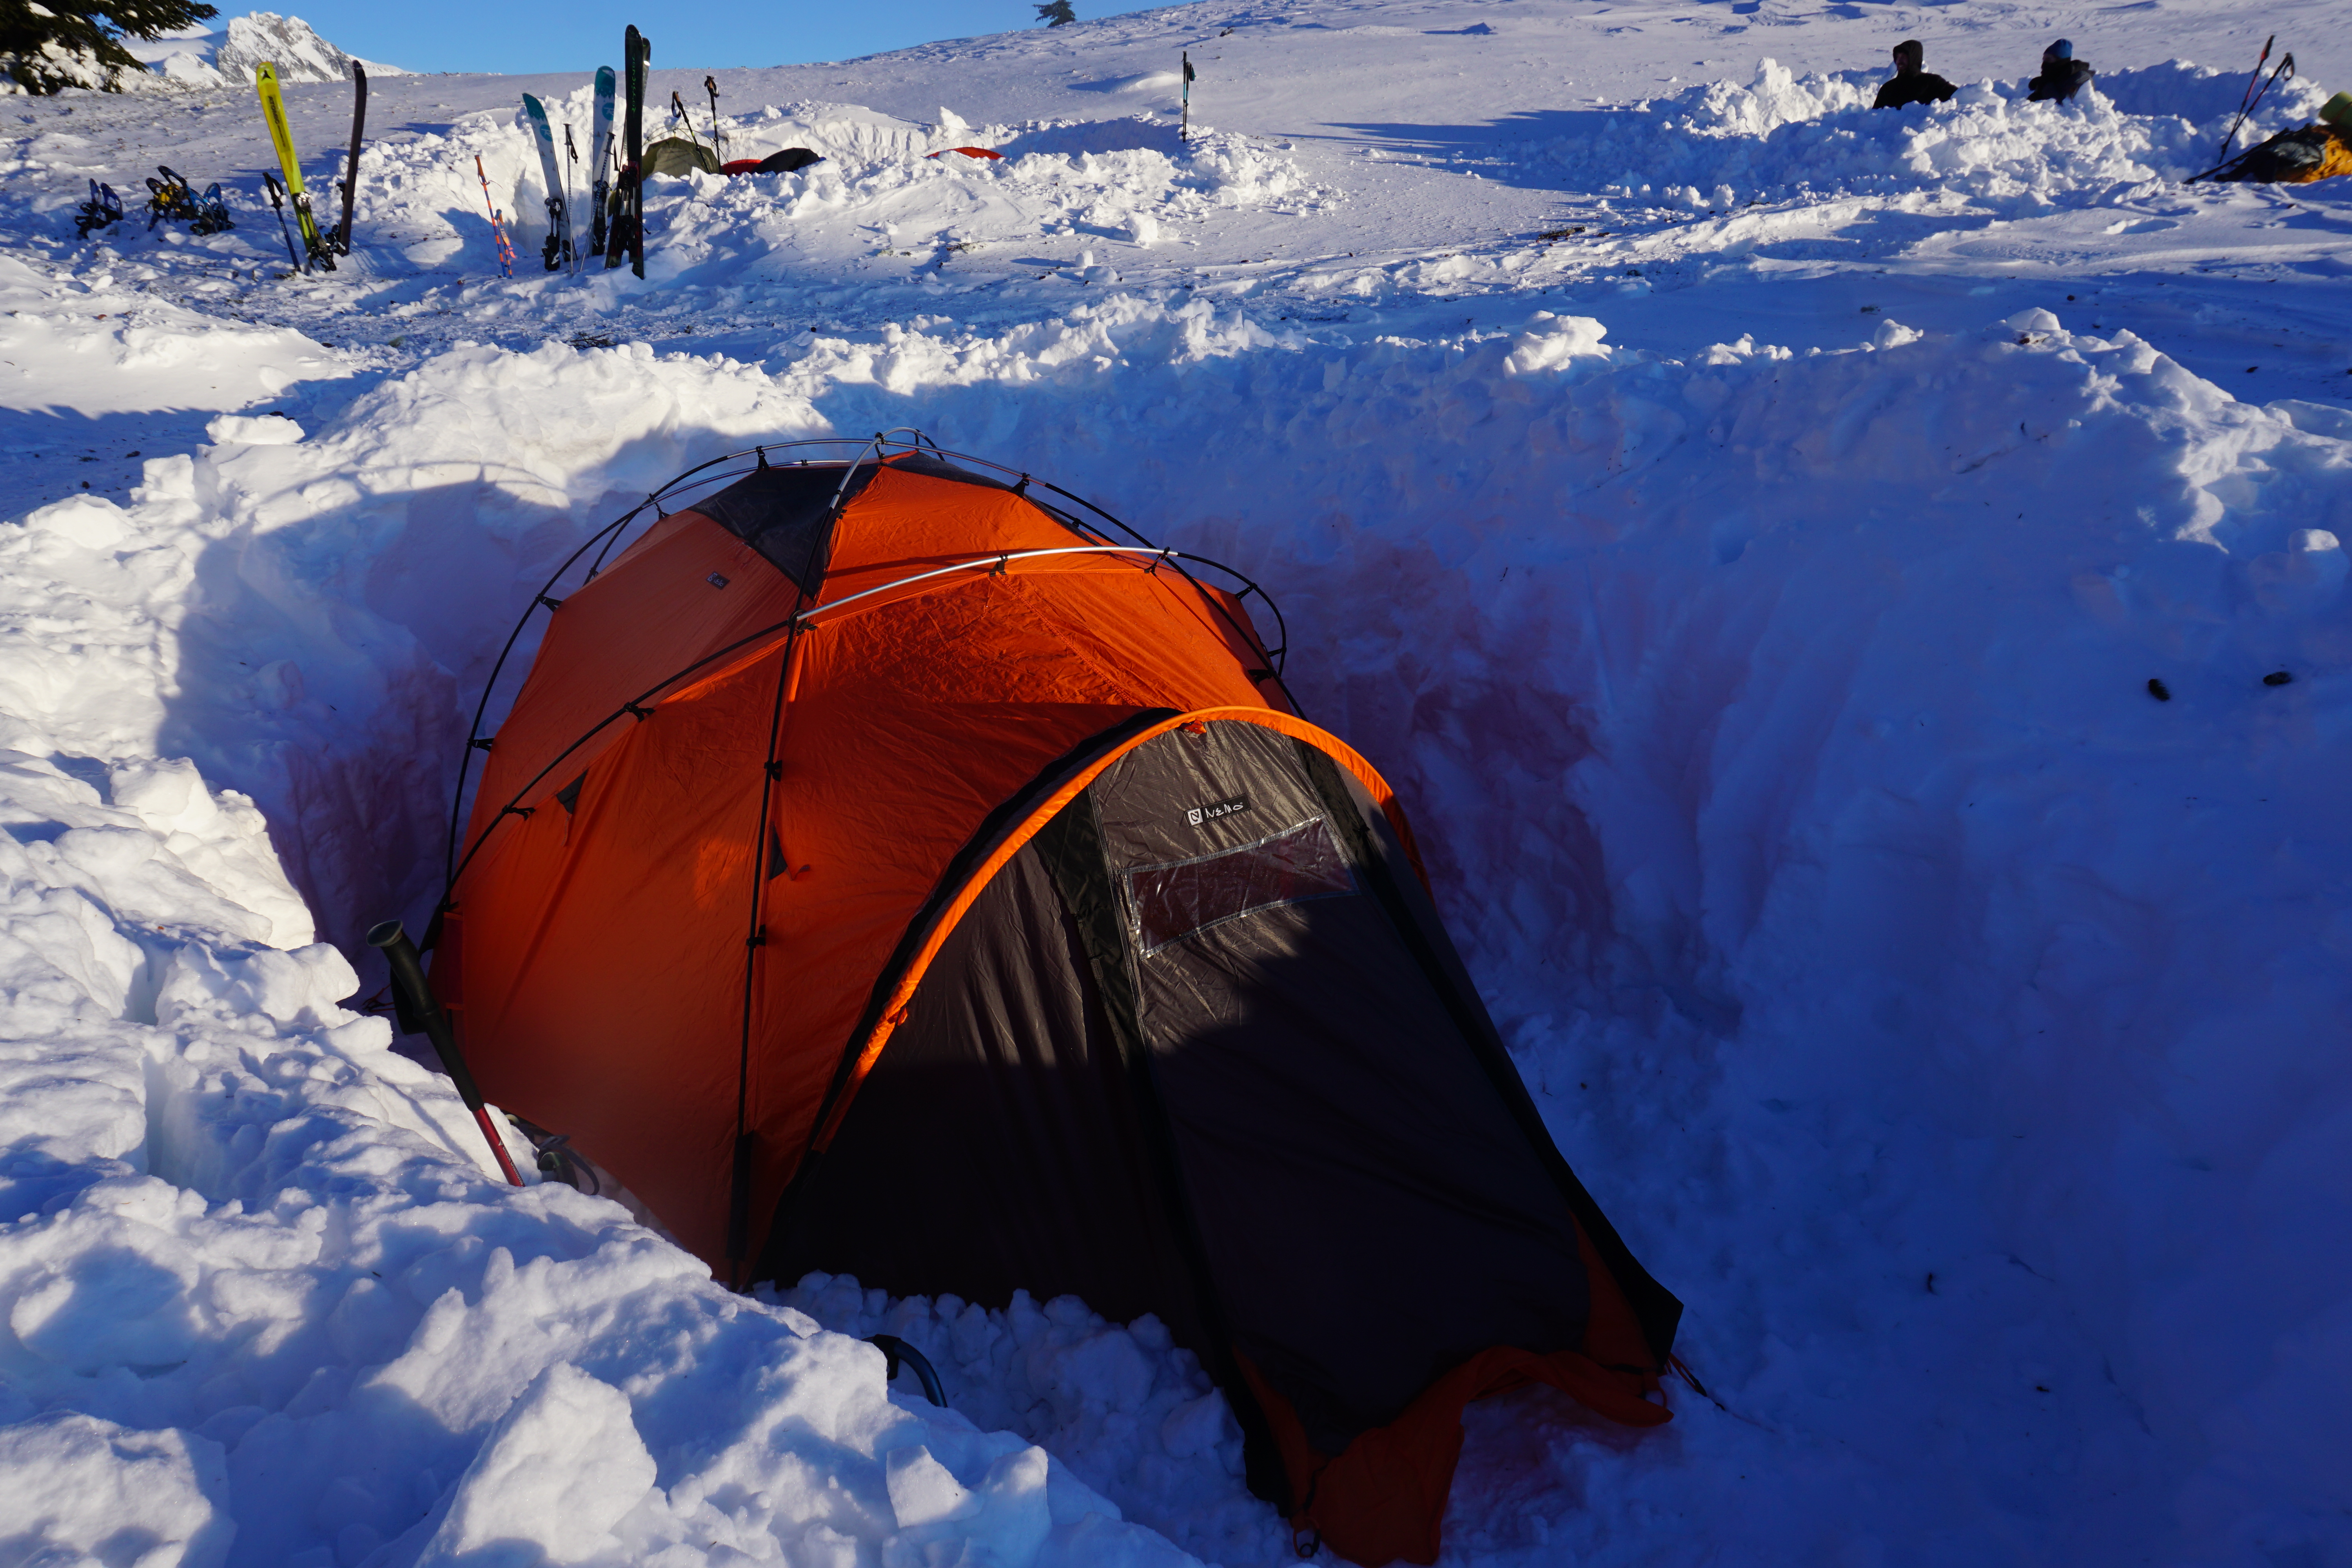
However, even though we use tents, there is still a lot to consider when making camp. You want to protect yourself from the elements as much as possible and of course you can’t just set up a tent on top of powder. We always start with digging a hole big enough for the tent and then stomping down the base with our snowshoes to make it as compact as possible. Location and weather conditions will usually dictate how deep our hole is. I recommend approximately 1 metre, especially if it’s windy because the snow walls will provide a natural shelter, as well as insulation. One tip for when you’re setting your tent up is giving consideration to how you will peg it. In the snow, the risk of losing your pegs is super high, so we either tie rope on the peg, or just skip pegs altogether and bury the rope. The snow will freeze around the rope, so when you’re done, it’s a lot easier to pull the rope out than to dig out frozen pegs.
We have also tried snow camping in a 3 season tent. It’s not ideal, especially if it’s really cold, but if you pack the sides of the tent with snow for insulation, it’s actually not too bad. We made sure to pack the snow up so that it closed the gap between the fly and the inner tent to avoid a draft, but because most 3 season tents are made of mesh, it’s unavoidable that it will be cooler than a true winter tent. Finally, make sure you fill in your hole at the end of your trip to avoid creating a hazard for future users. If the hole fills with powder, it may confuse a skier and could easily result in a broken leg if they don’t know it’s there.
Sleeping
So like I said, when we first started, we cut some corners on our sleeping gear. Depending where you’re going, you’ll want a really warm sleeping bag and a sleeping pad with a combined R-value of 5 or higher. Eventually we all ditched our double pad system in favour of the Thermarest Neoair XTherm, which is rated to R6 and can be used on it’s own. After camping in -20 degrees celsius at Elfin Lakes, Brandon invested in a -30 sleeping bag (Thermarest polar ranger), but Carolyn and I continued to use cheap -15 synthetic bags from Teton paired with a liner and blanket. I’m not going to link the bag because honestly it’s not very good and I think I’d be just as warm in my quality -7 down bag. If you already have a good summer bag (-7 or warmer), you can probably get away with pairing your summer bag with a liner and blankets, provided it’s not super cold. This year me and Carolyn finally gave in and bought North Face’s -29 Inferno bag and Marmot’s -18 Lithium bag respectively and to date, it’s been a lot easier to sleep warm. When picking your bag, I recommend sticking to down and checking what the sleeping bag’s comfort rating is.
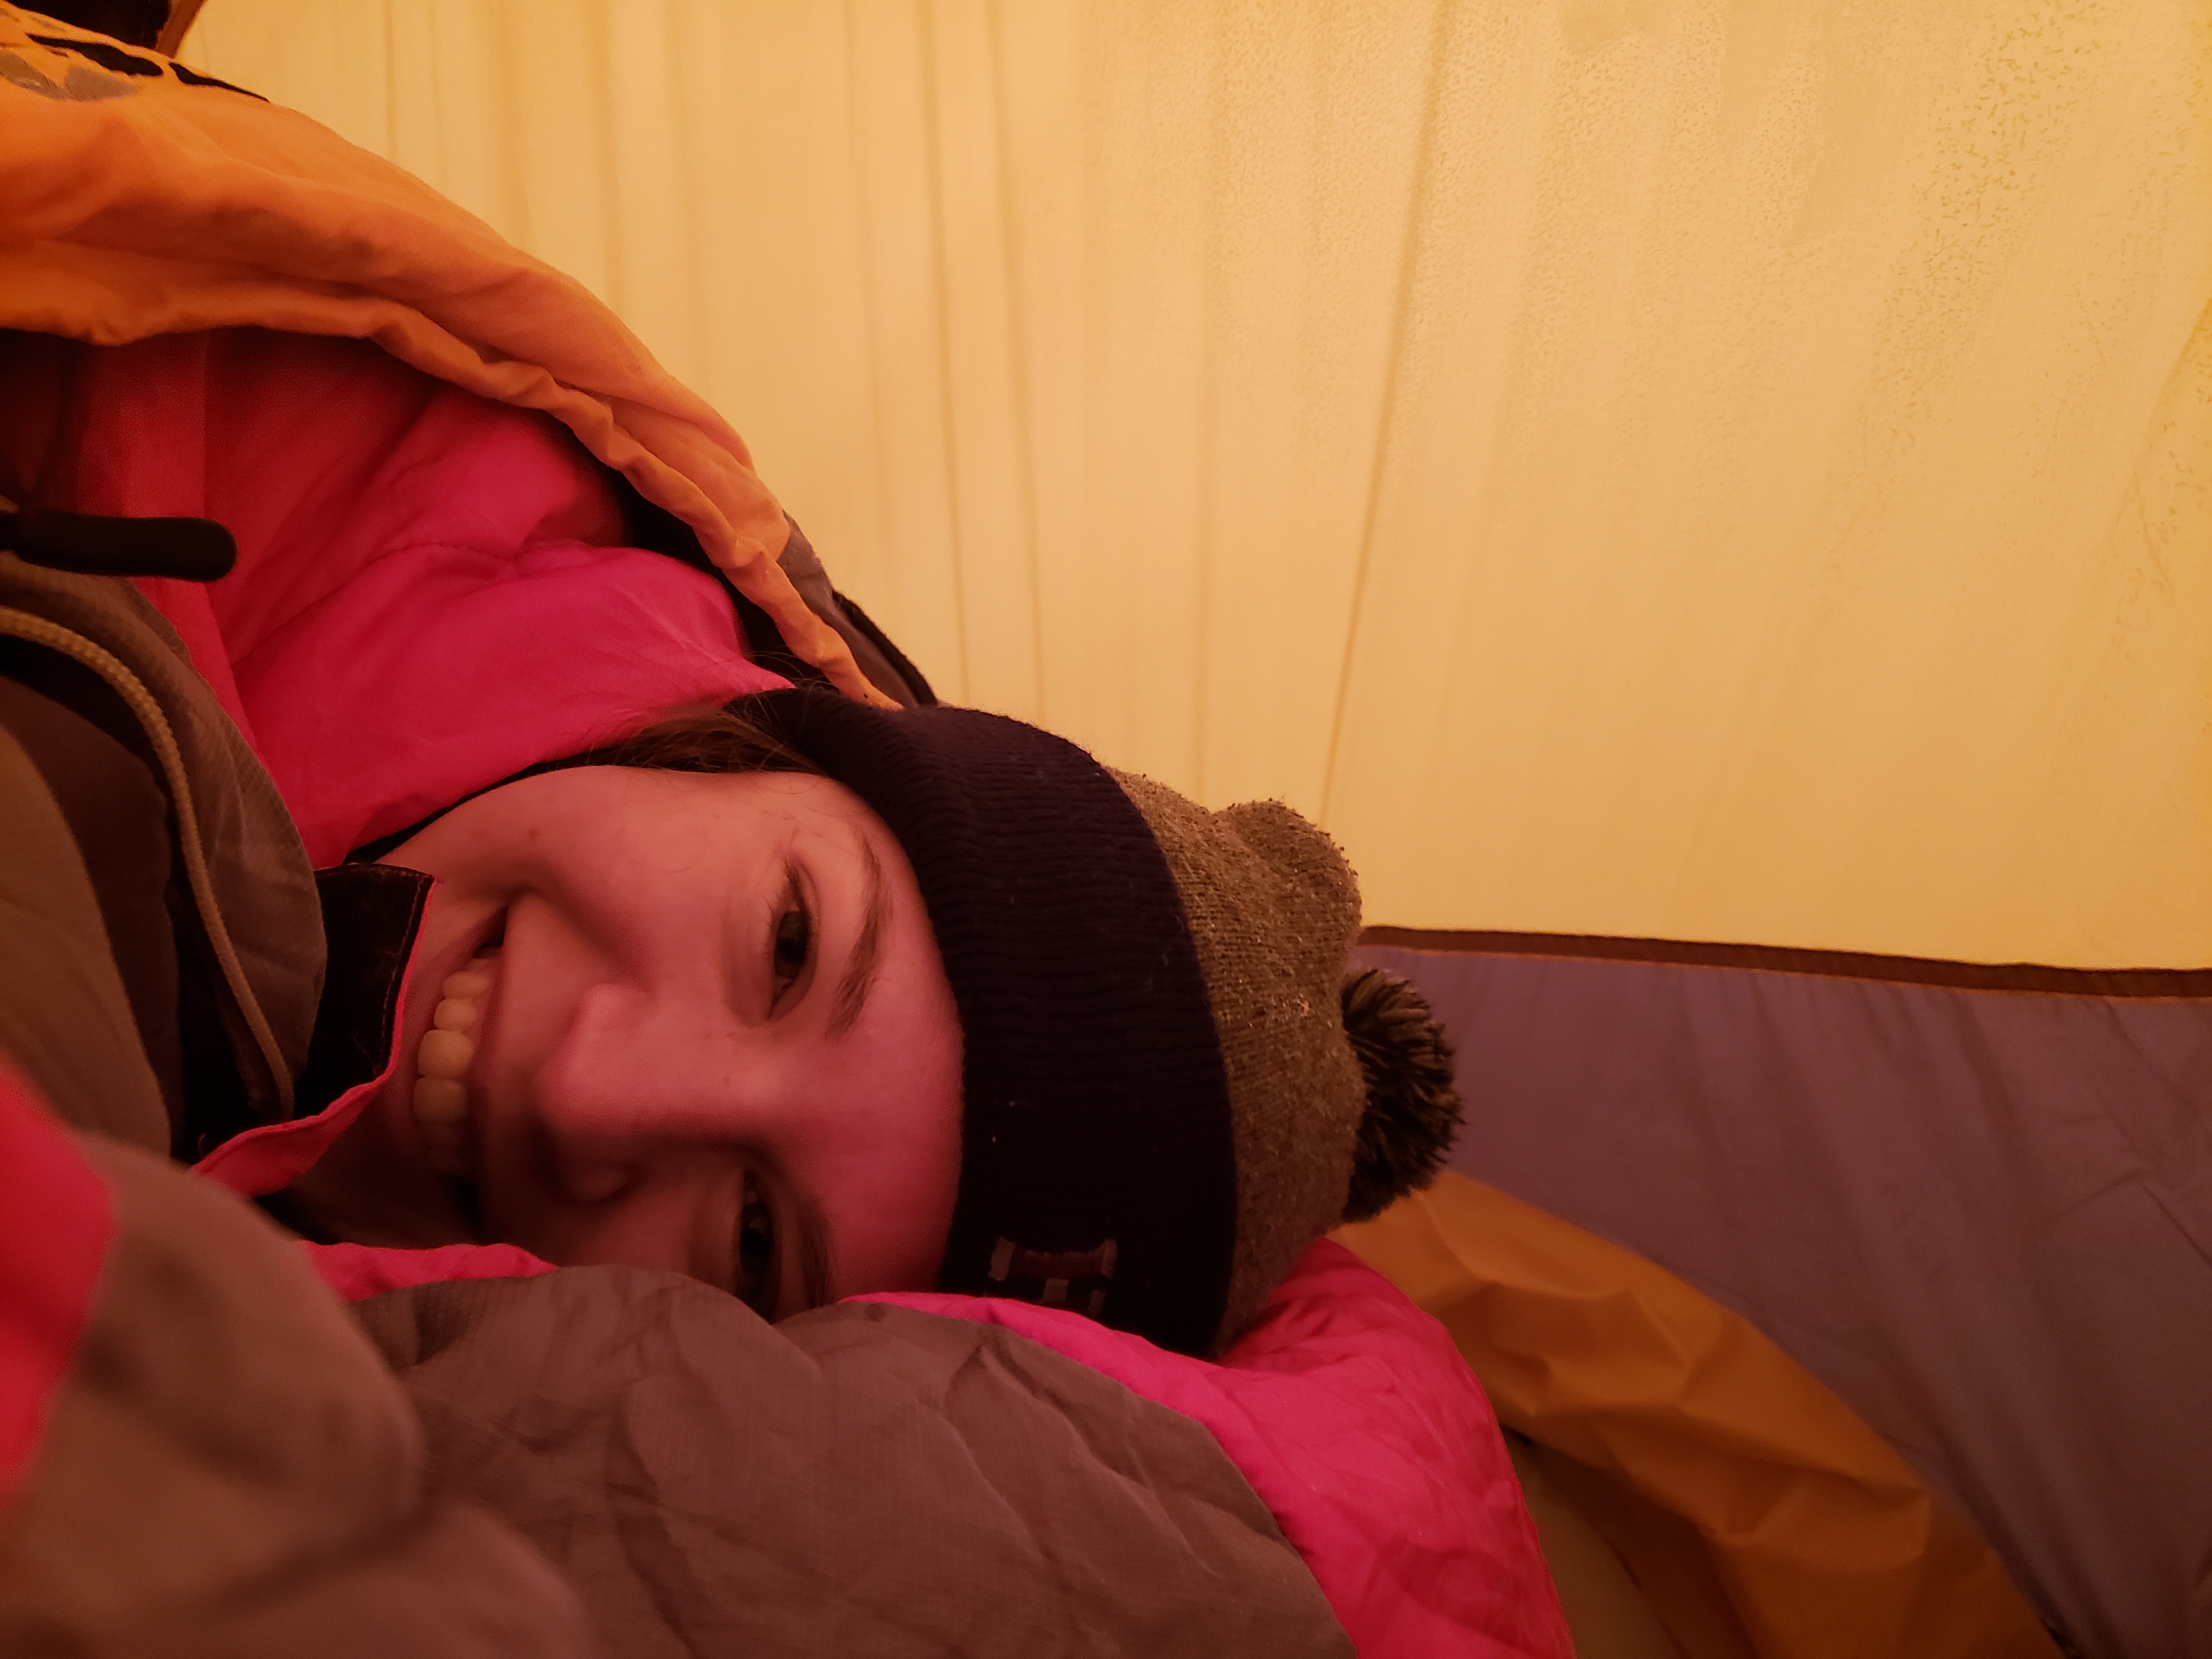
I can’t lie, staying warm at night is a lot of work when you’re snow camping. In addition to my gear, I sleep in fleece lined leggings under a pair of pants, several merino layers under a puffy jacket, balaclava, hat, gloves, and socks with slippers. I put foot warmers in my slippers and Carolyn stuffs all her pockets with hand warmers. We also all boil water to put in our nalgene bottles before bed to use as hot water bottles in our sleeping bags. I have an insulator for my nalgene to keep it warm longer.
I take my blanket into the sleeping bag with me (it’s warmer this way and less likely to fall off) and then to finish it off, I overlay my parka over my middle/butt area because I’m a side sleeper and line my snowpants between my bag and the tent to avoid a draft and stay insulated if I accidentally touch the side of the tent. With my new bag, I’m able to leave the liner and blanket at home. It can take a while to get warm in the sleeping bag because it takes a while for your body to heat the space. Try doing sit-ups in your bag right after you get in to warm it up. As a side sleeping, I also recommend starting on your back (it’s warmer this way because your sleeping pad reflects your body heat back at you), then switch to your side once you’re toasty warm.
My last tips are to cocoon into your sleeping bag, but avoid breathing into your bag as this will introduce moisture into your bag, which will make you colder. If you find yourself needing to pee, just get up and do it. Everyone hates getting out of the warm tent, but a full bladder will make your colder and keep you awake. I find that I will usually be a lot warmer after getting up to pee just by virtue of moving around. Your boots will likely freeze overnight, so know that they’ll be a challenge to put on when you leave the tent.
Clothing
Winter camping is all about layers. You don’t want to dress too warmly on the snowshoe in because you are going to sweat and you want to avoid sweating into all your layers. I usually just wear a thin merino sweater (Costco) under a fleece (Columbia). If I’m still cold or it’s snowing, I’ll add the shell of my ski jacket (but not the liner because it’s overkill). The removable liner was one of the main features I wanted in a winter jacket, I’m on my second “interchange jacket” from Columbia and really like it. I usually start with the shell and ditch either the shell or the fleece once I start sweating (pending if I need the waterproof layer on top). On bottom, I usually wear a pair of tights under my normal water resistant hiking pants. MEC’s sandbagger pants are my favourite and I hike in them in all seasons, although just searching them now I’m sad to find they don’t make the women’s version anymore! Then I pack a pair of snowpants to put on when we get to our campsite and my lightweight puffy for sleeping.
Merino is key when you’re snow camping. It really does still keep you warm when wet and it dries a lot faster than other fabrics. I’ve slowly been accumulating merino layers over the years and one of the best finds for me was switching to merino underwear and bra. It’s expensive and surprisingly hard to come by, but I love how much more quickly they dry. I recommend SmartWool and Icebreaker for merino undergarments. Changing your underwear is really hard and cold in the winter, so switching to merino meant I could go the whole trip (I’ve only done 1 nighters to date) without having to change my base layer. If I did 2 nights, I would bring a second set.
The other trick to winter camping is to bring lots of hats and mittens. Make sure you have a separate toque for sleeping as you don’t want to have to sleep in the hat you’ve been sweating into all day (or is wet from snow). I usually bring several pairs of thin gloves for mobility, a pair of waterproof insulated ski mitts, and another thinner pair of mittens for sleeping.
Footwear
Don’t skimp on footwear. Having a comfortable pair of boots that will keep you warm and dry all day is essential. I used to use a pair of snow boots from Sportchek that had really good waterproofing, but I found my feet would get cold after a while. Lots of boots have temperature ratings and I recommend getting something really warm, but not too bulky if you can avoid it.
Last winter I decided to try snow camping in mukluks and I love them. Manitobah Mukluks is a Canadian, indigenous owned company and I thought who would know better about how to keep your feet warm! I love my muks for warmth, but they can be challenging to pair with snowshoes. They don’t have thick soles like a lot of boots so it’s a challenge to get a really tight fit on the snowshoe, which is another important consideration when picking both your boots and snowshoes. What I do love about these boots though is that they are super warm and because they’re made with natural materials like rabbit fur, they did not freeze on me overnight! Plus a lot of their boots are waterproof – I tested mine snowshoeing in heavy rain for 5 hours and they stayed completely warm and dry!
Being prepared with both snowshoes or microspikes, depending on your trip, is also very important. Most of our snow camping has been done in remote locations with high snow accumulation where snowshoes were definitely required. My snowshoes were from Costco and getting a bit dated, so I picked out a new pair this year, MSR’s Lightning Ascent. The main reason I picked them is because the basket where you connect to your shoe is really comfortable and gets a tight fit to your boot. The straps on a lot of snowshoes can dig into your feet after awhile. Depending where you’re going though, you might be better off with microspikes. We used them when we camped at Keyhole (see photo under ‘clothing’), plus I use them a lot in the shoulder seasons on day hikes. I recommend Kahtoola, but I’ve heard Hillsound is great too.
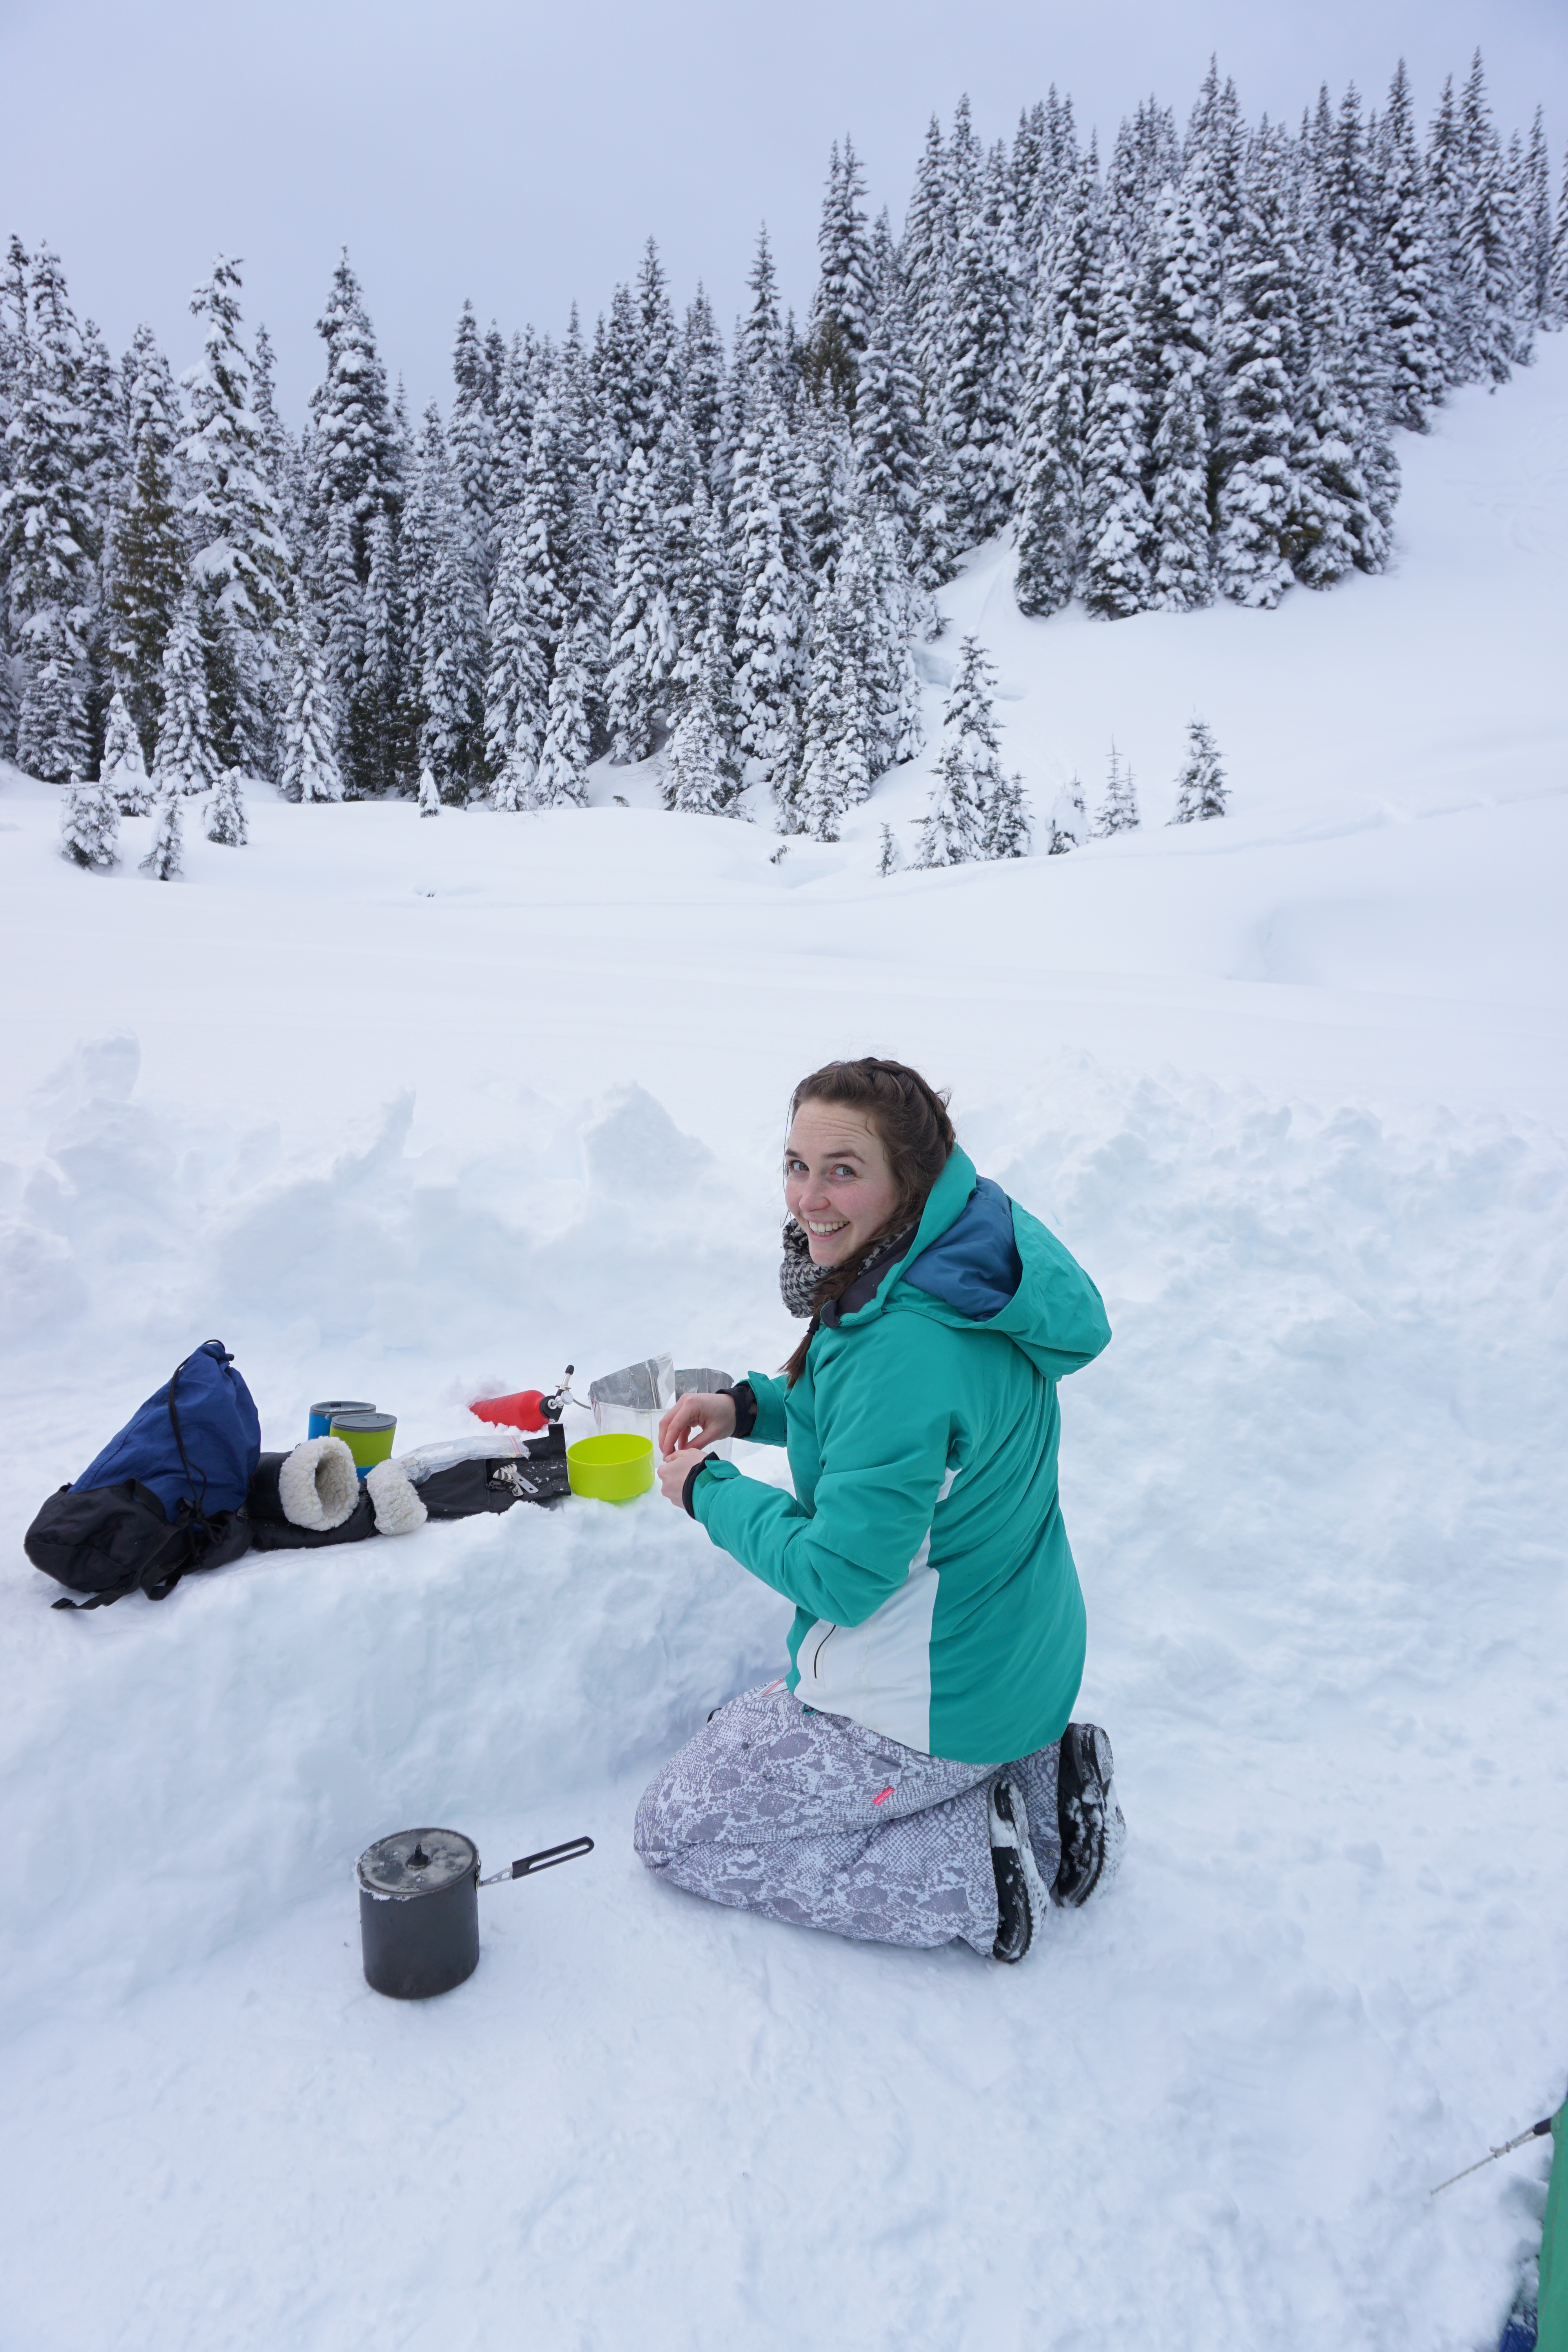
Cooking
Cooking when snow camping is not that different from backpacking, but there are a few considerations to keep in mind. The first is fuel. Avoid propane and iso-butane mixed gas when snow camping because they can freeze. Stick to white gas stoves if possible or find some way to insulate your fuel canister to keep it warm. Second, up your calorie intake. Being out in the cold for a long time burns a lot of calories, so be prepared with high energy treats that won’t freeze.
The last consideration is water. As I learned on my first trip, melting snow takes a long time and unless its super fresh, it tastes really bad. Melt the snow until its warm and then start adding more to the pot, each time warming it but not boiling. It takes a long time to boil, so once you get enough water, just boil it all at once at the end. It’s not required it you’re boiling it, but consider filtering the water anyways to improve the taste, or bring drink mixes to make it palatable. Also, avoid your platypus on snow trips as the straw will freeze. I usually take a nalgene and a thermos that I pre-fill with tea to keep me warm along the trail. Then I refill my thermos before bed for a nice warm treat when I wake up (or if I get cold overnight).
Building a snow kitchen is one of the fun parts of snow camping though! Plan ahead when digging your hole and pile the snow in one area for your kitchen counter. It’s not a difficult concept, we usually just consolidate the snow into a bit of couch/counter combo so that have somewhere to hang out. I always bring my inflatable sit upon to provide insulation against the snow. We’ll either put the pot right on the counter, or dig a little pit for it if it’s windy.
Bathrooms
Unless you go to Elfin Lakes (or somewhere that caters to winter visitors), it’s unlikely you’re going to have access to an outhouse. Even if where you’re going has outhouses, they’re likely to all be buried in the winter. The good news is, digging a hole is a lot easier in the winter! Just be mindful that your poop is going to stay frozen until Spring, so make sure to use the bathroom somewhere discreet once the snow melts. In winter though, you have to take all your toilet paper with you – there’s no burying paper in the winter.
In some cases, depending on location, you may need to bring a bathroom bag with you to carry your waste out. I’ve written a whole blog entry on backcountry bathrooms, so check it out for more information.
Feel free to ask any questions in the comments, I’m happy to share my experience – snow camping is tough, but it’s rewarding and me, Carolyn, and Brandon look forward to it every year!
Even though Whistler-Blackcomb is one big resort, I decided to write about them separately since it is two different mountains and I’ve spent so much time skiing both. I posted about Whistler first, so check out that post for more general info about the resort, like lift passes and parking.
Creekside is not an option for parking if you’re skiing Blackcomb, but there is an upper parking lot for Blackcomb if you want to jump right on the Blackcomb Gondola – though I understand it fills up pretty quickly. We always park in lots 4/5 (no matter which mountain we’re skiing) and take the shuttle over to Whistler village, so we always take the Excalibur Gondola up to start. The benefit of the Blackcomb Gondola is it takes you right to Rendez-Vous, which is the main hub on Blackcomb. Excalibur only goes halfway up and then you have to switch to the Excelerator Chair.
For a long time, Whistler was my favourite mountain. I loved going up the Peak Chair and eating at Creekside. I liked the long runs that swing you around the mountain and how many different lifts there are. But over time I’ve grown to really love Blackcomb. I don’t think I can say I like it more than Whistler, but they’re definitely tied and I try and alternate back and forth every time I visit.
The most popular runs on Blackcomb are at the 7th Heaven chair and it’s easy to understand why. On a clear day you can see all the Black Tusk and the surrounding mountains. 7th Heaven is completely clear of trees at the top, so it has amazing views before branching off into a dozen different runs. There’s a small café at the top and while it’s almost impossible to get a seat inside, Brandon and I have spent more than one occasion enjoying our home-packed lunches outside at the picnic tables or on the slopes. Otherwise, we usually hit up Glacier Creek for lunch. It’s large and the crowds usually clear out a bit by 1:30pm. I find it much busier at Rendez-vous and usually try and avoid eating there.
Once we get to 7th Heaven we’ll usually spend half of the day skiing there. There are tons of runs and you can pop in and out of the glades when you reach the top of the ski-line. There’s almost always small ramps scattered throughout the top, so Grant and I usually like to play around and test our abilities (we get at most a few inches of air, but we love it!).
If the conditions are bad though, 7th Heaven can be a bit of a nightmare. With no trees to shield you from the wind and blowing snow, visibility can be really bad at the top and they’ll often close the entire chair if the conditions are dicey. But on a clear day its really the best place to hang out!
After 7th Heaven, Glacier Chair is really popular, but it’s never been one of my personal favourites. A lot of the runs at Glacier are more advanced and though my skiing has improved in the past years, I still like to play it a little more cautious. However, I recently discovered something new in the Glacier Chair area that is totally worth checking out!
At the top of the Glacier Chair, there’s a small t-bar called the Showcase T-bar, which takes you just a little bit further up the mountain. I’ve always ignored it because I hate t-bars, but I recently learned that if you’re willing to do a short walk, there’s a run at the very top of showcase that goes down the back of Blackcomb Glacier to an ice cave! It’s shown on the printed resort map, but I guess it doesn’t see that much traffic because after the t-bar, you have to take your skis off and walk upslope about 5 minutes to get to the top of a bowl going down by Blackcomb Glacier. It only takes about 5 minutes, so it’s totally worth it in my opinion, but it is steep, so I was pretty out of breath from carrying my skis.
Once you get to the top of the bowl there are gorgeous views looking out over the mountains. Advanced skiers will climb further up the bowl, but I think most people just ski down from there. It’s steep at the top, but nothing unmanageable. The caveat with this run though is that it does go through avalanche terrain. The resort has a warning posted at the top of the lift that you are entering avalanche terrain, so make sure to check the bulletin before going. Fortunately the risk was low when we visited.
It’s a gorgeous run, we played it safe and followed the ski markers down the center of the bowl. When you get to the bottom of the first part of the bowl, if you look to the right, you’ll see the Blackcomb Ice Cave along the side of the run. We skied down to it and spent some time exploring and taking photos. This was my first ice cave, so it was a really neat experience, but I’m not knowledgeable about ice cave safety, so we ventured inside the opening, but not beyond as we had no idea what the risk was.
It’s a bit of a climb uphill again after the ice cave, but no where near as steep, I was able to ski it, but Brandon walked his board out. The run continues down around the back of the mountain and connects in again at the Crystal Chair. We had perfect weather when we visited the ice cave, so it made for a really fun day. I couldn’t believe I had skied the mountain for 7 years before discovering its existence!
Crystal Ridge can be a fun place to ski and I’ll often do a run or two in that area, but Jersey Cream is probably my favourite chair after 7th Heaven. It’s a shorter chair with limited runs, but I really like the views. Otherwise, there’s a ton of fun blue runs to do around the middle of the mountain and that’s where I’ll usually finish out my day. Depending on the conditions, we will ski down to the bottom, but sometimes we’ll download the last section on the gondola. Just be careful when you ski down that you take the right run based on where you parked. One leads to Whistler Village while the other leads to Blackcomb base.
And that about sums up my thoughts on Blackcomb and Whistler. It’s definitely not cheap to ski there, but I keep coming back every year because there’s such a wide diversity of runs, the snow is usually better than the local mountains, and it’s much closer driving distance than going all the way to the interior. I still ski Cypress a lot too, but I always have the best time at Whistler-Blackcomb! However, be aware that with covid, reservations are now required prior to arriving and all the restaurants are operating as booking only. So unless you bring your own lunch to eat outside, plan ahead! Otherwise, have fun!