Disclaimer: I wrote this blog a year ago and hiked the trail on September 27, 2020. I delayed posting out of respect for hiker Jordan Naterer, who went missing on this trail on October 10, 2020 and whose remains were not found until July 2021. Manning Park can get snow early in the Fall, which can make the trail difficult to follow and be exacerbated by freezing temperatures and limited daylight hours. It can be a beautiful trail, but it is also a strenuous hike and an unforgiving environment, so please don’t underestimate it in your zeal to photograph the larches. Don’t go unprepared; take the essentials and leave a trip plan. Check out my blog post on Personal Safety for more info.
The Heather Trail is the most trafficked trail in Manning Park in the summer, but by fall, everyone flocks to Frosty Mountain. It’s hard to see Mount Frosty in most of the park as it’s hidden behind other mountains and can’t be seen from the highway. But if you drive up Blackwell Road and stop at the first viewpoint, you can get a great view of it. I’d heard some talk about Frosty Mountain when I first started hiking and though I was intrigued by it, decided Frosty was probably a little too challenging for me.
In 2018, I decided I was finally ready to give it a try and I hiked the longer route up past Windy Joe Mountain, day hiking up to Frosty Peak from the PCT campsite. Even in summer, this is a challenging and strenuous trail, but boy is it rewarding. So earlier this Fall, Brandon and I decided to hike up the other (more trafficked) half of the trail from Lightning Lakes to try and catch a glimpse of the larches turning yellow.

There’s so many different ways to explore Frosty Mountain. It’s located near the midpoint of a loop trail with campsites located on either side. One side of the loop trail is shorter than the other, so you can either hike 21.5km up and back from Lightning Lakes (what we did this year), or hike 27km as a loop (exiting on the Windy Joe trail). Alternatively, you can camp at one or both of the campsites, either day hiking up to the top (what I did on my first visit) or if you’re determined, hiking your big pack up over the top.
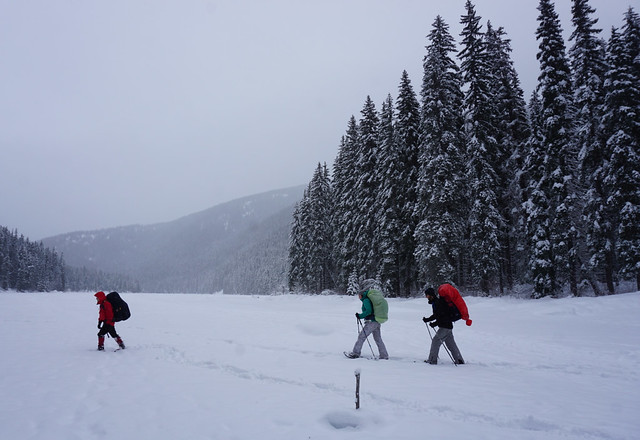
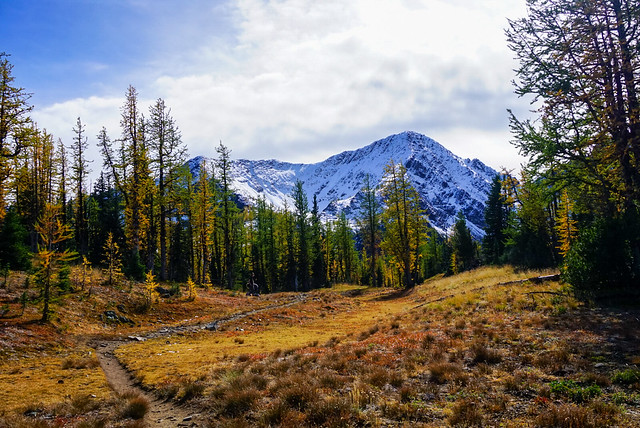
Like I said, our key interest in hiking Frosty on this occasion was to explore the larch meadow below the peak and snap some pictures of the needles turning from green to yellow. We were a little too early in the season to get the really gold hues, but we still got some truly beautiful views of the trees changing colour and had great weather for it. Plus with the fresh dusting of snow the yellow larches really popped! There were a lot of people around, but we were still a bit early in the season, so it never felt that crowded. If you’re a novice but want to see the larches, consider just hiking to the meadow and skipping the peak.

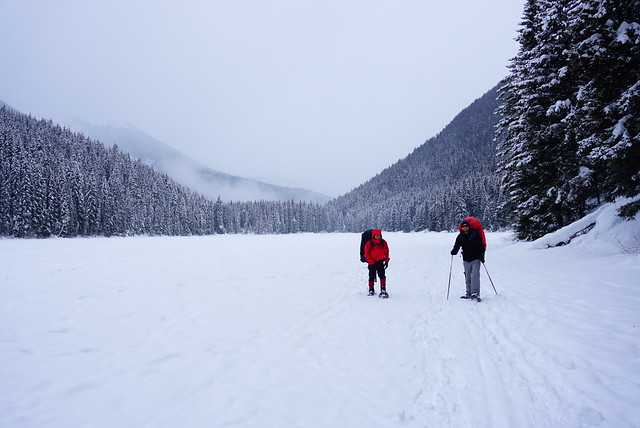
It rained the day before and was still foggy when we set out early on Sunday morning to drive the 2 hours out to Manning Park. With the shorter daylight hours, it’s essential to give yourself lots of time for this hike in the Fall. Me and Brandon left my house around 6:45am and were on the trail by 9am. We had the privilege of watching the sun rise from the highway and watched as it started to burn off the fog. There were still lots of low clouds hanging around when we got to Manning, but the sun was shining through and we were optimistic they would lift off by the time we reached the top.

Our plan had been to do the entire loop trail starting from Lightning Lakes. It’s a big climb, 1150m from the bottom to the top, but it’s spread over 11km, so I didn’t find it too bad. It’s steeper for the first 6km, but it levels off before you reach Frosty Creek Campsite. When I visited before, I camped at the PCT campsite on the other side. Both are located in the trees and have really small creeks as water sources, so I’d recommend bringing a water filter with you for both, but overall I’d give the edge to the Frosty Creek Campsite. It’s a bit more spacious. There’s two viewpoints before you hit the campsite; the first looks down towards lightning lakes and out to Hozameen Mountain, while the other is the first glimpse of Frosty through the trees. At the time we passed it, it was super cloudy at the top and there was a fresh layer of snow sitting on the peak. It looked super foreboding, as if it was the middle of a storm, but fortunately it cleared up in no time.
We continued along the trail until we finally hit the larch trees! Like I said, they weren’t quite at their peak, some were full yellow, others lighter green changing to yellow, but still very gorgeous. The trail exits the woods into the meadow and has the most beautiful view of snowy Mount Frosty peaking out behind the yellow needles of the larch trees. I’d been getting targeted adds on facebook for a few weeks before with this gorgeous picture of the larch meadows, with the mountain covered in snow behind them. It’s a beautiful picture and a rare time when what I saw before me looked exactly like what had been advertised in the photo! Except of course more unreal because I was there to experience it with my own eyes.
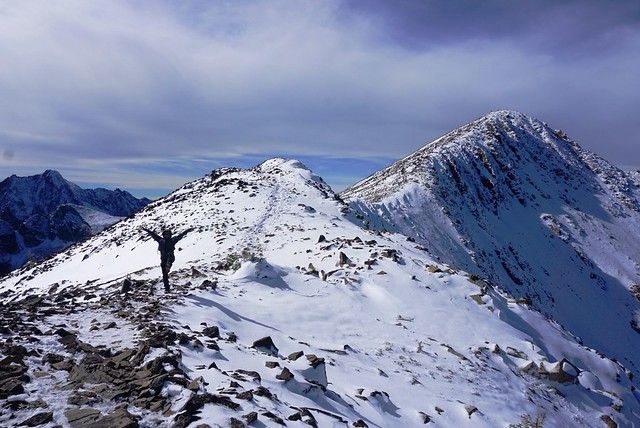
The trail winds through the meadows and then you pop out on the ridge, with a steep climb ahead to the trail junction for the loop trail, and then a final ascent along the ridge to the summit of Frosty Mountain. It’s very steep, but not that long to the junction. The problem in this instance was the snow. There was only a couple of centimetres of snow on the trail, but it had become very packed down and icy. It was perfect conditions for microspikes and I was kicking myself for not having them. I carry my microspikes all winter and spring and rarely get the opportunity to use them, but of course, the one time I really would have benefitted from them, I didn’t have them with me. It was still September and I hadn’t really thought there would be snow yet. So we slowly trudged our way up the slope, taking care with each step, arriving without incident.

The first milestone is reaching the junction sign. It’s really not obvious with the snow, but there is a trail going down the other side. There seemed to be a few people using it that were coming from the camp on the other side, but overall, most people seemed to be going up and back from Lightning Lakes. The second and final milestone is reached only by continuing across the ridge and climbing up to the final peak. It’s only about a kilometre (maybe a bit less), but both times I’ve found it annoying being so close to the top and still having to push to the end. The final ascent isn’t as steep as the climb up to the junction though, so it was easier in the snow.

The parking lot was packed when we arrived, but given the length of the trail it felt pretty empty as we were hiking. We passed one or two groups right at the beginning and got passed by a group of trail runners about halfway up. So by the time we got to the top, the peak was looking a little crowded. Fortunately, the trail runners didn’t stay too long and after a few minutes it was just us and 2 other guys at the top. It was REALLY cold and windy up there, so I don’t think people were sticking around for too long. The cold is definitely another thing to be prepared for; Manning is always chilly – it was about 3 degrees when we started hiking and was only supposed to go up to 11 degrees (at the bottom).

We layered up and had only intended to stay at the very top for a short while, planning to eat our lunch a little further down where it was more sheltered, but the view is just so damn spectacular I couldn’t bring myself to leave! It was pretty overcast when we arrived, but the sun came out and cleared away a lot of the clouds while we were up there, resulting in me having to take all my pictures twice with the changing weather conditions. I ended up eating my lunch standing up and walking around because I didn’t want to climb down yet and it was too cold to sit still. We stayed up there for about a half an hour or more and when we’d had our fill, started to trek back down. It’s definitely worse going down without spikes, but it was manageable along the ridge.

I had to rethink our plan to do the whole loop trail though. I thought the whole thing was 22km, but we’d already done 11km and looking at the map in retrospect, it was clearly going to be longer going the other way down, 6km longer to be precise. I have bad knees and at 22km, this hike was already much longer than any other day hikes I’d done all year, so we decided to just head back the way we’d come. Fortunately I’d already done the other side, so I didn’t really feel like I was missing much.
Going down the steep section was definitely a lot harder than going up. I had brought gloves with me for the cold and they were invaluable climbing back down. I did a lot of the trail in a kind of crouching position so that I could reach down and grab the rocks to steady myself. But no question, microspikes would have made it a whole lot easier. Looking back now, I’m a little embarrassed to admit I did it without spikes; it’s really important to know your limits and turn back if you’re unprepared. It was probably a bad judgement call for me to keep going without spikes and I’m working on getting better at making these tough choices. In the past year I have passed on summiting several scrambles (Needle Peak and all the summits on the HSCT) out of abundance of caution, so I am getting better at it.
There were still a good number of people coming up when we were going down and the summit was starting to look pretty crowded again. The meadows were more or less empty as we made our way back through them and I had to take all my photos again, this time with blue sky in the background! Otherwise it was a pretty uneventful hike back. My knee was bothering me, so I wrapped it up about halfway down and we stopped at the campsite for a snack break. When we sat down at the campsite, 6 hours into our hike, I realized that was the first time I’d sat down all day. We hadn’t taken any breaks on the way up, other than to snap a few photos, and while we’d taken a hiking break at the top, it’d been too cold to sit down. So it felt good to take a little rest before knocking out the last 6km of the hike.
Overall the whole thing took us 8 hours, which I think is pretty impressive for a 22km hike with 1150m of elevation gain! It was cold, but I loved all the varying weather conditions we experienced on the trail and really think we couldn’t have picked a better day!