Skyline II Backpacking Trip

Continuing on with my mini-series about Manning Park, I’m super thrilled to finally write about the Skyline II Trail! After my amazing hike to 3 Brothers, I was inspired to go back to Manning. My goal was to hike the full Heather Trail, but I needed someone to do it with me. This was back in 2017, so I didn’t have as many hiking and backpacking friends as I have now, so that pretty much left Carolyn and Brandon because Seth isn’t really a fan of backpacking. I think Carolyn must have been on vacation at the time, but Brandon happily agreed to go with me. I wanted to hike from Blackwell Road all the way down to Cayuse Flats, staying overnight at Kicking Horse Campsite and Nicomen Lake. But since this requires two vehicles, we decided to try out the Skyline Trail instead.

The Skyline Trail is located on the other side of the park (basically, the other side of the highway) and continues for 25km to Skagit Valley Provincial Park. Since hiking to Skagit Valley would also require two vehicles, we decided to do a there-and-back-again hike from Strawberry Flats in Manning Park. The Skyline Trail is also well known for its wildflowers, but it doesn’t receive quite as many visitors as the Heather Trail, presumably because of the elevation gain. We wanted to beat the crowds to the campsite, so we decided to take Friday off and head out early.
DSC01154

It was late July and a beautiful blue sky day. We started hiking around noon and our goal was to stay at Mowich Camp, which is located right at the halfway point along the trail: 12.5km. The start of the Skyline II Trail is a bit of a slog. You leave from Strawberry Flats, which is a little way past Lightning Lakes. You can also hike the Skyline I Trail, which leaves directly from Lightning Lakes, but is longer and takes a different route up. On the Skyline II Trail, it’s about 5km to the junction with the Skyline I Trail. There’s not a whole lot to see on the way up – it’s pretty much all uphill in the trees, but they start to thin out near the top and you can catch a glimpse of Snow Camp and Goat Mountain. While it’s not the most interesting section of the trail, I’ve always liked it because it’s not too steep, so it takes about 90 minutes to hike up.

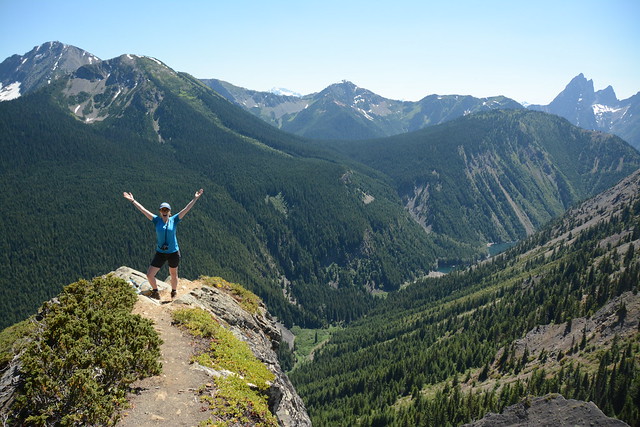
Once you reach the junction though, you are greeted by one of the most beautiful views in the park! From the junction the view completely opens up and you can climb down to this rock viewpoint that looks out over the park, all the way to the distinctive peak of Hozameen Mountain in Washington. The viewpoint isn’t for the faint of heart as there’s a pretty big drop-off, but we loved hanging out there while we ate our lunches.
HOP_5700

After that, it’s back into the trees for one last challenging section. You have to climb back down and up Deception Pass. You head right back into the trees and follow the switchbacks down along the pass before starting to climb back out – I think it’s about another 1-2km, but then you’re home free for the rest of the hike! That’s not to say it’s easy, but it is damn beautiful! Skyline II Trail is what firmly cemented Manning Park as my favourite provincial park and to date, I still consider Skyline II Trail to be my favourite hike in all of BC. Now I still have yet to hike in the Rockies, but until I make it out there, Skyline Trail is definitely holding on to the top spot.

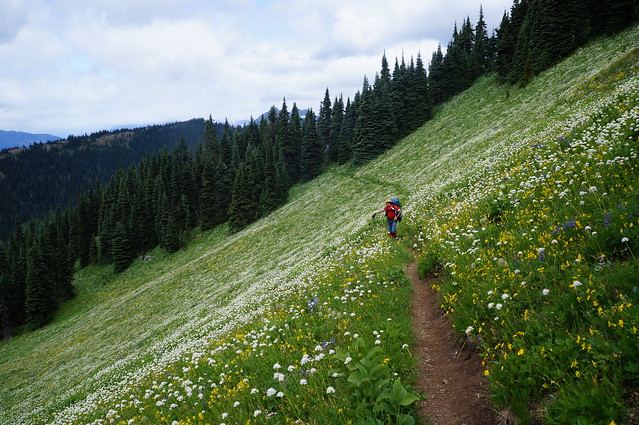
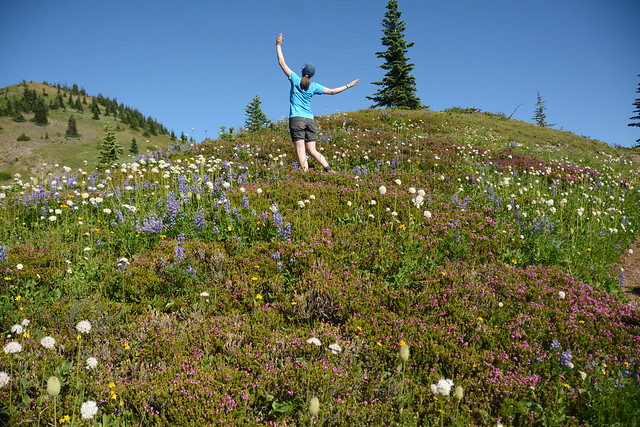
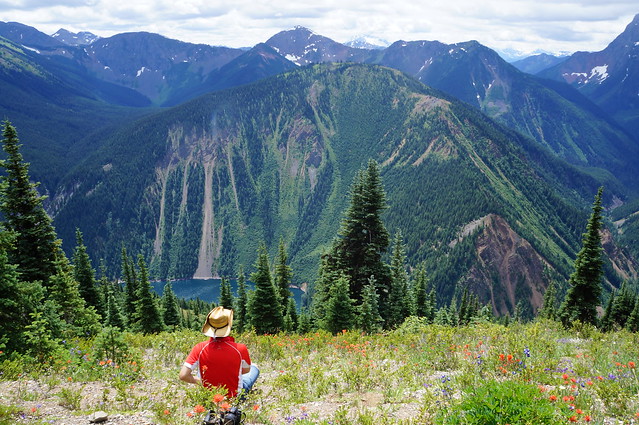
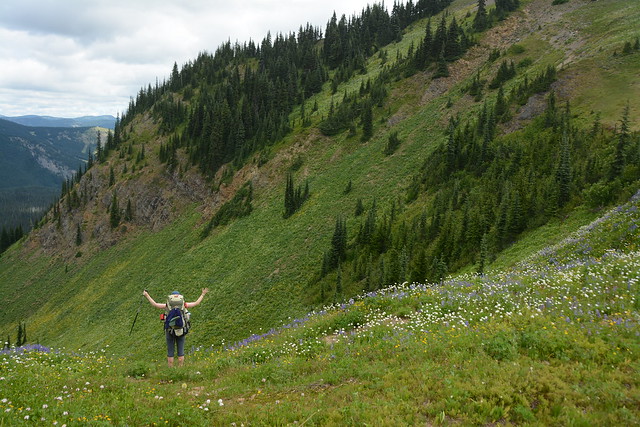
Once you climb out of the pass you quickly realize where the trail takes its name from. The rest of the hike is along the ridgeline looking down over meadows full of wildflowers to the Lightning Lakes Chain Trail, and out towards Hozameen Ridge and Hozameen Mountain. We had picked a dream day to hike the trail. There was absolutely no one on it since it was Friday, it was sunny, and the wildflowers were in peak bloom! I can’t recall exactly how long it took us to get to Mowich Camp, but it wasn’t the fastest. I have a feeling it was somewhere around 6 hours, which is a bit on the slow side for us, but we were constantly stopping to take pictures of the wildflowers and had a long lunch break at the viewpoint. Brandon is pretty silly and I was have a fun time hiking with him – he indulged me by taking lots of Sound of Music inspired photos of me dancing in the wildflowers.
HOP_5815

The big thing to be aware of if you’re camping on the Skyline Trail is the water supply. In hindsight, we were pretty lucky because we weren’t super prepared for it. There’s only one campsite on the entire trail and the water source is pretty small. It’s just one tiny stream that runs through the campsite. We weren’t sure if it was even going to be running, so we kept out eyes open for other water sources along the way. There are a few other streams running by, but it would have been a long walk from the campsite. Fortunately the stream in the campsite hadn’t yet dried up. Our plan had been to bring Brandon’s water filter since it was only a small source, but he forgot it, so we had to make do with the emergency water tabs in my first aid kit. Obviously we could have just boiled the water, which we also did to leave overnight, but the last thing you want after hiking all day is to drink hot water (or worse, no water if the stream was dried up). So plan accordingly if you’re going out there. In future, I would bring extra water with me just in case.
DSC01220

Despite the rest of the trail being breathtakingly gorgeous, Mowich Camp isn’t much to write home about. It’s hidden in the trees, so there’s no viewpoint from the camp. But it still goes down in my memory as one of the more memorable campsites. For the first, and only time, on all of my hikes, we were the only people at the campsite. Manning Park is too far to drive after work and then hike into the camp, so we ended up being the only ones there! It was a weird experience. I’ve camped several times with only a limited number of other people (Juan de Fuca Trail and Ring Lake come to mind), but never as the only people. We took over the whole campsite and picked the best spot to pitch our tent. Brandon set up his hammock across two trees and we set up his bluetooth speaker while we cooked to scare away any animals that might be attracted by the smell. Brandon made chili for supper and had even brought dessert up with him! Overall it was a relaxing evening, except when Brandon left to go get ready for bed and I was left alone in the tent with only the sounds of the forest to keep me company. It’s kind of creepy being the only people around and I was definitely more aware of the potential for animals to wonder into the campsite. We were very careful about keeping all of our smellies away from the tent.

But we weren’t disturbed at all and woke up in the morning to continue our journey. Our plan for day two was to hike along Hozameen Ridge to Monument 74 at the Canada-USA border for a view of Hozameen Mountain. We continued along the Skyline Trail for a little while until we reached the junction for Hozameen. The Skyline II Trail continues down from there all the way to Skagit Valley. I’ve never done that section of the trail, but I have heard there’s more elevation gain to reach the bottom, so it’s not as scenic as the Manning side of the hike. But our destination lay along the ridge. We took the junction onto the Hozameen Ridge Trail, which continues all the way to border, and I suspect onwards past Hozameen Mountain and Ross Lake. I was never able to find a proper map for it, so I’m not really sure. My GPS says the trail ends shortly before the border, but it definitely continues to the monument and beyond.
DSC00958

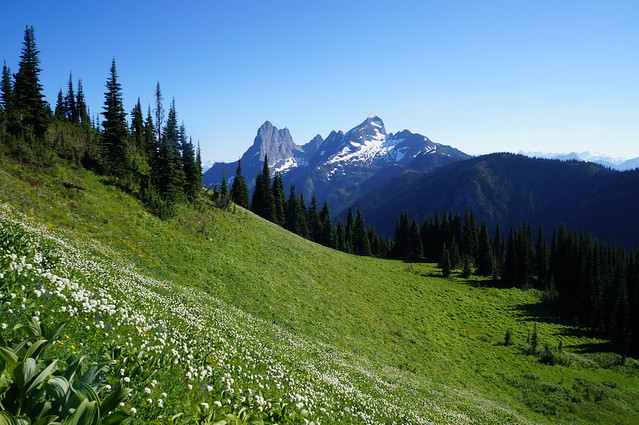
Hiking along the ridge is pretty easy. It’s mostly flat and you meander back and forth through the trees, catching views on both sides. As you approach the end of the ridge, you start climbing. This is definitely a more challenging section, but as you crest the end of the ridge, you’re rewarded with an unimpeded view straight to Hozameen Mountain. If you’ve ever been to Manning on a clear day, it’s likely you noticed Hozameen Mountain. It’s the biggest mountain in the area, with very distinctive jagged peaks. We decided it was the perfect lunch spot and couldn’t pass up the opportunity to soak in the view while we ate our wraps. While we were eating, we came across our first visitors of the day, three trail runners that were training for Manning’s ultra marathon in August, the Fat Dog 120. They had started running that morning and caught up with us at the half-point of their run (and our 3 day trip). They downed a few gels, snapped some photos of Hozameen, and then took off again while we stared flabbergasted that they’d run the same distance it took us 2 days to traverse in just one morning. I bet we had more fun though.

HOP_5937

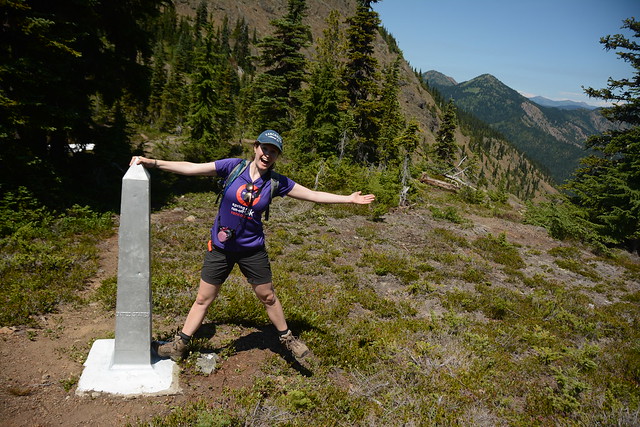
Our lunch viewpoint is where it looks like the trail ends on my GPS, from there it’s a steep downhill towards Hozameen. We could see the border monument and trail continuing at the bottom, but I was reluctant to go down there because I didn’t want to have to climb back up again. There was no way Brandon was leaving the last stretch of trail unfinished though and he dragged me down over the side to finish what we started. It is difficult to follow the trail down over the edge and it is pretty steep, so be careful if you’re following this route, but I definitely felt a sense of accomplishment when we reached the monument. It was my first time hiking to a border monument (I’ve since done Monument 78 as well) and we had a lot of fun snapping pictures and dancing around the monument.

I was surprised to learn upon reaching the monument that the entire border is actually clear cut through the park. As we hiked along the ridge, we noticed there was a corridor of clear cut trees, but never considered it was the border. I just assumed there was a transmission line down there. But once you arrive at the monument, it becomes pretty clear that it’s the border. I researched it after the trip and confirmed that it is true. There’s no signage at the monument, but I later learned when I hiked to the PCT monument that the border is also monitored by cameras. There’s a sign at the PCT monument asking you not to moon the border as you are on video! Wish I known this when I was flipping Trump the bird at the monument by Hozameen!
HOP_5979

We continued along the trail a little bit further to get another view of Hozameen Mountain before finally deciding to turn back. The trail definitely continues on, but it’s hard to judge the distance because mountains as large as Hozameen can be very misleading when guessing distance. All in all we hiked about 15km there and back to the campsite. We didn’t see anyone on the trail on our way back, but upon arriving it was obvious that other people had been busy hiking in all day. Our little solitary campsite was now filed with campers who had driven up in the morning to hike in for one night. It made me glad that we had taken Friday off and had the opportunity to hike the trail on our own, but we made some new friends with some of our fellow campers and swapped stories while teaching them to play exploding kittens.

DSC01079

We’d had two beautiful blue sky days, but the weather was forecasted to change on Sunday. When I hike with Carolyn, we’re always the first people up and on the trail, but when I hike with Brandon, we’re usually the last. Carolyn is a major morning person, while Brandon likes to take his time. I tend more towards being a morning person, but I can swing either way and enjoy sleeping in and taking it easy when I hike with Brandon. So despite being the first people to the campsite, we were among the last to leave. The clouds had finally moved in, but fortunately the rain was staying away. We made better time on the hike out, but we still stopped a lot to take more pictures. Even though I prefer round trip hikes, I find there-and-back-again hikes still look different from both directions and I have a tendency to take all my pictures twice – especially when it’s different weather conditions and all the photos look different anyways.

We stopped again at the big viewpoint for lunch and then pounded the last 5km back down to Strawberry Flats. I can’t remember if it ever did rain on us, which itself suggests that likely it didn’t, or at most was just a bit of drizzle. So even though it was 3 years ago that I hiked the trail, it still stands out in my memory as one of my most memorable backpacking trips and my all time favourite trail!
HOP_6069

Wedgemount Lake Backpacking Trip

It’s been 3 years since I hiked Wedgemount Lake, but this trail still haunts me!

Wedgemount Lake is a 14km round trip hike with a whopping 1200 metres in elevation gain. All I can say is, don’t underestimate it. Wedgemount has recently been added to Garibaldi Park’s database of reservable sites, so you now have to book to go up there, which wasn’t the case when I visited. I suspect this may have actually increased the traffic up there though because people that aren’t able to get a spot at Garibaldi Lake or Elfin Lakes, see it on the map and decide to go there instead. I don’t actually know if this is true or not, but I did meet a group of 5 guys at the trailhead to Elfin once who were changing their plans to go to Wedgemount when they realized Elfin was full, but just a guess!

Wedgemount is incredibly scenic once you get to the top, but boy is it a long slog to get there. I went in late August with Brandon the first summer I started camping and I believe we started hiking sometime after noon. There’s very little to see but forest until you reach the halfway point across a short boulder field. After that, it’s back into the woods again until just before the end when you have to climb a steep boulder field to get up to the top. Don’t get me wrong, the whole trail is steep, but the boulder field is definitely tough with overnight packs as you’re basically climbing up over the rocks.

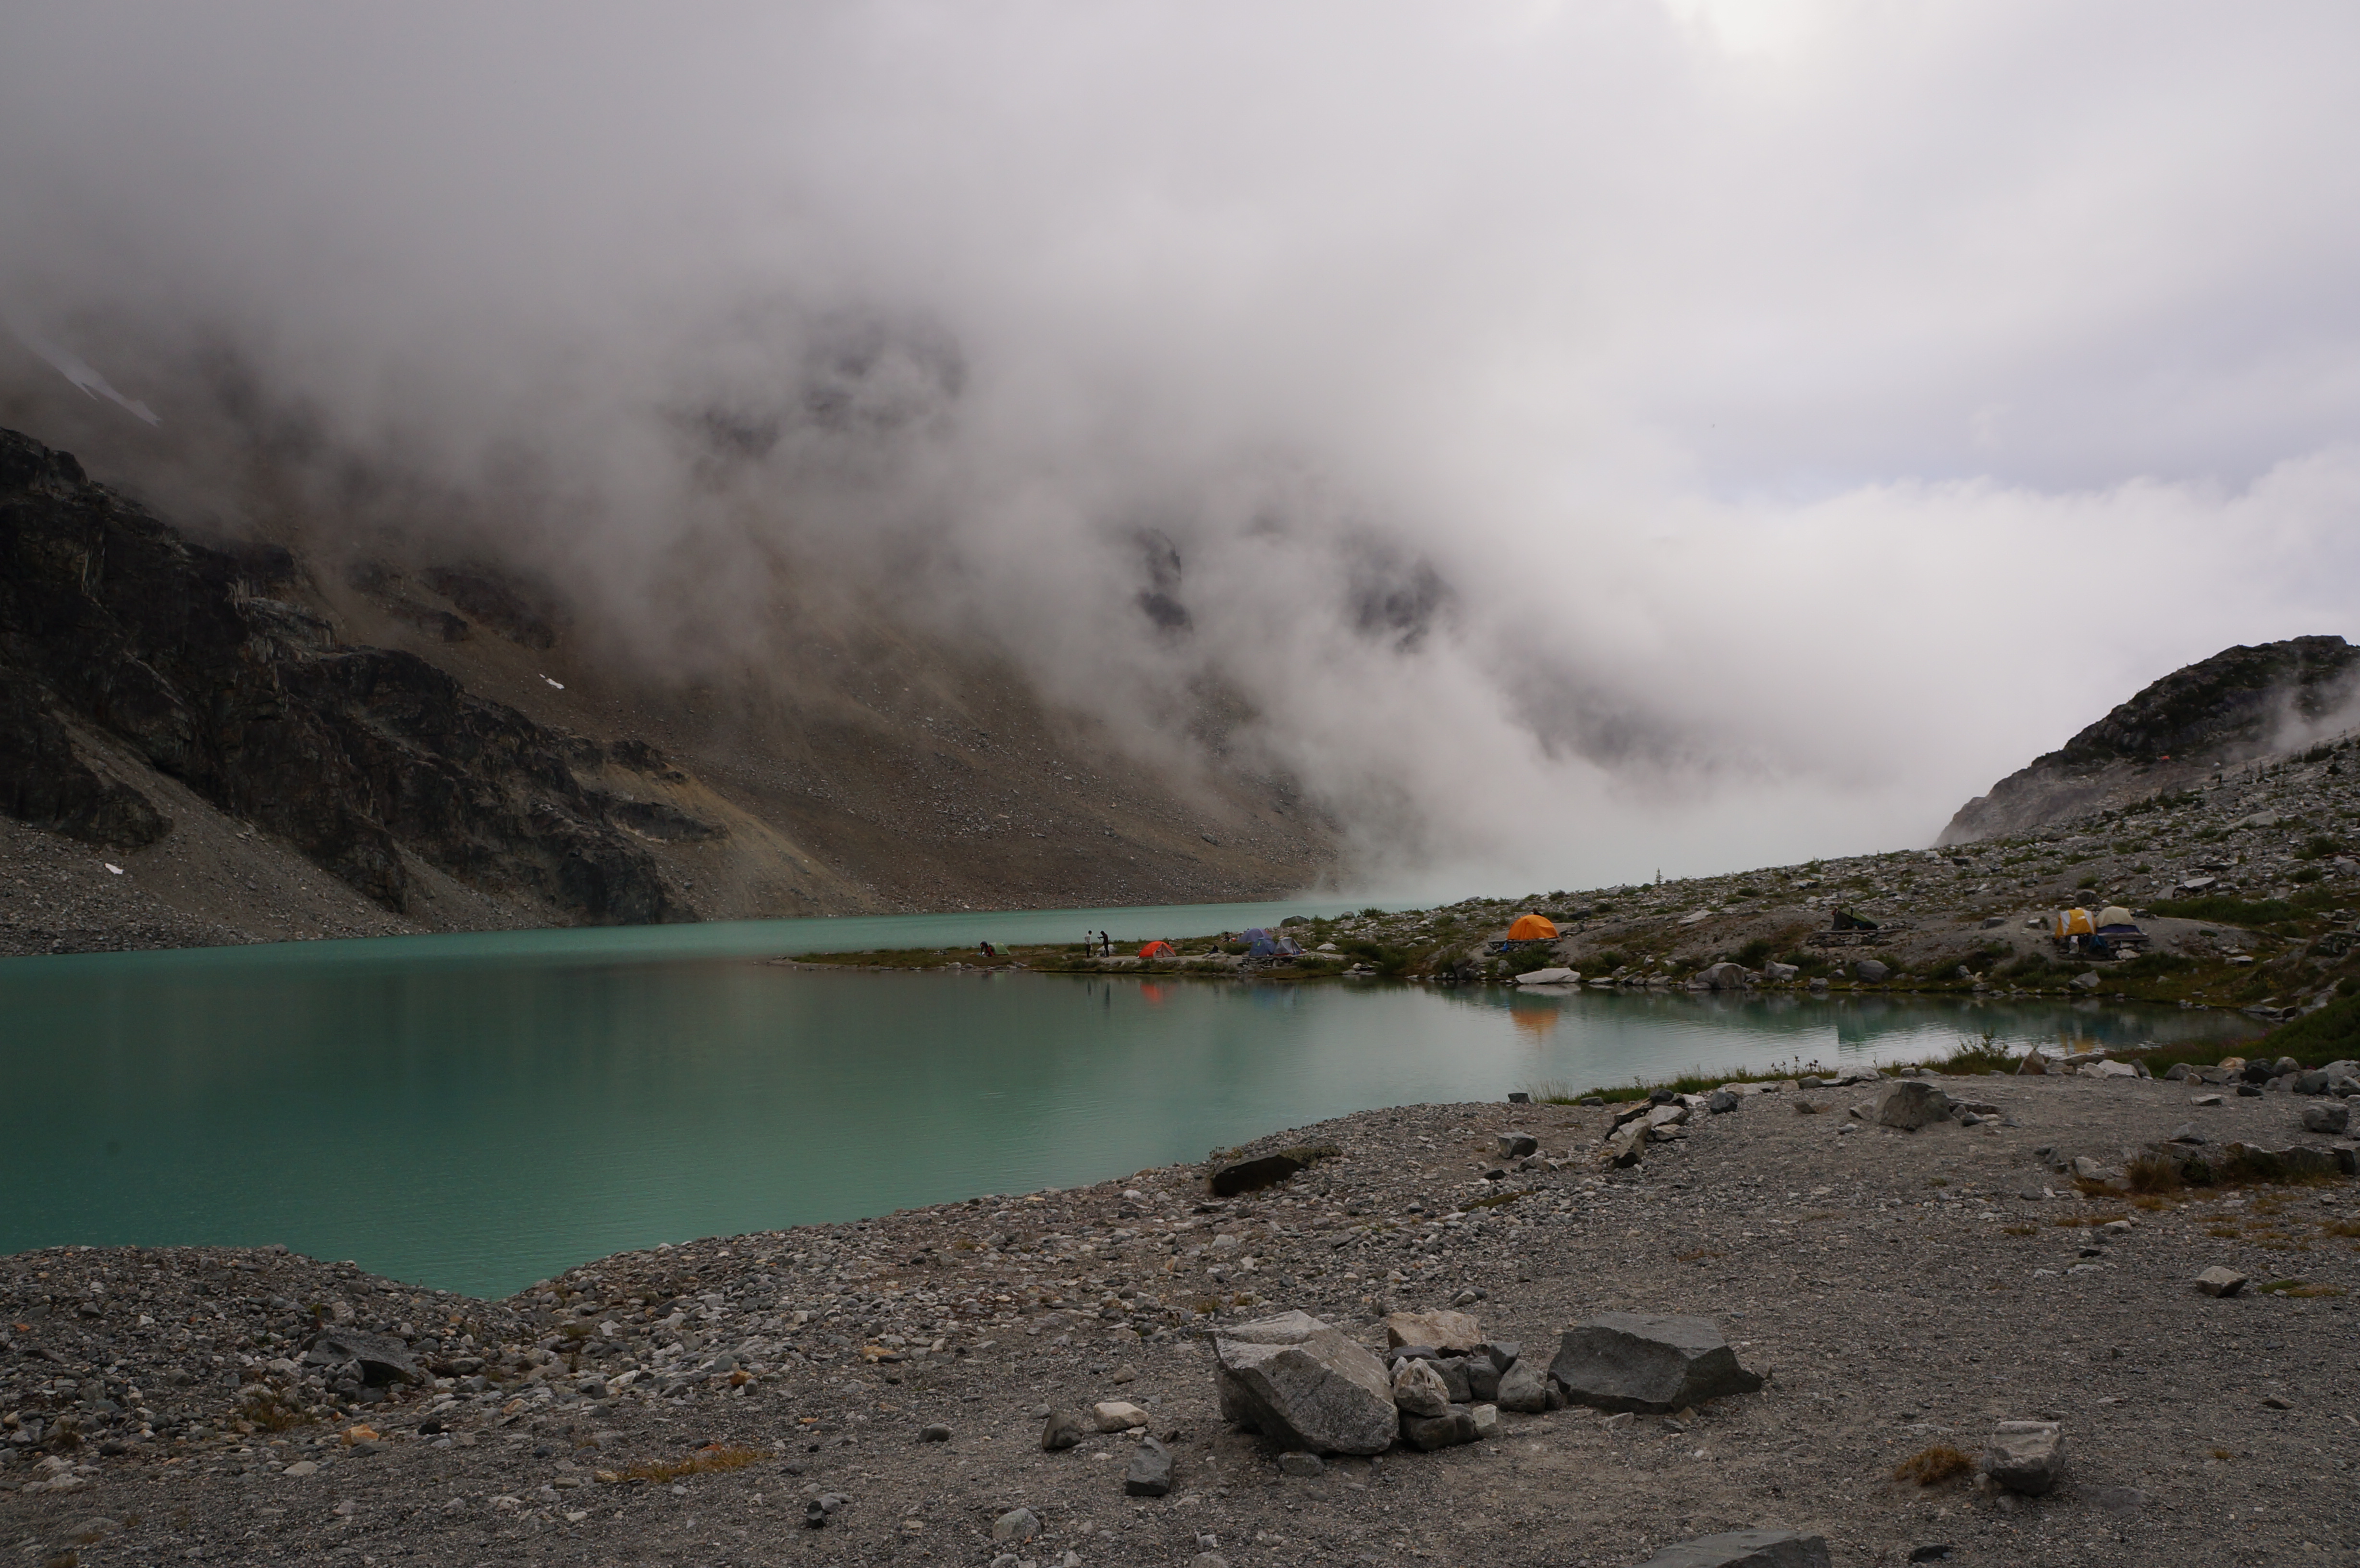
When you get to the top of the landslide, you’re in a valley of sorts, with Wedgemount lake at the bottom, surrounded by another set of peaks and the Wedgemount glacier. You hike down into the valley, which is completely wide open with very little shelter. Over the years, people have moved the rocks around to create little rock-walled campsites to protect from the wind that funnels in through the valley across the lake. There is a small hut up there as well, but I think most people opt to camp as there’s tons of space up there and lots of sites to choose from.

It was certainly windy when we went up there. Even though it was August, it’s one of the coldest camping trips I can remember. I was fine once I got in my sleeping bag and went to bed, but until then, it’s freezing sitting out on the ridge with nothing to shelter you from the wind. We set up our tent as fast as we could and tried to find the most sheltered place to quickly make and eat out supper. Then we hit the sack pretty early because it was just so cold outside.

It’s a beautiful location though. Wedgemount Lake itself is quite large, but the soils must be a lot siltier than other lakes in the park because it has a much paler blue hue to the water. The wind died down overnight and we got up early to do a little exploring around the lake. Like I said, it’s a wide open space surrounded by other mountain peaks, so there’s tons to explore up there. Our exploration was pretty limited, which kind of makes me what to go back, but that landslide still haunts me and I don’t want to have to haul my backpack up over it every again.

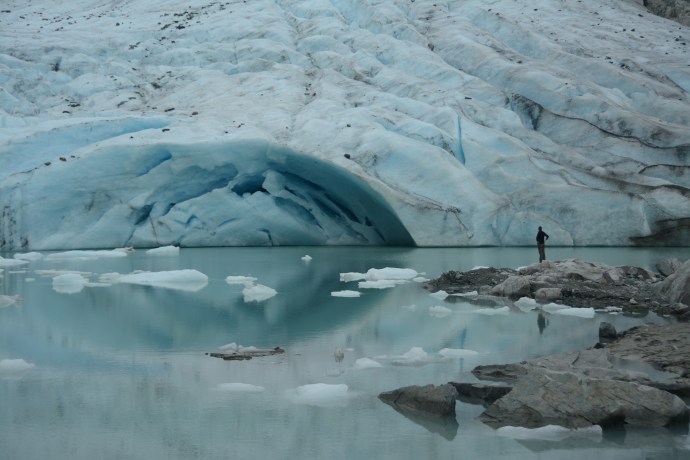
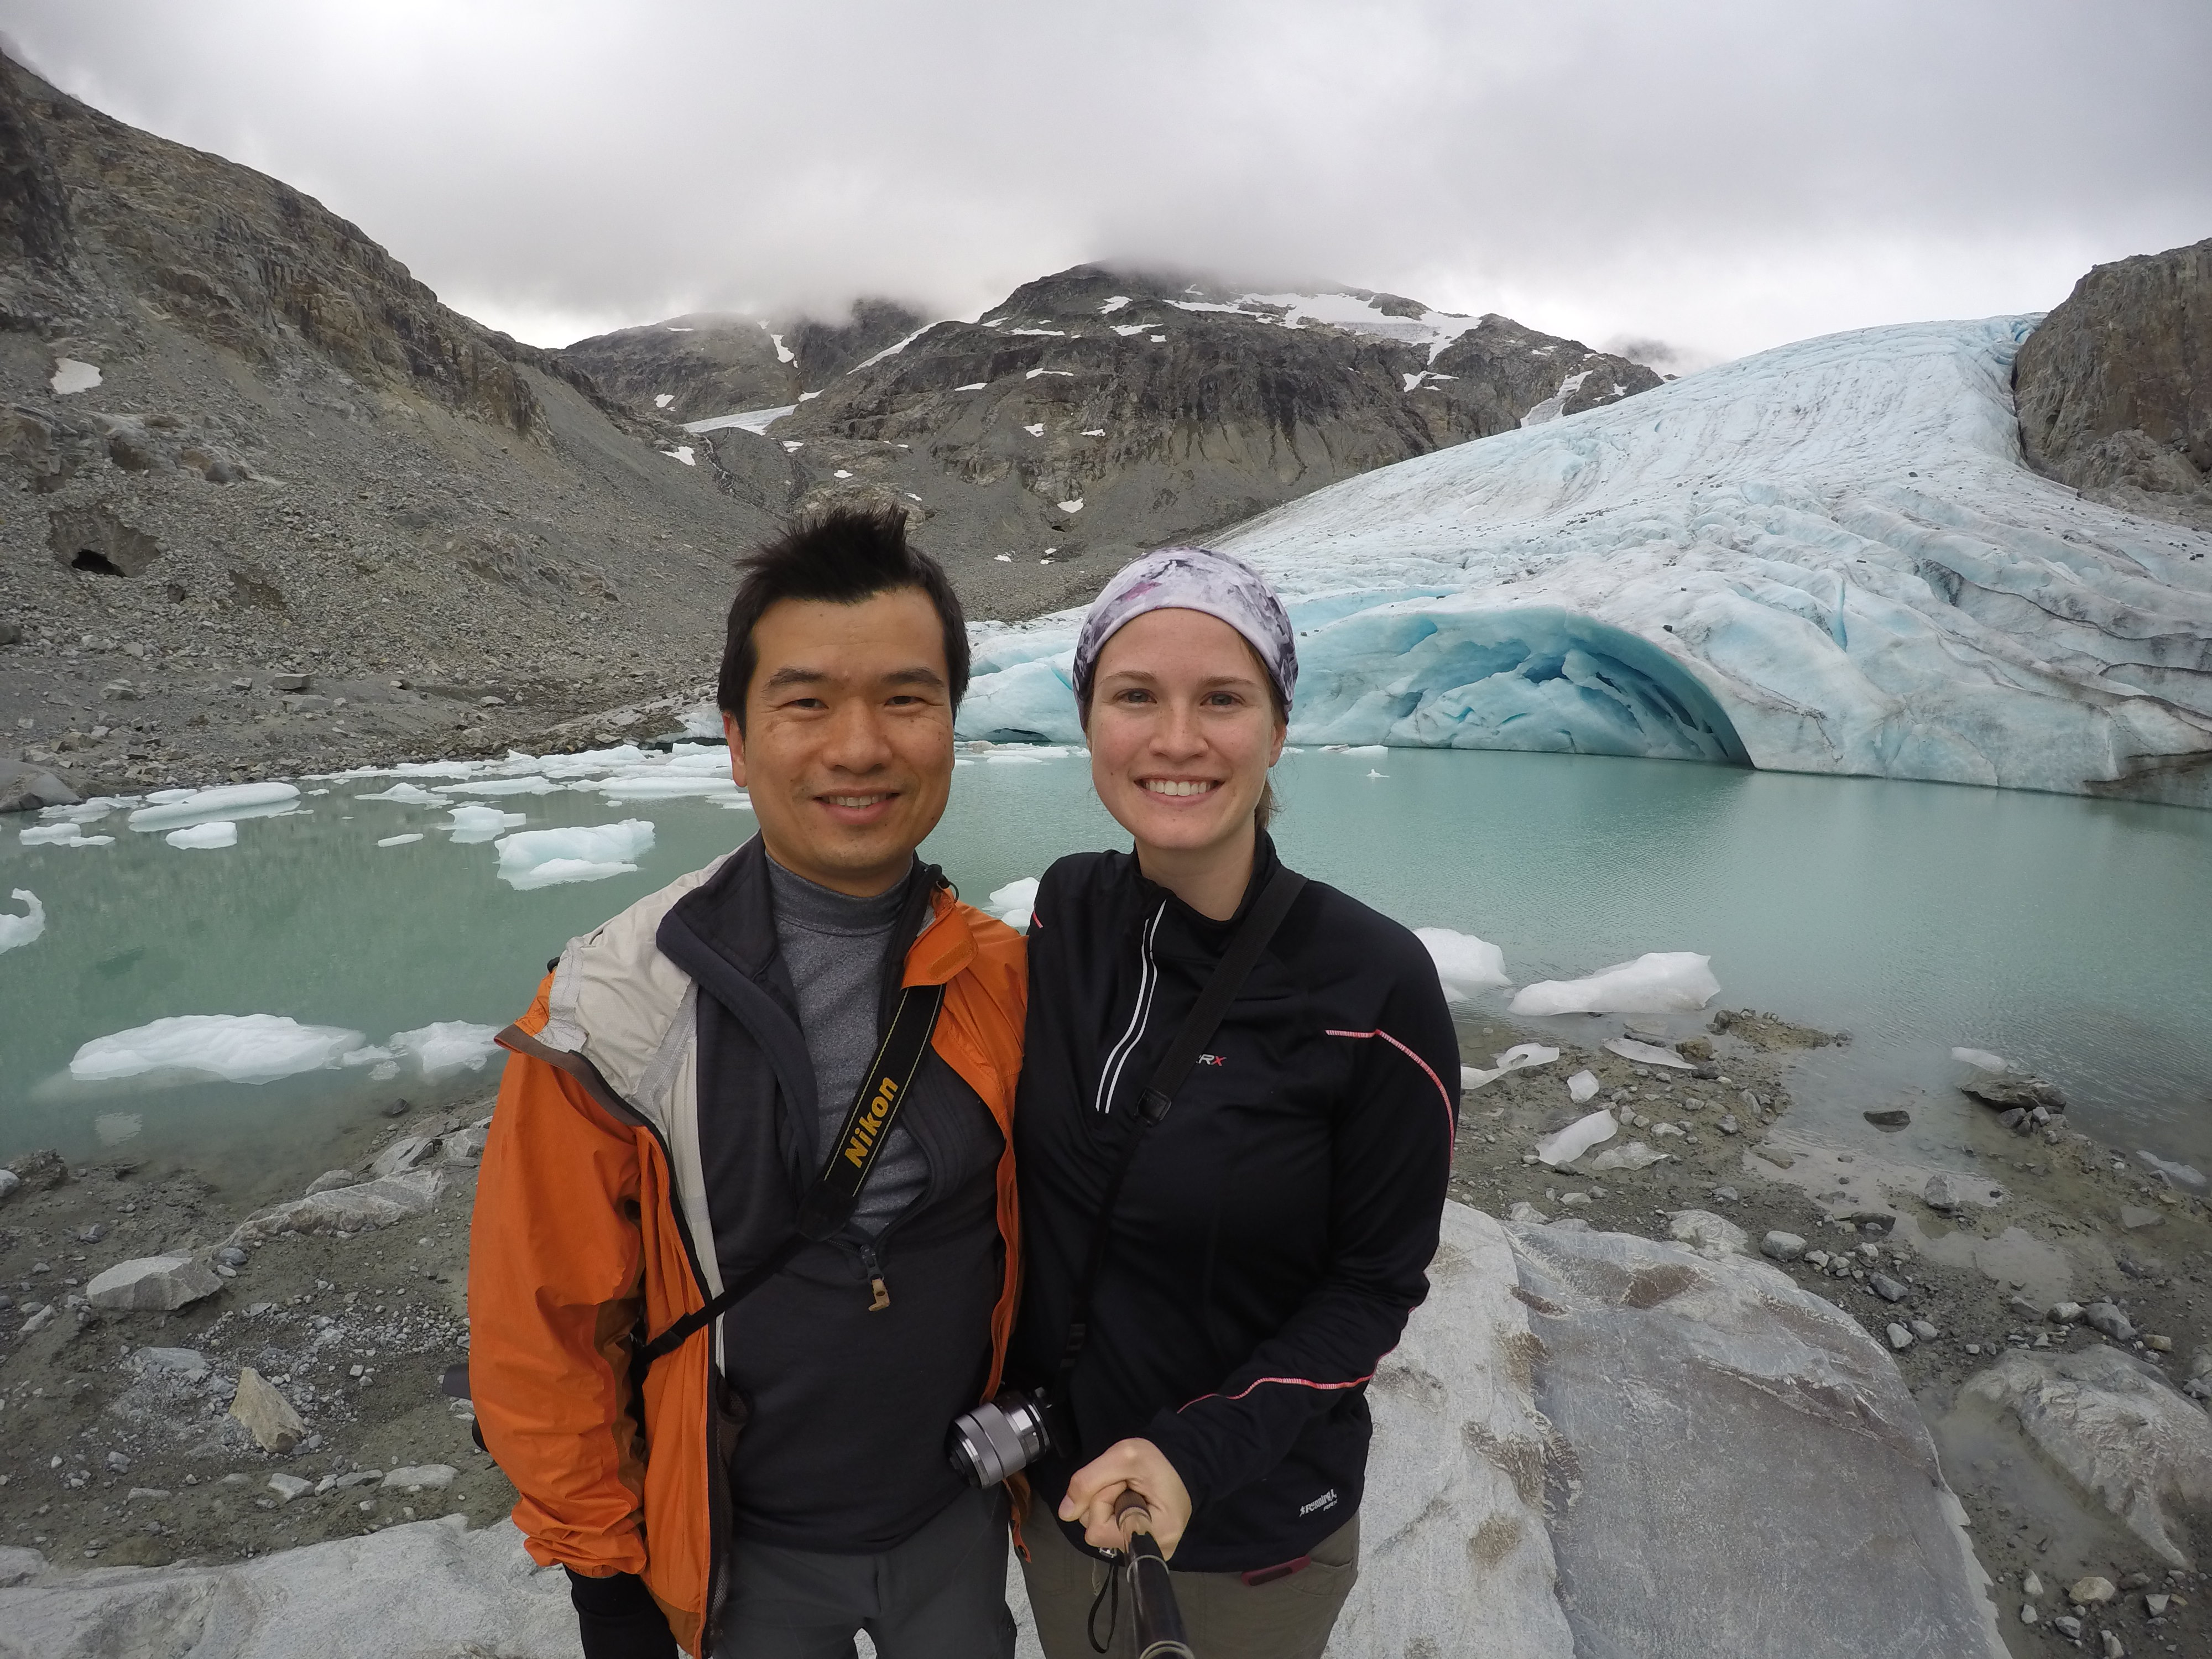
We did explore to the glacier though. If you walk around to the head of the lake, you can see the Wedgemount glacier. I’m sure it looks different every year depending on how the ice changes and melts, but the year we visited had left another lake at the base of the glacier with lots of bergy bits (real technical term – I’m a Newfoundlander, I would know) floating around. The glacier is huge and looks misleading in pictures, but Brandon got a few great photos of me standing at the base of the glacier that really put the size in perspective.

The lake is nice, but the glacier was definitely the highlight for me. The only other glacier I’ve hiked to is the glacier at the top of Brandywine Mountain, so it was a landscape quite unlike where I usually hike (the Brandywine Glacier was very different as the ice melt was flowing down the mountain instead of pooling).  I can’t decide whether Wedgemount makes for a better day hike or overnight though. A day hike seems like it might be rushed, but having just a day pack sounds a lot nicer, so it might be a judgement call based on your fitness level.

The clouds were looking pretty threatening though, so we didn’t stick around too long at Wedgemount. We packed up our things just before the rain hit and hiked back over the landslide and down again. Wedgemount is just as tough going down as it is going up. It’s a steep hike over the landslide and then the trail feels like it goes on forever after that, with nothing to look at and no respite for your knackered knees. It was a relief when we finally hit the parking lot.

Garibaldi Lake Backpacking Trip: First Timer

Garibaldi Park is hands down, one of the most beautiful provincial parks in the lower mainland. I’ve been to the lake on 3 separate occasions in the last 5 years and I really felt I experienced something new on every single trip. The first time I went to Garibaldi Lake was in 2015 as a day trip and it’s what inspired my desire to start backcountry camping. It was so beautiful at the lake that I really wanted the opportunity to stay there overnight. So the next year, I bought myself some backcountry gear and did a 3 day trip with Seth and Emily, who had just finished her bachelor’s degree and was visiting for the summer at the time.

Both times I’ve backpacked to the lake have been for 3 nights, which I think is a good length. I left work early on a Thursday and we drove out to the trailhead, aiming to be hiking by 5pm. I think we were a little bit behind, but we were certainly on the trail by 5:30pm and it took us about 3.5 hours to hike to the lake without any detours. 2016 was the first year that Garibaldi introduced the backcountry booking system, so we did have a campsite booked, but we decided to take Friday off to get ahead of the crowds and have one day with fewer people.

DSC01554

It’s a rough walk up to the lake for sure. It’s a pretty easy trail, but there is significant elevation gain (~800m) and the trail is pretty much constant switchbacks with no views for the first 6-7km. After that it gets a little more varied and less steep, before you finally reach the lake and hike in along the edge to the campsite. If you are hiking in a little later, like we were, be prepared to hike in the dark and have lights with you. Fortunately, we reached the campsite just around dusk and got to see the glacier at the back of the lake lit up pink with the alpen glow before night set in.

Hiking in Thursday night gave us two full days in the backcountry before we had to hike out again, so we planned to hit Garibaldi’s other two most popular attractions, Panorama Ridge and Black Tusk. I was most excited for Panorama Ridge because I’d seen so many amazing pictures of the bright blue waters of Garibaldi Lake as seen from the ridge looking down on it. So we decided to day hike to Panorama on Friday. We had each purchased a small daypack from Mountain Warehouse that we had stuffed into our big packs, so we crammed them full of all our day items.

DSC01739

It’s a bit of a rough start to Panorama Ridge when you leave the lake and have to hike back up over the bank, but after that the trail levels out a lot and has beautiful views of the alpine meadows. Panorama Ridge is about a 15km round trip hike from the lake and definitely ranks as one of my top 5 hikes. At first you hike through alpine meadows until you reach the base of Black Tusk, and then the trails branch off and you loop right the edge of Black Tusk Mountain down towards helm creek. You can’t see Black Tusk from this part of the trail, or Garibaldi Lake, but you can see down into the Valley and up to your final destination at the top of the ridge. I went during the August long weekend, so there were lots of wildflowers in bloom along the trail.

The last 2 kilometres of the trail are more difficult as you start climbing up towards the top of the ridge. It’s a steep trail and it can get quite crowded. Even though it was a Friday, it was still pretty busy, but I was glad we did it first. The view from the top is unbelievable and you should absolutely time your trip to eat up at the top so that you can hang out for a while. The view of Garibaldi and the surrounding mountains and glaciers is incredible, but it’s really the view back towards Black Tusk that took my breath away. I don’t think that view is showcased quite as much. I was anticipating and expecting the beautiful view of the lake, so I was surprised by the equally beautiful view looking back at Black Tusk and could never quite decide which direction to face!

I definitely think a day hike is the way to go for Panorama though. I know some people do Panorama as a 30km round trip, but I can’t imagine doing this unless you were a trail runner. It must be at least a 12 hour day to do the whole thing and that doesn’t leave much time to enjoy the views or the lake. Panorama Ridge was a whole day affair for us.

The year we went, there was still a lot of snow going up the side of the ridge towards the top. On the way up we could see some butt marks in the snow coming down from the top and Seth was really keen to slide down the snow on the way back. I think whether or not this is possible probably depends on the conditions when you visit, but I would absolutely recommend AGAINST it either way. Me and Emily were swayed by Seth’s enthusiasm about sliding down and decided to give it a try. But it’s a lot steeper than it looks and a lot longer. Once you start sliding down it’s really hard to control your speed and you’re pretty much committed to going the whole way. It is so cold to slide down a snowbank in your shorts and because we started picking up to much speed, we were forced to try and slow ourselves down with our hands, causing both our hands and butts to go totally numb for hours (yes. hours, I am not exaggerating). So yes, we did slide down, but I would not repeat the experience.

We finished the day with one of my favourite activities, a swim in the lake! If you don’t walk far enough in around the lake, you might never know that there’s a dock, but if you want to swim, this is absolutely where I’d recommend you go because then you can save yourself the torture of having to wade into the freezing, glacial water, and just jump in. I think I swam in the lake every time I’ve been up there and while it is freezing, it is one thing I would recommend! The cold water is so nice on your aching muscles and it makes for a great photo!

On Saturday we hit up Black Tusk. We would have preferred to stay at Garibaldi Lake all weekend, but unfortunately the campsite had been full for Saturday night by the time we booked, so we packed up everything and moved to Taylor Meadows on Saturday morning. Taylor Meadows is about 1.5km away from the lake and has traditionally been used for group and overflow camping back before the reservations were introduced. Now you can book all the campsites online and while it’s frustrating if you’re not fast enough to nab one, it does remove the stress of wondering whether you’ll find somewhere to pitch your tent for the night.

DSC01372

It was the BC Day weekend and as expected, it was a lot busier on Saturday. Taylor Meadows is nice, but it definitely can’t compare with the lake. The campsites have much less privacy and are all crammed together in the meadow. We decided to eat lunch in the hut and then started on the Black Tusk hike after lunch. Black tusk is a bit shorter than Panorama Ridge, but it has more elevation gain. The weather was cooler on the day we did Black Tusk as well. You hike in to the same junction, but instead of hiking around the mountain, this time, you hike up it. I wasn’t expecting to see the Lake from Black Tusk since you can’t see it from Panorama at all until the very top, but you can actually see the lake from a lot of the Black Tusk hike, which was really nice. There was still quite a bit of snow on Black Tusk though, even in August, so we did have to cross several snowy sections on the way up.

DSC01678

What I didn’t realize until the way down, was that the official Black Tusk hike actually ends about halfway up to the ridge (there’s a sign that marks the end of the hike – which I did see, but thought it was just an info board about the hike). So we kept going to the top of the ridge at the base of the tusk. It is definitely rough going in that last section. It is all scree going up to the ridge and every step you take you feel as if you’re sliding half a step back. Emily and Seth hated it and I didn’t particularly like it either. We pushed to the top of the ridge so that we could see the views on either side of the mountain, but Emily and Seth refused to go on from there. There is one last section that goes right to the base of the tusk and I really wanted to see it, so I braved the last 10-15 minutes up the slope on my own.

But that’s where I quit. I know there are people that climb Black Tusk, some of which bring actually safety and climbing gear, and others that just free hand it. I’m not one of those people. I’ve heard stories of how dangerous it is, so I opted to give it a pass. But, I did get beautiful views of the tusk and looking out around the surrounding area on both sides of the tusk. I have been back to Panorama Ridge since then, but that will probably be my one and only time up Black Tusk. It was a cool hike, but I’m not a huge fan of all the scree, so it’s one I’m happy to tick off my bucket list and move on from. But never say never I guess, I could probably be convinced to return on snowshoes.

And that was really it for our Garibaldi trip. We returned to Taylor Meadows and hiked out the next morning. It was Sunday when we hiked out, so there were still an insane number of people hiking in, and it’s kind of fun to watch all the day hikers sweating it on their way in while you hike all downhill with your pack and your sweater still on.

DSC01402

Overall, I do have a bit of a love-hate relationship with Garibaldi though. I definitely love it in that it is incredibly beautiful and awe inspiring, but it’s also mistreated by a lot of its visitors and that is really frustrating. I’ve had more than one “leave no trace” rant on this blog, but Garibaldi and Joffre are particularly bad for garbage. Please please please, respect the beautiful nature that we all share and pack out all your garbage! Do not leave garbage in outhouses as that attracts bears. If you can pack it in (uphill) full, then you can definitely pack it out empty.

DSC01481