Rockwall Trail Backpacking Guide

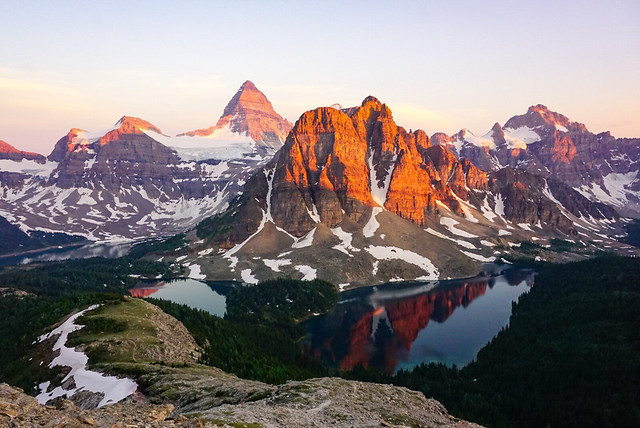
In the spirit of helping more people get hiking on some of western Canada’s most iconic trails, I decided to create a backpacking guide for the Rockwall Trail in Kootenay National Park. I hiked this trail over 3 nights in 2023 and had a fantastic time. I attribute most of the fun to my phenomenal hiking partners, but the beautiful scenery on the trail also made the experience unforgettable. I’ve already published a 2-part trail report, which you can read starting here, as well as a guide to Kootenay National Park. I’ve consolidated all of my Rockwall-specific knowledge here for those planning to hike the trail. Reservations for the 2026 season release at 7am PST on January 26, 2026 (8am MST).

The Trail

The Rockwall Trail is a 54km thru-hike located in Kootenay National Park in BC. You can hike the trail in either direction and there are several exit points that connect to the highway if you want to shorten your hike. The two main trailheads are located off Highway 93 at the Floe Lake and Paint Pots Trailheads. There are 5 campgrounds on the trail, with the most popular campsite at Floe Lake. Most people hike the trail over 3-5 days, depending on fitness level.

At 54km in length, the Rockwall Trail is not the longest trail in the Rockies, but there is a significant amount of elevation gain, so don’t underestimate it. The hike starts in the forest on both ends of the trail, climbing up towards the alpine, which runs between Helmet Falls and Floe Lake with 3 steep passes along the way. While Floe Lake is very popular, the trail takes its namesake from the large rock wall that runs between Helmet Falls and Tumbling Creek, which in my opinion, is the real highlight!

If you don’t like backpacking, you can visit Floe Lake as a day hike, but it is a 22km round trip hike, with 750m of elevation, so it’s a big day. I don’t recommend day hikes from any of the other trail entrances – unless you’re a trail runner – but the alternative trail entrances from Numa Creek and Tumbling Creek Trails offer the opportunity to shorten your backpacking trip.

PSX_20230903_210217

Time of Year

The best time of year to hike the Rockwall Trail is in the Summer or early Fall. If you go in late-June or early-July, be aware that there may still be snow on some of the trails. If you go later in the summer, it’s more likely that your trip might be impacted by wildfires. While most people prefer to backpack in the summer, late September is also popular due to the colourful larch trees near Floe Lake. However, you should be prepared for snow and cold conditions at this time of year. I hiked the trail at the very end of August and had great conditions.

Getting There

Unfortunately, this park is not accessible by public transit. Similar to other popular Canadian parks, the easiest way to access is by driving. The park is located on Highway 93, which is a 50 minute drive to the Floe Lake Trailhead from either Banff or Radium. The added challenge with the Rockwall Trail is that, because it’s a thru-hike, you will either need 2 cars, 1 at each trailhead, or plan to hitchhike between the two parking lots. I parked a car at each trailhead, which is the easiest option, but hitchhiking is not uncommon along this route and is relatively safe. I recommend making friends along the trail and looking for a ride from another hiker.

There is a large parking lot at the Paint Pots trailhead, but the Floe Lake trailhead is much smaller, so you may have to wait for a parking space to open up. I’ve also heard that break-ins are not uncommon at the Floe Lake trailhead, so make sure not to leave valuables in your vehicle.

20230829_123149

Permits

Like most popular hikes in the Rockies, securing your camping permits will likely be the hardest part of your trip. This is a popular trail and it attracts crowds every year. If you’re doing a day hike, you don’t need a permit for the trail, just the National Park Pass (discussed below). But if you want to try and get camping permits, then it’s important to mark your calendar with the permit release date.

The permit release date for 2026 is January 26, 2026 at 7am PST. Permits are $10 per person, per night (plus a booking fee) and they will disappear fast, so you need to be ready to book right when they release. I will try and update the release dates for permits every year, but they are usually announced by Parks Canada in late November or early December for the following year – so keep an eye on their page of release dates in future years. To make your bookings, visit https://reservation.pc.gc.ca/.

Once booking opens, select “backcountry” in the tabs along the top of the booking page, and then select “backcountry zone”. Next, select “Banff, Kootenay, and Yoho Backcountry” as your park and select your start date and access point. There are 3 options for access points along the Rockwall Trail: Floe Lake, Numa Falls, and Paint Pots. Numa Falls is only used if you’re doing a shorter version of the trail. If you want to hike south, select Paint Pots; if you want to hike north, select Floe Lake. If you have trouble getting your preferred itinerary, you can always try reversing direction or using different start dates.

Once you start your search, you will be forced to build your itinerary day by day. At the top of the page, you’ll see a dropdown menu where you can select your campsite and “add to stay”. Instead of building your itinerary this way, you can scroll down to the map and click on the “calendar” tab in the left sidebar to see a list of all available campsites per night. This is an easier way to see what’s available and build your itinerary. If you don’t see what you want, try refreshing or reversing your itinerary by updating your access point. People are constantly adding and changing dates and campsites in a rush to get their preferred itinerary, so the trick is to frequently refresh. Just because you don’t see a site available right away, doesn’t mean it won’t show up later if you keep refreshing.

My recommendation is to take what you can get and make changes later. If Floe Lake is not available, book Numa Creek and move on to the next day before those dates book up too. Once you have secured a booking for each of the dates in your itinerary, go back and look for cancellations. Keep refreshing until you see one, and then make a change to your booking to add it. This does cost more as you have to pay a small change fee, but it offers more flexibility in ensuring you at least get something. I wasn’t able to book Floe Lake when I made my original booking, but I was able to get a cancellation for it afterwards. You can track cancellations on Schnerp, which will notify you when a site opens up.
Here’s a few tips for getting your camping permits:

  • Get on the booking website 15 minutes early using as many devices as possible (computers, phones, ipads, etc). At release time, everyone on the website is entered into a random generator that assigns you a position in the queue. All of your devices will be assigned a place in line, then proceed to book your permits on whatever device has the shortest queue.
  • Once you get access, be flexible with both your starting date and itinerary. Use the “calendar” option to see available dates at each campsite. Consider shortening your itinerary by exiting on the Numa Creek or Tumbling Falls Trails.
  • If you don’t see any availability, keep refreshing for at least 15 minutes. With so many people trying to book campsites, dates are always disappearing and then becoming available again, so if you don’t see anything, keep refreshing.
  • Be prepared that you might not get what you want. Book alternative sites and sign up for cancellation notifications on Schnerp.
20230829_162446

National Park Pass

In addition to backpacking permits, which are specific to your campsite, you must also have a National Park Pass. These are much easier to obtain – there is no booking period and the number of passes are not restricted. The most common option is to purchase the discovery pass, which is available for $150 for a family, or $75 per person. It’s essentially an annual pass that covers everyone in your car. You leave it hanging in the car while you’re on the trail and it acts as a parking pass. If you have two cars, then you would need two passes. Alternatively, you can buy single adult day passes for everyone, which are $11 per person, per day. However, in 2025 and 2026, Canadians can obtain the Canada Strong Pass for free, which includes a free discovery pass and 25% off bookings! You can purchase passes online, in advance, or in person at the Kootenay and Banff park entrances.

Campsites

There are 5 backcountry campsites located along the trail, so there are multiple options for where to stay, which provides some flexibility when planning your itinerary and securing bookings. The campsites are pretty equally spaced along the trail, so it is easy to plan for a more relaxed itinerary, or you can plan your sites further apart if your itinerary is more aggressive. I’ll discuss itineraries below, but here’s an overview of the campsites running from north to south. They all include outhouses and bear lockers, and require valid permits for overnight use.

20230830_114825

Helmet-Ochre Junction – This is the most accessible campground on the trail, located 6km from the Paint Pots trailhead. It’s located along the river at a trail junction and has 6 tent sites. It’s a nice enough campground, but it’s often overlooked in favour of the more popular/scenic campsites. If you can’t get permits for Helmet Falls, this is a good alternative. It’s also a great option if you’re starting late in the day and don’t want to hike too far.

Helmet Falls – This is a beautiful campground located at the base of Helmet Falls, which cascades down the valley from Helmet Mountain. There are 18 tent sites and you can enjoy the view from the picnic area at the back of the campground. This is a great option to camp before or after you’ve hiked along the Rockwall.

Tumbling Creek – This campground is located at the bottom of the valley between Rockwall Pass and Tumbling Pass. There’s 18 tent sites and easy access to the river with nice views. This is a great option to camp before or after you’ve hiked along the Rockwall. You can also come direct to the campground along the Tumbling Creek Trail, which starts at the Paint Pots trailhead.

Numa Creek – This is the lowest elevation campground on the trail and is located between Tumbling Pass and Numa Pass. There’s 18 tent sites and easy river access. This is a great place to camp on your way to or from Floe Lake. You can also come direct to the campgound along the Numa Creek Trail, which starts at the Numa Falls trailhead.

Floe Lake – This is the most popular campground on the trail. If you can score a permit for this campground, do not hesitate to book it. The entire trail is very scenic, but Floe Lake is definitely the most scenic campground. It has 18 tent sites and is located 11km from the Floe Lake trailhead.

Itineraries

Planning this trail is pretty straight forward because it is a linear thru-hike. Your main decisions will be what direction to hike and over how many days. Here are a few recommendations based on how many nights you plan to spend on the trail. And here’s a useful trail graphic from Parks Canada, noting the distance between each campsite.

1-Night: Your best option if you only have 1 night is to camp at Floe Lake, hiking in and out from that trailhead. Add on 2km each way to hike up to the top of the nearby pass for a fantastic birds-eye view of Floe Lake. Alternatively, if you really want to see the Rockwall, you could spend 1 night at Helmet Falls and hike out via the Rockwall and Tumbling Creek Trail. You just have to be prepared for a big 20km day on day 2.

2-Night: 2 nights is probably the most awkward itinerary, because you can hike most of the trail, but it’s ambitious to do the whole thing. If you want to do the whole trail, I’d recommend camping at Helmet Falls and Numa Creek, which requires you to hike two 20km days back to back. If you don’t want to do the whole trail, hike north, camping at Floe Lake, followed by Tumbling Creek, and exit on the Tumbling Creek Trail. Or hike south, camping at Helmet Falls, followed by Numa Creek, and exit on the Numa Creek Trail. Hiking north allows you to visit Floe Lake, while hiking south allows you to hike the Rockwall. If you want to hit both, you have to do the whole trail.

3-Night: I did the trail in 3-nights, which I thought was a good length. Plan for your first and third nights at either Floe Lake or Helmet Falls (doesn’t matter which direction you go), and then your second night at either Tumbling Creek or Numa Creek. You will have one long day with this itinerary, but you can plan it around whether you’d like to have extra time at Floe Lake or on the Rockwall. I hiked south and camped at Numa Creek, meaning I had lots of time to relax at Floe Lake on my last night.

4-Night: This is the most relaxed itinerary. Do the trail in either direction and camp at Floe Lake, Numa Creek, Tumbling Creek, and Helmet Falls. You’ll have lots of time to enjoy Floe Lake, the Rockwall, and Helmet Falls.

20230829_150852

Hiking the Alta Via 1: Fanes to Averau

Welcome back to my trail report series on the week I spent hiking the Alta Via 1 in the Italian Dolomites. Last week I posted about the start of the trail and the first 20km of hiking between Lago di Braies and Rifugio Fanes. On Day 3, we left Fanes in the early morning to start our hike up to the top of Forcella dl Lech, one of the largest passes on the trail. This section of trail can sometimes be difficult to access if there’s poor weather due to exposure, but we had great condition and no concerns as we made our approach!

This was probably my favourite day on the trail. We were among the last hikers to leave the rifugio in the morning, but we only had 10km and 500m of elevation gain ahead of us, so we were feeling positive. It was quite chilly when we started off, but we started off with a short, but steep, climb up to the alpine plateau, which really warmed us up. The sun came out soon after and there were lots of horses grazing in the meadows, so Kristine spent some time with them, while I continued on to a small lake called Lago di Lemo. There’s no big lakes on the Alta Via 1, aside from Lago di Braies, so the opportunities for swimming were limited, but I was determined to swim in as many as possible.

PSX_20250922_161338
PSX_20250922_161202

There was no one around, so I hurried off to the lake and was able to get in a quick skinny dip before any other hikers showed up. A lot of the “lakes” are really just tarns, so some are quite shallow or don’t have the best water quality, but this one was really nice. We’d barely started hiking though, so we didn’t linger and continued on to a small cafe located in the valley. We debated stopping for a snack, but it was still quite early and neither of us were hungry, so we continued on through the valley.

There were lots of cows hanging out in the meadows, which Kristine loved, but we kept our distance because one of the mama’s was getting a bit worked up over her calf running off without her. For the most part, the livestock is harmless, but you should still respect them and maintain a safe distance. A man was trampled to death by a cow on a nearby hike previous to our trip, so accidents do happen.

PSX_20250922_161537
PSX_20250922_161753

Once we reached the end of the valley, the trail started to get a lot more crowded. The Pass is a popular day hike that can be done from the small town of Sciare, so we encountered a lot more hikers. When you reach the end of the valley, the trail starts to climb and you gain 400m of elevation over ~2.5km. At first it’s a more gentle ascent, but it gets steeper as you go. While we were hiking through the valley, we spotted the pass off in the distance and joked about what a brutal hike that would be. Then we started hiking up the mountainside and quickly realized it’s where we were headed!

PSX_20250922_161857
PSX_20250922_161959

Honestly, I loved this part of the hike. It was tiring, but the views were phenomenal! In my opinion, the trail up to the top of the pass had some of the best views of the trip. Plus, we really lucked out with the weather and it was a gorgeous sunny day. It made it a bit hot for hiking, but there was a nice breeze from the ridge. We stopped partway up for a snack and to enjoy the view, then continued on for another section of trail before stopping for lunch. I’d been planning to eat my sandwich at the top of the pass, but I got pretty hungry as we hiked and decided to just enjoy the view and eat it on the side of the mountain. There are no bad decisions on when to stop because the entire trail is stunning!

The last push to the top is quite steep and has lots of loose rock, but eventually you reach the gap in the mountain that forms the pass. The trail down the other side appears to disappear into nothing, so we hung out for a little bit, but didn’t stay too long because it was cold and windy at the top.

PSX_20250922_162206
PSX_20250922_162054

All I can really say about this pass is – thank goodness we were hiking this trail south! While the hike up the pass felt steep, it’s really nothing compared to the hike down. The downhill portion of the hike is almost vertical through engineered switchbacks that were built up into staircases at some point in the region’s history. I’d guess during one of the world wars, as there was lots of war infrastructure and tunnel systems around this part of the trail.

The backside of the pass involves hiking down 300m over less than a kilometre, making it twice as steep as the hike up. I was worried about my knees, which are sensitive to downhill, but the elevation loss is over such a short period of time, that they held up pretty well. Though we caught up with our American friend from Fanes and she was definitely struggling.

PSX_20250922_162347
PSX_20250922_163605

The views across to the other side of the trail were just as stunning as the hike up in the morning. From the pass, you can see straight across to Rifugio Lagazuoi, which is one of the most iconic Rifugios on the trail. We weren’t lucky enough to score reservations at Lagazuoi, which was disappointing, but a bit of a relief when we realized we didn’t have to hike up the other side that day.

The real reward of this part of the trail was that there’s another small lake at the base of the pass. Kristine doesn’t like cold water, so she didn’t participate in any of my swims, but there was no way I was hiking down that pass, staring at the lake the entire time, without swimming in it at the bottom! Especially because it was so warm in the afternoon. It was a really small water body and it wasn’t very deep, but it was still refreshing.

PSX_20250922_162613
PSX_20250923_202811

It was after my swim that we realized our next hut, Rifugio Scotoni, required hiking downhill another 150m. It doesn’t sound like a lot of elevation after everything else we’d already done, but it was disappointing because it was located off the trail, so we were going to have to start the next morning with a 150m climb uphill, before doing another 550m of uphill to Lagazuoi. At first, we were a bit disappointed with Rifugio Scotoni, mostly because we had wanted to be staying at the iconic Lagazuoi hut, but it grew on us. It was much less busy than Lagazuoi, and it had alpacas, which Kristine quickly befriended.

We were assigned a 4-bed dorm, which we shared with two German guys. We enjoyed the afternoon hanging out at the bar and soaking in the sun, although the experience was slightly ruined by a very loud French group, who we avoided all evening because one of the guys was wearing a shirt that said “51st State”, with the American flag inside a maple leaf. So we stewed and gave them mean glares like the non-confrontational Canadians we are (well, I am, Kristine can be pretty confrontational, lol, but there were at least 8 people in the group, so we were too intimidated to say anything).

PSX_20250922_162942
PSX_20250922_162821

It was super hot in the room overnight, so we didn’t sleep well, though it was freezing when we set off the next morning. We trudged our way back up the 150m to the trail junction, which Kristine was really not feeling, but the hike across the alpine to Lagazuoi was more enjoyable than expected. We were able to keep to the shade for a while, which was nice, because once the sun hits you, it’s really hot.

It was Day 4 for us and we’d yet to experience any bad weather, so we considered ourselves extremely lucky. In the summer, it’s very common for it to be hot in the morning, but then have a rainstorm roll in in the afternoon. We didn’t experience that at all. In fact, it was nice for 6 days straight, so I would say that from my experience, late September isn’t the worst time to visit.

PSX_20250924_103845
PSX_20250924_104228

It’s a little under 3km from the Scotoni junction to the Lagazuoi junction. Rifugio Lagazuoi is located off the main trail as well, so you don’t actually have to hike up there if you’re not staying at the hut. It’s another ~150m of gain over a little more than 1km, so you are adding a fair bit of elevation gain to hike to the top. I was determined to do it, with or without Kristine. Honestly, I thought she was going to skip it because she doesn’t like hiking uphill in the heat (who does?), but she was having a good morning, so she decided to hike up there with me. It helped that the sun was behind the mountain, so the hike up was mostly in the shade.

I’m really glad we did because there is so much history along the side of the mountain in this area. There’s all kinds of defensive infrastructure from the war, including a very extensive tunnel network. The tunnels are easy to visit on the way up to Lagazuoi, so we took our time and dipped in and out of the tunnels, which run along the ridge. So you can hike in from one side of the mountain, and then look out through windows down onto the other side of the mountain. It’s very cool!

PSX_20250924_104156
PSX_20250924_105723

You can take a gondola from the base all the way up to the top of Lagazoui, so there were a lot of people around when we reached the top at lunchtime. We stopped for a sweet treat and a drink and I finally tried kaiserschmarrn, which is a big German pancake. It looks a bit like a funnel cake, and it’s basically just scrambled pancakes covered in applesauce and icing sugar. It’s pretty tasty, but honestly, it could have used a bit of maple syrup (lol, I know). It was a cloudless day and the views from the top of the peak are absolutely stunning, so we enjoyed the experience, but were a bit apprehensive about our remaining mileage for the day.

PSX_20250924_104057
PSX_20250924_104353

We still only had 12km of hiking on day 4, but unlike the two previous days, we also had over 1000m of elevation gain. When we left Lagazuoi, we had to immediately hike down 600m to the highway, just to hike back up 350m on the other side of the road. I can’t lie, the hike downhill was rough. One of the biggest differences I noticed between Italian and Canadian trails was ease of terrain. Canadian trails usually try and take the path of least resistance to the top. If that involves switchbacking back and forth across the mountain, no problem. In Italy, switchbacks only seem to be used when absolutely necessary, like when coming down Forcella dl Lech, which is too steep for anything but switchbacks. The hike down Lagazuoi was brutal, mostly because the trail went straight down the mountain. It’s all lose rock and it’s hard to maintain your speed on the way down. It’s exhausting on the knees and our legs were like jelly by the time we finally made it to the bottom. It didn’t take too long because of the direct route, but no part of it was fun.

PSX_20250925_135727
PSX_20250924_104529

This area is called Passo Falzarego and we made a beeline to the local tourist shop and cafe for a bathroom break and another sweet treat. Kristine didn’t eat at the top of Lagazuoi, so she had her dessert, while I had a popsicle to cool down. It was pretty much just us and a bunch of biker dudes on the side of the highway, so we had a good laugh at ourselves while perched on the curb with burly men walking all around us.

We had ~4km of hiking left for the afternoon and we ended up splitting up for part of it. Kristine wanted to go direct to our hut at Rifugio Averau, but I was keen to fit in another swim, which involved a small detour. It was very hot, so Kristine continued on the main road, while I diverted to Lago di Limedes. From afar, this lake looks really cute, but it was probably one of the worst swims I had on the trail. At this point, I was trying to maintain a trend of swimming every day, so I wasn’t picky. Even up close, the lake looks nice, but it’s tiny and once you start to wade into it, you notice that it’s completely filled with slimy green algae that just floats around in the shallows. It was the warmest water of the trip, but I could easily understand why I was the only one swimming.

20250919_144348
PSX_20250924_104645

Kristine had a bit of a diabetic crash out while we were apart, so I ended up catching up to her again where she took a break to eat some sugar. Before you get to Averau, you have to hike to the top of Forcella Averau, which has more technical section that involves climbing up a chimney before you reach the top. Kristine was cursing at the chimney, but we both had to admit that the views were pretty stellar once we reached the top! You cross over the back of Mount Averau and then arrive at the Rifugio, which is nestled in the pass at the base of Mount Nuvolao.

Rifugio Nuvolao is the other iconic hut on the Alta Via 1. It’s the oldest hut on the trail and it’s serviced only by a cable car, so it’s pretty small. We didn’t score reservations at Nuvolao either because Mac’s Adventure Travels really let us down on the bookings, but I didn’t mind like I did with Scotoni, because the views from Averau were breathtaking! Overall, day 4 was my second favourite day on the trail (after day 3), but Rifugio Averau was my favourite hut of the trip.

PSX_20250924_104620
PSX_20250924_104919

This was the first day that we weren’t the first people to arrive to our dorm room – instead we were the last to arrive in our room of 6. It was one of the smallest rooms we stayed in, but our dormmates were all very nice and we be-friended two hikers from Singapore. We also had a balcony with an amazing view, which we marred by hanging all our sweaty clothes from it.

We spent the rest of the afternoon sitting out on the patio with a couple of beers, enjoying the view. As the sun went down, we got the most stunning sunset, which we enjoyed over supper. In my opinion, Averau had the best food on the trail and I couldn’t resist breaking my one-drink rule with a second glass of wine.

PSX_20250924_104945
PSX_20250924_105022

We sat next to a large group of older men, who were giggling over a photo of a phallic shaped rock that some other hikers had sent them. We saw it from across the table and started giggling too, much to their chagrin because they thought they’d offended our “young” sensibilities. We all ended up having a good laugh over it and learned that a bunch of them had recently travelled to Newfoundland, so we swapped a few stories.

We took in the stars while burning off a bit of energy after dinner to conclude what was really a perfect day on the trail. At this point, I felt like I was hitting my stride on the trail and I was honestly loving every second of it. It was unlike any trail I’ve ever hiked and the luxury of being able to hike with a light pack, eat a full meal every night, have a shower, and sleep in a real bed, were all such treats. More of the second half of the trail coming next week!

PSX_20250924_105239
PSX_20250924_105411

Hiking Tre Cime di Lavaredo

Now that I’ve finally gotten caught up on writing about all of my summer adventures in BC, it’s time to loop you in on an exciting holiday I took in late September! If you follow me on instagram, you probably already know that I spent two weeks exploring around the Dolomites. If you’re not following me on instagram, do it! I post so many photos and reels there @mariaadey.

The Dolomites is a mountainous region in Northern Italy. If you follow many outdoor influencers, you’ve probably already seen photos of them because the area has become increasingly popular among hiking enthusiasts. To be honest, it wasn’t really on my radar or bucket list. I was more intrigued by the Tour du Mont Blanc in France, but when an opportunity came up to join my friend Kristine on a trip to the Dolomites to hike the Alta Via 1, I couldn’t pass up the chance! The Alta Via 1 is a popular hut-to-hut thru-hike that extends for 120km through many popular hiking areas in the region. But more on that later, first I want to focus on a very well known hike called Tre Cime di Lavaredo.

PSX_20250915_065632
PSX_20250915_065654

I flew into Venice in mid-September and immediately jumped on a bus to meet Kristine in Cortina D’Ampezzo. You may have heard a lot about it recently because it’s one of the main host cities for the 2026 Winter Olympics. We had two days in Cortina to prepare for the Alta Via 1, but while there, we couldn’t miss the opportunity to hike Tre Cime di Lavaredo, which is located just east of Cortina. I landed in Venice at 4pm, was on a bus to Cortina by 6pm, and by 8am the following morning, we were waiting to catch a bus to the trailhead. So I certainly didn’t waste any time hitting the mountains!

If you’ve been to the Dolomites, or follow anyone who hikes there, chances are, you’ve seen photos of this hike. Tre Cime is to the Dolomites, what Joffres Lakes is to Vancouver. It’s an incredibly scenic hike that is fairly easy to hike and reasonably accessible. Every tourist in the Dolomites seems to have heard of this hike and plans to do it. That might make it a little bit unattractive to some – I definitely prefer to avoid these kinds of hikes at home – but when in Italy, I don’t mind sampling the main attractions!

PSX_20250915_070643
PSX_20250915_065738

It is possible to transit to most places in Italy, but it is definitely a confusing system to navigate. Most visitors drive through the Dolomites, but even that has its challenges because crowded parking lots have led to new tolls and restrictions (not unlike at Joffre Lakes). If you want to visit by bus, you need to reserve a ticket in advance, as they will sell out. It took me a crazy amount of time to figure out the bus system and I’m hesitant to even share because the routes are constantly changing. 

In the summer, I believe you can take a bus direct from Cortina to Misurina, then pick up the shuttle to the trailhead from there. If you’re travelling in the Fall (like us), then you have to take the 445 bus to Dobbiaco, and then double back on the 444 shuttle (which goes through Misurina) to the trailhead. The 445 bus is a city bus and can be booked through the Sued Tirol Mobil app and the 444 is also a city bus, but it’s been contracted to a third party. This is the most important one to book and the bus that most often sells out. It’s called the 3 peaks hike and can be booked through Drei Zinnen https://www.drei-zinnen.bz/en/ticket.

PSX_20250915_070122
PSX_20250915_070822

Both buses travel the same route along highway SS51, so we decided to get off at Lago di Landry instead of going all the way to Dobbiaco. We had a bit of time waiting for connections, but it was a really beautiful stop next to the lake and there’s a little cafe there, so we were able to grab coffee while we waited. The 444 bus picked us up on time and we were able to bypass a lot of confused looking tourists who had parked at the lower lot and we’re looking for a shuttle up to the top of the road where the trail starts. 

The trailhead is located next to Rifugio Aurenzo, so it’s a good landmark for planning your day. It’s actually the trailhead to two different hikes: Tre Cime di Lavaredo and Cadini di Misurina. I would say that Cadini di Misurina is just as popular as Tre Cime and I would have loved to do both, but I read that Misurina is a shorter hike with a popular viewpoint that gets extremely crowded with a line to the summit. Tre Cime is also crowded, but due to the longer trail, people get somewhat dispersed. So we just did Tre Cime, but maybe one day I’ll go back for Misurina. 

PSX_20250914_222325
PSX_20250915_070902

Like I said, we visited in mid-September, but we did this hike on a Sunday, so it was still extremely busy. We got some excellent views as we were driving up the road to the trailhead, but it was quite cloudy when we arrived at the top. The nice thing about this hike is that it’s a loop, so you don’t have to re-do any of the terrain. You can hike in either direction, but more people like to do the route counter-clockwise – it’s supposed to make the elevation gain easier. 

The hike is certainly forgiving when you start, as you walk along a wide road that looks down over the valley. We didn’t get many views on the way out due to the clouds, but Kristine is a huge livestock enthusiast and there were lots of cows, so she was running around trying to photograph them all. It’s ~1km of easy walking to a small church that looks out over the valley, and then another ~600m to the first hut of the trail: Rifugio Lavaredo. In total there are 4 huts along the route (including Aurenzo at the trailhead), but Lavaredo was my favourite one. Kristine was immediately distracted by the hut’s pet goats, while I purchased our first sweet treat of the trip! 

PSX_20250915_070233
20250914_125914(0)

One thing I quickly discovered about Italy is to enjoy the opportunities for sweet treats and coffee. Unfortunately I am not a coffee drinker, which was too bad because there’s a huge coffee culture there, but Kristine would always grab a cappuccino and we quickly started making our way through as many of Italy’s sweet treats as possible. The first one was a cannolo, which was a chimney cake filled with cream. It was delicious, but rarer than we thought, as I didn’t encounter any more hut cannolo’s until the end of the trip! We hung out for a while at the hut in order to give the clouds some time to clear off. It didn’t really work, but we still enjoyed the break.

After Lavaredo, you head up towards Tre Cime, which translates to “three peaks”. It’s ~1km to hike up to the top of the pass. You can follow the road, or take the shortcut along the mountainside. We just followed the road because it’s less steep. It was very busy at the top of the pass and from there, a lot of people branch off to explore via ferratas and other routes. I would say that the top of the pass is one of the best views on the trail, so take the time to enjoy it. We had a great view looking down the other side of the pass to the next rifugio, but the peaks were still shrouded in cloud. Personally, I think this just added to the experience and we got cool misty photos of the huge rock monoliths. 

PSX_20250915_070956
PSX_20250915_070309

At this point, we’d hiked less than 3km at a very slow pace, so we decided we had to try and pick things up a bit. This was easier said than done as the views are so incredible along the entire route and we were constantly taking photos. I took 500 photos over the course of the day, which I thought was a bit extreme for one hike, but Kristine took over 800, so I finally found someone even more enthusiastic! 

It’s a pretty easy walk down from the pass, but there is a short climb to get up to the next rifugio, which is known as the Dreiszinnenhutte. It was the biggest hut on the trail and a popular place to stop for lunch. The hut looks down on a small lake and there’s another little chapel next to the hut. One of the first things I was surprised to learn was how heavy the German influence is in the Dolomites. The hut architecture throughout the region is very Bavarian, as is the cuisine. I was expecting to see lots of pizza and pasta, and while there was pasta, I didn’t see a lot of pizza. Instead, there was lots of bratwurst and schnitzel on the menus. 

PSX_20250915_070402
PSX_20250915_070554

Kristine ordered a bratwurst for lunch and I ordered a “split pea soup with dough balls”. If you’re from Newfoundland, you can definitely guess what I was envisioning for this meal. A thick, pureed split pea soup with balls of cooked bread. What I actually got was a thin and greasy vegetable broth with green peas that had been battered and deep fried. Honestly, it wasn’t a bad meal, but it definitely didn’t sit well in my stomach after so much traveling. But at the time, we enjoyed a nice lunch break with some German beer.

Dreizinnenhutte marks the halfway point of the hike, so we continued on after lunch with some downhill switchbacks through the alpine. I think this section of trail is why it’s recommended to hike counter clockwise – the switchbacks make for a tiring hike if you walk the other direction. We still stopped a lot for photos along the way. It was our first introduction to the Italian alpine environment, which is very barren. I’m sure it’s not helped by the fact that we were heading into Fall and everything was dying, but it did surprise me how accessible the alpine is in Italy. I’m used to hiking all day through the trees to get to the alpine in Canada, but in Italy, you can easily start and finish in the alpine. It makes for a scenic hike, but it can also be very tiring with the lack of shade. Fall seemed to be the perfect time for us. It was still warm enough to wear shorts most of the time, without having to deal with summer levels of heat. Although it was still hotter than we’d anticipated.

PSX_20250915_071040
PSX_20250915_071956

What was disappointing to see was all the people not following leave no trace principles. In the same way that people like to stack rocks in North America, people have gotten into the habit of re-arranging rocks in the alpine to spell out names and messages. There’s a large flat valley at the bottom of the switchbacks and the entire meadow was filled with rock signs, which really mar the landscape – it was sad to see.

After crossing the valley, we were rewarded with a big climb up the other side. It was a struggle as it was getting warmer, but we crawled our way up to the top and continued on to the last hut of the day. The clouds had lifted a lot since we’d started the hike and we got a great view of the three peaks along the last section of trail. We stopped at the final hut and got some photos hear a little pond that made for a nice viewpoint. After the hut, you crest the top of the pass and you get a view out towards Cadini di Misurina, so we stopped here for a while to admire the jagged peaks, and then concluded the hike at Rifugio Auronzo. 

PSX_20250915_145504
PSX_20250915_071412

We celebrated with an apple strudel and boarded our bus back to Cortina. We stopped again at Lago di Landry, but the cafe was closed for the day. I temporarily freaked Kristine out with a malfunctioning bus ticket for the last segment of our trip. This was my first time using an e-sim while traveling (usually I buy a sim card locally or just go without). The e-sim was a really cheap and an easy way to use data while traveling and I’ll definitely be using it again, but sometimes my phone would get confused choosing between networks and we weren’t able to load our bus ticket at the lake because there was limited service. The bus driver let us ride anyways and I eventually figured it out, but overall, the bus system is really not very intuitive. 

Either way, I felt that Tre Cime was a great introduction to the Dolomites! I’m glad we did it before the Alta Via, because I think it wouldn’t have been quite as impressive after a week on that trail, but I really did enjoy the experience, in spite of the large crowds. If you want to visit, make sure you do take the time to plan out your trip and how you will get there, because you won’t necessarily be able to visit on the fly. Be prepared to do the hike with 5000 other people, but fortunately, the views will outshine the crowds!

PSX_20250914_221629
PSX_20250915_074357