Banff Winter Guide

This is a bit different than the kind of post I usually write, but I just spent a full 7 days in Banff on a winter ski holiday. That’s pretty much the longest I’ve ever stayed in one place on vacation, so I actually feel like I have a lot to say about Banff in the winter – from skiing, to hiking, to skating, and where to eat and shop.

Getting There

20220227_151612

The easiest way to get to Banff is to fly to Calgary. If you’re in BC, you could consider driving, but since I was meeting Emily (who was coming from Newfoundland), I opted to fly as well. It’s actually relatively easy to get around without a car in Banff (there’s a pretty comprehensive bus system around town and to the ski resorts), so you can just take a shuttle from the airport into Banff if you prefer. Otherwise, you’re pretty much limited to renting a car, which is what we did – it’s about a 90 minute drive. Just be careful, most rentals come with 4 season tires, which we were fine with because we grew up driving in a snowy climate, but if you’ve never driven on snow, I recommend paying extra for proper snow tires. Along the main highway from Calgary to Lake Louise, you will be fine, but beyond that, winter tires are needed.

Where to Stay

20220228_160157

Your options are pretty much to stay in Banff or Canmore. I think there is limited accommodations in Lake Louise, but there’s little else there, so I recommend Banff or Canmore. Banff is definitely more fun and attracts the tourists and crowds. Canmore is where more of the locals live, so it has a different atmosphere, but I do still really like it there. It’s cheaper in Canmore, so if you’re looking to save some money, it’s a good option. The thing about Banff is that it’s 20 minutes closer to all of the ski resorts and it’s actually located in the National Park, so it’s a lot of fun. We stayed in Banff and I recommend staying on the main road so you can walk into town for shopping and food. We were about 1.5km outside of the downtown, but we didn’t mind the 15 minute walk because parking in the downtown is a bit of a nightmare.

Skiing Guide

20220302_102209

I’m going to be making an individual post about each of the ski resorts, but in a nutshell, there are 3 major resorts to chose from in Banff National Park. We opted to get the “SkiBig3” pass, which allowed us to hop around from resort to resort. With our pass, we had a 5 day span in which to do 3 ski days, so we did one at each mountain. The pass also includes tubing and night skiing at Norquay on the same day you ski there. As well as there are other perks and discounts with the pass at various stores and restaurants. If you need to rent gear, I recommend doing it in Banff to save yourself some time on the mountain. There are many rental places and you can pick up your skis or board the night before you use them.

Lake Louise – the furthest from Banff (45 min drive), but arguably the most popular of the 3. It’s located right off the highway, so it’s not as high elevation as Sunshine, but has some great runs on the back of the mountain for more advanced riders.

Sunshine Village – the highest and largest of the 3, it’s about a 20 minute drive from Banff and there’s a big gondola to transport you to the top. Probably the best resort for beginners as it had the most variety of terrain and on a sunny day you can see all the way to Mount Assiniboine. Because of its higher elevation, it generally gets the most powder.

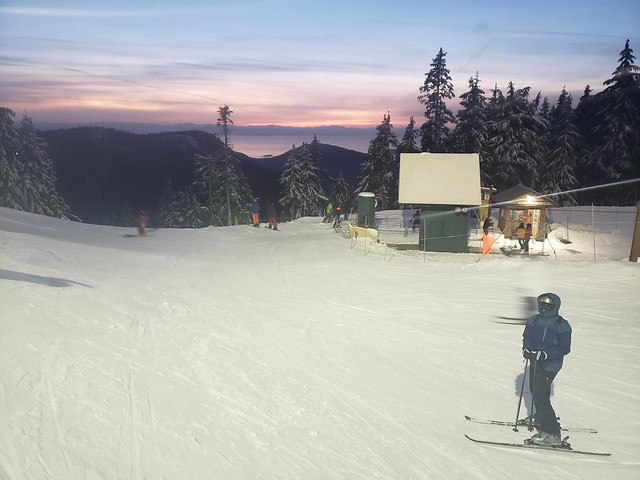
Norquay – the smallest of the 3 mountains, but the closest to Banff (just 10 min drive). Norquay is the most diversified as they also offer a small area for night skiing and have tubing. That said, it’s a steeper mountain and I wouldn’t recommend for beginners.

Where to Eat

20220228_192851

Advising on restaurants is way out of my normal wheelhouse, but I ate at so many that I wanted to share some of my thoughts. In Banff, most of the restaurants are located in the downtown core and they continue up along Banff Ave, with several located in the hotels. Canmore also has a really nice downtown area and it’s worth checking out for a day.

Ticino Swiss Italian – This was my favourite restaurant of the trip because they do a traditional cheese fondue and have a cute Swiss-ski vibe. It was also the most expensive meal I had on the trip, but I don’t regret it. The Grizzly House also does fondue and is located right in downtown.

Park Distillery – We almost skipped this one because we didn’t realize it had food – in addition to a HUGE cocktail menu, it also has a great food menu. I had the game bannock (elk and beef) and Emily had a vegan burger, both of which were delicious. I was extremely tempted by their bison burger as well and will have to return again!

Nourish Bistro – A completely vegetarian restaurant, we visited this one for Emily and ended up loving it. They also have a lot of cocktails (at very reasonable prices), as well as yummy salads, bowls, and burgers. A great option for non-meat alternatives.

Rocky Mountain Flatbread Co – I didn’t visit on this trip because they don’t offer vegan cheese for Emily, but it’s located in Canmore and is a fantastic pizza restaurant if you have a craving!

El Toro – A Mexican restaurant higher up on Banff Ave. We hadn’t been planning to eat there because it didn’t look like anything special, but it was the closest restaurant to our hotel and we were really lazy one night. They have a wide variety of choices and we ended up really loving the pasta! A great cheaper alternative.

3 Bears Brewing – We mostly visited this one for the beer, but it has a really great vibe and food as well. It’s in a new building with beautiful high ceilings – you can get a 6-beer flight and some really tasty eats to accompany your meal. We also visited Banff Ave Brewing, but liked 3 bears a lot more.

Grizzly Paw Pub – Similar vibes to 3 Bears, but located in Canmore, I really like their beer (which you can find in most AB liquor stores) and their burgers!

Canary Coffee – A very cute little coffee shop in Canmore that has the kindest owner! Recommend if you’re looking for a hot drink or a tasty snack.

Beaver Tails – There are 2 locations in Banff and a third in Canmore. BeaverTails are iconic canadian pastries shaped like, you guessed it… beaver tails, and you can customize with your own toppings. It’s a bit of a must have if you’re on a winter trip to the Rockies!

Other places we tried included Farm + Fire, which is a beautiful restaurant that had mildly disappointing food, and Graze, in Canmore, which likewise was mildly disappointing. The next time I return I would like to visit The Bison or Saltlik, which seem to be the higher end restaurants. There’s also several Indian, Mexican, and Italian restaurants that we never made it to. We wanted to visit Block, which is a tapas restaurant, but it’s very small and cramped and Covid is still a thing, so we opted not to risk it.

Where to Shop

20220303_152831

Banff has a plethora of crappy souvenir shops that I kind of despise (please if you are buying something associated with indigenous culture, make sure it is authentic!), so we skipped pretty much all of those, but there’s still a bunch of great shops in both Canmore and Banff. To be honest, I even kind of prefer the shopping in Canmore because there’s less of the touristy crap and more locally made wares.

Banff Tea Co – I’m obsessed with tea and I go here every time I visit. The workers are so nice and they have so many great flavours, as well as health teas. Lots of the teas are named after local landmarks and it’s such a fun place to shop.

Evoolution – This was a new discovery for us and there’s a shop located in both Banff and Canmore. They sell specialty oils and vinegars and have the whole store set up as a tasting bar. Try as many as you want with bread and check out their recommended pairings to bring a few small bottles home with you!

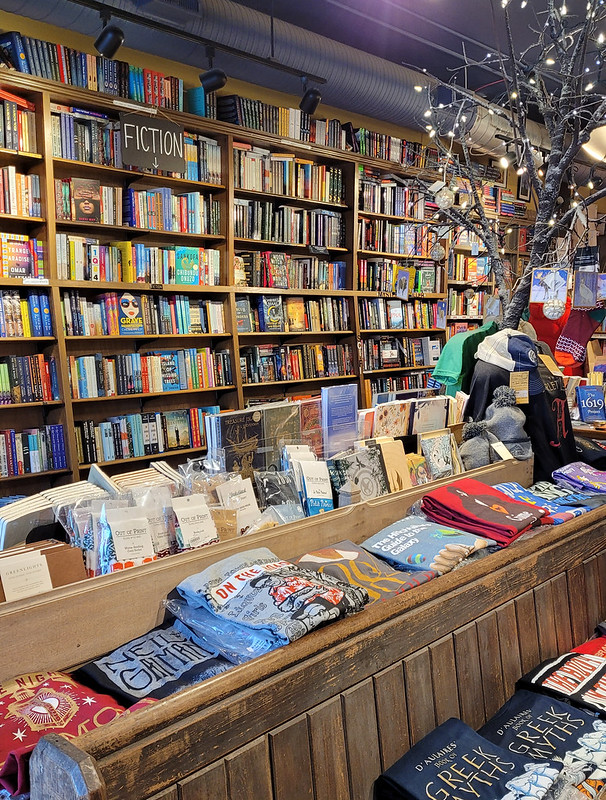
Cafe Books – There are no book shops that I’m aware of in Banff, but there’s a great one in Canmore! Cafe Books is split into two sections, with new books in the front shop and used books in the back shop. They carry a ton of specialty items and special editions and I had the best time browsing through both parts of the shop!

Big Bear Trading – This is the one souvenir shop I did like because they carried a wider variety of items and featured more locally made items. If you want to get specific Banff related items, then I would recommend this one.

Alberta’s Own Marketplace – Located in Canmore, this is the much more authentic place to buy souvenirs. Everything in this shop is hand crafted and beautiful! They have tons of beauty products, hand knits, clothing, jewelry, and prints. I got a gorgeous handmade merino knit headband.

Project A – Similar to Alberta’s Own Marketplace, Project A has a beautifully curated selection of jewelry, clothing, and beauty products. My top pick is the candles from Land of Daughters, which is a female, indigenous owned business (FYI, you can also get these at Coastal Bookstore in Port Moody).

Banff Doghouse – Definitely stop in here if you have a dog. They have all kinds of great toys and treats, so we had to get a little souvenir to take home for Sadie (she’s already eaten it).

A few other shops I’m a fan of are The Tin Box and Mountain Mercantile in Canmore, as well as the Canmore Tea Co. I didn’t like it quite as much as the Banff Tea Co, but I still bought some tea to take home from both! There’s also a few nifty stores in Banff, including Cabin 108, The Spirit of Christmas, and Monod Sports.

If you’re looking for any outdoor clothing or gear, there’s also a ton of shops to choose from. They’re all franchises, so I won’t go into too much detail, but it’s great to be able to visit SmartWool, North Face, Patagonia, and Atmosphere, which are more often stocked in other stores rather than having their own flagship stores.

Attractions

20220227_094958

In addition to skiing, there are lots of other outdoor attractions in Banff, here’s a few that we tried just to get you started:

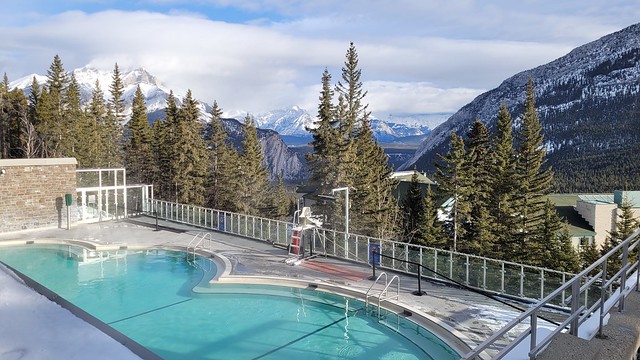
Banff Upper Hot Springs – Located just outside of town and up on the mountain, it makes for a great side trip! You can drive or take the bus and the springs is owned by Parks Canada, so it’s actually very reasonably priced at just $10pp.

Johnston Canyon – Located on the Bow Valley Parkway, it’s a fun walk out to some ice waterfalls through the canyon. The trail will be covered in snow and ice though, so make sure you bring microspikes, or rent cleats in town.

Lake Louise Skating or Snowshoeing – One of the most iconic scenes in the Rocky mountains, in the winter you can skate on the lake or rent snowshoes or cross country skis to explore across it. We were hoping to skate, but it was a very snowy day when we visited, so we hiked to the back of the lake instead.

Lake Minnewanka – Probably the highlight of the whole trip for me. Lake Minnewanka is a huge lake that completely freezes over in the winter. Similar to Lake Louise, whether you will be able to skate or snowshoe on it will largely depend on the weather. If you opt to skate on any lake, make sure you check the ice conditions and research the weather from the previous week. Blue ice is the safest. Stay away from grey ice.

Other Things to Note

There’s just 2 random things I wanted to note. The first is to make sure you get your park pass when you enter the park on the way to Banff. You will need it to park everywhere inside the park. It’s $10 per person, per day, or you can get the family pass for the whole year for $145. This is what we did since I plan to be back in the Rockies again later in the summer.

The second thing is to watch your speed. The speed limit on the highway inside the park is 90km/h, which is 20km/h less than on the highway from Calgary. The speed limit in Banff is 30km/h. I’ve never seen so many cops prowling around the streets as in Banff, so pay close attention to your speed or you might be going home with a fine.

Let’s Talk: First Aid

First aid is one of those things I always knew was important, but it took me a while to really learn just how useful it is. Being able to swim was something that was always really important to my Mom, so she put me in swimming lessons as a kid and later signed me up for lifeguarding courses when I turned 14. I did junior lifeguarding until I was 16, when I completed my National Lifeguard course and was certified for 4 years. First aid is a major component of this course and it is something that has served me well ever since. I’ve done several variations of first aid courses for work and guiding ever since and I think it is so worthwhile to invest time in learning basic first aid. Even if you don’t have a formal certification, being able to recognize symptoms and treat simple emergencies is a huge asset in the outdoors.

I was employed for 2 summers as a lifeguard at age 18, other than that I’ve never had any formal capacity as a first aider. Yet, since then I’ve treated a seizure, heat exhaustion, heat stroke, a broken arm, injured knees, and any number of cuts, scrapes, and blisters. I never leave my first aid kit at home, and I’ve been surprised by how often I’ve needed it. You can be resourceful in the wilderness, but I’ve never regretted carrying along a few extra first aid items (and you will definitely regret if you need them and don’t have it). I think the most important thing is knowing what to bring and how to recognize symptoms.

First Aid Training

Let’s start with training. The easiest way to learn is to do a formal course. There are 3 basic first aid courses: Emergency, Standard, and Wilderness First Aid. Having done them all at least once, I think Standard First Aid is the best bang for your buck. I don’t like Emergency First Aid, it’s only a 1 day course and it covers very little outside of CPR and AED. While these are good skills to have, I don’t think they are the most practical. I’m much less likely to need CPR and much more likely to need to bandage a broken wrist, so I find Standard First Aid more practical (plus you learn CPR/AED in all 3 courses).

Standard First Aid is generally a 2 day course and covers diagnosing and treating all different kinds of ailments, which is why I think it’s more useful. Treating heat stroke was the most life threatening thing I’ve ever done and I was able to diagnose it incredibly quickly, to the benefit of the individual (read about that experience here). Even for simple things, diagnosis can make a big difference. I was once 3 days into the wilderness and had a frightened hiker approach me with heartburn, I gave him pepto-bismal and it resolved in no time (somehow he’d never heard of heartburn – he described his symptoms and Emily immediately diagnosed it as heartburn since she gets it a lot, while I sang the pepto-bismal rhyme and he looked at us like we had 3 heads). So in my opinion, Standard First Aid is more practical than Emergency.

Wilderness First Aid sounds like it would be the most applicable for outdoor adventure (and it is), but it’s also the most expensive and has the biggest time commitment (2 long days or 3 shorter days). In my opinion, Wilderness First Aid is glorified Standard First Aid. It covers the same material, but from the perspective of someone in the wilderness with limited resources. So you practice splinting with sticks, homemade stretchers, and hypothermia wraps, but it’s not substantially different. Though once you have Wilderness First Aid, it’s half the work to re-certify it every 3 years (just a day), so I try and keep mine up to date. So if financial is a concern, I’d recommend Standard First Aid as the best course.

An idea of what “technical” means

Understanding Your Abilities

The second part of first aid is knowing what to bring with you and keeping a cool head in an emergency. If you panic, your patient will panic, so my approach has always been to be reassuring while asking lots of questions. Honestly, the presence of a first aid kit and care from someone who seems like they might be able to help is often reassurance enough for the patient. The other important thing is knowing when to call for help and doing so immediately. For example, you can probably handle small cuts and scrapes yourself, as well as mild dehydration. When my friend broke her wrist on a hike, I was able to wrap it for her to make her comfortable enough to walk back to the car on her own.

Dehydration is one of the more dangerous problems you can encounter, so being able to recognize it is important so that you can self treat. When I did the North Coast Trail, on the third day, me and Emily were both feeling really low and when Emily started to complain of an upset stomach, I immediately made the whole group stop hiking and we took a break while we both chugged a litre of electrolytes. While Emily’s energy remained low, our quick action prevented it from getting worse and we were able to finish the day in good spirits, with no injuries. In contrast, when my friend got heat stroke on the trail to Assiniboine, I didn’t know she was feeling bad until it was really too late. Her muscles started cramping, she couldn’t stand, and she even started losing feeling in her legs – all of these symptoms occurred within 15 minutes of her stopping to say she felt sick. In this case, I immediately made an SOS to emergency services on my inreach and spent 3 hours rehydrating her while waiting for help. Don’t try and be a hero; sometimes professionals and a quick extraction are needed and you are much wiser to make the call in those scenarios. Read my post on personal safety for more about communication devices and preparedness.

VideoCapture_20210707-104610

What to Bring

And the last thing I want to highlight is the more practical side of what to bring with you. Lots of places sell small first aid kits and most people opt for a tiny one to throw in their backpack. I wouldn’t say my first aid kit is large, but it is more sizable than what most people bring. Sometimes I lament the extra weight, but I always bring it. REI has a pretty comprehensive list of what to bring, which you can view here. Personally, I like to bring band-aids in varying sizes, a blister kit, sutures, antibacterial wipes, dressings, compression gauze, a tensile bandage, surgical scissors, triangle bandage, tweezers, safety pins, medical tape, polysporin, and latex gloves. I also bring electrolytes, advil or tylenol, pepto-bismal, and an emergency blanket and bivvy sack. Depending where I’m going, sometimes I throw in a small bottle of aloe and in the winter I will add hand warmers. One thing I don’t have is a sam splint, which I’ve been considering adding because it’s on a lot of first aid kit lists, but I’m not convinced I couldn’t just use a stick or a hiking pole in an emergency.

Your first aid kit is only meant to complement your 10 essentials, so make sure you also have extra clothes, food and water, as these can also help in a first aid emergency. If someone in your party is injured and it takes you longer to hike back – you don’t want to further endanger yourselves by not having other essentials, like a headlamp. I always remind myself to pack for the hike that goes wrong rather than the hike that goes right. I bring my insulated seat cushion on most hikes as well, because it can make a big difference to your comfort if you’re stuck sitting on the cold ground for hours waiting for help.

To conclude, my biggest recommendation is to get a first aid kit and learn what to do with it. Learning how to diagnose symptoms and how to treat them can make someone feel a lot more comfortable in an emergency, and may even save your life or the life of a friend. Stay safe out there!

DSC09384

Ski Resort Series: Cypress

Cypress is probably my most skied resort in BC after Whistler-Blackcomb, but I’ve never found the time to write about it because I rarely ski there in the day. When we first moved to Vancouver, we made a few trips up the mountain for Saturday skiing, but it’s such a popular place, it hardly seemed worth it. Since then, I’ve been up on the occasional weekend, but always for snowshoeing. Unless you get there super early, you will have to walk a long distance to get to the resort, so come prepared. I once did the whole walk from the lower lots in ski boots and my feet just about died, so bring a bag to pack your other shoes with you, it’s worth it.

20170210_201615

This might lead you to believe that I don’t really like Cypress, but in fact, I do actually really like skiing there. There are three resorts located in very close proximity to the city: Cypress, Grouse, and Seymour, of which Cypress is the largest. Cypress actually spreads across two mountains: Black Mountain and Mount Strachan, with the ski resort nestled in between the two. I like Cypress because even though it gets busy, it’s large enough to spread out the skiers and boarders, unlike the smaller mountains like Seymour, which can become very congested.

20170210_201711

Mount Strachan is the higher of the two mountains and has two key chairs: Lion’s Express and the Sky Chair. There are some smaller chairs that service the bunny hill, but Lions and Sky are the key lifts. Sky Chair is obviously popular because it goes up to a phenomenal viewpoint looking out towards both Howe Sound and the backcountry. It also has the added fun of being a rare 2-person chair, so it feels kind of vintage and is fun to board. It’s one of the best places to catch sunset on the mountain. I also like the Lion’s Express, which I find tends to have the shortest queues because it’s the fastest chair (although the queues often look very long, they just move quicker).

20190206_175203

Black Mountain also has two chairs, Eagle Express and Raven Ridge. I’m a little embarrassed to say I’ve never actually skied the Raven Ridge chair – it’s the last part of the mountain they usually open and it doesn’t have any lightning, so it’s not open for night skiing either. I can’t recall ever skiing Cypress when it was actually open. But I do really like the area accessible from Eagle Express. There are lots of intersecting runs from this part of the mountain. You can also ski the green run, Panorama, which has great views looking down into the city.

Screenshot_20220216-100749_Instagram

So why do I like Cypress so much, even though I’m loathe to go on the weekends? As my photos indicate, it’s mostly for the night skiing. Cypress is pretty expensive for a lift pass given its size, but it is one of the best value for money if you want to ski from dawn ’til dusk. A full day pass allows you to ski all the way until 10pm! Generally I will just get an evening pass, which starts at 5pm, and ski after work. Being able to hit the slopes when you finish work for the day is one of the coolest parts about living in Vancouver. Pre-pandemic, we would night ski and then grab a beer in the resort around 9pm before heading home for the night.

20190206_175411

The only downside to night skiing is the conditions are often not all that great. There’s no chance to groom the runs during the day, so they’ll either be pretty tore up, or they’ll be very slippery from heating up in the day and then freezing again overnight. But occasionally you get a visit where it’s either snowing while you’re there, or you get above the clouds and get a beautiful inversion down over the city. I love skiing there in March, when there’s enough daylight that you can catch sunset from the skychair on your first run.

20190206_174755

If you don’t have a car, Cypress is accessible by bus, but I think you might be limited to the daylight hours. I have taken the bus in the past, but it’s not a city bus, so it is rather expensive if you’re already shelling out for a full day of skiing. My preference has always been to carpool or take an evo or modo up the mountain. If you drive, just made sure you have snow tires or chains, which are required on Cypress Mountain Road in the winter.

So overall, despite the crowds, I do really like Cypress and try to ski there at least once a year. Definitely recommend it since it’s so close to the city and does have some truly beautiful views! Sorry for the low quality photos, they’re all a few years old and taken on crappy cell phones, one day maybe I’ll lug my night camera up there for sunset!

Cypress map