Let’s Talk: Winter Camping

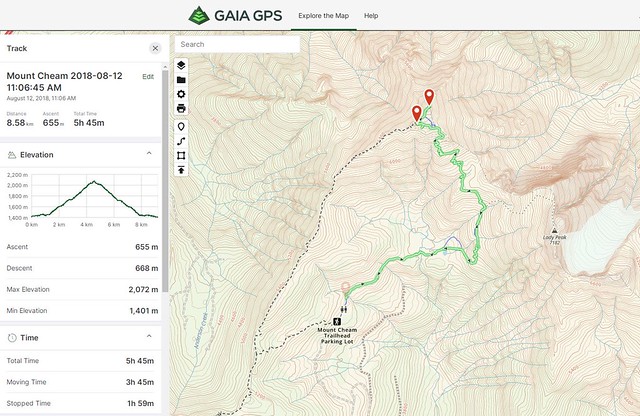
To-date, I’ve written about all of my snow camping adventures (find them here). All of my posts include useful information and lessons learned about snow camping, but I decided to make a guide to Winter Camping to compile the key things I’ve learned in one place for those debating taking up snow camping! It’s a lot more work than summer camping, but I find it hugely rewarding! Please keep in mind that I am still only a novice snow camper/snowshoer – I always stick to low risk avalanche zones and sleep in a tent – if you’re looking for advice on snow shelter construction or ski touring, you’ll have to look elsewhere.

Safety

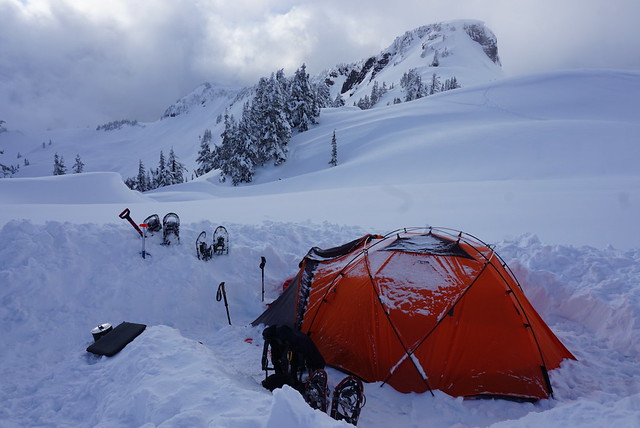
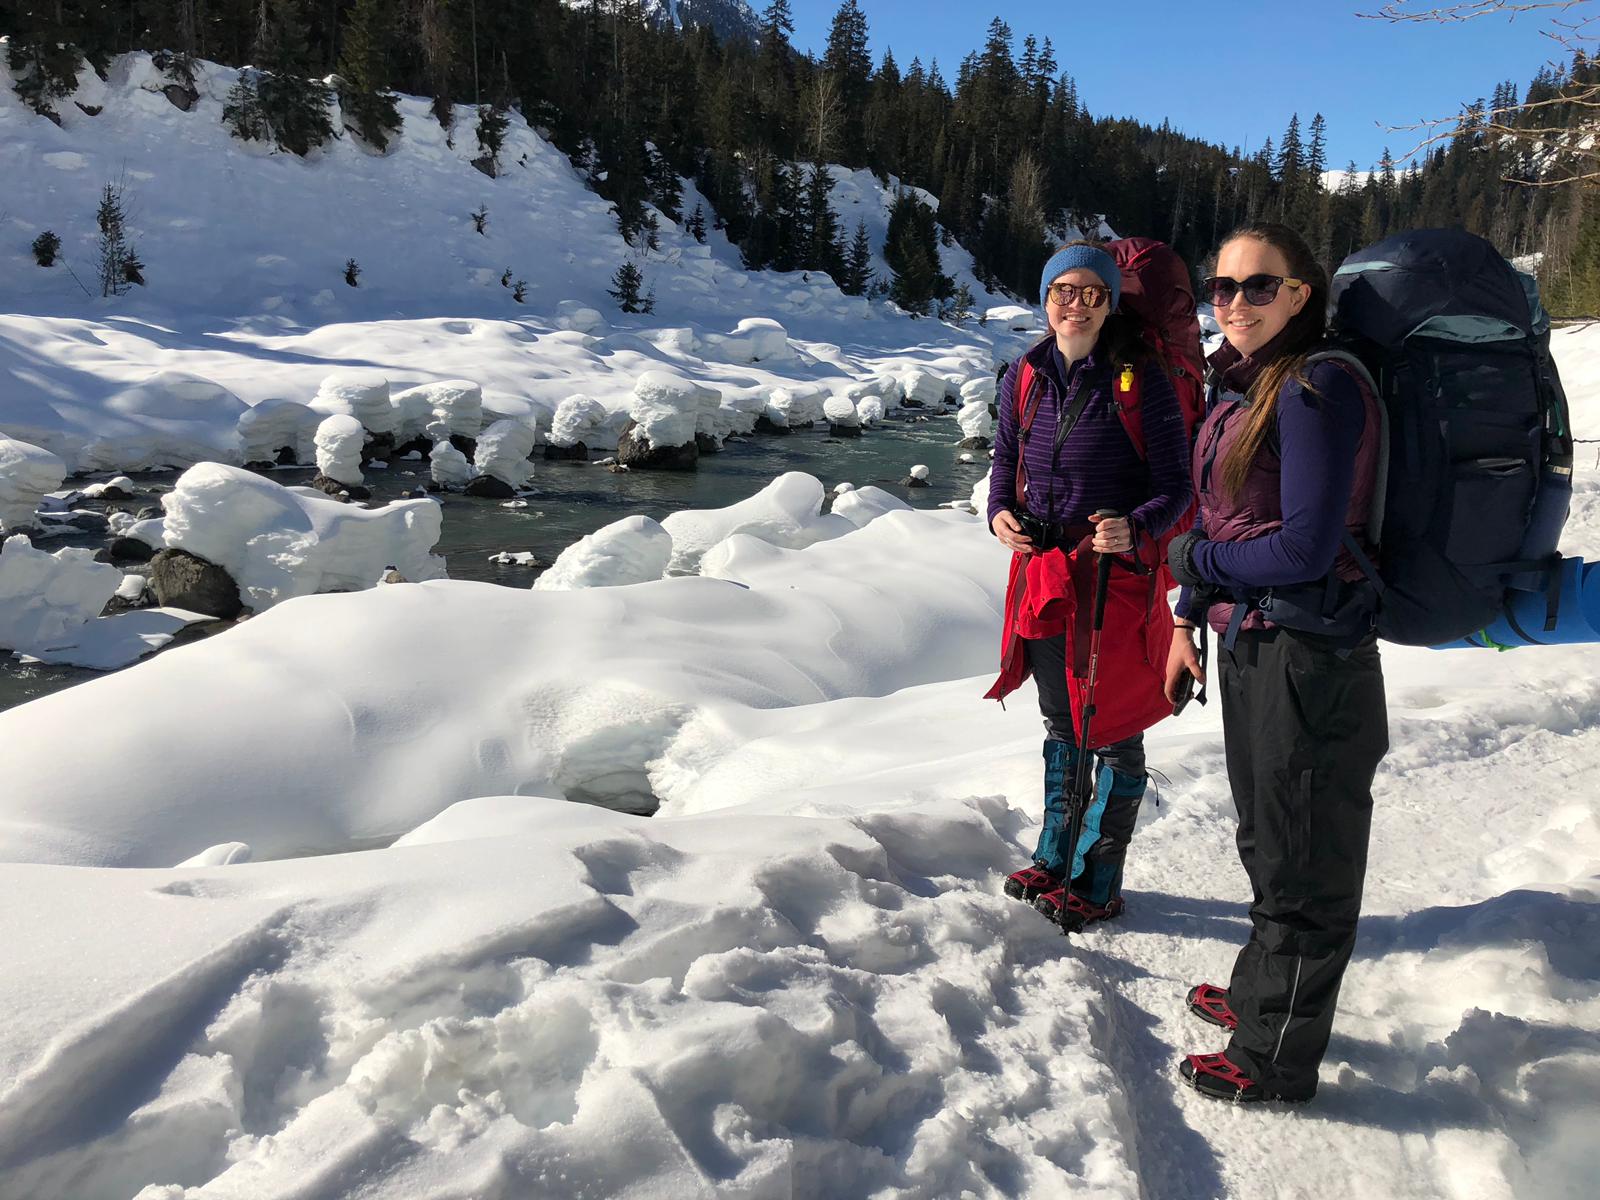
Safety is the number one consideration if you’re thinking of taking up snow camping. I know the pictures of us hanging out and camping in the snow look awesome (at least I think they do, others *Emily* think it looks like a nightmare), but if you think snow camping may be beyond your ability or you’re not prepared, do not go. It’s not something you do for the ‘gram, it’s dangerous. But if you think you’re ready, be prepared with the 10 essentials and lots of warm clothing and sleeping gear. Wear proper footwear and bring lots of hand and foot warmers with you. See my blog post on personal safety for more information about the 10 essentials.

But the most important consideration is avalanche safety. Avalanche Canada is a wonderful resource for assessing avalanche risk and always check it before you go. There are lots of places to snowshoe and camp outside of avalanche terrain, but if we’re going into avalanche terrain, our personal rule is that we won’t go anywhere that’s higher than moderate risk, end of story. We’ve all taken the Avalanche Safety Training and Brandon owns a transceiver, probe, a shovel. Me and Carolyn just own shovels right now, but rent probe and transceiver when needed.

Even with training, we still avoid high risk areas, but taking the training allowed us to learn how to start identifying avalanche terrain and risk so that we are equipped with the knowledge to make decisions. Avalanche safety is about a lot more than just checking the bulletin. Even on days where the risk is low or moderate, you can still trigger avalanches and get into trouble if you don’t understand how to assess the conditions and control your exposure to risk. When in avalanche terrain, it’s not enough for 1 person to be experienced. Everyone needs to be equipped with the proper gear and knowledge.

Gear

DSC05439

I think that gear is probably the biggest bottleneck to getting into snow camping. Camping gear in general is expensive and in the winter you definitely benefit from warm and lightweight gear. It took us a while to get started with snow camping because we were weary of investing in a ton of expensive gear for something we might not enjoy, so we cut a lot of corners and bought some cheap gear to try it out. The downside was that because we loved snow camping, a lot of the gear had to be replaced again, which is a bit wasteful, but can generally be sold secondhand. Plus check what you can get second hand in the first place to help you get started!

My main tip for saving money is to supplement your existing gear. Buy a cheap blue foamy to go under your existing sleeping pad and a warm sleeping bag liner or blanket (or both) to increase the warmth of your existing sleeping bag. The downside is that this is not lightweight and you can expect to have a heavy pack on the first trip. The other alternative is to rent gear, which is a great option if you really think you’re going to love it. See the sections below for more detailed information on specific gear.

Shelter

DSC05463

Shelter is obviously one of the biggest considerations when you’re snow camping and is one of the things that can be the most expensive, or the cheapest. The first time me and Carolyn went out we took my parents ancient 4 season tent, it held up, but was definitely not meant for snow camping and weighed a whopping 10lbs. Fortunately (for us) it was only a 2 person tent and Brandon decided he wanted to be included on these adventures, so he decided to invest in a winter tent so that the 3 of us could go together!

The main feature of a winter tent is that it’s double walled, so basically it has no fly and the poles are exposed, but the double wall and lack of mesh keep you warm inside. Brandon’s tent works great, but it came at a super high price tag, so it’s not practical if you’re just starting out. If this is the case, one thing you can consider is building your own snow shelter. I’d really like to try this some day, but we were a bit overwhelmed with everything we had to learn about snow camping that we didn’t want to add shelter building to the list. It’s something we hope to explore in the future though.

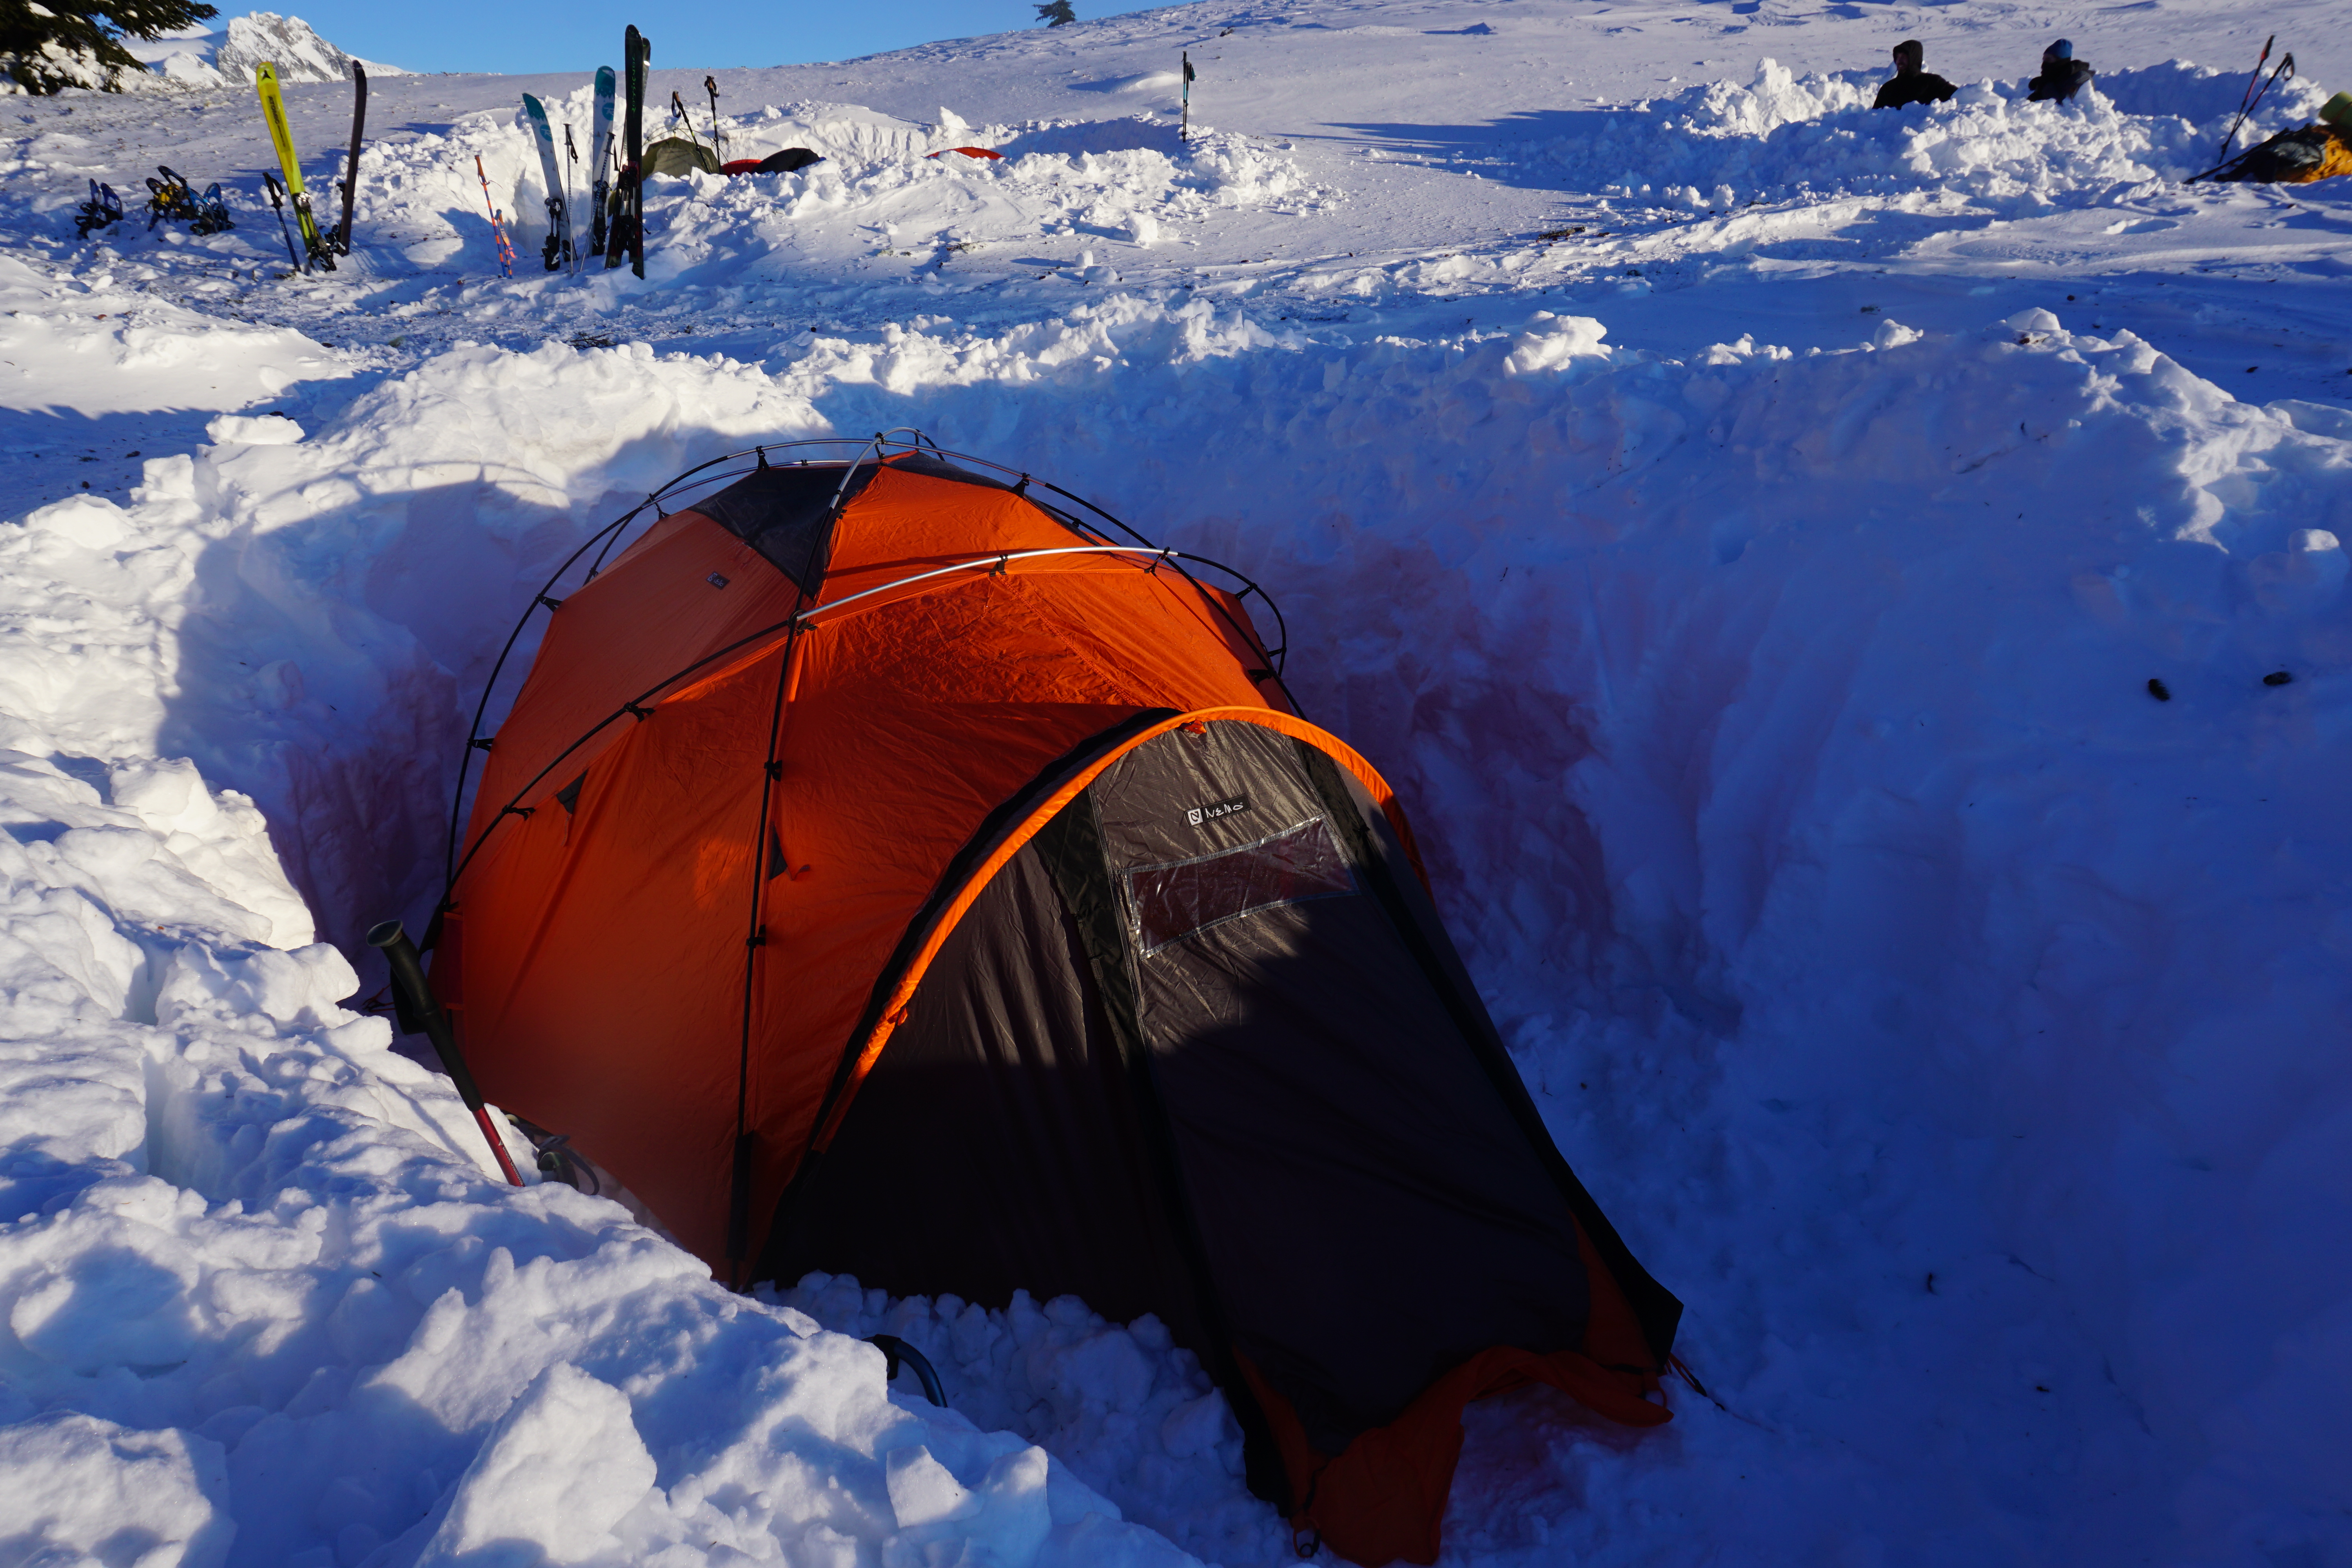
However, even though we use tents, there is still a lot to consider when making camp. You want to protect yourself from the elements as much as possible and of course you can’t just set up a tent on top of powder. We always start with digging a hole big enough for the tent and then stomping down the base with our snowshoes to make it as compact as possible. Location and weather conditions will usually dictate how deep our hole is. I recommend approximately 1 metre, especially if it’s windy because the snow walls will provide a natural shelter, as well as insulation. One tip for when you’re setting your tent up is giving consideration to how you will peg it. In the snow, the risk of losing your pegs is super high, so we either tie rope on the peg, or just skip pegs altogether and bury the rope. The snow will freeze around the rope, so when you’re done, it’s a lot easier to pull the rope out than to dig out frozen pegs.

We have also tried snow camping in a 3 season tent. It’s not ideal, especially if it’s really cold, but if you pack the sides of the tent with snow for insulation, it’s actually not too bad. We made sure to pack the snow up so that it closed the gap between the fly and the inner tent to avoid a draft, but because most 3 season tents are made of mesh, it’s unavoidable that it will be cooler than a true winter tent. Finally, make sure you fill in your hole at the end of your trip to avoid creating a hazard for future users. If the hole fills with powder, it may confuse a skier and could easily result in a broken leg if they don’t know it’s there.

Sleeping

So like I said, when we first started, we cut some corners on our sleeping gear. Depending where you’re going, you’ll want a really warm sleeping bag and a sleeping pad with a combined R-value of 5 or higher. Eventually we all ditched our double pad system in favour of the Thermarest Neoair XTherm, which is rated to R6 and can be used on it’s own. After camping in -20 degrees celsius at Elfin Lakes, Brandon invested in a -30 sleeping bag (Thermarest polar ranger), but Carolyn and I continued to use cheap -15 synthetic bags from Teton paired with a liner and blanket. I’m not going to link the bag because honestly it’s not very good and I think I’d be just as warm in my quality -7 down bag. If you already have a good summer bag (-7 or warmer), you can probably get away with pairing your summer bag with a liner and blankets, provided it’s not super cold. This year me and Carolyn finally gave in and bought North Face’s -29 Inferno bag and Marmot’s -18 Lithium bag respectively and to date, it’s been a lot easier to sleep warm. When picking your bag, I recommend sticking to down and checking what the sleeping bag’s comfort rating is.

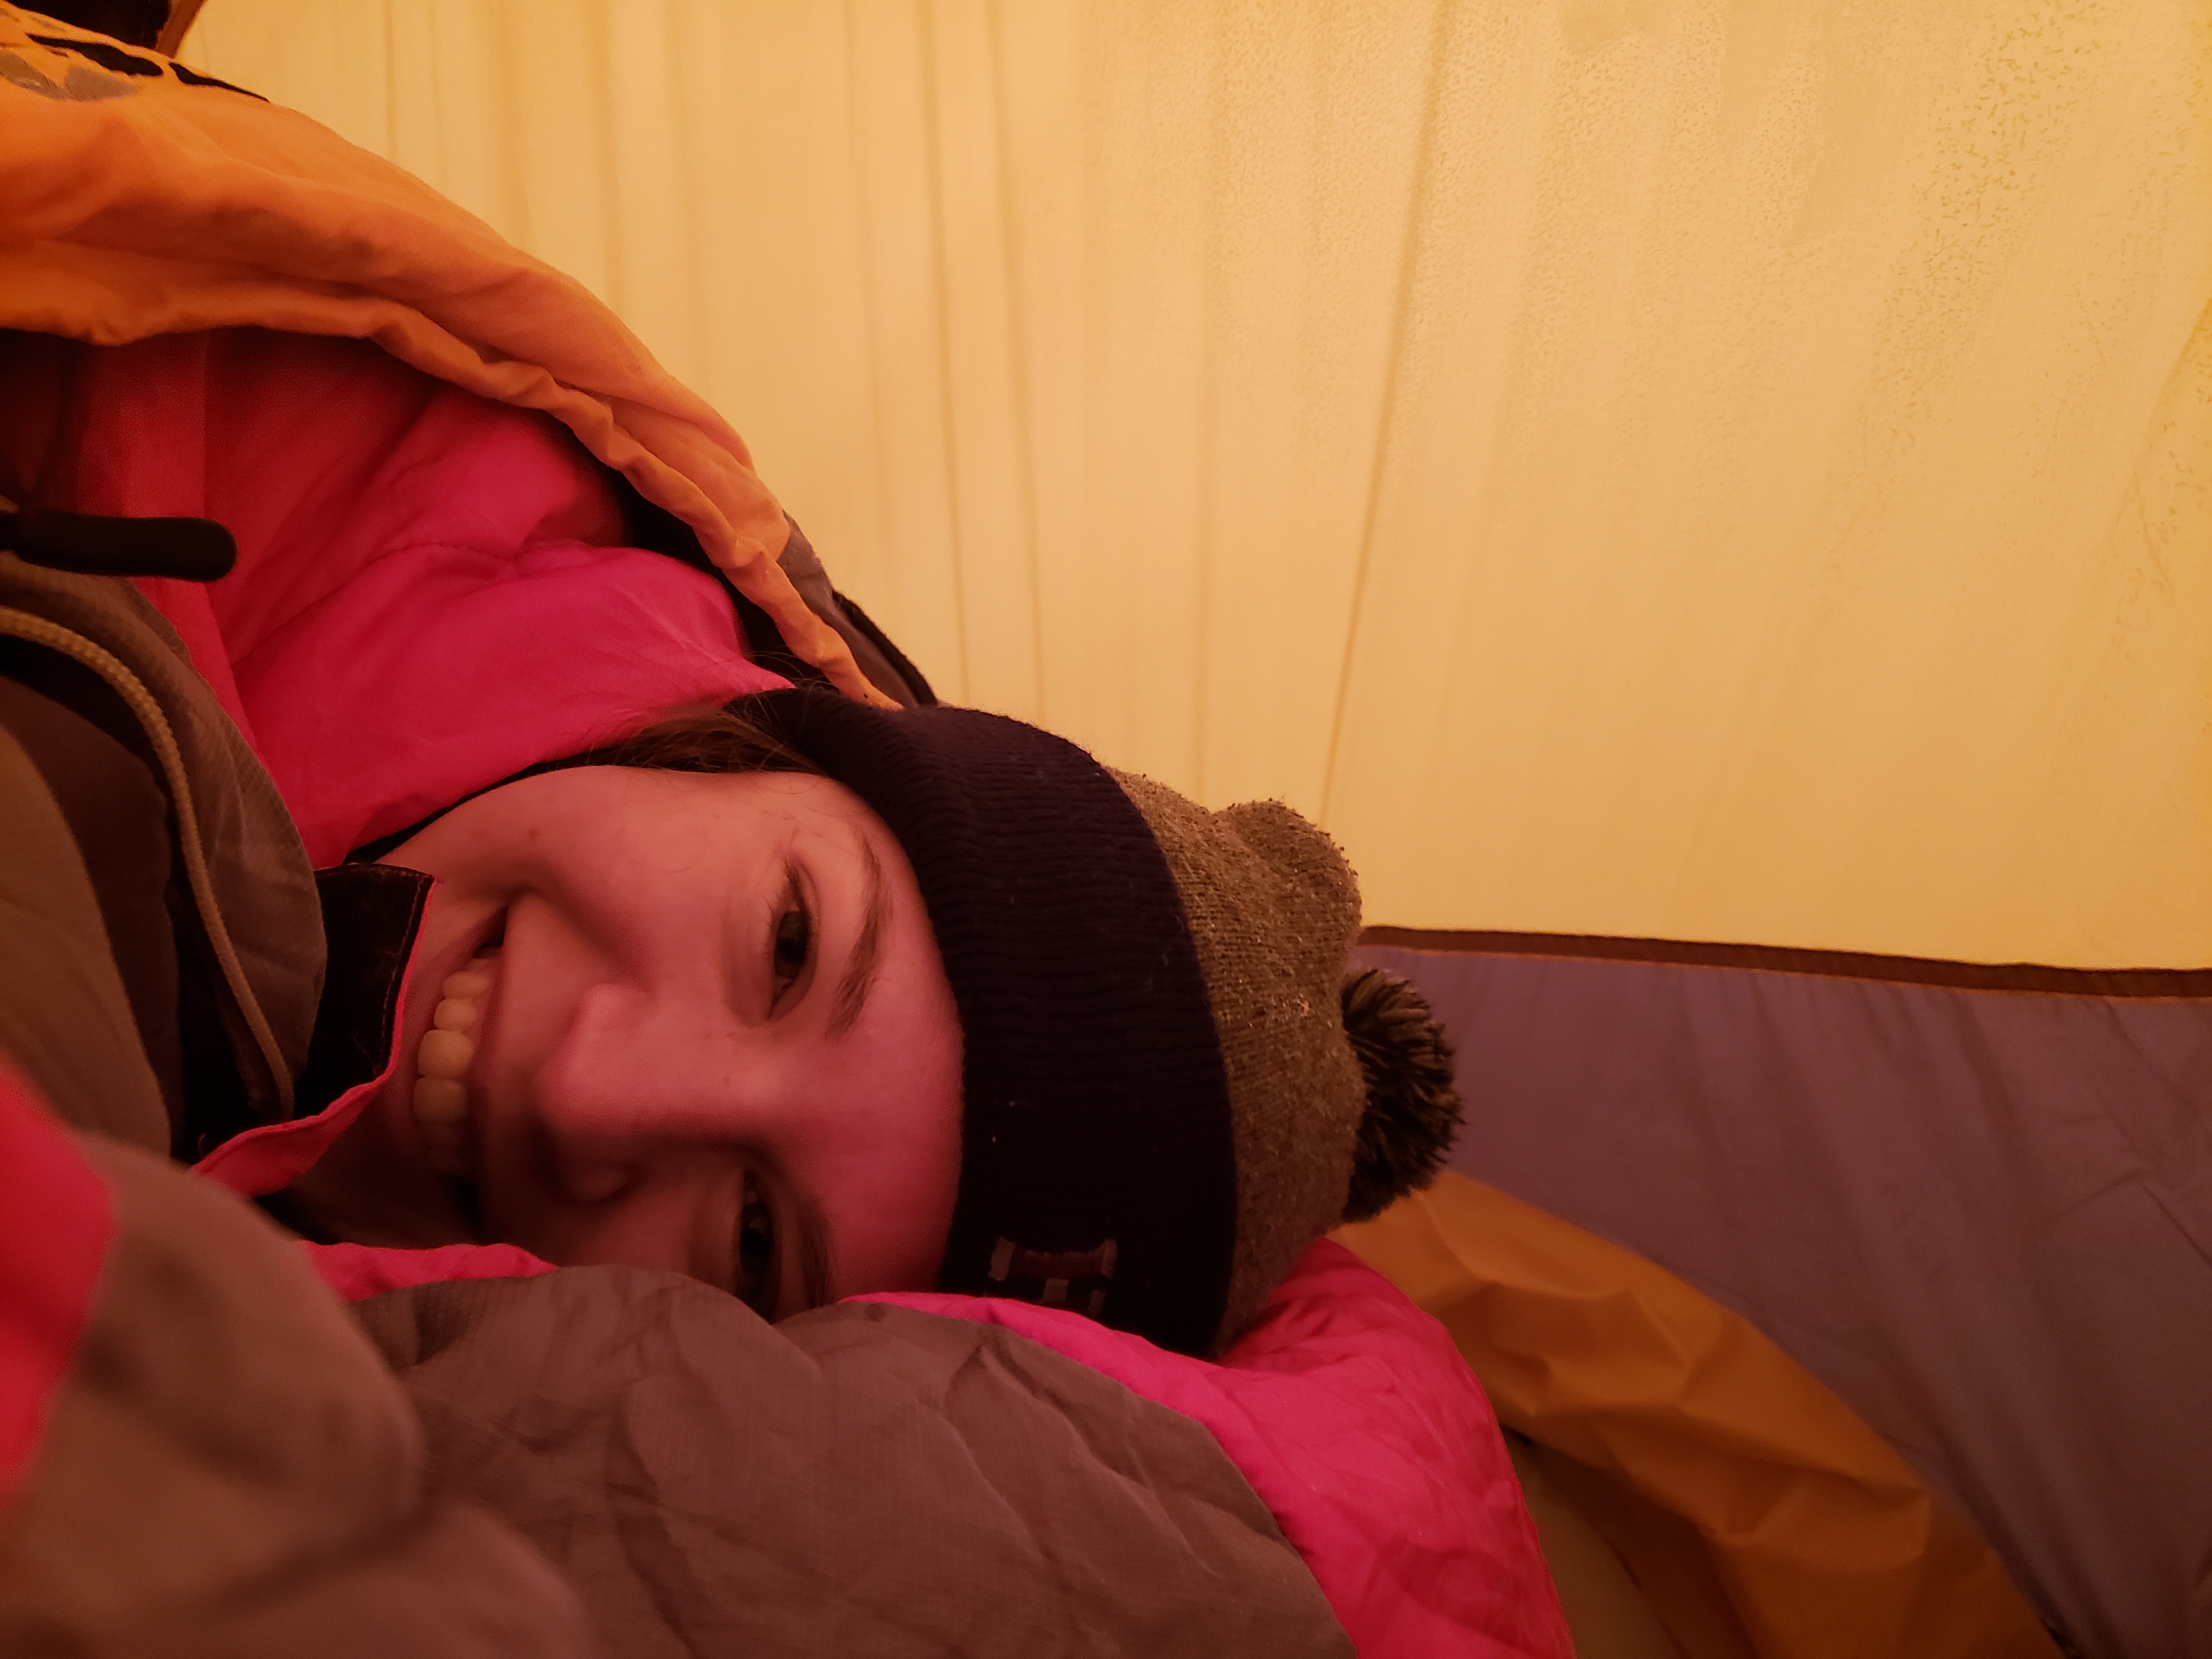
I can’t lie, staying warm at night is a lot of work when you’re snow camping. In addition to my gear, I sleep in fleece lined leggings under a pair of pants, several merino layers under a puffy jacket, balaclava, hat, gloves, and socks with slippers. I put foot warmers in my slippers and Carolyn stuffs all her pockets with hand warmers. We also all boil water to put in our nalgene bottles before bed to use as hot water bottles in our sleeping bags. I have an insulator for my nalgene to keep it warm longer.

I take my blanket into the sleeping bag with me (it’s warmer this way and less likely to fall off) and then to finish it off, I overlay my parka over my middle/butt area because I’m a side sleeper and line my snowpants between my bag and the tent to avoid a draft and stay insulated if I accidentally touch the side of the tent. With my new bag, I’m able to leave the liner and blanket at home. It can take a while to get warm in the sleeping bag because it takes a while for your body to heat the space. Try doing sit-ups in your bag right after you get in to warm it up. As a side sleeping, I also recommend starting on your back (it’s warmer this way because your sleeping pad reflects your body heat back at you), then switch to your side once you’re toasty warm.

My last tips are to cocoon into your sleeping bag, but avoid breathing into your bag as this will introduce moisture into your bag, which will make you colder. If you find yourself needing to pee, just get up and do it. Everyone hates getting out of the warm tent, but a full bladder will make your colder and keep you awake. I find that I will usually be a lot warmer after getting up to pee just by virtue of moving around. Your boots will likely freeze overnight, so know that they’ll be a challenge to put on when you leave the tent.

Clothing

Winter camping is all about layers. You don’t want to dress too warmly on the snowshoe in because you are going to sweat and you want to avoid sweating into all your layers. I usually just wear a thin merino sweater (Costco) under a fleece (Columbia). If I’m still cold or it’s snowing, I’ll add the shell of my ski jacket (but not the liner because it’s overkill). The removable liner was one of the main features I wanted in a winter jacket, I’m on my second “interchange jacket” from Columbia and really like it. I usually start with the shell and ditch either the shell or the fleece once I start sweating (pending if I need the waterproof layer on top). On bottom, I usually wear a pair of tights under my normal water resistant hiking pants. MEC’s sandbagger pants are my favourite and I hike in them in all seasons, although just searching them now I’m sad to find they don’t make the women’s version anymore! Then I pack a pair of snowpants to put on when we get to our campsite and my lightweight puffy for sleeping.

Merino is key when you’re snow camping. It really does still keep you warm when wet and it dries a lot faster than other fabrics. I’ve slowly been accumulating merino layers over the years and one of the best finds for me was switching to merino underwear and bra. It’s expensive and surprisingly hard to come by, but I love how much more quickly they dry. I recommend SmartWool and Icebreaker for merino undergarments. Changing your underwear is really hard and cold in the winter, so switching to merino meant I could go the whole trip (I’ve only done 1 nighters to date) without having to change my base layer. If I did 2 nights, I would bring a second set.

The other trick to winter camping is to bring lots of hats and mittens. Make sure you have a separate toque for sleeping as you don’t want to have to sleep in the hat you’ve been sweating into all day (or is wet from snow). I usually bring several pairs of thin gloves for mobility, a pair of waterproof insulated ski mitts, and another thinner pair of mittens for sleeping.

Footwear

IMG-20210131-WA0002

Don’t skimp on footwear. Having a comfortable pair of boots that will keep you warm and dry all day is essential. I used to use a pair of snow boots from Sportchek that had really good waterproofing, but I found my feet would get cold after a while. Lots of boots have temperature ratings and I recommend getting something really warm, but not too bulky if you can avoid it.

Last winter I decided to try snow camping in mukluks and I love them. Manitobah Mukluks is a Canadian, indigenous owned company and I thought who would know better about how to keep your feet warm! I love my muks for warmth, but they can be challenging to pair with snowshoes. They don’t have thick soles like a lot of boots so it’s a challenge to get a really tight fit on the snowshoe, which is another important consideration when picking both your boots and snowshoes. What I do love about these boots though is that they are super warm and because they’re made with natural materials like rabbit fur, they did not freeze on me overnight! Plus a lot of their boots are waterproof – I tested mine snowshoeing in heavy rain for 5 hours and they stayed completely warm and dry!

Being prepared with both snowshoes or microspikes, depending on your trip, is also very important. Most of our snow camping has been done in remote locations with high snow accumulation where snowshoes were definitely required. My snowshoes were from Costco and getting a bit dated, so I picked out a new pair this year, MSR’s Lightning Ascent. The main reason I picked them is because the basket where you connect to your shoe is really comfortable and gets a tight fit to your boot. The straps on a lot of snowshoes can dig into your feet after awhile. Depending where you’re going though, you might be better off with microspikes. We used them when we camped at Keyhole (see photo under ‘clothing’), plus I use them a lot in the shoulder seasons on day hikes. I recommend Kahtoola, but I’ve heard Hillsound is great too.

Cooking

Cooking when snow camping is not that different from backpacking, but there are a few considerations to keep in mind. The first is fuel. Avoid propane and iso-butane mixed gas when snow camping because they can freeze. Stick to white gas stoves if possible or find some way to insulate your fuel canister to keep it warm. Second, up your calorie intake. Being out in the cold for a long time burns a lot of calories, so be prepared with high energy treats that won’t freeze.

The last consideration is water. As I learned on my first trip, melting snow takes a long time and unless its super fresh, it tastes really bad. Melt the snow until its warm and then start adding more to the pot, each time warming it but not boiling. It takes a long time to boil, so once you get enough water, just boil it all at once at the end. It’s not required it you’re boiling it, but consider filtering the water anyways to improve the taste, or bring drink mixes to make it palatable. Also, avoid your platypus on snow trips as the straw will freeze. I usually take a nalgene and a thermos that I pre-fill with tea to keep me warm along the trail. Then I refill my thermos before bed for a nice warm treat when I wake up (or if I get cold overnight).

DSC08682

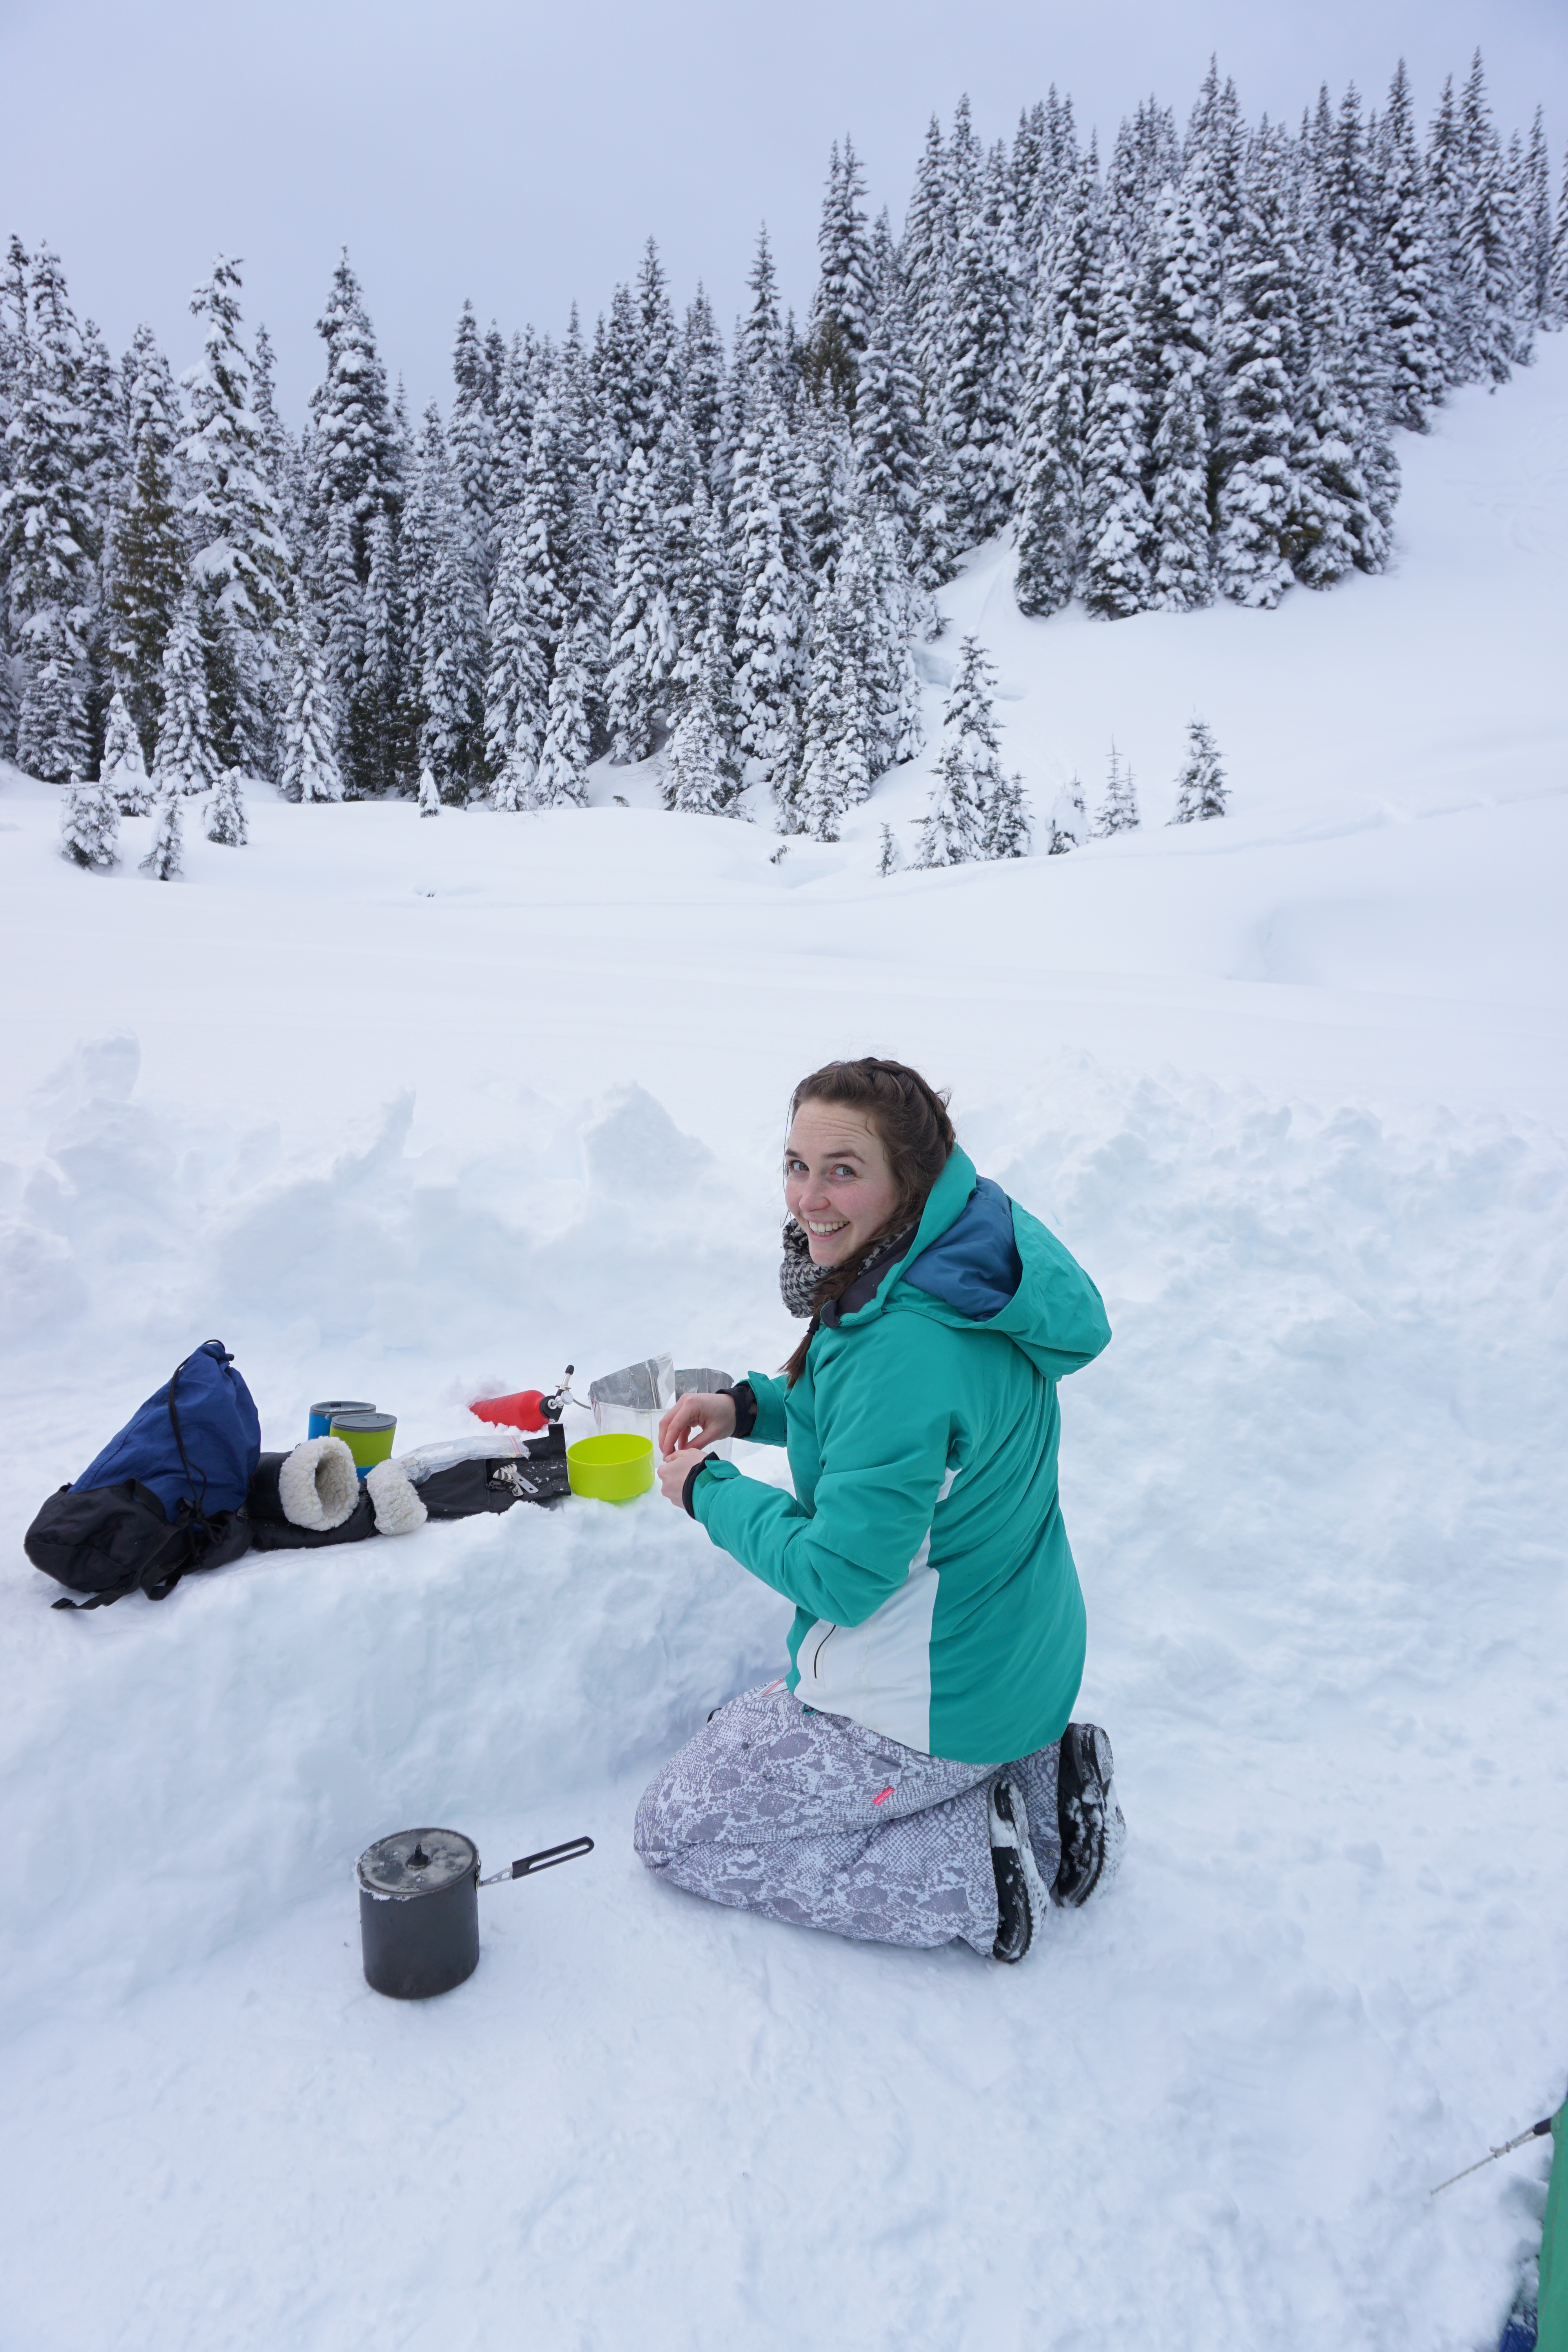
Building a snow kitchen is one of the fun parts of snow camping though! Plan ahead when digging your hole and pile the snow in one area for your kitchen counter. It’s not a difficult concept, we usually just consolidate the snow into a bit of couch/counter combo so that have somewhere to hang out. I always bring my inflatable sit upon to provide insulation against the snow. We’ll either put the pot right on the counter, or dig a little pit for it if it’s windy.

Bathrooms

Unless you go to Elfin Lakes (or somewhere that caters to winter visitors), it’s unlikely you’re going to have access to an outhouse. Even if where you’re going has outhouses, they’re likely to all be buried in the winter. The good news is, digging a hole is a lot easier in the winter! Just be mindful that your poop is going to stay frozen until Spring, so make sure to use the bathroom somewhere discreet once the snow melts. In winter though, you have to take all your toilet paper with you – there’s no burying paper in the winter.

In some cases, depending on location, you may need to bring a bathroom bag with you to carry your waste out. I’ve written a whole blog entry on backcountry bathrooms, so check it out for more information.

Feel free to ask any questions in the comments, I’m happy to share my experience – snow camping is tough, but it’s rewarding and me, Carolyn, and Brandon look forward to it every year!

Let’s Talk: Personal Safety

Real talk – you can die in the wilderness.

There are so many things that can happen to you when you go on an adventure outdoors. Everything from becoming injured to becoming lost. If this happens, you want to make sure you give yourself the best chance at being found and at surviving an extended period of time in the outdoors. That’s why it’s so essential to be prepared every time you go outside. Even routine day hikes can go awry and you don’t want to find yourself in a tight spot. I’d argue that day hikes have the potential to be the most dangerous as you’re more likely to have less gear with you.

So when are you most vulnerable? When you’re a beginner and when you become complacent. I’ve spent a lot of time in the last few years educating myself on being prepared, but I feel lucky nothing bad ever happened to me when I first started hiking because I just naturally knew less and didn’t understand how to really be prepared. It’s hard to be prepared when you don’t understand the risks. Search and Rescue tasks have been way up because with the pandemic, more people are looking to enjoy nature than ever before. While it’s great that more people are getting outside, it’s also super important to get educated.

But it’s not just beginners who are at risk. Those who are experienced, but become complacent in their safety, are just as much at risk. It’s still easy to take a wrong turn on the trail or find yourself hiking in the dark as you get more confident in your abilities. I’ve noticed with some of my friends, there’s a tendency to bring less stuff on hikes in an effort to lighten packs and move faster. That’s great when everything goes as planned, but you don’t want to find yourself in a situation where you left something at home that you shouldn’t have.

So whether you’re a beginner or experienced, what should you do to be prepared for a trip into the backcountry?

Create a Trip Plan

In my opinion, creating a trip plan is one of the most important things you must do. Make sure you research where you are going and outline what you expect the trip to look like. In your research of the trail or camp, you should take into consideration:

  • Seasonal conditions (will all the snow be melted? is there avalanche risk?)
  • Weather conditions (is there rain in the forecast? will it be cold?)
  • Daylight hours (how long will it take? will I be hiking in the dark?)
  • Ability (how long is the hike? how much elevation gain?)
  • Special equipment (will I need microspikes? beacon, probe, or shovel?)
  • Emergency contact (does someone know where I’m going and when I’ll return?)

Having an emergency contact who knows your trip plan is so important. If you become lost, this individual will be able to alert search and rescue quickly and advise them on where to look for you. There’s a lot of other information that can be helpful in assisting search and rescue. Leave a trip plan at BC Adventure Smart, or leave the following information with your contact:

  • Where you’ll be hiking, the route you’ll be taking, and when you’ll check in
  • What equipment you have with you
  • Identifying features of your equipment, such as jacket colour, tent brand, and hiking boots
  • Any other important medical information

10 Essentials

When I first started learning about the essentials, I thought it sounded like a lot of stuff and that it was impossible to bring everything with me on every hike. I’ve since learned that a lot of the essentials don’t actually take up that much space and many are things you would intuitively bring with you anyways.

20200926_201920

For example, even as a beginner I knew it was important to bring extra food and water (#1) in case the hike took longer than expected or was super challenging, and extra clothes (#2) in case it was cold at the top. What I’ve learned over the years is to always bring more water than I think I’ll need and I always bring a pack of water tabs with me as a back up (though these won’t help you on a dry hike). I also learned that your warm clothes should be more than just an extra sweater. Bring a hat and gloves, socks, a rain jacket, and warm layers made of wicking fabrics such as wool, fleece, or poly.

Other essentials that are pretty intuitive and don’t take up much space include a pocketknife or multi-tool (#3), a signaling device (#4) such as a whistle, mirror, or flare, and a headlamp or flashlight (#5). Even though it’s small, a headlamp seems to be something a lot of people leave at home. I think people just plan to use their phone flashlight if they need a light, but remember, you’ll likely be taking pictures on your phone or using it for navigation, which can run out the battery, and it may become a lifeline for you if you get lost. A head lamp enables you to be hands-free, making a dark descent safer. I recommend throwing in an extra set of batteries with your headlamp as well, just in case.

A first aid kit (#6) is also intuitive for most people, yet many hike without it. I have a pretty sizable first aid kit that I carry with me whenever I go out, but there are lots of pocket sized kits available at MEC, canadian tire, walmart, etc. Ideally everyone should have their own small kit in case they get separated and at least one person should have a more substantial kit. Some important things to carry in your kit include band-aids, blister care, dressings, gloves, medical tape, scissors, sam splint, and gauze or tensile bandage. I also like to bring polysporin, wet wipes, tweezers, electrolyte powder, and some medications (peptobismal, advil).

Essentials that can be less intuitive to bring on every day hikes include a firestarter (#7) – I bring a ziploc with waterproof matches and 2 small firestarters – and shelter (#8). I think shelter is one people could get hung up on because it sounds like you should bring a tent, but it’s really as simple as bringing an emergency blanket with you. North Shore Search and Rescue recommend pairing a bivvy sack with your thermal blanket. I keep both in my first aid kit so that I never forget them.

I want to spend a bit of time talking about the last two essentials; navigation (#9) and communication (#10), because it’s something I’ve given a lot of thought to over the past year. Also, please note, depending on the activity, your essentials list may need to expand to include other specialized gear such as PFD and spare paddle if you’re boating; transceiver, probe, and shovel if you’re in avalanche terrain; or ropes and harness if you’re climbing (as examples).

Navigation

Most people use a cell phone for navigation and communication, myself included until the past year. Options for navigation range from a map and compass, to your phone, to a GPS. Having a map is important because it will set you up for success from the beginning. It’s good to check the map in advance to identify any areas where the trail branches so you can be sure to take the right fork. Maps can become less useful if you become lost and don’t know where you are on the map (unless you’re good at identifying topography, which I still think is an important skill), which is where a GPS can become more useful.

With a GPS, you can track your steps from the very beginning, leaving a digital trail for yourself to follow back if you become lost. The good news is, you don’t really need a dedicated GPS for this and there are lots of great apps you can use directly on your phone. I don’t personally have a GPS and always use my phone, there’s just a few things you need to do in advance to make sure it will work for you in the field.

GaiaGPS

If you’re relying on a GPS app, make sure to download the map offline before your adventure and to turn on location services. A lot of maps load from the network and you don’t want to find yourself without navigation because you forgot to pre-load the map. You also want to make sure your battery is going to last if you’re using your phone (especially if you’re also relying on your phone for communication). Make sure you have full battery before you leave and bring a power bank with you. There’s lots of trail apps out there, I personally like the GaiaGPS app. Just be aware that the trails on many apps are based on user data – just because you see a trail on the map doesn’t mean it’s safe; some trails may pass through climbing routes or only be used for winter travel, so you still need to do your research.

Communication

Communication is probably one of the hardest parts of emergency preparedness. It’s expensive to purchase satellite devices, so understandably a lot of people rely on their phones or the fact that they’re hiking in a group and have left a trip plan. The obvious problem with relying on a cell phone is that you may not always have service. If you only hike near cities with good cell service, then it’s probably fine – just make sure you know how to get your GPS coordinates off of your phone in the event you need to be rescued.

If a cell phone is your only communication device and you’re not sure if you’ll have service, then hiking in a group and leaving a trip plan with someone you trust can reduce your risk. By hiking in a group, it’s easier to manage injuries on the trail because it’s usually possible for one of your hiking mates to provide first aid or to turn back for help. It won’t be great if you have an emergency that requires a quick extraction, but at least one of your fellow hikers should be able to go for help faster than having to wait for your emergency contact to raise the alarm when you don’t check in. And in a scenario where your whole group gets lost, you still have the safeguard of your emergency contact to send Search and Rescue to look for you.

However, if you’re going to be spending any extended time in the wilderness – where help or your check in time with your emergency contact are more than a day away – then you should really either buy or rent a reliable satellite communication device for the trip. They are expensive, but it could literally save your life.

inreach

I’m not an expert on satellite devices, so you’ll definitely want to do your own research. Options range from the SPOT, to the InReach, to a personal locator beacon. I recently purchased an InReach Mini from Garmin that I’ve been very happy with. The InReach is more expensive to buy upfront, and costs ~$15-25 a month for a basic subscription. If you won’t actually be using the device that much, you can suspend your subscription for months at a time, which is a nice feature. SPOT has a cheaper upfront cost, but I understand the annual subscription can get pricey and I haven’t heard very good things about their customer service.

The main difference between the two is that SPOT is a one way communication device, so most likely you’ll only be using it to notify your emergency contact to how the trip is going, or to activate the SOS function for emergency rescue. The InReach is a two-way communication device that works like SMS. It has the SOS function as well, but you can also send and receive texts to anyone with a cell phone or email address. Both are great if you find yourself running a day behind schedule or you have a non life-threatening injury, because you can notify your emergency contact. However, my InReach saved us a lot of grief this summer when Brandon’s car broke down on the forestry road to Cape Scott, because after hitching a ride back into town, I was still able to communicate with the group stuck on the forestry road. Plus in an emergency, it’s reassuring to get an immediate response back when you activate SOS, being able to communicate with you enables rescuers to be more prepared for your situation.

Grow Your Knowledge

That pretty much concludes this blog post – I just wanted to note that while the internet is a great resource, there are lots of hands-on ways to grow your skills as well. There are lots of organizations that offer group hikes focused on skill development and I’ve seen a lot of webinars popping up with safety and skills based workshops. Red Cross offers several first aid courses – I don’t recommend their emergency first aid course as it’s too basic, but I’ve done both their standard and wilderness first aid courses, which are excellent. If you spend a lot of time skiing or snowshoeing, I’d also recommend taking Avalanche Safety Training, or if you canoe or kayak, to take the respective training course from Paddle Canada.

Finally, check out the new docu-series on North Shore Search and Rescue, which you can stream for free on Knowledge Network. North Shore is the busiest S&R in Canada and the documentary does an excellent job showcasing the work that they do and the importance of being prepared in the backcountry. Happy adventures everyone!

Lets Talk: Backcountry Gear

Anyone who hikes all the time, loves talking about gear. I started off with a lot of gear that was either old or borrowed. My parents gave me a lot of their old camping gear, which was very robust, but a bit on the heavy side. Since then I’ve slowly been replacing my gear over the years, though there’s a few older pieces I still use because I love them.

Unlike me, Carolyn used the same crappy gear for years and then this year she decided it was time to finally replace everything all at once. Not ideal on the chequebook, but the two of us having been talking all gear all the time for months, especially in advance of the Black Friday sales, so I figured I’d share some of my favourite pieces of gear that I use!

First off, backpacks. It took me a few years to replace my old 80L travel backpack, which weighed a whopping 7lbs, but subsequently I went a little backpack crazy. A few years ago I got the Gregory 60L Amber, which I loved, but started to find it was a little too big for me as I downsized my gear, so this year I got the Gregory 53L Jade, which I LOVE. The Amber is one size fits all, but I got the Small size in the Jade, so it’s actually 50L and has some great features. My favourite are the suspension back, the fact that you can remove the head of the pack, and the easy access water pockets. Almost all of my friends use Gregory packs, Emily sports the 44L Amber and Carolyn has the 55L Maven. For men, check out the Gregory Zulu or Stout.

Next up, sleeping gear. Having a good sleeping bag and pad can really improve your nights as there’s nothing worse then being cold. A good sleeping bag was the one thing I invested in from the start. I’ve been using the MEC -7 Aquilina bag for years, sadly they don’t make it anymore, but a better alternative would be the MEC -9 Delphinus (it’s warmer, lighter, costs about the same, and it’s purple!). The male version is the MEC -9 Draco. The key things for me in a sleeping bag were getting something that has a high comfort rating and is down (I know it’s not great for wet climates, but its just so warm). I went for a women’s bag because women generally sleep colder than men. If you’re looking for something warmer, Carolyn recently bought the Marmot -18 Lithium, and Brandon uses the Thermarest -30 Polar Ranger when we snow camp. I’ve been looking at purchasing the North Face -29 Inferno bag for snow camping myself.

Don’t forget to put some serious thought in your sleeping pad as well. A good sleeping bag will only do so much if you’re not using a warm pad. When buying a pad, pay special attention to the R-value as this is what tells you how insulating the pad is. My recommendation is to stay above an R-value of 3. Some people buy summer mats with super low R-values, but something around 3 will be a great 3 season mat for you. I used the MEC Reactor 3.8 for a long time because it’s on the cheaper side, but if you can stomach the cost, I’d now recommend the Thermarest Neoair Xlite. It weighs less and in my opinion, is comfier. Currently though, I use the Thermarest Neoair Xtherm. It’s an expensive mat, but it’s 4 season and I use it snow camping as well, so it’s been good value for me.

Moving on to tents. I’ve been using the North Face Talus 3 for years and I absolutely love it (and got it for a steal), but at 6.5lbs, it’s a heavier tent, so I’m not sure I’d recommend it. Although when you do actually sleep 3 people in it, the weight to person ratio is generally less than a lot of standard 2 person tents, so it’s decent value for 3 people, but heavy if you only have 2. I’ve been doing a lot of research on tents lately because I was looking to purchase a new one. I’ve been comparing between ultralight freestanding tents and ultralight tents that are set up using hiking poles. Take my advice with a grain of salt because I haven’t tested these tents, but I narrowed my research down to my top two picks, which were the Big Agnes UL Tiger Wall, and the Gossamer Gear The Two.

I recently purchased The Two, which rings in under 2 pounds and can be set up using hiking poles, or two tent poles purchased from Gossamer. I haven’t had a chance to test it out yet, but looking forward to trying it out next year! I think the downside to this tent will be that it’s a single walled tent. So if you want double walled, check out the Big Agnes, which is a little bit heavier, but still very light. If you’re looking for something a little cheaper, I think one of the best value on the market is the Marmot Tungsten, which comes in both standard and ultralight (higher price, but worth it in my opinion). Again, there’s much lighter tents out there, but you pay for it. Brandon uses this tent, so I do have experience with it.

Stoves and pot sets is one area where I will encourage you to seek advice elsewhere. My stove is the one piece of gear I inherited from my parents that I still use and therefore is ancient. It runs on propane, so the fuel is heavier, but I keep using it because it’s a robust little stove that provides great heat distribution. I also have a smaller stove that runs on iso-butune mix that I love, but I got it in New Zealand, so you can’t find it in North America. Brandon and Carolyn both use white gas stoves, which are a must have if you’re snow camping, but personally I like the gas stoves. In addition, I just have the basic 2 pot set from MSR. It’s pretty cheap and the coating is starting to come off, but it served me well for several years.

I think that about covers it for major pieces of camping equipment, but I’ll link a few more of my favourite miscellaneous items below if you’re on the hunt for any other gear.

Hiking boots: I swear by Vasque, the Breeze is probably the closest to what I currently hike in.

Sit-upon/Pillow: MEC Seat Cushion (I fold it in half to use as my pillow. LOVE IT)

Mug: GSI Infinity Mug (seriously, this thing is the best!)

Safety: Kahtoola Microspikes (excellent for icy conditions), Garmin InReach Mini (could save your life)

Kettle: Sea to Summit Kettle (collapsible and great for hot chocolate on day trips)

Sleeping bag liner: Sea to Summit Reactor Extreme (great for winter camping)

Clothing: Honestly, Costco is the best. They have merino base layers, wool socks, small compressible puffy jackets, puffy slippers, just stay on the lookout for great deals! No need to break the bank on clothing, although I started using merino undies and bra when I hike now and I am a huge fan! They’re a little pricier, but you can usually get them on sale from Icebreaker or Smart Wool. They dry so fast and keep you warm even when they’re sweaty.

The only other thing I wouldn’t skimp on is your rain jacket. If you’re relying on it to keep you dry, it’s worth investing money in. I’m currently saving up for a gore-tex Arc’teryx shell jacket – they’re top of the line for rain jackets, but you definitely pay for it.