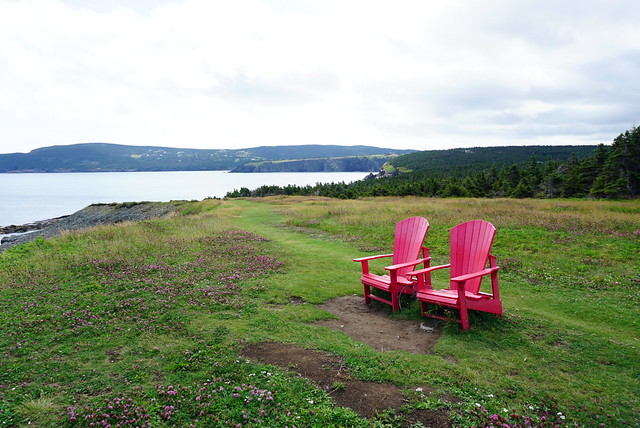
This is going to be a short post for a short trail. Silver Mine Head Path runs from Middle Cove Beach to Motion Drive on the edge of Torbay. If you want to take 2 cars, it’s approximately 2km one way, but given the short distance, it’s still only 4km to walk there and back, which is what I did.
Silver Mine Head Path was never really a priority for me because it was so short (funny how that happens), but it was the only section of trail I hadn’t done on between St. John’s and St. Francis, so I decided to fit it in one morning when I was home in August 2021. I parked at Middle Cove Beach and walked towards Torbay – it only took me an hour and a half and it was a gorgeous sunny day, so I finished it off with a dip in the ocean! Not something I normally do, but I’ve been getting more into cold water swimming in the last few years. I always thought North Atlantic Ocean was the coldest place to swim, but it turns out in the middle of the summer, the glacier fed lakes in BC are a fair bit colder!
For such a short walk, Silver Mine Head Path gives you a really good bang for your buck. It starts with a short climb up to the top of the bluff and then you continue along the scenic coast all the way to Torbay and back. There’s not too much going on since it’s a short trail, but there aren’t many trees either, so I enjoyed the beautiful ocean views. Plus I really liked the grassy meadows on the Torbay side of the hike – I imagine it would be a great place for lupins at the right time of year (or at the very least, fireweed).
So in conclusion, this is the hike to do if you’re looking for a short walk after work or on a Sunday morning. Along with hiking out to Torbay Point and back (on Cobbler’s Path), I think both trails make for great evening walks when you only have an hour or two and are craving that fresh salty air. I’ve always gone to Signal Hill, but I’ll be hitting up these trails instead in the future!
Spring is my favourite time to go kayaking! It’s too cold in the winter and the alpine backpacking season is so short in the summer, that Spring has become my core kayaking season. I’ve been on several kayaking trips over the years and bought my own kayak last year, but I am by no means a kayaking expert. If you’ve read my avalanche safety post, this post will be a lot like that in that it’s mostly about me discussing some of the risks in hopes of convincing you to take a paddling safety course.
I’d kayaked and canoed a handle of times as a kid and a teenager, mostly just renting a kayak for a couple of hours or going on a guided tour. We decided to take up kayak camping in 2018, but my first order of business was to take a basic kayaking safety course first. I didn’t know anything about self rescue and figured this was a basic skill before going paddling for anywhere longer than a few hours.
I was definitely right and took the Paddle Canada sea kayaking basics course. Most of what I was hoping to gain from this course was how to get back in my boat if I fell out, which I did learn, but I would say the most helpful part of the course was actually the focus on paddling skills. Even 4 years later, I’m still not a great paddler, so this is something I’m always focusing on. If your arms hurt after a day of paddling, then you’re not doing it right. If you’re in the lower mainland, I did my course with West Beach Paddle and highly recommend!
Kayaking is not inherently difficult, but like a lot of adventure activities, it does have a certain amount of risk associated with it. If you’re not prepared for the conditions and you capsize your boat, suddenly it has a lot more risk. Knowing how to do partner and self rescue is a skill that actually isn’t that challenging, but something that I think it’s really important to know how to do, and not necessarily intuitive without training. If you don’t know how to get back in your boat, then you should really consider what kind of conditions you go out in. If it’s summer and you’re just renting in a lake for an hour, it’s probably fine, but if you’re going into any kind of remote conditions for an extended period of time, definitely take a course.
In addition, if you’re renting, it’s likely the rental company will provide you with all the safety equipment you need, but if they don’t, make sure first and foremost that you have a PDF. Most kayakers I see are wearing lifejackets, but I see a lot of SUPs out and about in Indian Arm without any lifejacket on board and it boggles my mind. It’s the single most important piece of equipment, at least make sure you have it on board, and better yet, wear it. The other pieces of equipment that are required on a kayak are a whistle, hand pump, towline, and a paddle. I also recommend having a paddle float and a spare paddle. If you don’t know what a paddle float is, take the course.
My experience has been that reading the conditions is also very important. The course I did focused on managing wind and weather, and a little bit about navigation, in your decision making. The mountains and topography in the lower mainland can create some really interesting wind and wave patterns and the best time for paddling is early in the morning or later in the evening. If the wind gets over 20km/h and you’re a beginner, it’s best to plan not to go at all. Seth and I once spent all morning loading the kayaks and driving to our destination just decide not to go at all because the wind had come up. On multi-day trips (and on some day trips), you also want to be prepared with extra provisions in case the conditions change and you can’t get back when you’d intended. It’s better to wait out strong winds and currents, especially if you’re not a strong paddler.
Since taking the basic sea kayaking course, we recently returned to take Paddle Canada’s Level 1 course, which is focused on day tripping. So we went over additional navigating skills, how to read current and tide charts, and worked on improving all our paddling strokes. If you’re a casual paddler, I think just doing the basics course is likely fine, as the main skill you want is the ability to get back in your boat. However, when we did the Basics course, it didn’t cover self-rescue, only partner rescue. Our instructor was great and taught us self-rescue anyways, but it’s an important consideration if you’re going solo or in a double, so check if your course teaches it.
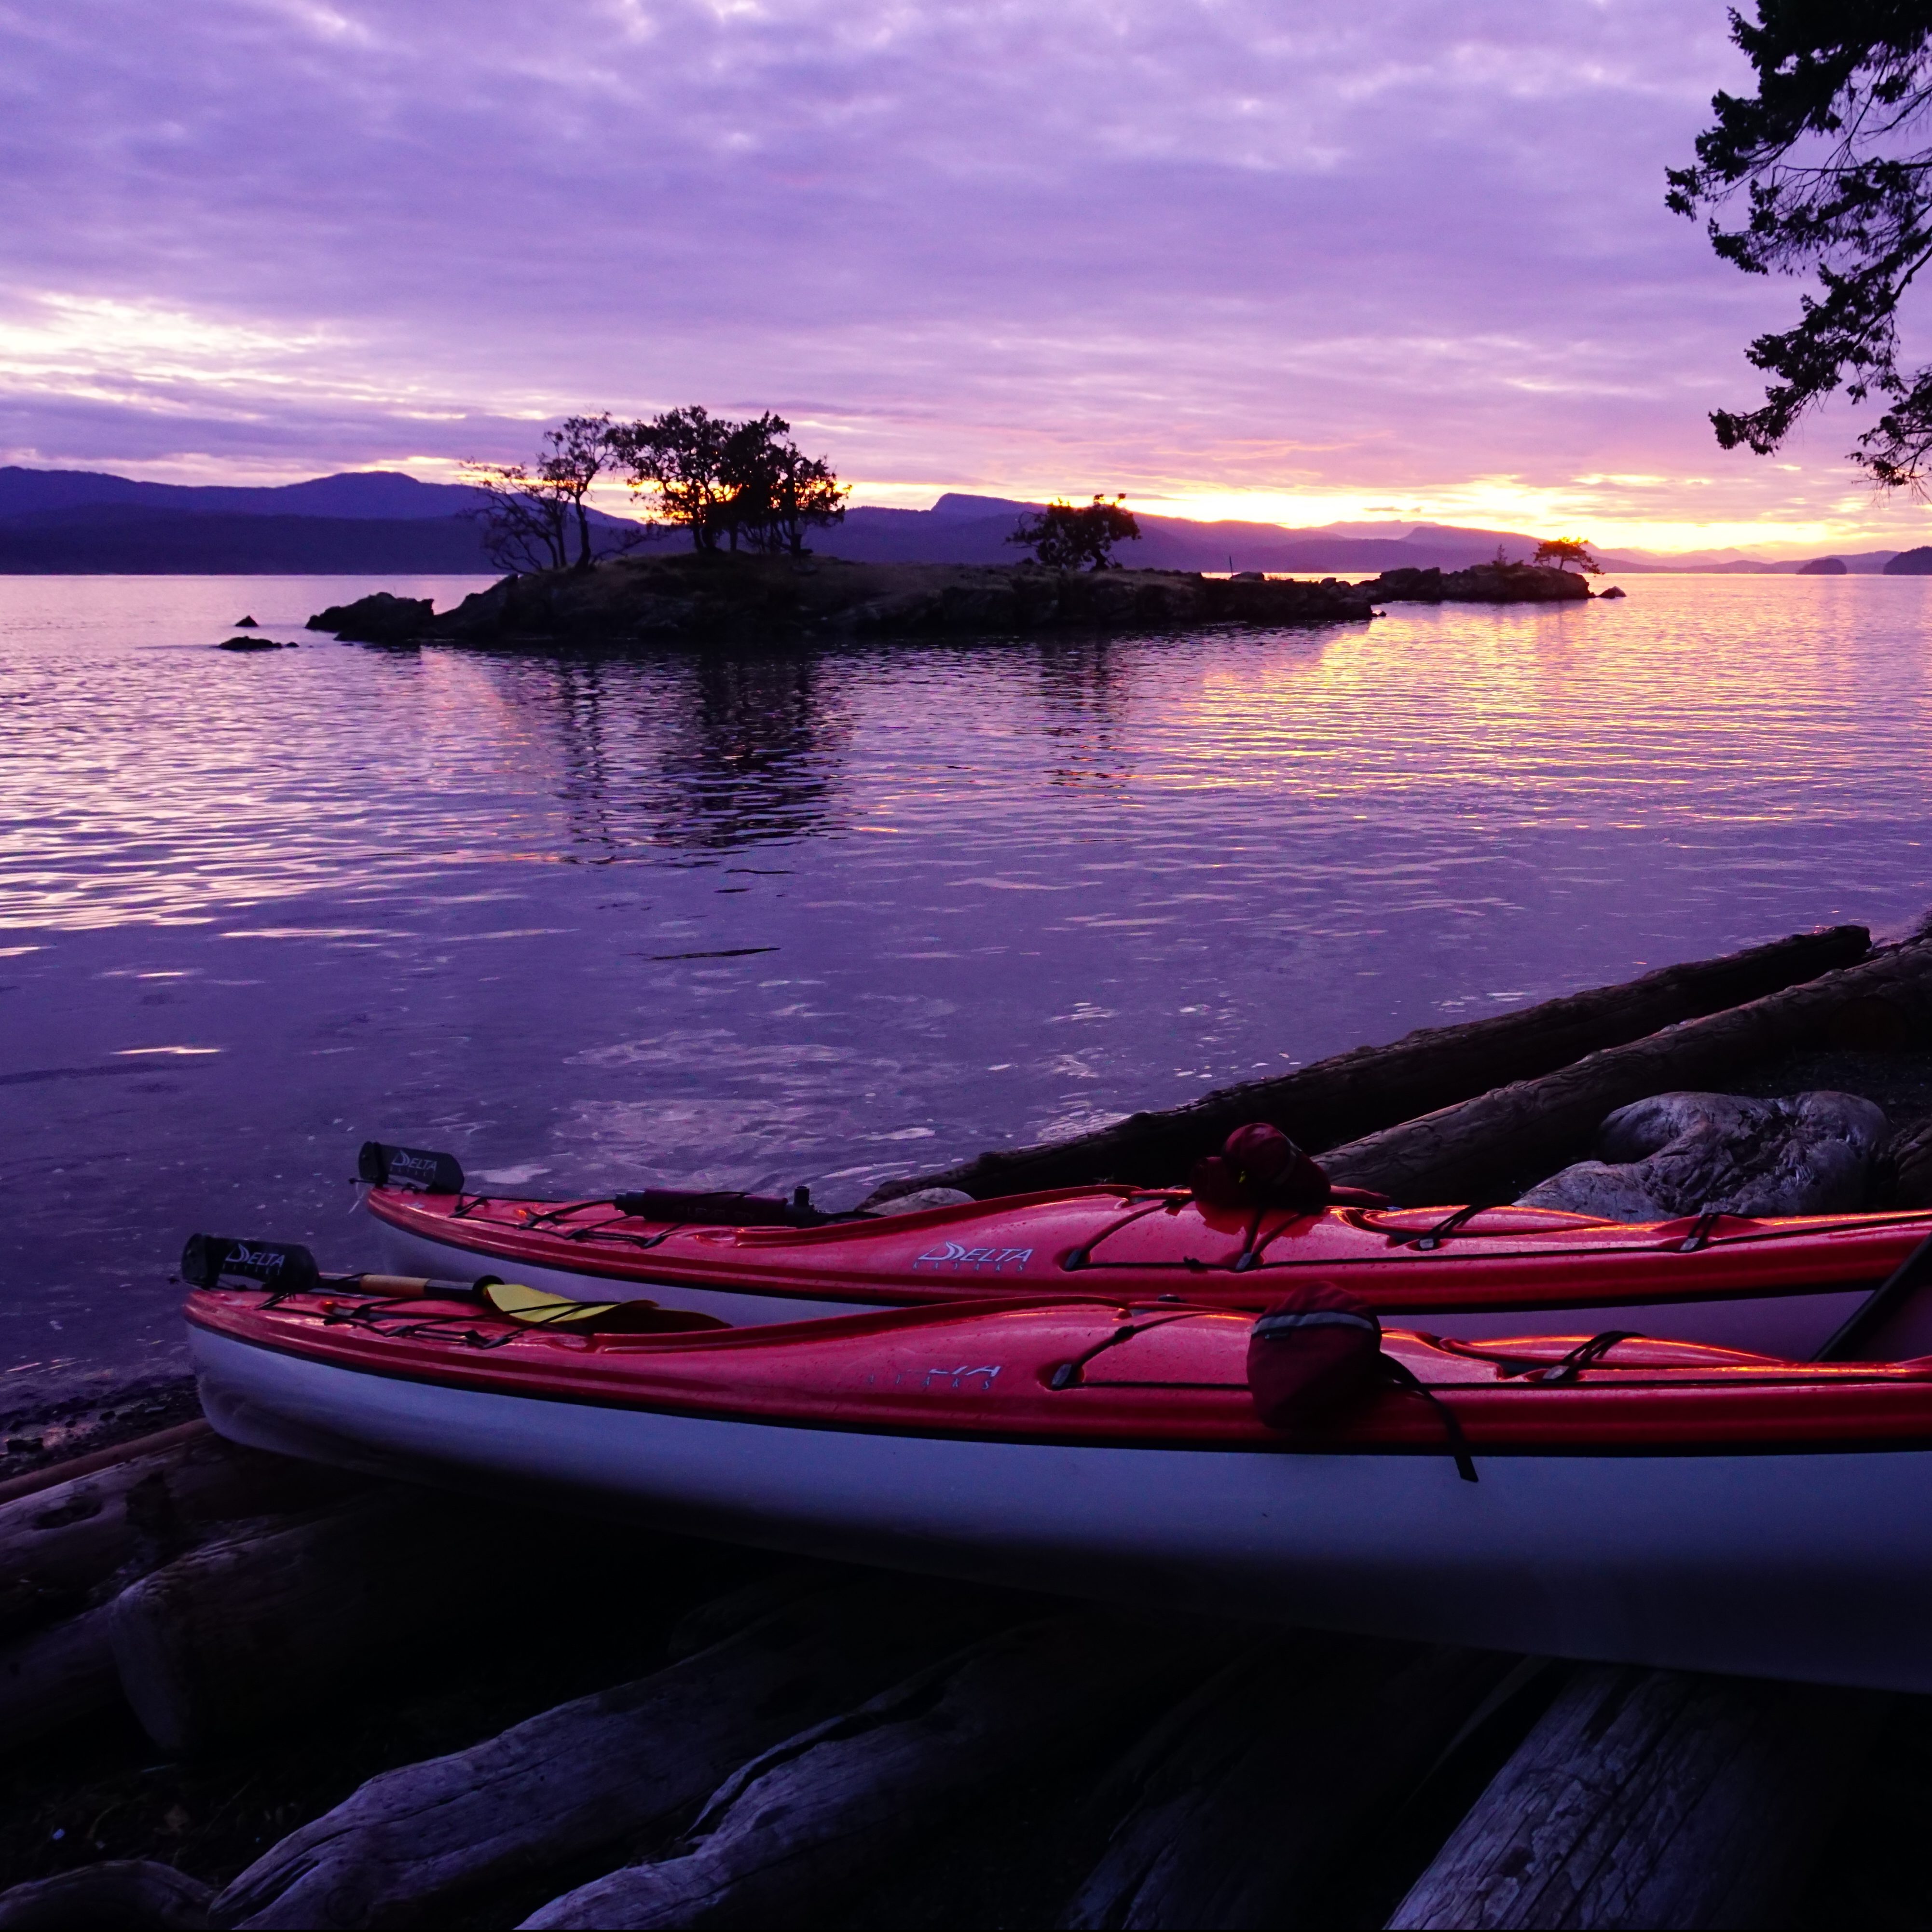
Before taking the course, I’d only ever been out in double kayaks. They’re bigger, but I viewed it as more fun and you do have more power in the boat with two people paddling. Though they have gained the nickname of “divorce boats” because of the tendency to argue with your partner when you’re both in a boat together. We learned so many skills at the course and decided it was safer to have 2 boats as opposed to one (for the purpose of rescue, but also so that we could each focus on our own skills and interests when out on the water). Since then, we’ve always kayaked together in singles, except when we went on a 3-day trip in New Zealand where the rental company refused to rent singles. This was due to how windy it can get and their doubles are a lot more stable on the water. So it does depend on location, but generally in BC it’s recommended to use 2 singles over a double.
So in conclusion, as always when it comes to safety, my recommendation is to make it a priority and take a course if you frequently kayak, are going on an overnight trip, or going anywhere remote or with challenging conditions. It is a bit pricey, which is why I mostly recommend the Basics Course, which is only 1 day and will cover all the most important aspects of kayaking. But if you’re interested, the Level 1 course is also great and runs for 2 days. We’d like to do Level 2 some day, but it’s a lengthy course that involves a multi day trip, so for right now, we’ll wait a few more years and continue to practice our skills on our own!
In my opinion, Mickeleen’s Path is one of the best mid-length day hikes for when you only have one vehicle. This section of the trail goes from Bay Bulls to Witless Bay, so it’s only about a 40 minute drive from St. John’s and it has a convenient ATV trail that you can use to loop back to where you started instead of having to hike back along the entire trail. There’s nothing to see on loop back, so the official ECT section is a lot more scenic, but if you want to cut some time off, you can walk back along the ATV track instead.
When driving there, turn left off the highway and into Bay Balls harbour and follow Southside Road to the very end, where there is a small parking lot. I believe you have to walk a bit further down the road to get to the trailhead, but then follow the left trail branch along the coast. Most of the first part of the trail is in the woods, but around the 2km mark you reach the grassy bluffs and can continue around the headland. The trail does continue to pop in and out of the woods, but it’s very scenic for a solid 3-4km as you go around South Head.
I hiked it solo in early August and made my first pit stop in Island Cove for a small lunch. I saw several whales right at the edge of the harbour as I was eating and I had a good laugh when O’Brien’s whale watching tour blazed right past when the whales were diving without being any the wiser. I’m sure they knew where else to find whales since I later spotted both the boat and the whales on the other side of South Head, but it was still comical to watch them motor right over where the whales were feeding.
For some reason I thought Mickeleen’s Path wasn’t very scenic, so I was thrilled at the views as I continued along the coast. It was extremely windy on the day that I visited, but I also got some blue skies, so it made for really nice photos. I stopped for a second lunch on the bluffs past Upper Red Cove that look out towards Gull Island. One of my favourite parts of hiking around Witless Bay is the ecological reserve and I loved spotting the puffins frantically flapping over the top of the water.
If you’re doing the trail as a one-way, you can end on Bear’s Cove Road in Witless Bay and drive home from there. In that scenario, it’s approximately a 7km hike. However, since I was solo and only had the one vehicle, Sean had given me a tip about the ATV track, so I decided to continue on along that route. To find the track, take a left on the road when you get off the main trail and then very shortly after, take a right to get on the ATV trail. It’s a lot like Shoal Bay Road if you’ve ever hiked the Spout – gravelly with lots of potholes – so if it’s rained recently, you may have a lot of large puddles to navigate around. The road follows a horse shoe shape around the headland and eventually connects back in with the original trail just before you get back to the parking lot in Bay Bulls. This route is just over 11km, so it definitely beats going the whole way back and is pretty flat.
Overall I’m definitely a fan of Mickeleen’s Path and recommend it as a great solo hike or for when you only have one car. The whole route took me just under 3.5 hours, with 2 breaks, so budget 4 hours if you’re doing the loop trail. And keep your eyes open for puffins and whales!